Official: Airfix II Campaign
England - East Anglia, United Kingdom
Member Since: November 29, 2007
entire network: 68 Posts
KitMaker Network: 7 Posts
Posted: Monday, December 09, 2013 - 07:22 AM UTC
South Australia, Australia
Member Since: August 14, 2007
entire network: 5,926 Posts
KitMaker Network: 271 Posts
Posted: Monday, December 09, 2013 - 07:24 AM UTC
Quoted Text
Hi
Just enlisted , will be building the Handley Page Hampden.

I shall be attempting to remove the rivets and engrave panel lines in there place,or maybe even end up with some left if it is to difficult in certain areas .
Could you bring yourself to build it with the rivets?
Here is that kit I built about 40 or so years ago..

I was out in the shed the other day and decided to take a look in my old air force trunk which is where I put all my old models at one stage. As you can see they were not very well packed in their original packing box and a couple of prop blades have departed company and they need a good clean. Back then I used to build everything with the wheels up.
I just had an idea for a campaign but it nay be a bit too specialised as I am not sure if many people have kits they built 30+ years ago as a child readily available.
Cheers all and good luck with the Hampden johnny,
Warren
You may be right, I may be crazy.

#439
Washington, United States
Member Since: November 05, 2005
entire network: 4,950 Posts
KitMaker Network: 564 Posts
Posted: Monday, December 09, 2013 - 08:36 AM UTC
Quoted Text
at the time I was about 10 or 11
looks like the work of a younger modeler. Along the top and bottom of the rear window is a ridge at least 1/8" above the plastic and gaps of similar size at the edges of the window. IIRC it was a 'Skill Level 2' kit but clearly it was higher than that, opening doors and hood, detailed / customizeable engine.
Hanger Queens in Waiting:
Monogram 1/72 F8F-1
Corsair the Sky Pirate - 1/72 Ace A-7D
Century Series - Airfix 1/72 F-105G
Anti Shipping - Academy 1/72 PBJ-1D
Academy 1/72 F-84E
British Columbia, Canada
Member Since: September 03, 2009
entire network: 6,965 Posts
KitMaker Network: 609 Posts
Posted: Monday, December 09, 2013 - 08:45 AM UTC
Hi Johnny, welcome to the fun! It'll be nice to see you go to town on the Hampden

When once you have tasted flight you will walk the Earth with your eyes turned skyward.
For there you have been, and there you will always long to return.
-Leonardo Da Vinci
South Australia, Australia
Member Since: August 14, 2007
entire network: 5,926 Posts
KitMaker Network: 271 Posts
Posted: Monday, December 09, 2013 - 09:08 AM UTC
Quoted Text
Quoted Text
at the time I was about 10 or 11
looks like the work of a younger modeler. Along the top and bottom of the rear window is a ridge at least 1/8" above the plastic and gaps of similar size at the edges of the window. IIRC it was a 'Skill Level 2' kit but clearly it was higher than that, opening doors and hood, detailed / customizeable engine.
A younger modeller with absolutely no references or how to guides. And no one to show him how to do anything! Woe always me... And I still haven't improved much in 40 years..

You may be right, I may be crazy.
Ontario, Canada
Member Since: February 04, 2008
entire network: 2,507 Posts
KitMaker Network: 141 Posts
Posted: Monday, December 09, 2013 - 10:00 AM UTC
Warren the only model from when I was a kid is this Airfix P-51 that I made into a Reno race plane ,completely what if.
Part of prop missing and tail.
Hand painted of course.

My Mom and Dad hang it on the Christmas tree every year!

" The Die Hards"
43rd MIDDLESEX REGIMENT
MACHINE GUN CORPS
XXX CORP
The most effective way to do it, is to do it.
- Amelia Earhart
South Australia, Australia
Member Since: August 14, 2007
entire network: 5,926 Posts
KitMaker Network: 271 Posts
Posted: Monday, December 09, 2013 - 10:18 AM UTC
Nice camo job!!
Cheers for now
Warren
You may be right, I may be crazy.
South Australia, Australia
Member Since: August 14, 2007
entire network: 5,926 Posts
KitMaker Network: 271 Posts
Posted: Tuesday, December 10, 2013 - 08:03 PM UTC
The Ju 52 continues to grow..
Tamiya Extra Thin Cement, it gives you wings..


I have no idea where the aileron hinge went..

Maybe, like part of the wing root, it was short shot...
Cheers
Warren
You may be right, I may be crazy.
England - East Anglia, United Kingdom
Member Since: November 29, 2007
entire network: 68 Posts
KitMaker Network: 7 Posts
Posted: Wednesday, December 11, 2013 - 10:52 AM UTC
Hi
Thanks Warren, Jessica.
Thats great nice natural looking weathering ,any model completed got to be a good one....
Think i may still have some old ones somewhere with special gloss/matt camo going on ,see if i can find one .Could be a good campaign idea.
J
Scotland, United Kingdom
Member Since: May 25, 2005
entire network: 2,218 Posts
KitMaker Network: 760 Posts
Posted: Wednesday, December 11, 2013 - 11:17 AM UTC
#439
Washington, United States
Member Since: November 05, 2005
entire network: 4,950 Posts
KitMaker Network: 564 Posts
Posted: Wednesday, December 11, 2013 - 11:47 AM UTC
Well, I'm impressed, 1/72 right? The navigator's table is mind blowing.

Hanger Queens in Waiting:
Monogram 1/72 F8F-1
Corsair the Sky Pirate - 1/72 Ace A-7D
Century Series - Airfix 1/72 F-105G
Anti Shipping - Academy 1/72 PBJ-1D
Academy 1/72 F-84E
British Columbia, Canada
Member Since: September 03, 2009
entire network: 6,965 Posts
KitMaker Network: 609 Posts
Posted: Wednesday, December 11, 2013 - 07:19 PM UTC
Murdo, that Stirling cockpit is miles better than the planks you got from Airfix. I almost thought you were using a photo-etch set
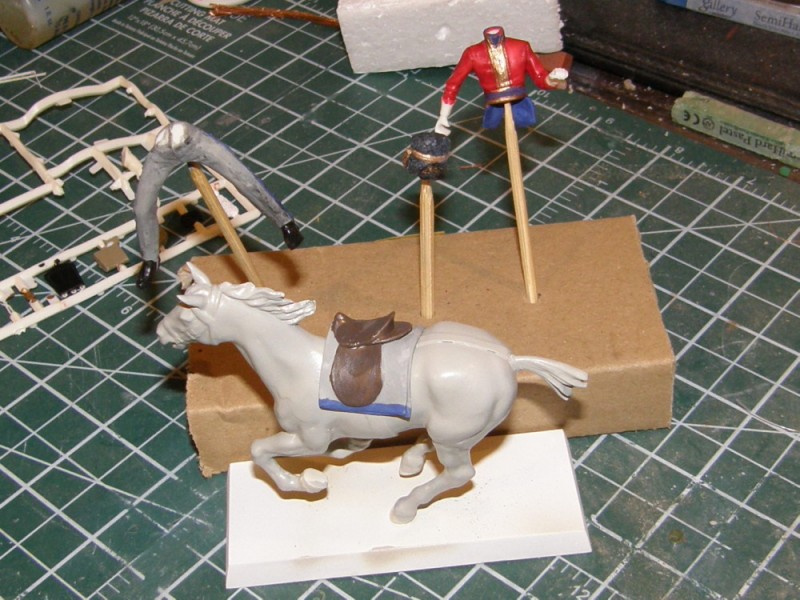
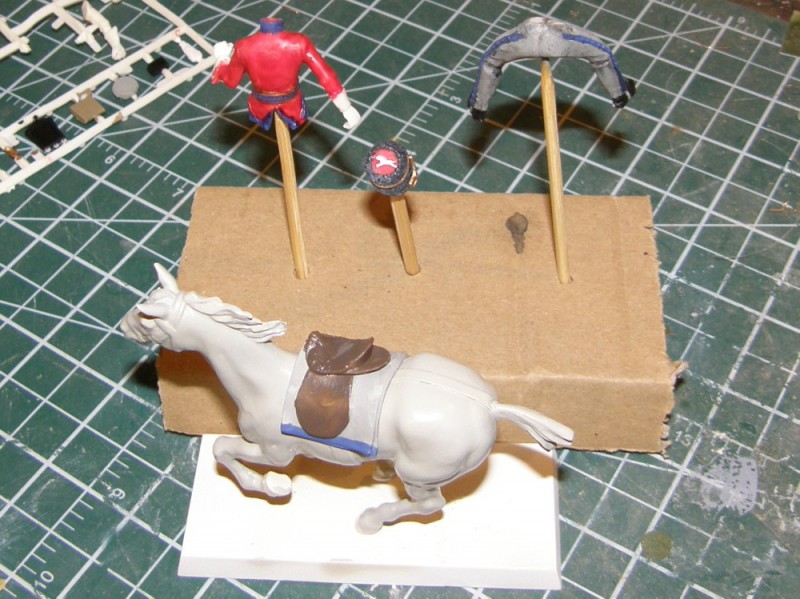
Now, to prevent people from thinking I'm neglecting my man and his horsie
When once you have tasted flight you will walk the Earth with your eyes turned skyward.
For there you have been, and there you will always long to return.
-Leonardo Da Vinci
South Australia, Australia
Member Since: August 14, 2007
entire network: 5,926 Posts
KitMaker Network: 271 Posts
Posted: Wednesday, December 11, 2013 - 08:44 PM UTC
You may be right, I may be crazy.
New York, United States
Member Since: August 25, 2006
entire network: 2,539 Posts
KitMaker Network: 263 Posts
Posted: Thursday, December 12, 2013 - 01:21 AM UTC
Excellent detail on that cockpit.
Jim
"Socialism is a philosophy of failure, the creed of ignorance, and the gospel of envy, its inherent virtue is the equal sharing of misery." ---- Winston Churchill
#439
Washington, United States
Member Since: November 05, 2005
entire network: 4,950 Posts
KitMaker Network: 564 Posts
Posted: Thursday, December 12, 2013 - 03:16 AM UTC
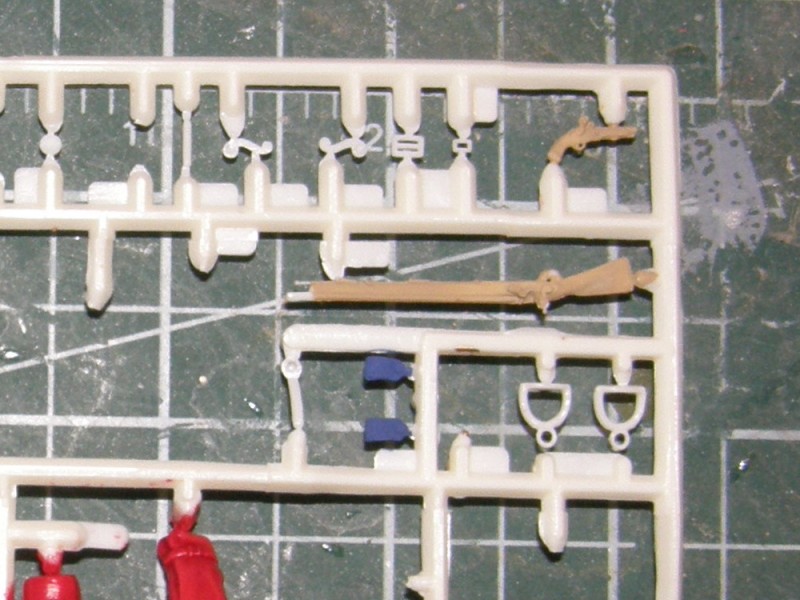
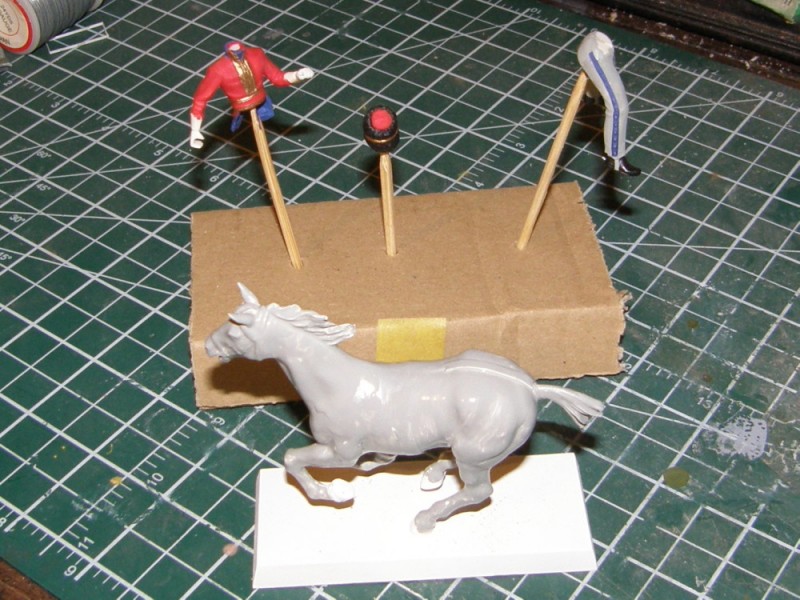
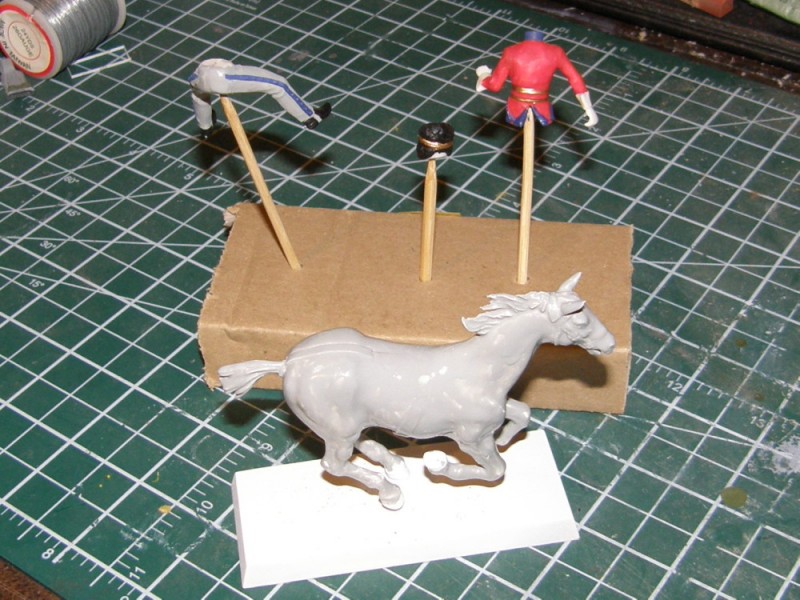
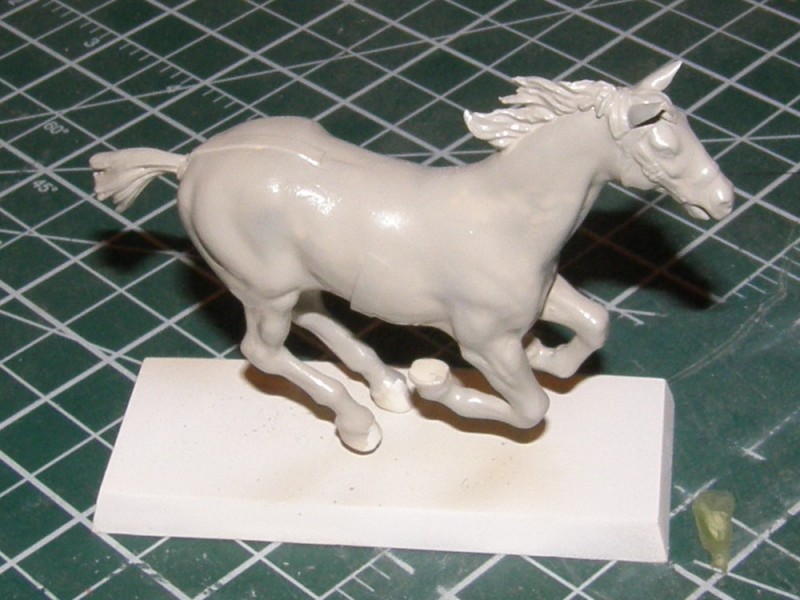
Is that a Headless Horseman?
BTW, is that regular Styrofoam under the plain brown wrapper?
Hanger Queens in Waiting:
Monogram 1/72 F8F-1
Corsair the Sky Pirate - 1/72 Ace A-7D
Century Series - Airfix 1/72 F-105G
Anti Shipping - Academy 1/72 PBJ-1D
Academy 1/72 F-84E
Ontario, Canada
Member Since: February 04, 2008
entire network: 2,507 Posts
KitMaker Network: 141 Posts
Posted: Thursday, December 12, 2013 - 05:00 AM UTC
Modelling can sometimes be a pain in the ass and now we have a photo to prove it!
" The Die Hards"
43rd MIDDLESEX REGIMENT
MACHINE GUN CORPS
XXX CORP
The most effective way to do it, is to do it.
- Amelia Earhart
South Australia, Australia
Member Since: August 14, 2007
entire network: 5,926 Posts
KitMaker Network: 271 Posts
Posted: Thursday, December 12, 2013 - 05:32 AM UTC
You may be right, I may be crazy.
British Columbia, Canada
Member Since: September 03, 2009
entire network: 6,965 Posts
KitMaker Network: 609 Posts
Posted: Thursday, December 12, 2013 - 09:10 AM UTC
Quoted Text
Is that a Headless Horseman?
BTW, is that regular Styrofoam under the plain brown wrapper?
He's a whole lot more than headless at the moment. He's also horseless, armless, legless...

I was out of Styrofoam when I needed that toothpick stand so I cheated and used a folded-up piece of cardboard.
When once you have tasted flight you will walk the Earth with your eyes turned skyward.
For there you have been, and there you will always long to return.
-Leonardo Da Vinci
England - West Midlands, United Kingdom
Member Since: August 01, 2012
entire network: 960 Posts
KitMaker Network: 175 Posts
Posted: Sunday, December 15, 2013 - 01:35 AM UTC
I have to shelf the Ju87 I'm working on and switch to an alternative Airfix Kit. I had originally panned to do some rail buildings and I'll be working on a water tower and engine shed.
South Australia, Australia
Member Since: August 14, 2007
entire network: 5,926 Posts
KitMaker Network: 271 Posts
Posted: Sunday, December 22, 2013 - 07:07 PM UTC
Some progress on the Ju 52!!
Pre-purple..

Purpled..

I think that is close enough to Milka Purple.
Cheers
Warren
You may be right, I may be crazy.
Ontario, Canada
Member Since: February 04, 2008
entire network: 2,507 Posts
KitMaker Network: 141 Posts
Posted: Monday, December 23, 2013 - 10:23 AM UTC
Wing things on and Gray and Silver paint, next up Gloss White.

" The Die Hards"
43rd MIDDLESEX REGIMENT
MACHINE GUN CORPS
XXX CORP
The most effective way to do it, is to do it.
- Amelia Earhart
South Australia, Australia
Member Since: August 14, 2007
entire network: 5,926 Posts
KitMaker Network: 271 Posts
Posted: Tuesday, December 24, 2013 - 05:19 PM UTC
I present to you my Ju 52/3m operated by Ju-Air in Switzerland and sponsored by Milka Chocolate (which we can't get here anymore)...


As much as I would love to be able to recommend this ancient Airfix kit I can't/ Fit is rubbish for most parts, the canopy only vaguely fits in its intended place, short shot parts, moulds have had it in various places as well.
But enough of that, for its time it wasn't a bad attempt at the corrugations, but I would love to see Hasegawa or someone do one today and see how they went with the
corrugated skin.
Well I am about to put the Ham and Turkey in the Webber and let it cook for a few hours for our Christmas dinner. The Bentley will have to wait for another time to get finished as I have some review builds to do (woe always me..), HMS Belfast and USS Long Beach spring to mind, as well as an F-18 so I can test some decals Miss Cooper sent to me.
Cheers all and Merry Christmas!
Warren
You may be right, I may be crazy.
British Columbia, Canada
Member Since: September 03, 2009
entire network: 6,965 Posts
KitMaker Network: 609 Posts
Posted: Tuesday, December 24, 2013 - 06:25 PM UTC
That is a mooooving accomplishment.
When once you have tasted flight you will walk the Earth with your eyes turned skyward.
For there you have been, and there you will always long to return.
-Leonardo Da Vinci
British Columbia, Canada
Member Since: September 03, 2009
entire network: 6,965 Posts
KitMaker Network: 609 Posts
Posted: Wednesday, December 25, 2013 - 10:03 AM UTC
While I had the aircraft grey out for my DC-9, I put a coat on the horsie
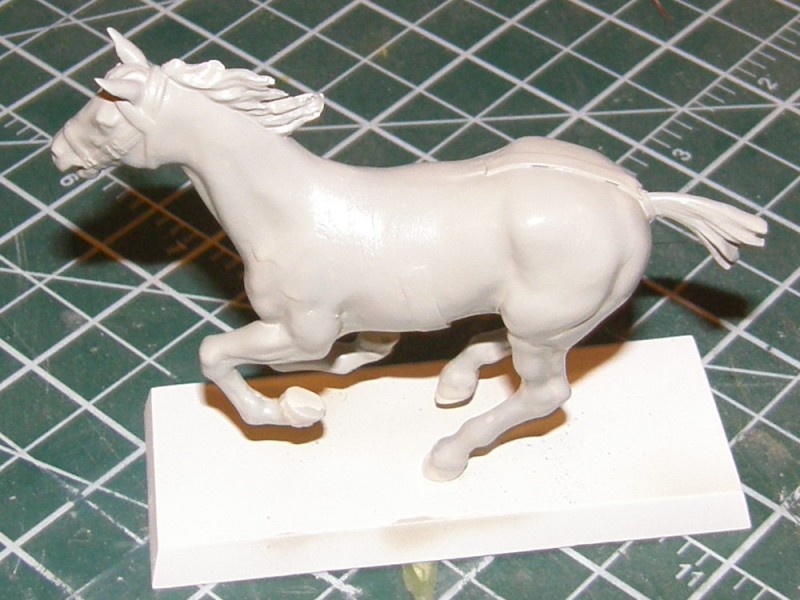
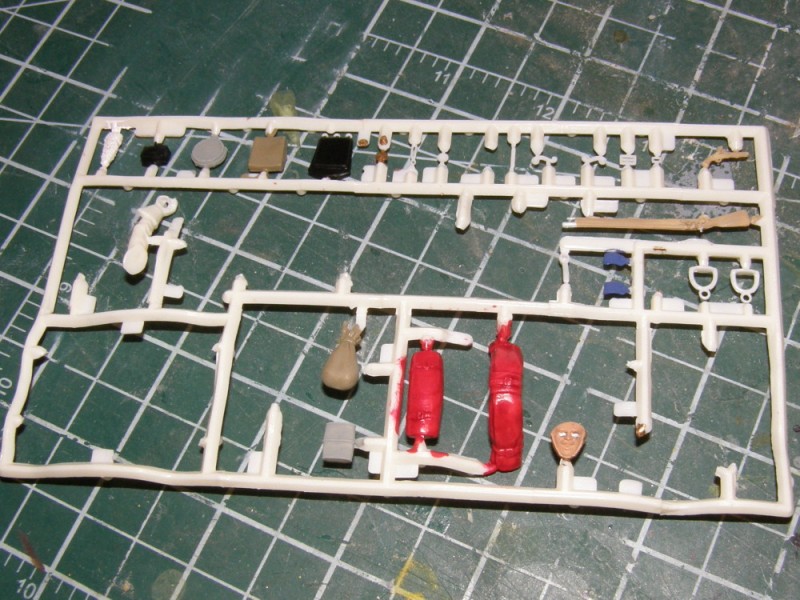
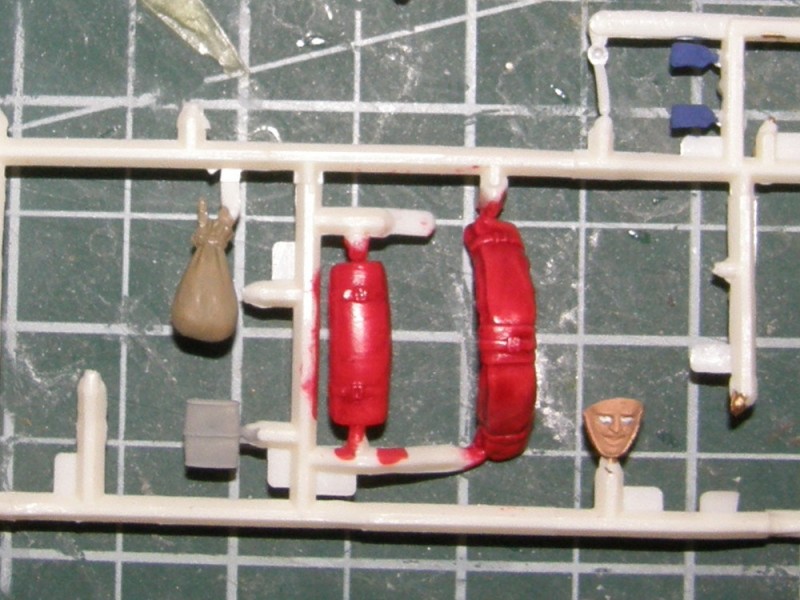
I've also been working on Mr Man's face
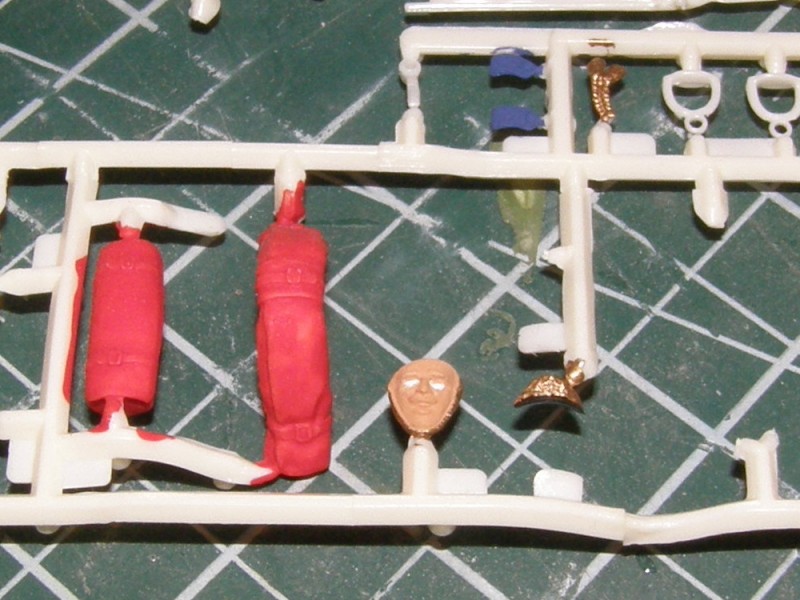
Now that I have that picture blown up, it appears that Chris Hadfield was a Dragoon 200 years ago. I'm going to have to paint that 'stache carefully
When once you have tasted flight you will walk the Earth with your eyes turned skyward.
For there you have been, and there you will always long to return.
-Leonardo Da Vinci
British Columbia, Canada
Member Since: September 03, 2009
entire network: 6,965 Posts
KitMaker Network: 609 Posts
Posted: Thursday, December 26, 2013 - 07:25 PM UTC
When once you have tasted flight you will walk the Earth with your eyes turned skyward.
For there you have been, and there you will always long to return.
-Leonardo Da Vinci