


Modeling in General
General discussions about modeling topics.
General discussions about modeling topics.
Hosted by Jim Starkweather
Official: Airfix II Campaign

md72

#439

Member Since: November 05, 2005
entire network: 4,950 Posts
KitMaker Network: 564 Posts

Posted: Wednesday, March 12, 2014 - 03:20 PM UTC
Too bad about the 737. The F-5 is fighting me tooth and nail. I may not make it myself. With any luck I'll get the cockpit (just a seat), pilot and canopies installed. then it's time for more filling and sanding (canopy is ~.04 shorter than the fuselage...


Berwickboy

Member Since: April 27, 2013
entire network: 450 Posts
KitMaker Network: 63 Posts
Posted: Thursday, March 13, 2014 - 09:02 AM UTC
I have actually applied the decals to the 'Streak' 

Being Airfix of a certain vintage they had a very slight Yellowing but surprisingly I only had a couple of tears, and one was due to my having to cut the underwing Star & Bar to go around the pylon. Generally they went on well although they are thicker than modern day decals and do not wrap around edges well.
Airfix do not include an underside illustration so I have had to use the excellent Roy Cross artwork as a guide. One thing to notice is the nose patch, the box shows it not touching the nose wheel bay or ant-glare panel, however, the decals do and the top looks a lot different to the instructions. I also had to cut out the 'wedges' in the solid colour which is there to allow them to wrap around the nose and tail, unfortunately this made them real b****rs to apply leaving gaps which will need filling in. I tried using Humbol Decalfix last night but it didn't seem to help so today I have applied Microsol to the 'sticky out bits' and it seems to have helped them adhere.
Next job is a coat of protection then on to the weathering. The surface looks used already so it's down to panel lines.
It might just have to be a winter model to hide some of the abominable finishing like what I have done, well, it is a USAF example from Weasthersfield UK


amegan
#243

Member Since: March 21, 2008
entire network: 996 Posts
KitMaker Network: 63 Posts

Posted: Thursday, March 13, 2014 - 10:08 AM UTC
The Thunderstreak looks okay, and I know what you mean about the decals, but I remembered from a previous build that the DUKW decals were thicker than they should be, I used Microsol in large quantities and was happy with the result. I have gone old school on both trucks and didn't use the airbrush at all.

jimb
Member Since: August 25, 2006
entire network: 2,539 Posts
KitMaker Network: 263 Posts
Posted: Friday, March 14, 2014 - 12:59 AM UTC
The Thunderstreak looks pretty good.
Jim
Jim

Berwickboy
Member Since: April 27, 2013
entire network: 450 Posts
KitMaker Network: 63 Posts
Posted: Friday, March 14, 2014 - 10:40 AM UTC
I thought it about time I posted a progress picture of the 'Retired and Modified' RAF Whaleback.

In contrast to the Thunderstreak I am really enjoying this build as I can use my imagination and know that criticism will be fruitless, my own criticism that is
You may be able to see various additions, the lockers now have lids and I have used Grandt Line wingnuts as locks, the cabin has been detailed using bits from Tamiya's Perkasa, Microrod, Plasticard and odd bits from the Emergency set. The turret mounts have been removed and the holes covered so they are now tanks for foam extinguishant, the Silver tops are a 1/32 F86 nosewheel and the White tops are from the Airfix Refueling set. My crowning glory though is at the stern, I have made a Fire Hose out of the foam nozzle off the Emergency set Austin K6 fire engine with a piece of tube on the end, a swivel base from the Whaleback Oerlikon, a handwheel from the K6 and a bent piece of Microrod as the handle.
The Hull has been sprayed Gloss Red which you can't see here, below the waterline will be Hull Red. I have yet to decide on the deck/superstructure colour but they maybe Green deck and Red or Yellow superstructure.
This weekend I will be mainly finishing the F84 and gluing the boat superstructure together.
Have a great weekend folks

ljames0874

Member Since: August 15, 2012
entire network: 408 Posts
KitMaker Network: 39 Posts

Posted: Tuesday, March 18, 2014 - 06:34 AM UTC
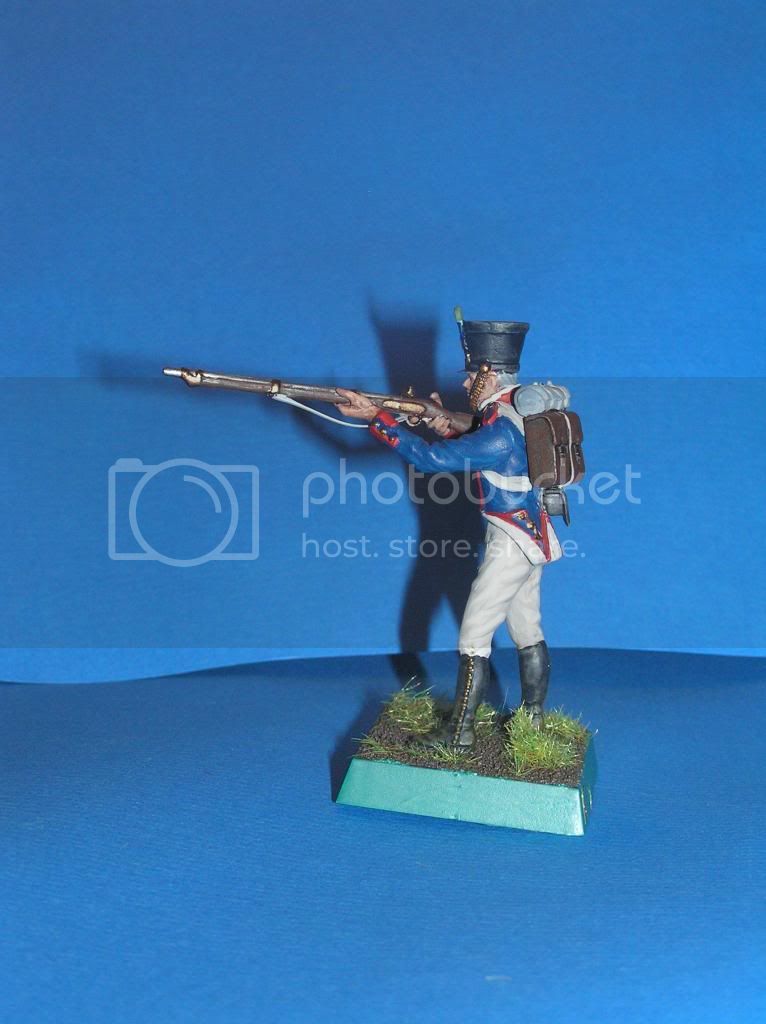
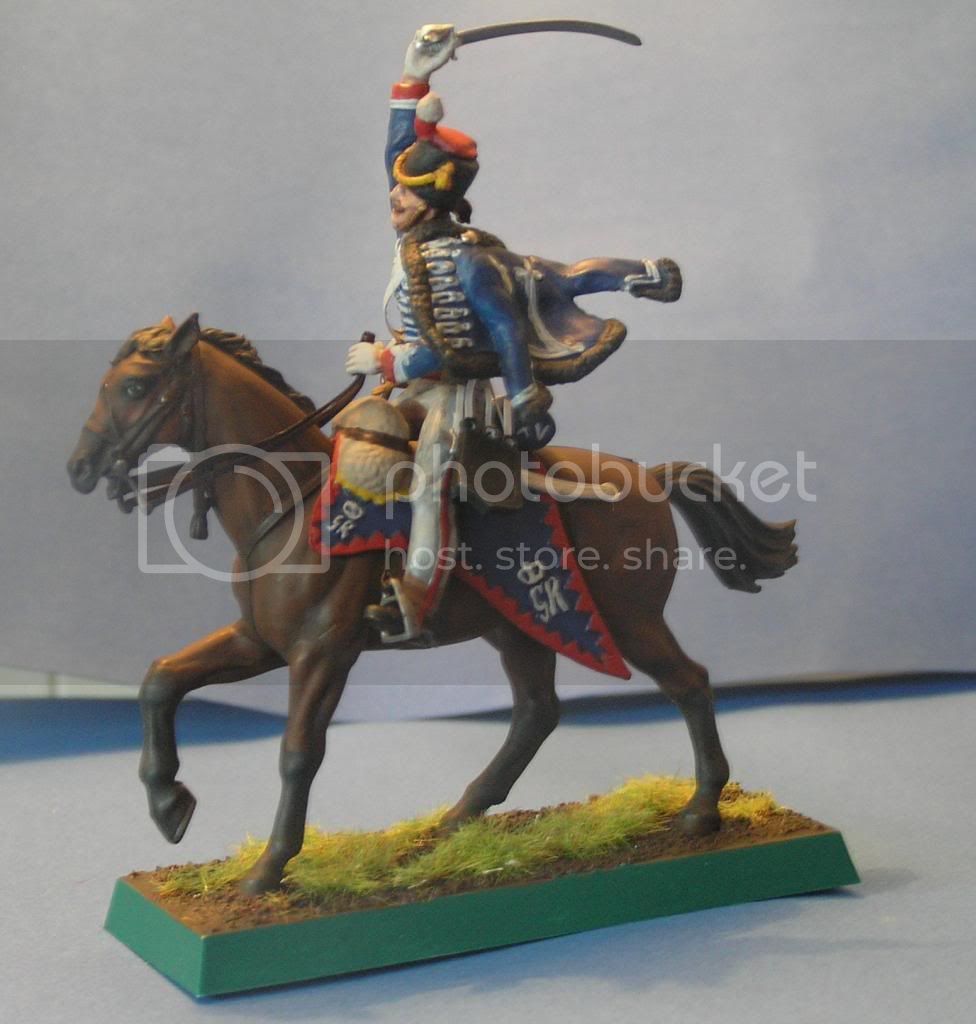
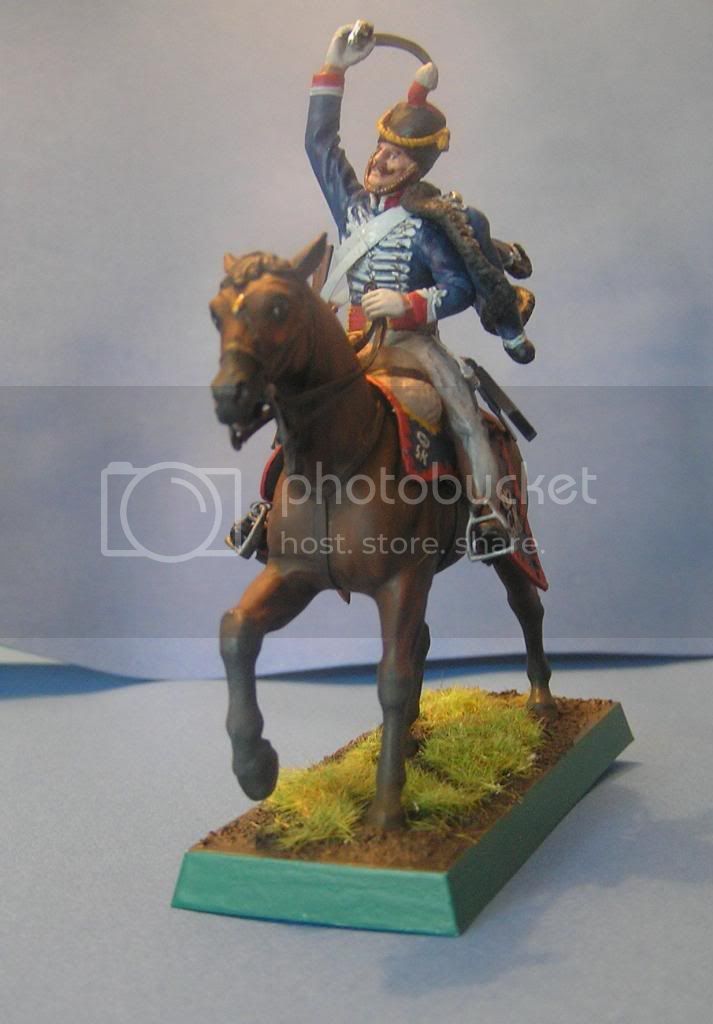
..... and I'm done! I had a bit of, ahem "fun" getting the reins to fit in the Hussar's hand, but I got it sorted in the end. This campaign was a lot of fun, and a nostalgic blast from the past.


Cheers everybody!
Cheers everybody!
md72
#439
Member Since: November 05, 2005
entire network: 4,950 Posts
KitMaker Network: 564 Posts
Posted: Tuesday, March 18, 2014 - 06:40 AM UTC
Good for your, don't forget to post in the gallery.
I'm making PAINFULLY slow progress on the F-5. Hopefully I can get the pilot glued in tonight and start with trying to make the canopy fit with the Fuselage. Lots of ugly gaps.
I'm making PAINFULLY slow progress on the F-5. Hopefully I can get the pilot glued in tonight and start with trying to make the canopy fit with the Fuselage. Lots of ugly gaps.
Berwickboy
Member Since: April 27, 2013
entire network: 450 Posts
KitMaker Network: 63 Posts
Posted: Tuesday, March 18, 2014 - 07:56 AM UTC
I have finally completed the Thunderstreak. My photo's are not good as I have changed my computer and do not have a suitable photo software, however, I have uploaded 4 so enjoy.


and finally the blurriest

and finally the blurriest

c4willy
#305

Member Since: February 01, 2006
entire network: 1,673 Posts
KitMaker Network: 35 Posts

Posted: Friday, March 21, 2014 - 12:55 PM UTC
I'll call this done .... done as a freshly repaired and re-painted whirlwind from the depot. (if such a thing was possible at that time) It's a great weee kit that went together with little fuss considering it's advancing years. So here are some pics of the finished article.


md72
#439
Member Since: November 05, 2005
entire network: 4,950 Posts
KitMaker Network: 564 Posts
Posted: Saturday, March 22, 2014 - 10:10 AM UTC
It's not for lack of trying on this one.
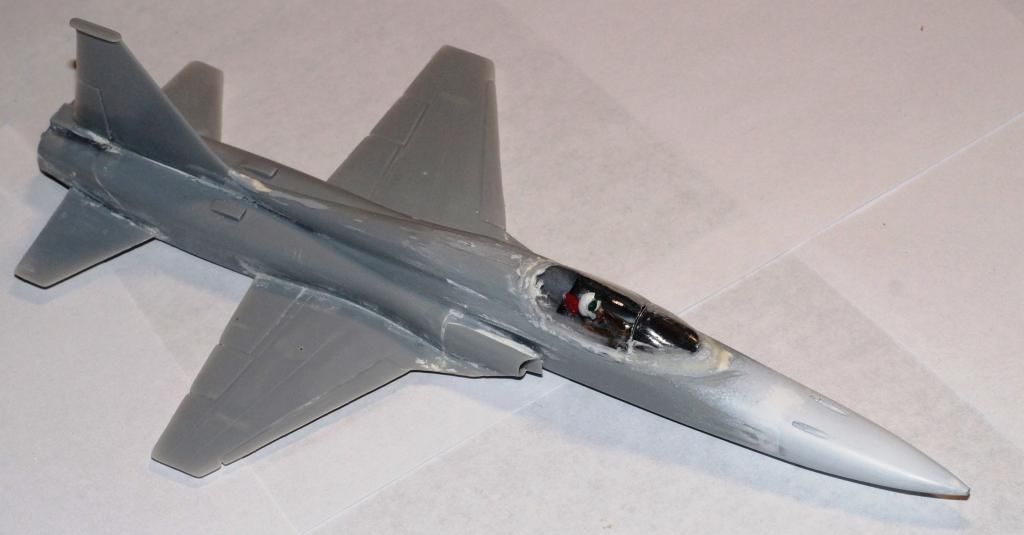
The canopy is too short and doesn't fit the fuselage profile. So I've built the walls up and now I've filled the gaps and starting the sanding process. I dipped both halves in Future before I started, so it might look OK by time I'm done.

The canopy is too short and doesn't fit the fuselage profile. So I've built the walls up and now I've filled the gaps and starting the sanding process. I dipped both halves in Future before I started, so it might look OK by time I'm done.

Jessie_C

Member Since: September 03, 2009
entire network: 6,965 Posts
KitMaker Network: 609 Posts

Posted: Saturday, March 22, 2014 - 03:31 PM UTC
Some great work is going on here Lee, I love the groundwork you've done with your figures. How did you get the grass looking so good?
Meanwhile, back at the Scotts Greys' Depot, I've done some more work on my horsie

And now Mr Man looks more at home
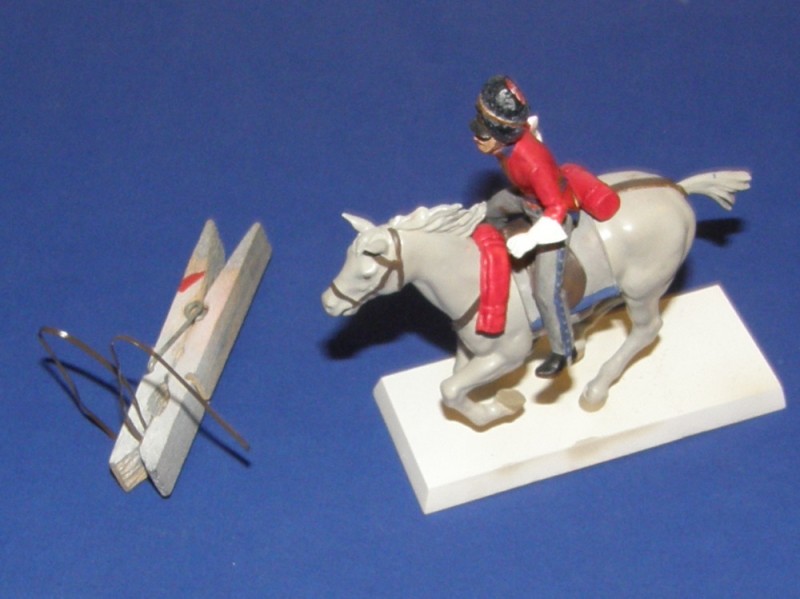
Lee, I love the groundwork you've done with your figures. How did you get the grass looking so good?Meanwhile, back at the Scotts Greys' Depot, I've done some more work on my horsie
And now Mr Man looks more at home
amegan
#243
Member Since: March 21, 2008
entire network: 996 Posts
KitMaker Network: 63 Posts
Posted: Sunday, March 23, 2014 - 05:28 AM UTC
Love the Whirlwind, always was a nice kit and an attractive subject.
I thought the F5 was better than that.
Jessie, I couldn't do that, I tried the figures years ago, you have to be more of an artist than I am.
I thought the F5 was better than that.
Jessie, I couldn't do that, I tried the figures years ago, you have to be more of an artist than I am.

FJHueso
#156

Member Since: February 29, 2004
entire network: 119 Posts
KitMaker Network: 9 Posts

Posted: Monday, March 24, 2014 - 10:44 AM UTC
At last! Only expecting to varnish the missile,and to make an adequate stand, my trusty ol' Bloodhound is finished!
I don't know if underttake one (some of the figures, not too good and a Morse 18 to finish yet, before March leaves us (Bign Guns Campaign). Apart from the pics on the Gallery, there you have two more:

Chris, Mike: nice birds, yours!
tomorrow I'll try to upload better pics
Regards
Javier
I don't know if underttake one (some of the figures, not too good and a Morse 18 to finish yet, before March leaves us (Bign Guns Campaign). Apart from the pics on the Gallery, there you have two more:
Chris, Mike: nice birds, yours!
tomorrow I'll try to upload better pics
Regards
Javier
md72
#439
Member Since: November 05, 2005
entire network: 4,950 Posts
KitMaker Network: 564 Posts
Posted: Monday, March 24, 2014 - 11:24 AM UTC
So how bad was the Bloodhound? Your earlier post mad it sound interesting. I picked one up at auction, less than U$5 bundles with another kit. Hope I didn't lose too much in the deal.
md72
#439
Member Since: November 05, 2005
entire network: 4,950 Posts
KitMaker Network: 564 Posts
Posted: Monday, March 24, 2014 - 06:29 PM UTC
Well, it might be time to bin this monster.

Looks Like I didn't center the canopy too well and sanded thru it trying to clean up the mis matches.

Looks Like I didn't center the canopy too well and sanded thru it trying to clean up the mis matches.
ljames0874
Member Since: August 15, 2012
entire network: 408 Posts
KitMaker Network: 39 Posts
Posted: Monday, March 24, 2014 - 07:32 PM UTC
Quoted Text
Some great work is going on here
Thanks a lot Jessie! The grass was dead easy really, it is just Citadel (Games Workshop) static grass, stuck on in patches, over
some fine sand painted to look like earth. Yours is coming on nicely, grey horses are definitely the hardest to paint, but they can look beautiful.
FJHueso
#156
Member Since: February 29, 2004
entire network: 119 Posts
KitMaker Network: 9 Posts
Posted: Tuesday, March 25, 2014 - 04:29 AM UTC
Not too bad, Mark if you don't mind "some" elbow grease... It shows its age (misamtching molds, specially in body halves and wheels), flash,... But not so difficult to build. Mine was a case of nostalgia, and after all, is a not much expensive kit.
Regards
Javier
Regards
Javier
jimb
Member Since: August 25, 2006
entire network: 2,539 Posts
KitMaker Network: 263 Posts
Posted: Thursday, March 27, 2014 - 08:43 AM UTC
Ok, so I've managed to make some progress on my L1011. Not much, but some. I've even managed to keep my dirty fingerprints off of the "gleaming white fuselage". Will I finish by Monday? Well, that remains to be seen.
Here you can see the final paint on the fuselage before the decaling. The wings & landing gear are just in place for the photo & are not glued on.
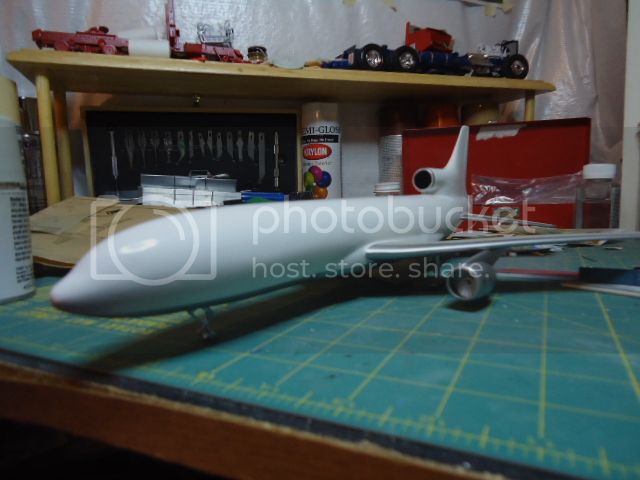
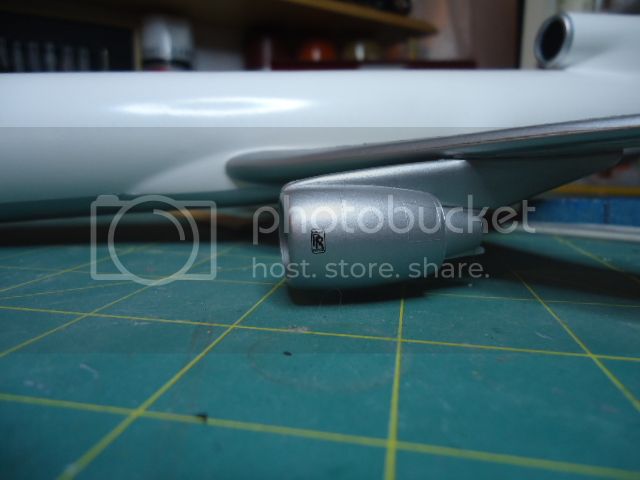
I did manage to get to "Rolls Royce" decals on the engines, though.
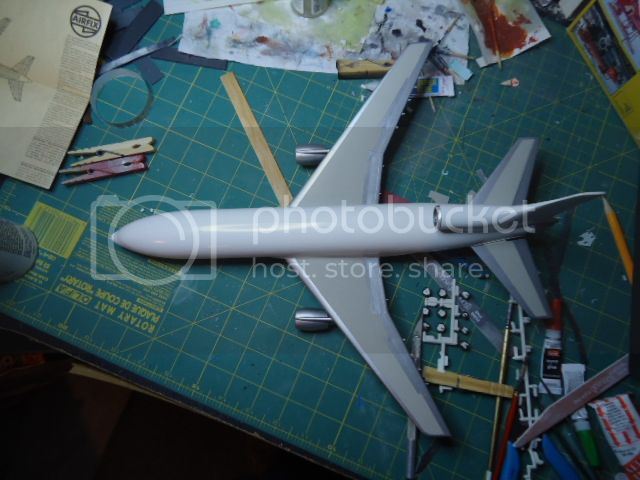
Here is an over head shot so you can see the over all look. It's coming along nicely, I think.
I will admit that I'm getting a new respect for body work on this build. It seems like for about a week it was fill, sand, prime, repeat. The sanding dust was everywhere!
Hopefully more updates over the weekend.
Jim
Here you can see the final paint on the fuselage before the decaling. The wings & landing gear are just in place for the photo & are not glued on.

I did manage to get to "Rolls Royce" decals on the engines, though.

Here is an over head shot so you can see the over all look. It's coming along nicely, I think.

I will admit that I'm getting a new respect for body work on this build. It seems like for about a week it was fill, sand, prime, repeat. The sanding dust was everywhere!
Hopefully more updates over the weekend.
Jim
md72
#439
Member Since: November 05, 2005
entire network: 4,950 Posts
KitMaker Network: 564 Posts
Posted: Thursday, March 27, 2014 - 09:12 AM UTC
Beautiful! Quite the reward for a lot of sanding and filling.
I'm going to barge ahead on the the F-5 but there's no way I'll be done by Monday.
I'm going to barge ahead on the the F-5 but there's no way I'll be done by Monday.

almonkey
Member Since: March 23, 2003
entire network: 2,124 Posts
KitMaker Network: 369 Posts

Posted: Thursday, March 27, 2014 - 09:37 AM UTC
@chris wilson - don't know if you've seen it, but i'm building the exact same whirlwind kit, and your post above had me thinking that i didn't remember posting those pics!


Quasimofo
Member Since: November 30, 2012
entire network: 105 Posts
KitMaker Network: 18 Posts

Posted: Thursday, March 27, 2014 - 09:45 AM UTC
James: Beautiful job on the Tristar!
That's where my 737 should be right about now, but I still haven't been able to get it re-primed after having to strip it. I had quite the sand-and-fill fest on it as well...thank the gods for Mr. Surfacer!
Looking forward to seeing your bird finished.
That's where my 737 should be right about now, but I still haven't been able to get it re-primed after having to strip it. I had quite the sand-and-fill fest on it as well...thank the gods for Mr. Surfacer!
Looking forward to seeing your bird finished.
jimb
Member Since: August 25, 2006
entire network: 2,539 Posts
KitMaker Network: 263 Posts
Posted: Thursday, March 27, 2014 - 10:37 AM UTC
Thanks for the comments, guys. It sure has been an exercise in patience. "Zen and the Art of Model Aircraft"? Sounds like a good book. At least this one hasn't had to go into the Purple Pond (yet).
I guess the best part of this is if I don't finish this for the Airfix II Campaign, I can always submit it for the Smurf Scale Campaign.
Jim
At least this one hasn't had to go into the Purple Pond (yet).I guess the best part of this is if I don't finish this for the Airfix II Campaign, I can always submit it for the Smurf Scale Campaign.
Jim
Quasimofo
Member Since: November 30, 2012
entire network: 105 Posts
KitMaker Network: 18 Posts
Posted: Thursday, March 27, 2014 - 01:54 PM UTC
Quoted Text
At least this one hasn't had to go into the Purple Pond (yet).
LOL! How did you know I used the Purple Paint Purifier(TM)? Were you peeking when I was stripping my 737 and cursing? I saw purple for a week after that...for a variety of reasons.
jimb
Member Since: August 25, 2006
entire network: 2,539 Posts
KitMaker Network: 263 Posts
Posted: Thursday, March 27, 2014 - 02:35 PM UTC
Lucky guess!
Jim
Jim
Removed by original poster on 03/28/14 - 12:12:43 (GMT).
 |

WEB HOSTING BY


Copyright ©2021 KitMaker Network and Kitmaker Network, a subsidiary of Silver Star Enterprises
All Rights Reserved. Please read our Conditions of Use and Privacy Policy.
All Rights Reserved. Please read our Conditions of Use and Privacy Policy.