Official: Ancient Airfix campaign

#041
Kobenhavn, Denmark
Member Since: July 20, 2006
entire network: 10,069 Posts
KitMaker Network: 119 Posts
Posted: Sunday, December 16, 2012 - 07:38 AM UTC
Campaign'oholic - 252+ campaigns completed
British Columbia, Canada
Member Since: September 03, 2009
entire network: 6,965 Posts
KitMaker Network: 609 Posts
Posted: Sunday, December 16, 2012 - 09:48 AM UTC
Those will look very good. It's really nice to see such variety in subjects for this campaign.
When once you have tasted flight you will walk the Earth with your eyes turned skyward.
For there you have been, and there you will always long to return.
-Leonardo Da Vinci
England - South East, United Kingdom
Member Since: January 11, 2003
entire network: 4,307 Posts
KitMaker Network: 788 Posts
Posted: Sunday, December 16, 2012 - 09:54 AM UTC
Quoted Text
Those will look very good. It's really nice to see such variety in subjects for this campaign.
I agree Jessica, most campaigns have only one genre; this one has attracted everything from a bus to figures. The only things missing from the Airfix catalogue I think are the technical models like the beam engine etc and motor cycles..
Bulldog#3
Grumpy Old Modeller No1
Growing old disgracefully!
British Columbia, Canada
Member Since: September 03, 2009
entire network: 6,965 Posts
KitMaker Network: 609 Posts
Posted: Sunday, December 16, 2012 - 10:31 AM UTC
Quoted Text
Quoted Text
Those will look very good. It's really nice to see such variety in subjects for this campaign.
I agree Jessica, most campaigns have only one genre; this one has attracted everything from a bus to figures. The only things missing from the Airfix catalogue I think are the technical models like the beam engine etc and motor cycles..
And the
Bluetits...
When once you have tasted flight you will walk the Earth with your eyes turned skyward.
For there you have been, and there you will always long to return.
-Leonardo Da Vinci
#305
Christchurch, New Zealand
Member Since: February 01, 2006
entire network: 1,673 Posts
KitMaker Network: 35 Posts
Posted: Sunday, December 16, 2012 - 06:05 PM UTC
Hi jesper and thanks! Just realised that the overall RLM02 which was a scheme from 1944, (apparently) which would mean that the cockpit would actually be RLM66 and not RLM02 as I have it! Time for a repaint of the interior before the canopy goes on! And then it'll be hurry up and wait while the masks make their way over.
#047
England - East Anglia, United Kingdom
Member Since: September 13, 2005
entire network: 2,016 Posts
KitMaker Network: 237 Posts
Posted: Monday, December 17, 2012 - 02:55 AM UTC
Quoted Text
Quoted Text
Those will look very good. It's really nice to see such variety in subjects for this campaign.
I agree Jessica, most campaigns have only one genre; this one has attracted everything from a bus to figures. The only things missing from the Airfix catalogue I think are the technical models like the beam engine etc and motor cycles..
"Heres one I made earlier"


for another campaign

Major Caryle,
"Shall we have a go at the far end now,sir?"
Lt Colonel "Johnny" Frost,
"Having a go,is hardly text book terminology Harry"
Major Caryle,
"But you'll let us try sir?"
A Bridge Too Far
Lottery Campaign "Oh de Vichy"
Isere, France
Member Since: April 23, 2011
entire network: 735 Posts
KitMaker Network: 80 Posts
Posted: Monday, December 17, 2012 - 08:10 AM UTC
#372
United Kingdom
Member Since: March 10, 2010
entire network: 2,568 Posts
KitMaker Network: 126 Posts
Posted: Monday, December 17, 2012 - 09:39 AM UTC
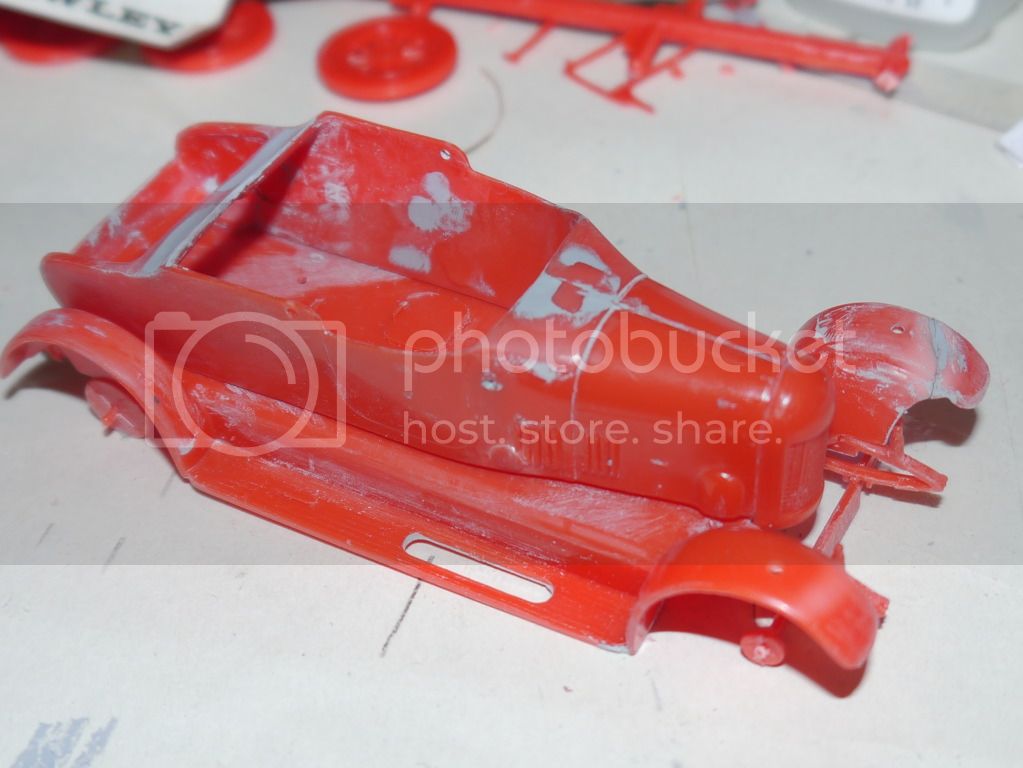
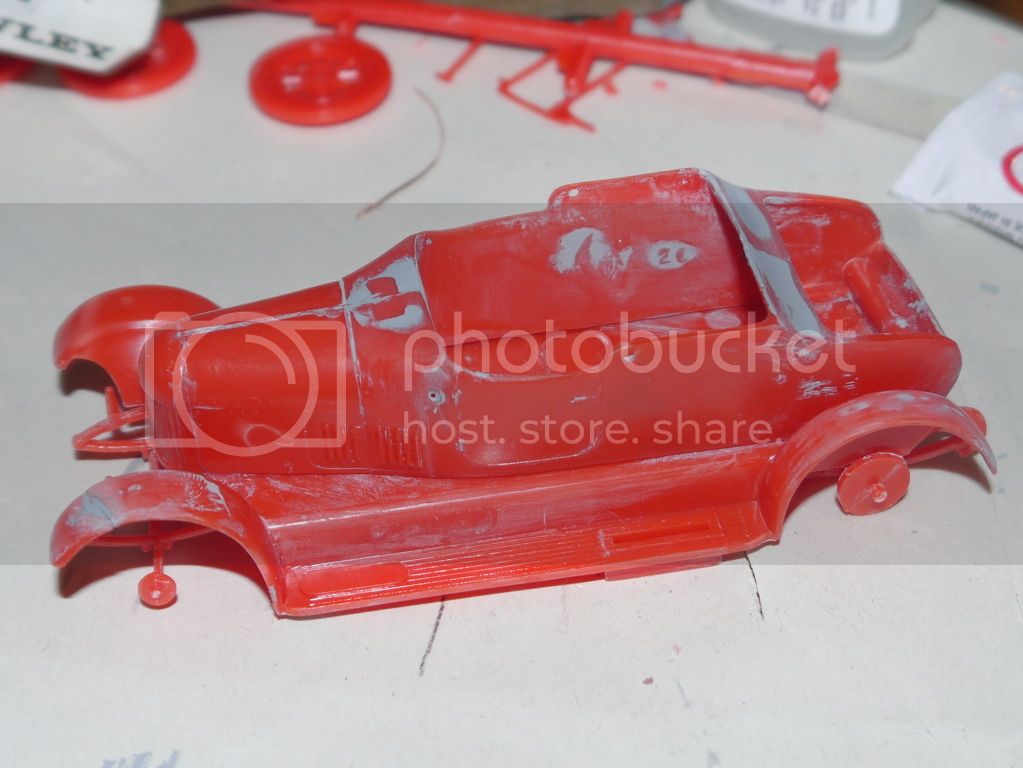
Wow! Looks like Airfix needed to include a tube of filler with that kit!
On the bench: 1/72 Mosquito, Lightning F.6, DH.2,
AMT Vulcan Shuttle Surak.
Cyber-Hobby 1:35 Sherman Firefly IC - still stalled.
England - South East, United Kingdom
Member Since: January 11, 2003
entire network: 4,307 Posts
KitMaker Network: 788 Posts
Posted: Wednesday, December 19, 2012 - 09:58 AM UTC
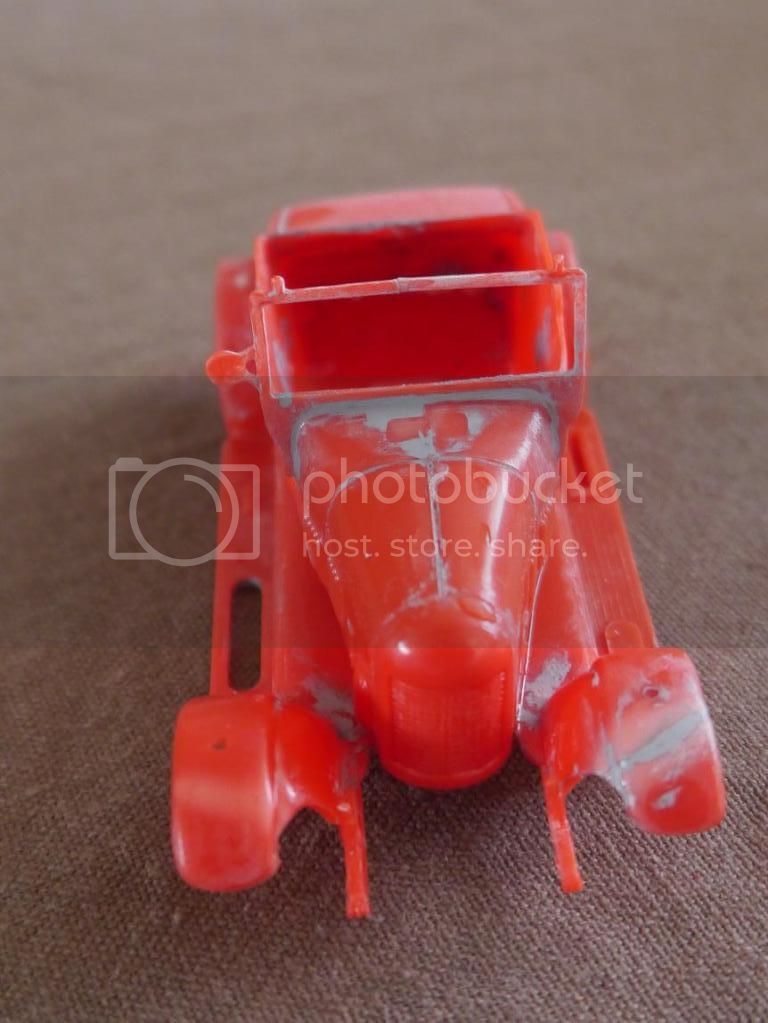
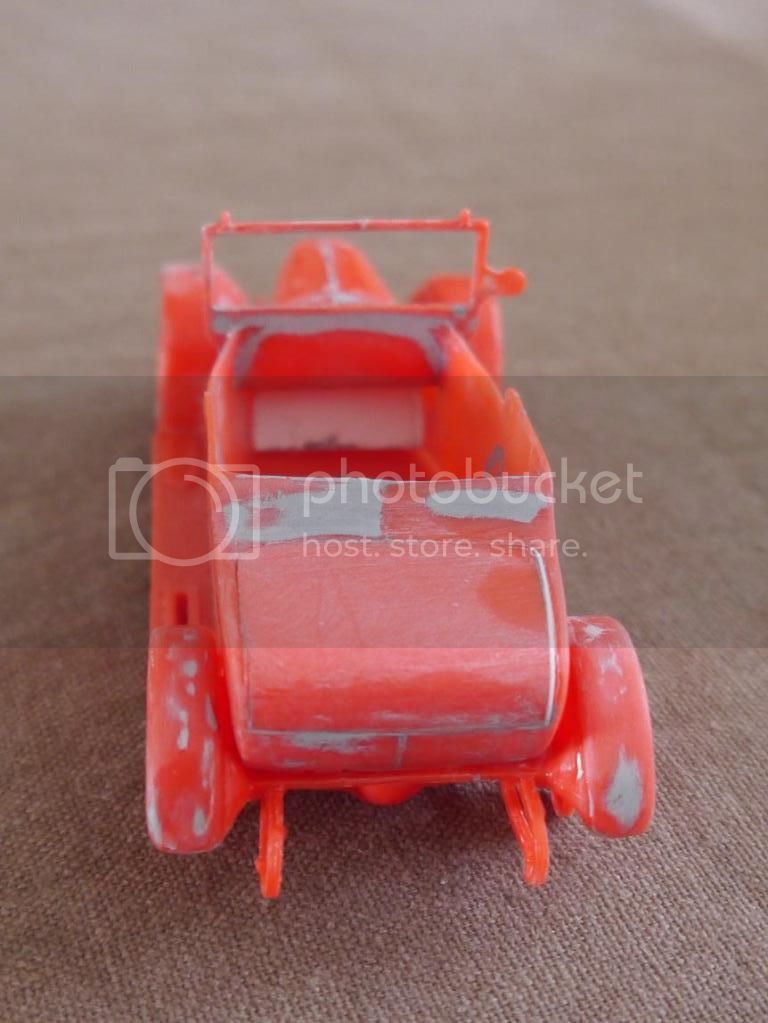
OK, decided that I wouldn't be beaten. Hopefully I'll be able to post some in progress and completed shots of the Sprite and TR4A tomorrow. Front end of the TR4 was so warped I had to use superglue to get the floorpan into the body.......just hope all 4 wheels hit the ground when I put them on!
Bulldog#3
Grumpy Old Modeller No1
Growing old disgracefully!
England - South East, United Kingdom
Member Since: January 11, 2003
entire network: 4,307 Posts
KitMaker Network: 788 Posts
Posted: Thursday, December 20, 2012 - 12:17 AM UTC
Bulldog#3
Grumpy Old Modeller No1
Growing old disgracefully!
Isere, France
Member Since: April 23, 2011
entire network: 735 Posts
KitMaker Network: 80 Posts
Posted: Thursday, December 20, 2012 - 07:50 AM UTC
Hello, very nice montage DAVE
steph
British Columbia, Canada
Member Since: September 03, 2009
entire network: 6,965 Posts
KitMaker Network: 609 Posts
Posted: Thursday, December 20, 2012 - 12:15 PM UTC
Now that you've got your Triumph done, it's time to do a
James May conversion on it.
When once you have tasted flight you will walk the Earth with your eyes turned skyward.
For there you have been, and there you will always long to return.
-Leonardo Da Vinci
#042
England - North East, United Kingdom
Member Since: November 18, 2006
entire network: 2,828 Posts
KitMaker Network: 212 Posts
Posted: Saturday, December 22, 2012 - 08:24 AM UTC
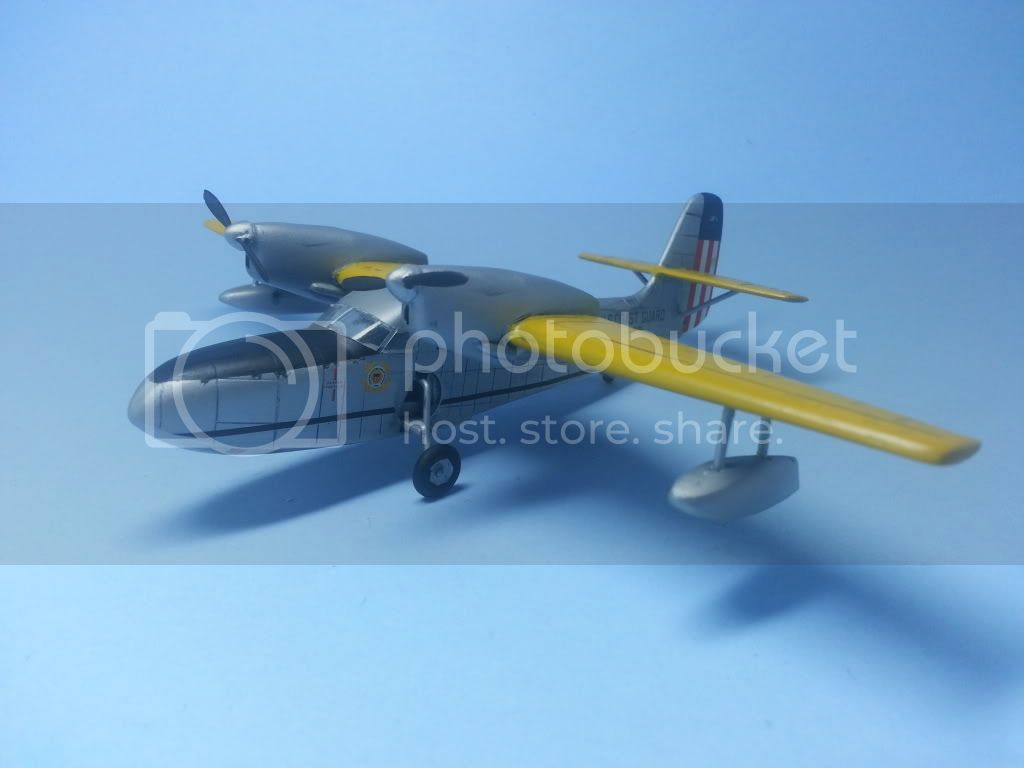
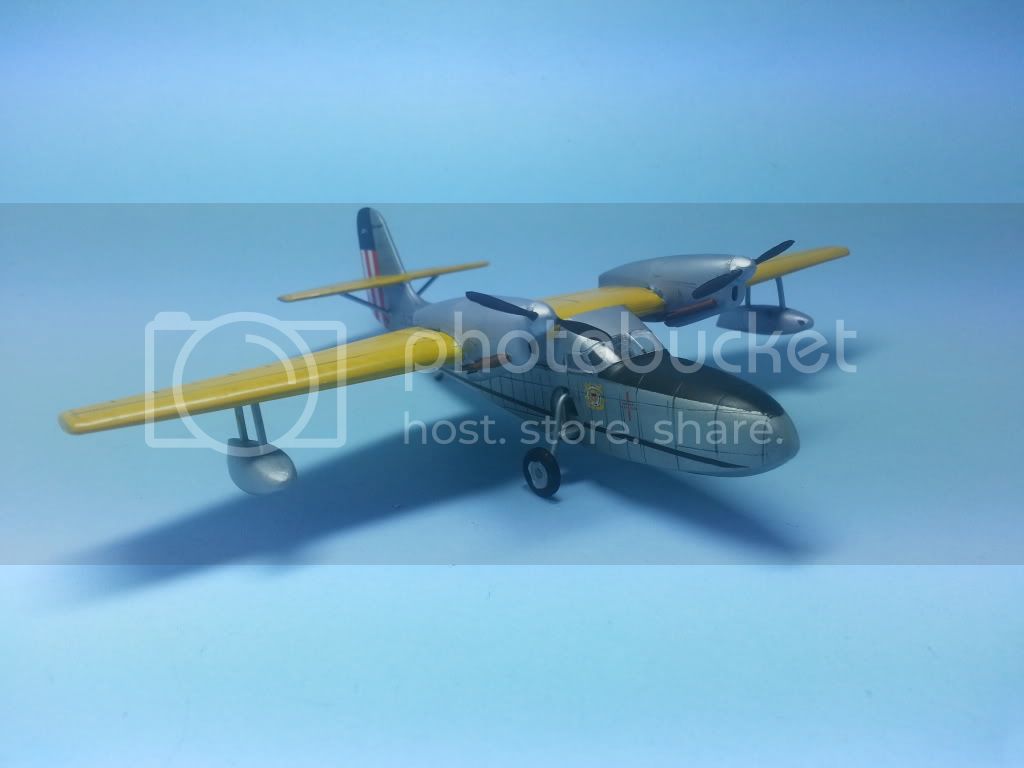
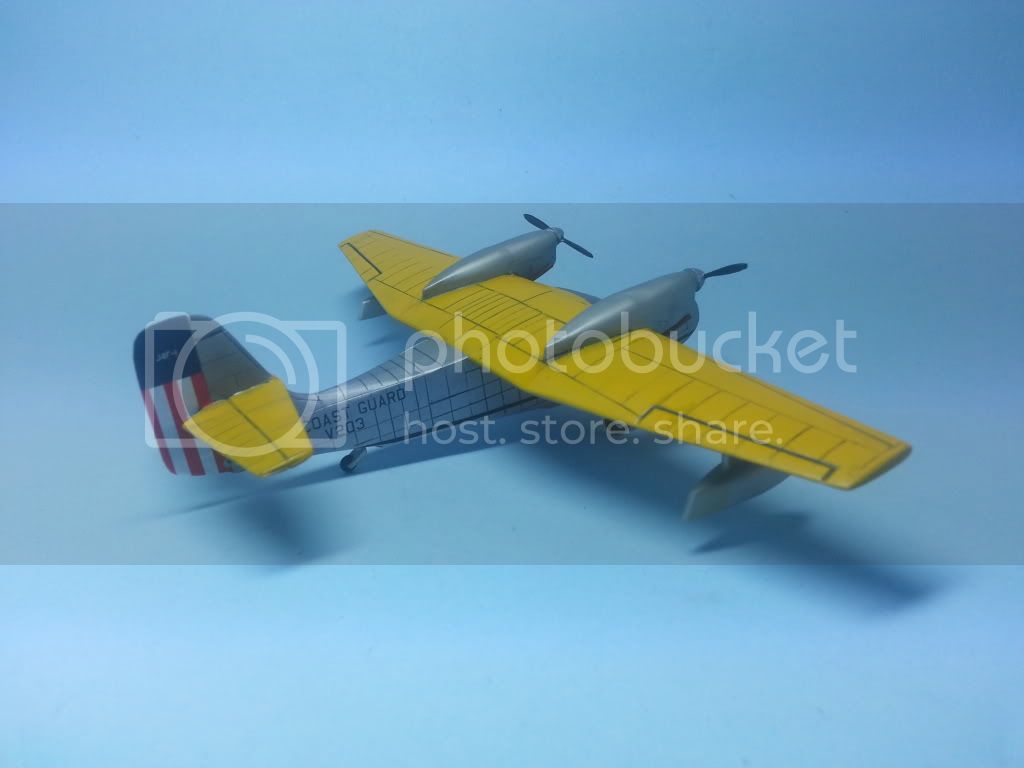
The Gosling/Widgeon has now been decaled.

next up will be the oil wash...
Modellers Creed: This is my toolbox. There are many like it, but this one is mine. My toolbox is my best friend. It is my life. I must master it as I must master my life. My toolbox, without me, is useless. Without my toolbox, I am useless.
#305
Christchurch, New Zealand
Member Since: February 01, 2006
entire network: 1,673 Posts
KitMaker Network: 35 Posts
Posted: Saturday, December 22, 2012 - 01:15 PM UTC
#439
Washington, United States
Member Since: November 05, 2005
entire network: 4,950 Posts
KitMaker Network: 564 Posts
Posted: Saturday, December 22, 2012 - 05:04 PM UTC
Looking good. Now how am I going to clean the keyboard after that nautical misadventure? This this is a Lenovo, not a HiLuxe...
Hanger Queens in Waiting:
Monogram 1/72 F8F-1
Corsair the Sky Pirate - 1/72 Ace A-7D
Century Series - Airfix 1/72 F-105G
Anti Shipping - Academy 1/72 PBJ-1D
Academy 1/72 F-84E
Ontario, Canada
Member Since: November 14, 2009
entire network: 270 Posts
KitMaker Network: 5 Posts
Posted: Saturday, December 22, 2012 - 06:03 PM UTC
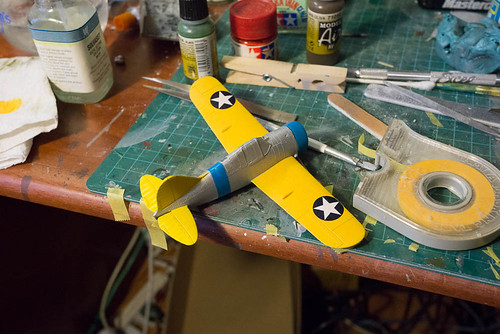
Well, paint was done and I started on the decals
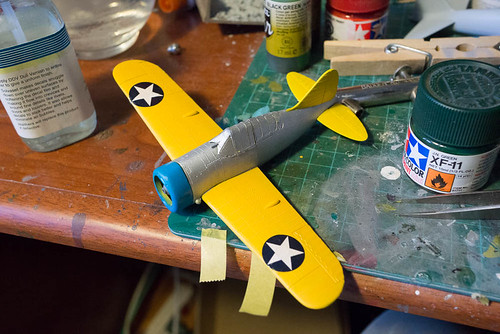 Airfix F2A-1 Buffalo 1/72
 by
mawz_models, on Flickr
But I ran into a problem, the fuselage stripe self-destructed, so out came the paint again
 Airfix F2A-1 Buffalo 1/72
 by
mawz_models, on Flickr
Problem solved, now for the rest of the decals.
Isere, France
Member Since: April 23, 2011
entire network: 735 Posts
KitMaker Network: 80 Posts
Posted: Saturday, December 22, 2012 - 10:46 PM UTC
#041
Kobenhavn, Denmark
Member Since: July 20, 2006
entire network: 10,069 Posts
KitMaker Network: 119 Posts
Posted: Monday, December 24, 2012 - 11:43 AM UTC
Some really great builds going on in this campaign. It will be interesting to follow.
Looking forward to see more

Campaign'oholic - 252+ campaigns completed
British Columbia, Canada
Member Since: September 03, 2009
entire network: 6,965 Posts
KitMaker Network: 609 Posts
Posted: Monday, December 24, 2012 - 11:49 AM UTC
Quoted Text
hello, finished sanding and filling ... phew. I want to know if i can add some little thing (handles on the hood, brake pedals, door handles.). good Sunday.
steph 
Hi Steph, I'm sorry I missed this until now. Yes, that kind of small scratchbuilding and adding detail is allowed for in the rules.
Amuse-toi bien : )
When once you have tasted flight you will walk the Earth with your eyes turned skyward.
For there you have been, and there you will always long to return.
-Leonardo Da Vinci
England - East Midlands, United Kingdom
Member Since: March 23, 2003
entire network: 2,124 Posts
KitMaker Network: 369 Posts
Posted: Saturday, December 29, 2012 - 08:53 AM UTC
and my leopard is assembled!

just needed a bit of filler here and there to level out a few gaps.

and painted, and of course only after its painted did i notice i needed a bit more filler on the turret bustle!
heres something i didn't expect, when building these kits the tracks always seem slightly too small, in some cases i've had them break off wheels due to this, not so with this kit though-

its possibly stretched over the years.
i think i'll cut it to length then hide the new joint under the fender
ipms member 10318, click the IPMS-UK link under the avatar to see!
ACCIDENT PRONE? ME? NAAAAH!
SCREW YOU PHOTOBUCKET! ------------------------------------------------>>>>
#041
Kobenhavn, Denmark
Member Since: July 20, 2006
entire network: 10,069 Posts
KitMaker Network: 119 Posts
Posted: Monday, December 31, 2012 - 01:30 AM UTC
Nice progress, Phil. If you cut carefully you might be able to use the surplus track links for hanging on the turret or hull.
Looking forward to see more
Happy New Year to all

Campaign'oholic - 252+ campaigns completed
England - East Midlands, United Kingdom
Member Since: March 23, 2003
entire network: 2,124 Posts
KitMaker Network: 369 Posts
Posted: Monday, December 31, 2012 - 04:50 AM UTC
thats what i thought jesper!
but now one track is done, the off cuts seem a bit too thick to hang on the hull, and there are track links moulded on the rear anyway, i will of course not throw them away (you never know!)
happy new year all!!
i'm off drinking now!


ipms member 10318, click the IPMS-UK link under the avatar to see!
ACCIDENT PRONE? ME? NAAAAH!
SCREW YOU PHOTOBUCKET! ------------------------------------------------>>>>
#042
England - North East, United Kingdom
Member Since: November 18, 2006
entire network: 2,828 Posts
KitMaker Network: 212 Posts
Posted: Monday, December 31, 2012 - 10:39 AM UTC
Modellers Creed: This is my toolbox. There are many like it, but this one is mine. My toolbox is my best friend. It is my life. I must master it as I must master my life. My toolbox, without me, is useless. Without my toolbox, I am useless.
#041
Kobenhavn, Denmark
Member Since: July 20, 2006
entire network: 10,069 Posts
KitMaker Network: 119 Posts
Posted: Saturday, January 05, 2013 - 04:10 PM UTC
Nice build, Allen. Great job on this old kit.
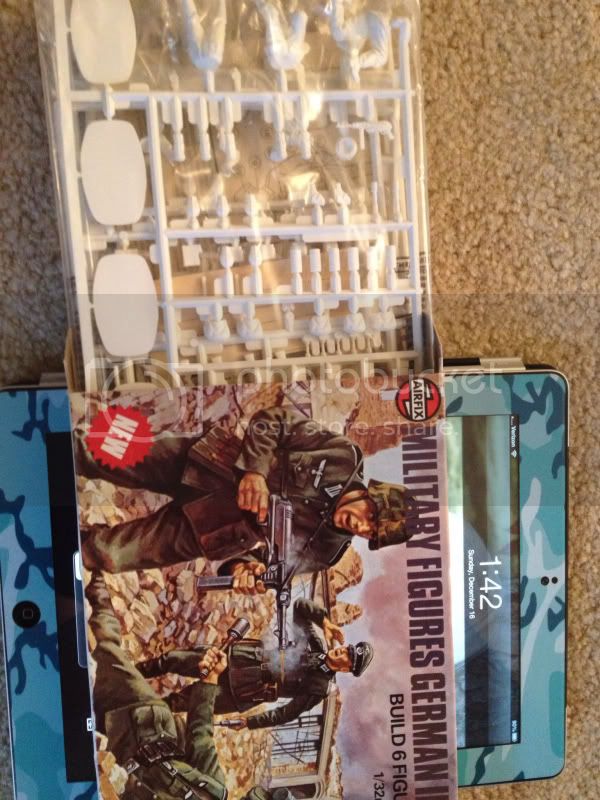
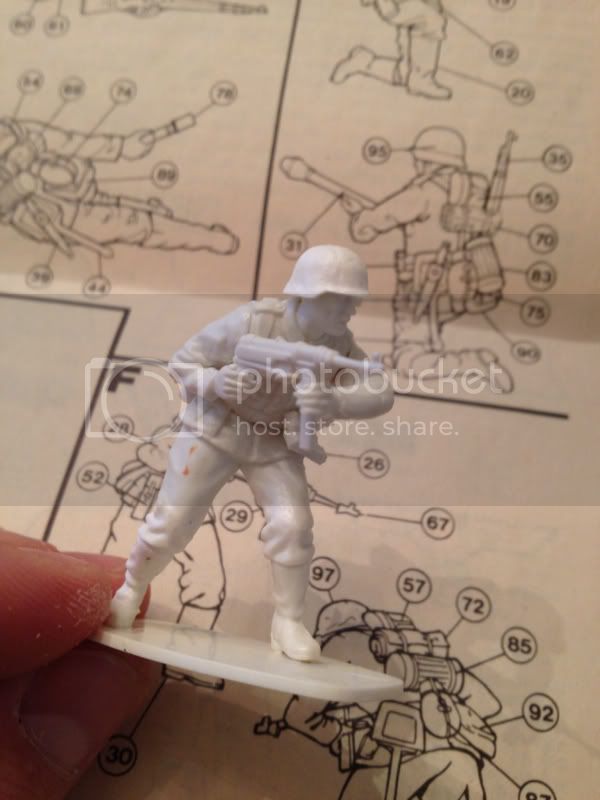
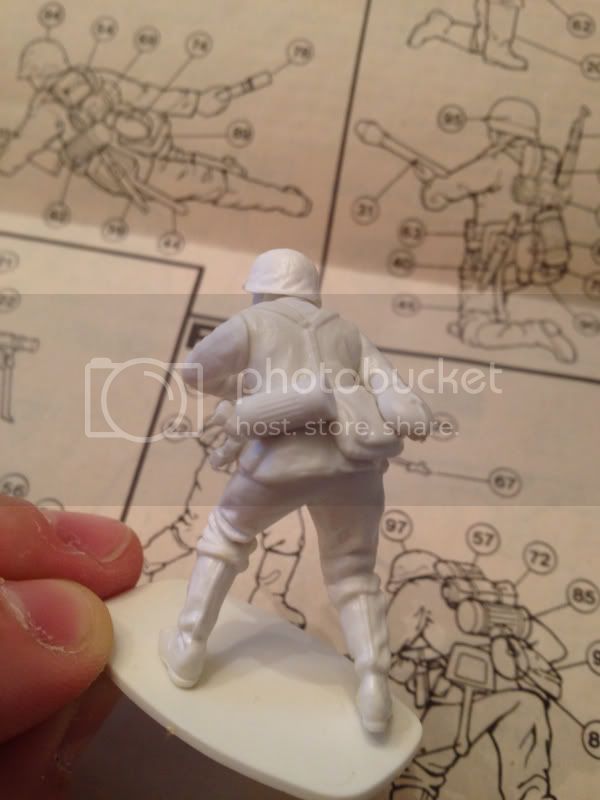
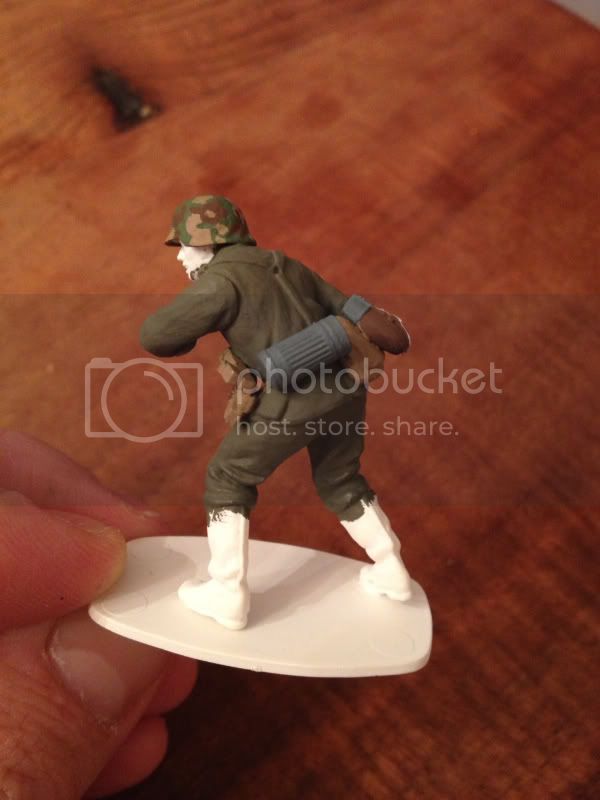
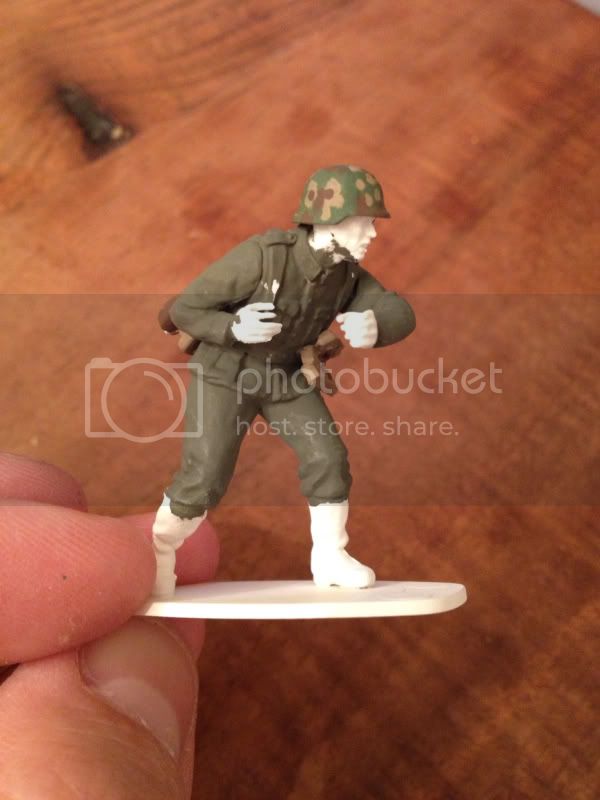
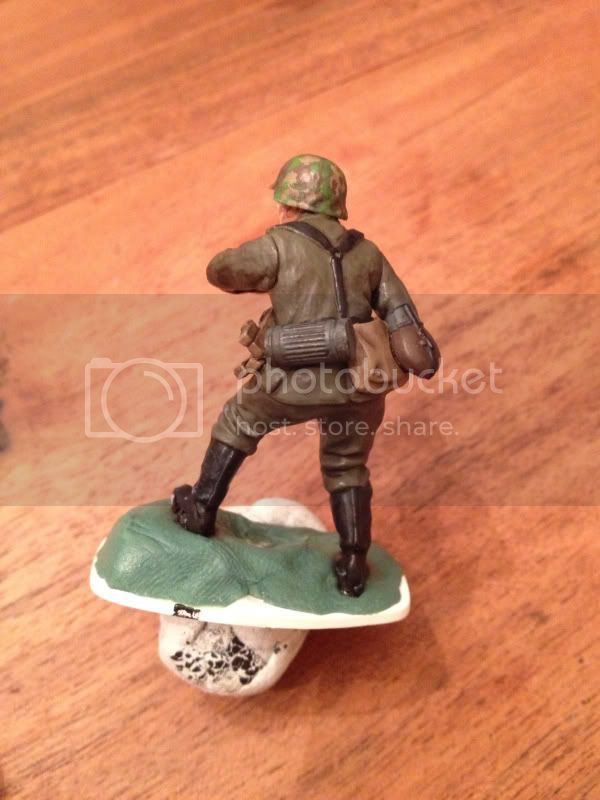
A little more progress on my German infantry man. The painting is progressing nicely, but still some way to go. Next are the skin areas.
More to follow
Campaign'oholic - 252+ campaigns completed
#041
Kobenhavn, Denmark
Member Since: July 20, 2006
entire network: 10,069 Posts
KitMaker Network: 119 Posts
Posted: Thursday, January 10, 2013 - 03:59 AM UTC
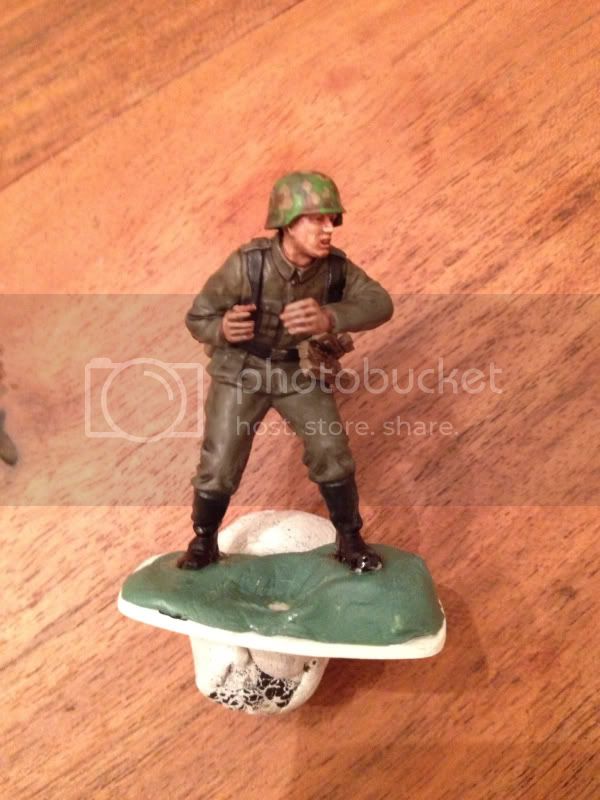
A little more progress on the infantry man.
More to follow
Campaign'oholic - 252+ campaigns completed