Official: Ancient Airfix campaign

#130
Noord-Holland, Netherlands
Member Since: June 07, 2002
entire network: 8,797 Posts
KitMaker Network: 1,186 Posts
Posted: Monday, October 08, 2012 - 03:39 AM UTC
@ Sam
Great job on that biplane. Very nice finish.
@ Dave
You make me feel the slowest modelbuilder in the world. Nice result on the Jag. Nice color too. You also get a very nice shiny coat. Somehow I found that very hard to do.. coming from the realm of matt muddy vehicles
Here is an update from me. Got some paint on it last weekend. The chassis and all the other red parts were painted last week. Did the white this weekend and gave it it's shiny coat. Now it is up to painting the details.

Greetz Robert "FAUST" Blokker
"Wees niet onverstandig, haastig of voortvarend; alles sal regkom, as ons almal ons plig doen".
FUTBOL KAVGADIR!!!!!!!
England - South East, United Kingdom
Member Since: January 11, 2003
entire network: 4,307 Posts
KitMaker Network: 788 Posts
Posted: Monday, October 08, 2012 - 04:54 AM UTC
Looking good Robert, it's ages since I made the Merc - the extra work you've done has lifted this old kit.
I got the Ford 3-litre and Ferrari 250LM in the post today. Both look reasonably clean, mould quality and flash levels seem ok. The Ford doesn't have decals for the numbers - you're supposed to cut out the paper ones from the instruction sheet and use them. That may end up as a ficticious road-going version...........
Bulldog#3
Grumpy Old Modeller No1
Growing old disgracefully!
#047
England - East Anglia, United Kingdom
Member Since: September 13, 2005
entire network: 2,016 Posts
KitMaker Network: 237 Posts
Posted: Tuesday, October 09, 2012 - 08:53 PM UTC
Hey Rob

nice paint job on the Merc,looks neat

I've done a bit more on the bus,its a masking nightmare!!!
I did the white first then masked it off followed by the bright red,masked, and finally the purple /brown red.
I hand painted the black

I painted the top deck seats Tamiya dark yellow and the wahed them with a raw umber oil paint

The lower deck inside seats were fabric covered and a trip to the London Transport Museum show they are a red and blue pattern,I've tried to copy this by using a blue base then using a piece of mesh as a stencil then airbrushing red over
Not great but it will mostly hidden when the top goes on

Top on decals too do


Should get the decals on today
More pics soon
Andy

Major Caryle,
"Shall we have a go at the far end now,sir?"
Lt Colonel "Johnny" Frost,
"Having a go,is hardly text book terminology Harry"
Major Caryle,
"But you'll let us try sir?"
A Bridge Too Far
Lottery Campaign "Oh de Vichy"
England - South East, United Kingdom
Member Since: January 11, 2003
entire network: 4,307 Posts
KitMaker Network: 788 Posts
Posted: Tuesday, October 09, 2012 - 10:51 PM UTC
Neat work Andy, the old 'B' type was always a good kit. That and the Dennis fire engine got converted into many other vehicles as well.
Good job well under way, looking forward to seeing that completed!
This one started as the Dennis fire-engine (just to show what can be done with these oldies!)

Bulldog#3
Grumpy Old Modeller No1
Growing old disgracefully!
#047
England - East Anglia, United Kingdom
Member Since: September 13, 2005
entire network: 2,016 Posts
KitMaker Network: 237 Posts
Posted: Tuesday, October 09, 2012 - 11:26 PM UTC
Het Dave
Thanks mate
I love that Dennis conversion,I will do another B type bus and go a bit mad on it but this is an OOB build for the campaign.
I've got a Bandai 1/16 Dennis Fire engine in the stash!!!
Andy
Major Caryle,
"Shall we have a go at the far end now,sir?"
Lt Colonel "Johnny" Frost,
"Having a go,is hardly text book terminology Harry"
Major Caryle,
"But you'll let us try sir?"
A Bridge Too Far
Lottery Campaign "Oh de Vichy"
Ontario, Canada
Member Since: November 14, 2009
entire network: 270 Posts
KitMaker Network: 5 Posts
Posted: Saturday, October 13, 2012 - 02:01 AM UTC
After a little bit of fun finding the campaign thread, here I am. Got started a few days ago but I hadn't uploaded pics until today.
Here's the obligatory start pic:
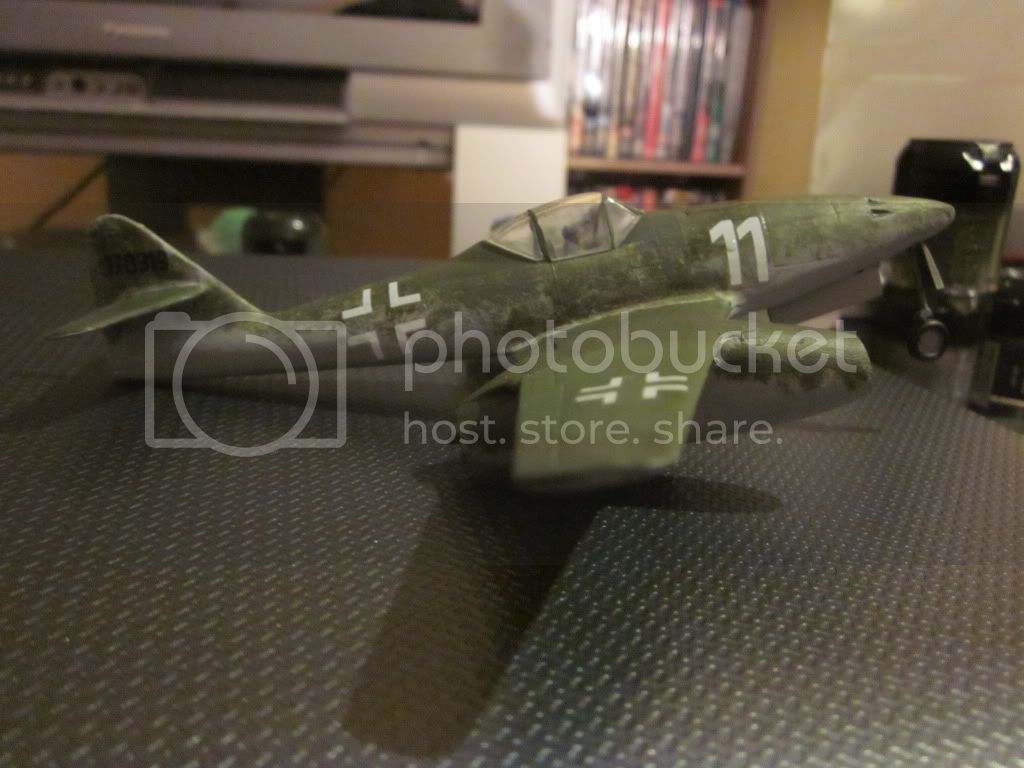
 Airfix Brewster F2A-1 Buffalo 1/72
 by
mawz_models, on Flickr
It's Airfix's F2A-1, circa 1973. Note that despite what's often said online, the cowl is actually correct, for an F2A-1 or a B239E. It's wrong for the F2A-2/3 and the B339E though, being too short. Of course the box markings are for the aircraft it's incorrect for, but I'll do a yellow-wing F2A anyways with the kit markings, they're close enough to markings actualy worn by F2A-1's for me.
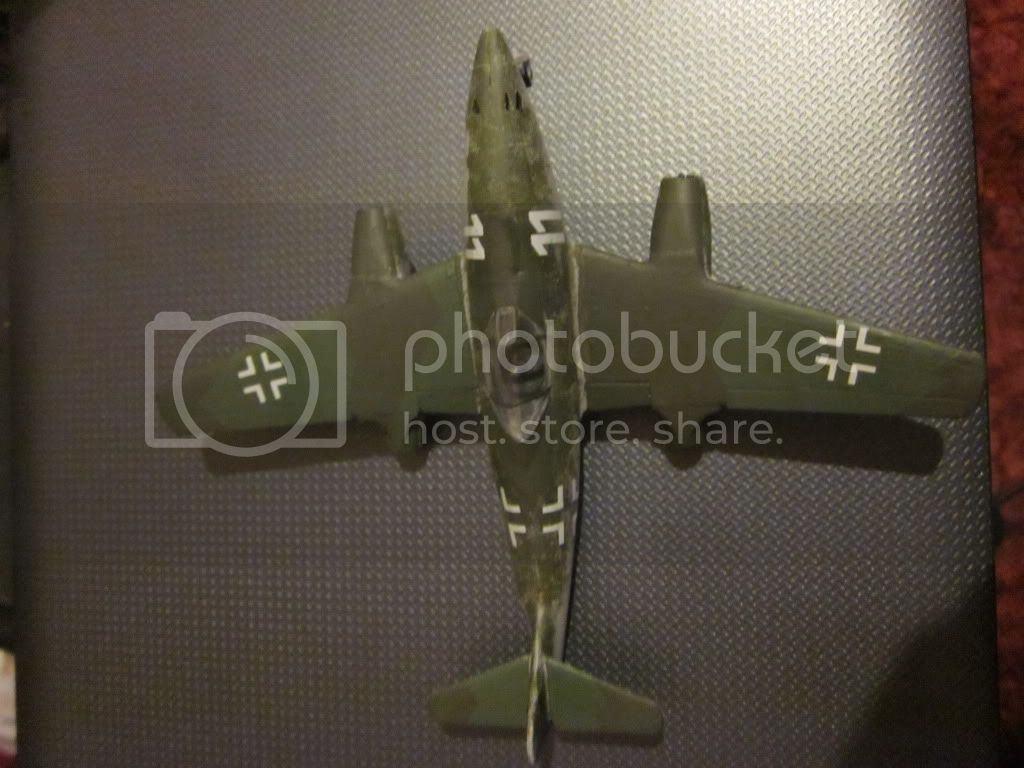
And this is how she stands now:
 Airfix Brewster F2A-1 Buffalo 1/72
 by
mawz_models, on Flickr
England - South East, United Kingdom
Member Since: January 11, 2003
entire network: 4,307 Posts
KitMaker Network: 788 Posts
Posted: Saturday, October 13, 2012 - 02:34 AM UTC
Nice start Adam
I finished my second entry today - the Ford 3-litre (actual designation I believe was the P68). There are no decals for this kit, just cutout paper numbers on the instruction sheet so I found some numbers in my spares box and an alternative paint scheme on Google (the Ferrari 250LM will be red and I wanted some difference between them)


I've no idea where the red on the interior comes from that shows in a couple of the photos - the whole inside of the body had a couple of good coats of matt black; or how the sanding dust from the body joint seams ended up inside! Too late to do anything about it now and it's not so obvious in real life as it is in the photos!
Bulldog#3
Grumpy Old Modeller No1
Growing old disgracefully!
#047
England - East Anglia, United Kingdom
Member Since: September 13, 2005
entire network: 2,016 Posts
KitMaker Network: 237 Posts
Posted: Sunday, October 14, 2012 - 04:26 AM UTC
Hi Chums
The B Type is done and I loved every minute of this build and to think I built this in one night when I was a lad staying round my Grans on a Saturday night,this one took a little longer!!
Here we go kids....


Hope you like
Andy
@ Dave ...the Ford looks great mate,green and gold go so well together
Major Caryle,
"Shall we have a go at the far end now,sir?"
Lt Colonel "Johnny" Frost,
"Having a go,is hardly text book terminology Harry"
Major Caryle,
"But you'll let us try sir?"
A Bridge Too Far
Lottery Campaign "Oh de Vichy"
England - South East, United Kingdom
Member Since: January 11, 2003
entire network: 4,307 Posts
KitMaker Network: 788 Posts
Posted: Sunday, October 14, 2012 - 05:14 AM UTC
Andy
That's a real beaut! Looks excellent, nice finish
As I've said before, many of these old airfix kits are very underated and can really come up well. Such a shame that many of the moulds are now well worn-out or have been modified over the years (I'm looking for the Mk1 Ford Capri at the moment and they're like golden rocking horse wotsit!)
Bulldog#3
Grumpy Old Modeller No1
Growing old disgracefully!
British Columbia, Canada
Member Since: September 03, 2009
entire network: 6,965 Posts
KitMaker Network: 609 Posts
Posted: Sunday, October 14, 2012 - 06:49 AM UTC
A couple more fine finishers! Dave, do you have in-progress shots?
When once you have tasted flight you will walk the Earth with your eyes turned skyward.
For there you have been, and there you will always long to return.
-Leonardo Da Vinci
England - South East, United Kingdom
Member Since: January 11, 2003
entire network: 4,307 Posts
KitMaker Network: 788 Posts
Posted: Sunday, October 14, 2012 - 06:58 AM UTC
Quoted Text
A couple more fine finishers! Dave, do you have in-progress shots?
Sorry Jessica
When I start working taking photos is the last thing I think of!
Just taken one of the Ferrari 250LM especially for you! In the box so that I can move it off of the dining table (my workbench)while the paint dries and I eat my meal!

Bulldog#3
Grumpy Old Modeller No1
Growing old disgracefully!
#243
England - North East, United Kingdom
Member Since: March 21, 2008
entire network: 996 Posts
KitMaker Network: 63 Posts
Posted: Monday, October 15, 2012 - 11:39 AM UTC
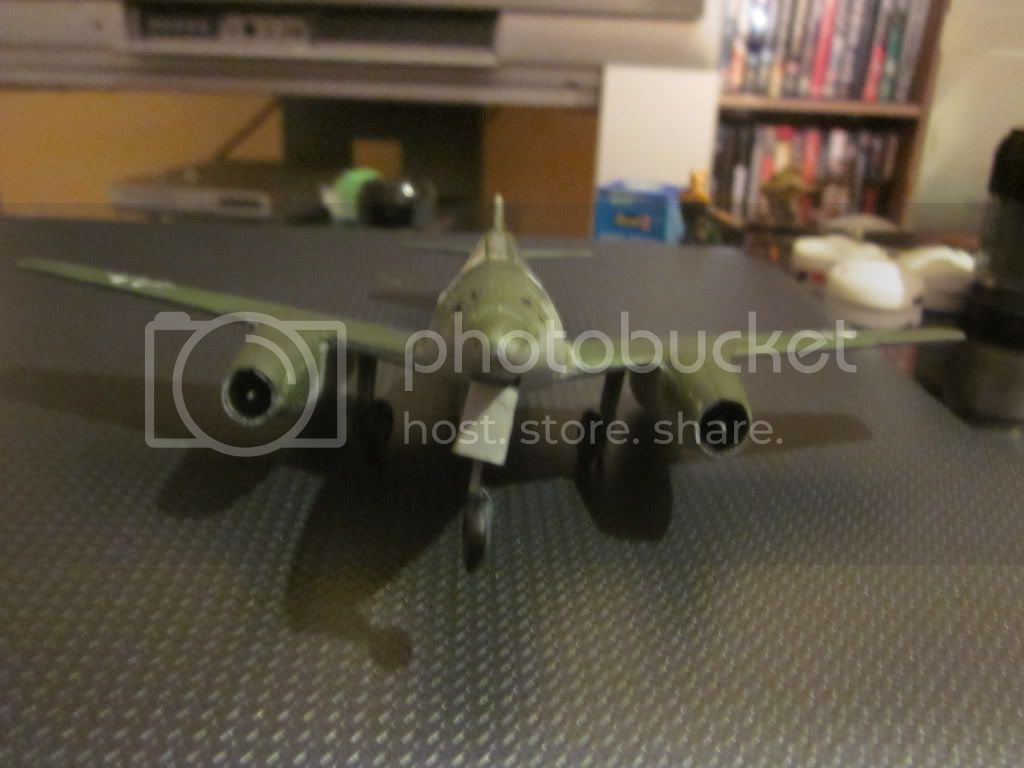
Likewise had a job to find it. love the Old Bill bus, never built that kit. Started with the Arado 196. New boxing and the mouldings are not as sharp as they used to be. I know because I have another date 1995 in the stash. Once cleaned up the fits are good, tho detail is sparse.


a little filler has been added but most joints are neat without it, floats are dry fitted, going to paint float and aircraft separately and need to drill floats and fuselage for rigging. float bottoms will be fitted last after rigging
Andrew
Pfalz DIIIa, Eduard 1/48 Uffz Max Hitschler Jasta 18 Late 1917
England - South East, United Kingdom
Member Since: January 11, 2003
entire network: 4,307 Posts
KitMaker Network: 788 Posts
Posted: Thursday, October 18, 2012 - 04:10 AM UTC
Bulldog#3
Grumpy Old Modeller No1
Growing old disgracefully!
British Columbia, Canada
Member Since: September 03, 2009
entire network: 6,965 Posts
KitMaker Network: 609 Posts
Posted: Thursday, October 18, 2012 - 05:10 AM UTC
That shape is sooo 1960s! Congratulations on finishing, Dave and thanks for playing
Watch for your models to appear in a feature when the campaign is over.
When once you have tasted flight you will walk the Earth with your eyes turned skyward.
For there you have been, and there you will always long to return.
-Leonardo Da Vinci
#130
Noord-Holland, Netherlands
Member Since: June 07, 2002
entire network: 8,797 Posts
KitMaker Network: 1,186 Posts
Posted: Thursday, October 18, 2012 - 06:19 AM UTC
@ Dave
Congrats on reaching the finish line with three models. They all look great. Love the shapes of the Ford and the Ferrari. Great job. Good finishes as well.
@ Andy
That bus looks fantastic with all those ads on it. Great finish great result and congrats on finishing.
@ Adam.
Cool plane. Looking forward to the finished kit.
@ Andrew
Cool kit that arado coming together neat.. Are those floats meant to be open at the bottom?
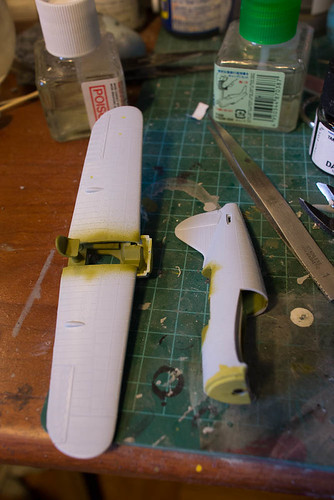
Okay... Well I think the secret is out... I'm slow. Could be Captain Slow but somebody already holds that name. I did some more painting. Mostly of the details. But sadly the only pic of it I have is this one of my painted woodwork.

Oh yeah and since I'm planning a bit of groundwork in the end I started a bit of a sideproject. As I didn't like the driver which was a real weak point of the kit. So I took a Dragon figure which pose suited what I had in mind and started hacking. Then I started sculpting and the result was this

For the full built check out my
Converting a soldier to a racing car driver thread on Historicus Forma
More pics should follow soon.
Greetz Robert "FAUST" Blokker
"Wees niet onverstandig, haastig of voortvarend; alles sal regkom, as ons almal ons plig doen".
FUTBOL KAVGADIR!!!!!!!
British Columbia, Canada
Member Since: September 03, 2009
entire network: 6,965 Posts
KitMaker Network: 609 Posts
Posted: Thursday, October 18, 2012 - 08:06 AM UTC
He looks great! But if he's German shouldn't his racing helmet have a spike on the top?

When once you have tasted flight you will walk the Earth with your eyes turned skyward.
For there you have been, and there you will always long to return.
-Leonardo Da Vinci
#243
England - North East, United Kingdom
Member Since: March 21, 2008
entire network: 996 Posts
KitMaker Network: 63 Posts
Posted: Thursday, October 18, 2012 - 08:41 AM UTC
I like that driver, nice modelling and no the floats shouldn't be open but this is one of my tricks, the floats should have rigging wires securing them to the fuselage, the rigging will be done before I close up so I have somewhere to secure it. Did something similar on a HP Heyford recently
Andrew
Pfalz DIIIa, Eduard 1/48 Uffz Max Hitschler Jasta 18 Late 1917
Washington, United States
Member Since: September 02, 2009
entire network: 227 Posts
KitMaker Network: 9 Posts
Posted: Tuesday, October 23, 2012 - 05:07 PM UTC
Here is a little progress:
Rough Assembly

Nose Detail

Front Pod Underside showing filled "sink troughs"

Passenger Pod, with LOTS of filler !

Engine Sub-Assy, again plenty of filler !

I have already spent far more time just filling than I ever did in the 1970s when I built my first Airfix Eagle !
Next, Assy and Paint
Ian
England - South West, United Kingdom
Member Since: September 01, 2012
entire network: 123 Posts
KitMaker Network: 16 Posts
Posted: Wednesday, October 24, 2012 - 07:58 AM UTC
#130
Noord-Holland, Netherlands
Member Since: June 07, 2002
entire network: 8,797 Posts
KitMaker Network: 1,186 Posts
Posted: Wednesday, October 24, 2012 - 09:42 AM UTC
Ola guys and gals...
I have sad news... I killed the Merc today. It was finished and I wanted to glue the carriage to the chassis. The glued seeped out and ruined both the paint and the soft plastic on both sections. I put it back in the box in the idle hope I can fix it but more likely it will be binned. It has been a long time since I have felt this devastated. Going to see if I can find the other one I must have somewhere. But I probably won't enter anything in this campaign. It has been a fun ride with you guys and gals. Thanks a lot.
Greetz Robert "FAUST" Blokker
"Wees niet onverstandig, haastig of voortvarend; alles sal regkom, as ons almal ons plig doen".
FUTBOL KAVGADIR!!!!!!!
England - South West, United Kingdom
Member Since: September 01, 2012
entire network: 123 Posts
KitMaker Network: 16 Posts
Posted: Wednesday, October 24, 2012 - 12:06 PM UTC
Faust, really sorry to hear that mate. I hope you manage to rescue it one day!
#439
Washington, United States
Member Since: November 05, 2005
entire network: 4,950 Posts
KitMaker Network: 564 Posts
Posted: Wednesday, October 24, 2012 - 04:02 PM UTC
Bummer dude.

Hanger Queens in Waiting:
Monogram 1/72 F8F-1
Corsair the Sky Pirate - 1/72 Ace A-7D
Century Series - Airfix 1/72 F-105G
Anti Shipping - Academy 1/72 PBJ-1D
Academy 1/72 F-84E
British Columbia, Canada
Member Since: September 03, 2009
entire network: 6,965 Posts
KitMaker Network: 609 Posts
Posted: Wednesday, October 24, 2012 - 04:32 PM UTC
Quoted Text
Ola guys and gals...
I have sad news... I killed the Merc today. It was finished and I wanted to glue the carriage to the chassis. The glued seeped out and ruined both the paint and the soft plastic on both sections.
I think that given the circumstances we can relax the out of the box rule to allow for major repairs such as this. Should you feel up to doing the necessary rebuilding you're quite welcome to restore it to the glory it should have had.
Or we can join you in crying in your beer

When once you have tasted flight you will walk the Earth with your eyes turned skyward.
For there you have been, and there you will always long to return.
-Leonardo Da Vinci
England - South East, United Kingdom
Member Since: January 11, 2003
entire network: 4,307 Posts
KitMaker Network: 788 Posts
Posted: Wednesday, October 24, 2012 - 05:26 PM UTC
That's a real bummer Robert....you sure it can't be fixed 'cos it looked as if you were making a really neat job of that old Merc!
Have a
, chill for a while and take another look!
Bulldog#3
Grumpy Old Modeller No1
Growing old disgracefully!
#130
Noord-Holland, Netherlands
Member Since: June 07, 2002
entire network: 8,797 Posts
KitMaker Network: 1,186 Posts
Posted: Thursday, October 25, 2012 - 09:00 AM UTC
Ola guys and gals..
Thanks for the replies. It is funny how such a small thing can ruin an evening. Not even Ajax winning over Man city could make it better.
@ Jessie. Very kind of you to offer an exception to the rules for me. However in the light of a new day I glanced in the box and surveyed the damages. The soft plastic of the kit is so damaged by the glue that it would mean I have to create even more damage disassembling it and then pretty much scratchbuilding the chassis and also pretty much scratchbuilding the bulk of the carriage. And then I probably will not even get the result I'm satisfied with. And I think that isn't worth it anymore. It's a DNF for the Merc in the last lap.
I probably will re-use the front axle for another scratch project. And that is the only good thing coming out of this.
Greetz Robert "FAUST" Blokker
"Wees niet onverstandig, haastig of voortvarend; alles sal regkom, as ons almal ons plig doen".
FUTBOL KAVGADIR!!!!!!!


 (Bits skew-iff, but the door kept breaking off and the attaching pin eventually melted.