

Ko, looking good so far but I still have no idea what the rear view mirrors are for but I can't wait to be surprised.
Paul
Modeling in General
General discussions about modeling topics.
General discussions about modeling topics.
Hosted by Jim Starkweather
Official Rusty/Scrap campaign

hofpig

Member Since: March 04, 2007
entire network: 1,330 Posts
KitMaker Network: 56 Posts

Posted: Sunday, June 08, 2014 - 11:24 PM UTC


noddy927

Member Since: February 15, 2013
entire network: 1,273 Posts
KitMaker Network: 149 Posts
Posted: Sunday, June 08, 2014 - 11:55 PM UTC
Ko I am following with much interest, still not sure where you are going with this lol.
Pete
Pete
hofpig
Member Since: March 04, 2007
entire network: 1,330 Posts
KitMaker Network: 56 Posts
Posted: Monday, June 09, 2014 - 04:24 AM UTC
I think I finally worked out what to do with the fuel tank.....
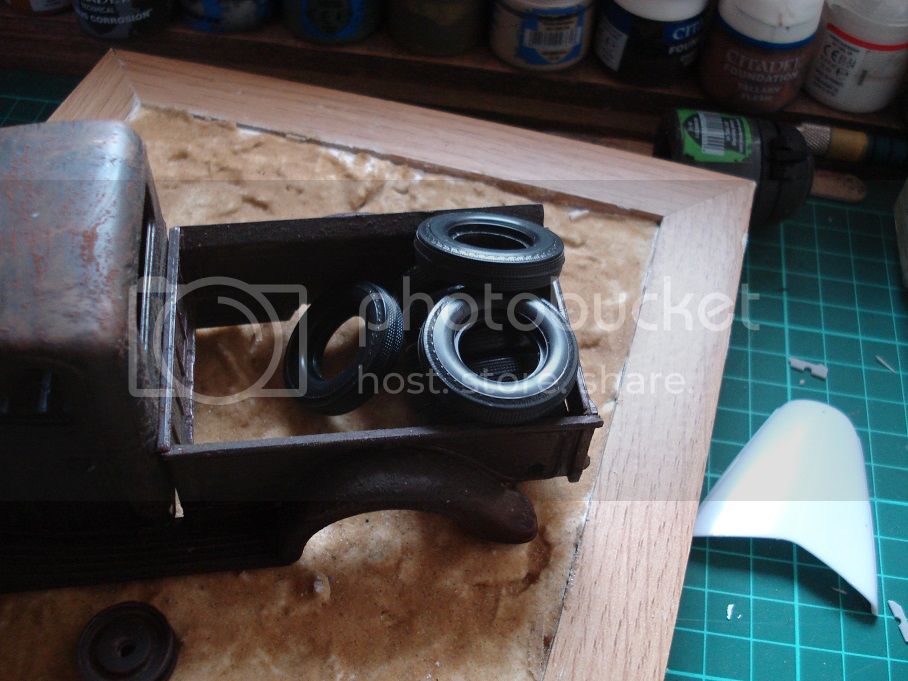
What do you guys think, I need to clean the tyres up a bit but a good solution?
Paul
What do you guys think, I need to clean the tyres up a bit but a good solution?
Paul

KoSprueOne

Member Since: March 05, 2004
entire network: 4,011 Posts
KitMaker Network: 879 Posts
Posted: Monday, June 09, 2014 - 12:26 PM UTC
Robert, Paul, Pete - Thanks for the comments  It's not going to be any big deal surprise
  The 'scrap material' will be mounted on top of the concrete slab and represent some sort of abandoned energy plant, or antenna array, or vapor core center, etc
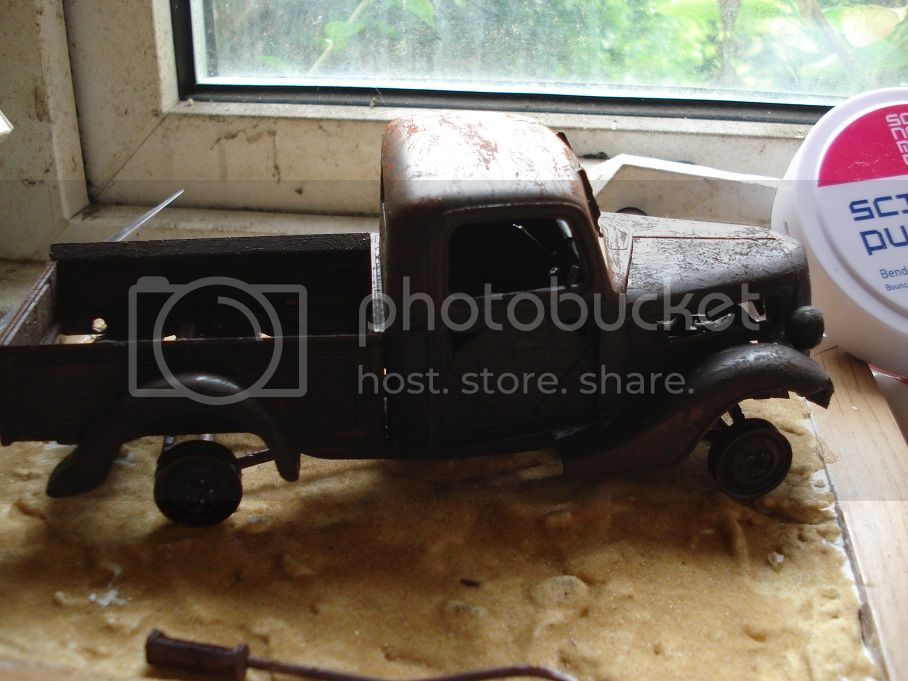
Paul - great rust effect on that pick up. I don't see the fuel tank though.

It's not going to be any big deal surprise The 'scrap material' will be mounted on top of the concrete slab and represent some sort of abandoned energy plant, or antenna array, or vapor core center, etc Paul - great rust effect on that pick up. I don't see the fuel tank though.

thewrongguy

Member Since: October 17, 2002
entire network: 448 Posts
KitMaker Network: 38 Posts

Posted: Monday, June 09, 2014 - 02:28 PM UTC
Hi again.
Made a little progress.


First time trying out the hairspray method and it was a struggle, but I think I'm ok with the direction this is headed. I'm planing on rusting it up more from here. I'm planning on finishing it as a Pak40 in '46-'47 sitting in a scrapyard waiting to be made into razor blades.
It's not been the best kit in the world, but it is the best two dollar 38 yr old kit I've ever built.
Cheers
Jeff
Made a little progress.
First time trying out the hairspray method and it was a struggle, but I think I'm ok with the direction this is headed. I'm planing on rusting it up more from here. I'm planning on finishing it as a Pak40 in '46-'47 sitting in a scrapyard waiting to be made into razor blades.
It's not been the best kit in the world, but it is the best two dollar 38 yr old kit I've ever built.
Cheers
Jeff
hofpig
Member Since: March 04, 2007
entire network: 1,330 Posts
KitMaker Network: 56 Posts
Posted: Monday, June 09, 2014 - 10:02 PM UTC
Quoted Text
Paul - great rust effect on that pick up. I don't see the fuel tank though.
That would be the idea.
Paul
noddy927
Member Since: February 15, 2013
entire network: 1,273 Posts
KitMaker Network: 149 Posts
Posted: Tuesday, June 10, 2014 - 03:42 AM UTC
Hi Paul wow you really take time to think about things before putting them into practice.......it was months ago you asked for help with ideas to hide the tank lol. But you came up with a good plan, the tyres look good there, chew them up a bit and weather them and it will look spot on.
Hi Jeff the PAK is coming along nicely, you plan on using pigments?
Pete
Hi Jeff the PAK is coming along nicely, you plan on using pigments?
Pete
hofpig
Member Since: March 04, 2007
entire network: 1,330 Posts
KitMaker Network: 56 Posts
Posted: Tuesday, June 10, 2014 - 05:49 AM UTC
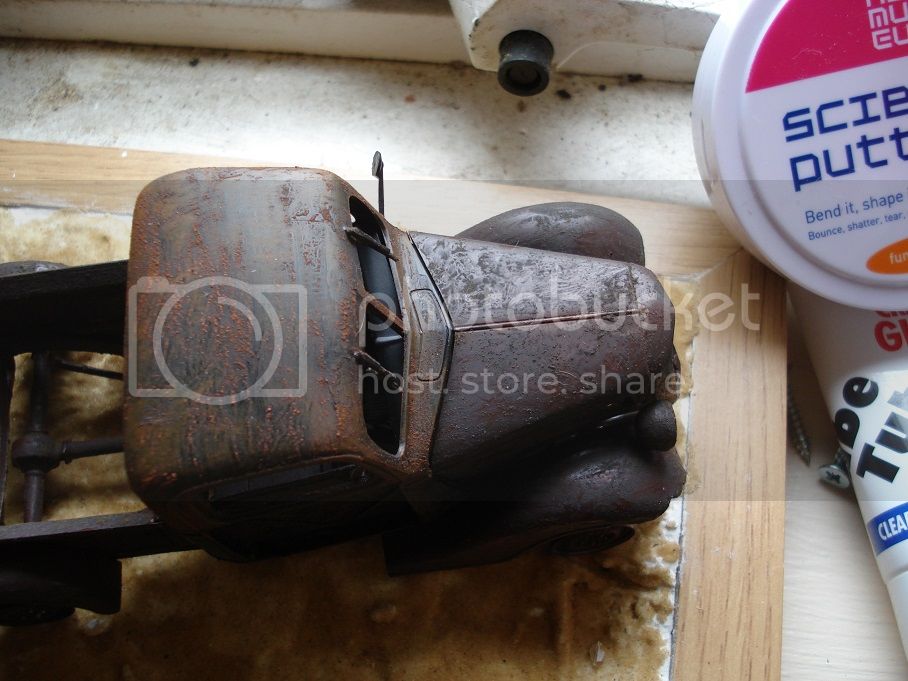
Yes well every other thing I tried just did not look right So I had to take a while to think about it. Then yesterday on opening the box for the first time in two months I saw all the tyres the kit had, swore loudly and came up with that idea. I also plan on using the 2nd bonnet( hood for the americans) as target practice, More to follow on that(and a bit more rust to boot). I sent a while today looking at pics of old tyres so I think I have a handle on the varying paint jobs on those.
Paul
Paul
thewrongguy
Member Since: October 17, 2002
entire network: 448 Posts
KitMaker Network: 38 Posts
Posted: Wednesday, June 11, 2014 - 05:49 AM UTC
Quoted Text
Hi Jeff the PAK is coming along nicely, you plan on using pigments?
Pete
Thanks for the compliment and again for letting me join the group build. Doing a little research on my lunch break at work to see how to best use pigments to rust this up more. This is new ground for me. On a whim I picked up one of those Tamiya weathering kits (the ones that look like woman's make up) and might try experimenting with that a bit too.
Cheers
Jeff
thewrongguy
Member Since: October 17, 2002
entire network: 448 Posts
KitMaker Network: 38 Posts
Posted: Wednesday, June 11, 2014 - 02:38 PM UTC
Hi again.
Little more progress. Painted the details and getting it ready for a wash tomorrow.

I'm hoping my high school French has held up. I thought that feraille = scrap in English. I also added a phoney baloney inventory stock number similar to what I saw in scrap yards in my youth.
Cheers,
Jeff
Little more progress. Painted the details and getting it ready for a wash tomorrow.
I'm hoping my high school French has held up. I thought that feraille = scrap in English. I also added a phoney baloney inventory stock number similar to what I saw in scrap yards in my youth.
Cheers,
Jeff
hofpig
Member Since: March 04, 2007
entire network: 1,330 Posts
KitMaker Network: 56 Posts
Posted: Saturday, June 14, 2014 - 02:21 AM UTC
Some more pics now I have tested and undercoated the tyres....
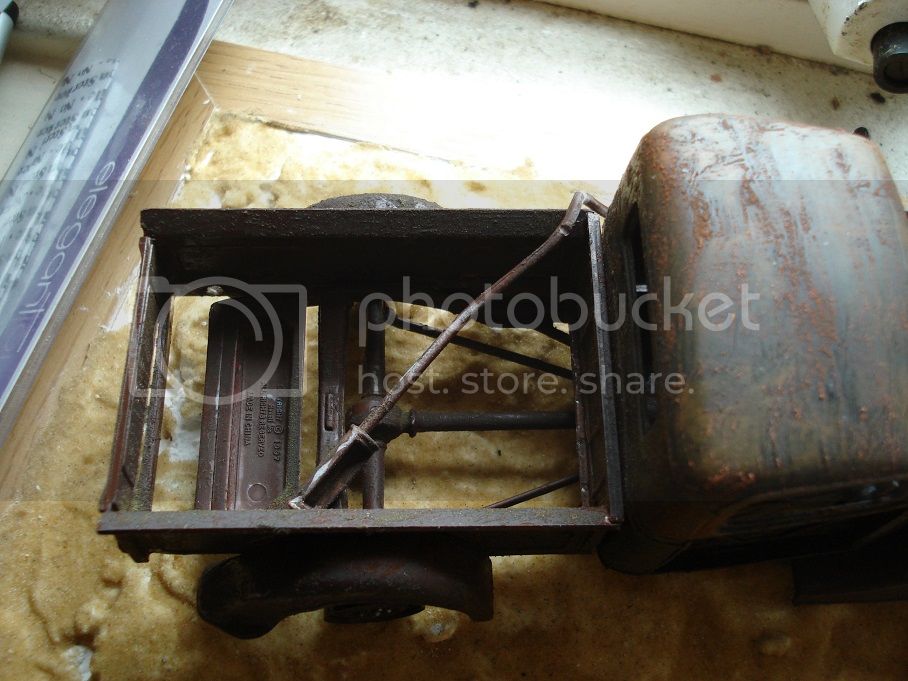
The offending fuel tank...
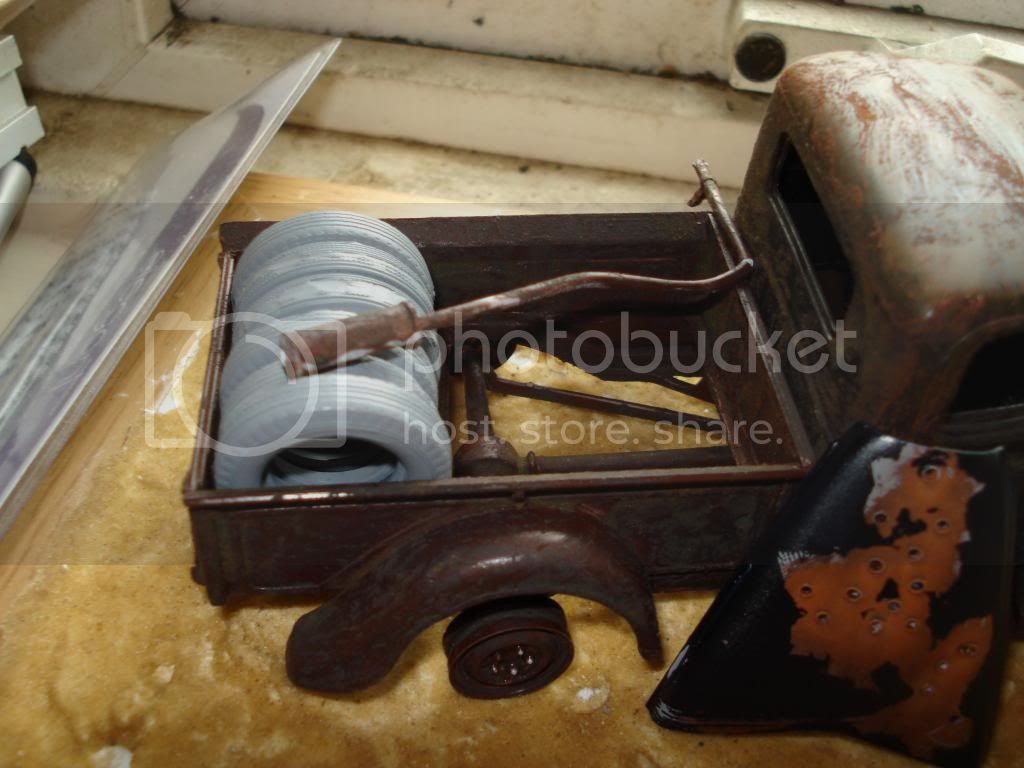
With the tyres fitted in place now I just need to paint them all so many shades of grey to apply.......
So that's heading towards how it should look once finished.
Paul
The offending fuel tank...
With the tyres fitted in place now I just need to paint them all so many shades of grey to apply.......
So that's heading towards how it should look once finished.
Paul
noddy927
Member Since: February 15, 2013
entire network: 1,273 Posts
KitMaker Network: 149 Posts
Posted: Saturday, June 14, 2014 - 05:42 AM UTC
Very nice Paul, and the tyres will do the trick. I would place them so they look like they have been thrown in, oh and tack the tread off them. Nobody throws good tyres away.
Pete
Pete
KoSprueOne
Member Since: March 05, 2004
entire network: 4,011 Posts
KitMaker Network: 879 Posts
Posted: Saturday, June 14, 2014 - 11:01 AM UTC
Jeff - nice detail touch with that 'inventory stock number'
Paul - yep, problem solved but Pete has a good point about the tread
Paul - yep, problem solved but Pete has a good point about the tread
hofpig
Member Since: March 04, 2007
entire network: 1,330 Posts
KitMaker Network: 56 Posts
Posted: Saturday, June 14, 2014 - 07:57 PM UTC
Yeah I did try to remove the damn tread but it does not want to budge, not with a variety of files anyway.
thewrongguy
Member Since: October 17, 2002
entire network: 448 Posts
KitMaker Network: 38 Posts
Posted: Monday, June 16, 2014 - 02:04 PM UTC
I'm going to call this one done. I may make a base for it down the line, but right now I'm swamped.


A pretty fun little 2 week project and had a lot of fun experimenting with new techniques. I'm not crazy about it because I feel like I over weathered it, but I have to keep reminding myself it's supposed to be a piece of rusty scrap.
Cheers
Jeff
Also where is the gallery located for uploading a finished photo? I'm not seeing it in the campaign section of http://photos.kitmaker.net/
noddy927
Member Since: February 15, 2013
entire network: 1,273 Posts
KitMaker Network: 149 Posts
Posted: Tuesday, June 17, 2014 - 12:59 AM UTC

PrickleHead

Member Since: December 31, 2013
entire network: 338 Posts
KitMaker Network: 10 Posts

Posted: Sunday, June 29, 2014 - 09:22 PM UTC
Am late starting with this but am in with:


noddy927
Member Since: February 15, 2013
entire network: 1,273 Posts
KitMaker Network: 149 Posts
Posted: Monday, June 30, 2014 - 11:59 PM UTC
Pricklehead a nice looking kit, you can do loads with that.
Pete
Pete
KoSprueOne
Member Since: March 05, 2004
entire network: 4,011 Posts
KitMaker Network: 879 Posts
Posted: Sunday, July 06, 2014 - 06:04 AM UTC
a little more progress on dirt color and concrete slab weathering. Also the 'switch box' is glued into place.
I woke up this morning to find graffiti all over one side of the slab. I guess a bunch of guys came by last night and hit it up. Wonder who they are?
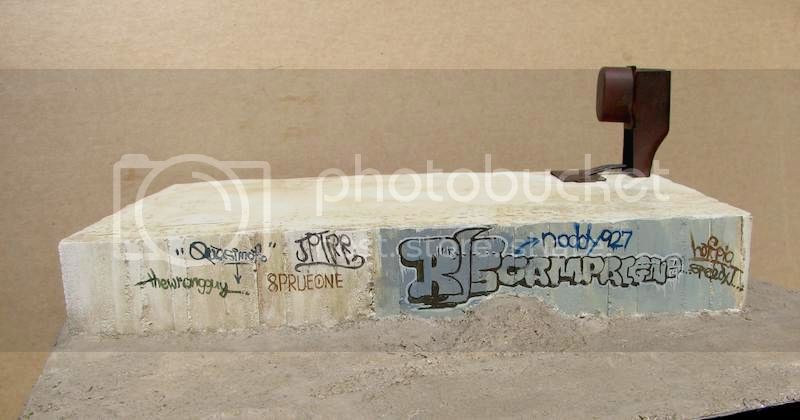
I woke up this morning to find graffiti all over one side of the slab. I guess a bunch of guys came by last night and hit it up. Wonder who they are?
noddy927
Member Since: February 15, 2013
entire network: 1,273 Posts
KitMaker Network: 149 Posts
Posted: Monday, July 07, 2014 - 12:10 AM UTC
Nice work KoSprue
PrickleHead
Member Since: December 31, 2013
entire network: 338 Posts
KitMaker Network: 10 Posts
Posted: Thursday, July 10, 2014 - 07:41 PM UTC
Where I am with my '41 Ford:


PrickleHead
Member Since: December 31, 2013
entire network: 338 Posts
KitMaker Network: 10 Posts
Posted: Saturday, July 12, 2014 - 08:44 PM UTC
Hi my finished '41 Chevy (said Ford earlier!)


AussieReg

#007
Member Since: June 09, 2009
entire network: 8,156 Posts
KitMaker Network: 593 Posts
Posted: Saturday, July 12, 2014 - 11:39 PM UTC
Really nice work Pricklehead, great result.
How did you do the rust effect through the topcoat, hairspray or something else?
Cheers, D
How did you do the rust effect through the topcoat, hairspray or something else?
Cheers, D

PrickleHead
Member Since: December 31, 2013
entire network: 338 Posts
KitMaker Network: 10 Posts
Posted: Sunday, July 13, 2014 - 01:29 AM UTC
Quoted Text
Really nice work Pricklehead, great result.
How did you do the rust effect through the topcoat, hairspray or something else?
Cheers, D
Hi Aussie
Just used salt effect. Thanks for the thumbs up.
KoSprueOne
Member Since: March 05, 2004
entire network: 4,011 Posts
KitMaker Network: 879 Posts
Posted: Sunday, July 13, 2014 - 03:23 AM UTC
Yes, that pick up looks rusted down realistically. Good job
 |

WEB HOSTING BY


Copyright ©2021 KitMaker Network and Kitmaker Network, a subsidiary of Silver Star Enterprises
All Rights Reserved. Please read our Conditions of Use and Privacy Policy.
All Rights Reserved. Please read our Conditions of Use and Privacy Policy.