

again great work Robert
Pete
Modeling in General
General discussions about modeling topics.
General discussions about modeling topics.
Hosted by Jim Starkweather
Official Rusty/Scrap campaign

noddy927

Member Since: February 15, 2013
entire network: 1,273 Posts
KitMaker Network: 149 Posts
Posted: Monday, December 16, 2013 - 01:50 AM UTC

SpeedyJ

Member Since: September 17, 2013
entire network: 1,617 Posts
KitMaker Network: 66 Posts
Posted: Monday, December 16, 2013 - 01:15 PM UTC
Thanks.
Did something tonight. Rocket Rony bashed away with a 3-0.
To bad, one of the most friendly persons I've met in my life.
So concentration on the TA.
Michelins.

Spare tire on the back.

Let's see what the colours turned out to be, when I wake up.
Regards,
Robert Jan
Did something tonight. Rocket Rony bashed away with a 3-0.
To bad, one of the most friendly persons I've met in my life.
So concentration on the TA.
Michelins.
Spare tire on the back.
Let's see what the colours turned out to be, when I wake up.
Regards,
Robert Jan
noddy927
Member Since: February 15, 2013
entire network: 1,273 Posts
KitMaker Network: 149 Posts
Posted: Tuesday, December 17, 2013 - 01:19 AM UTC
loving the torn tyre with the wire showing, amazing attention to detail Robert
Pete
Pete
SpeedyJ
Member Since: September 17, 2013
entire network: 1,617 Posts
KitMaker Network: 66 Posts
Posted: Tuesday, December 17, 2013 - 06:12 AM UTC
Thanks Pete. I'm still not satisfied with the rersults after painting the tires. have to find the right mix. Maybe I remove some extra rubber on the outside.
I used some black heat shrink to make tube. Stripped some wire and glued them together. Planning a second one, more damaged so you can see more from the tube.
Regards,
Robert Jan
I used some black heat shrink to make tube. Stripped some wire and glued them together. Planning a second one, more damaged so you can see more from the tube.
Regards,
Robert Jan
SpeedyJ
Member Since: September 17, 2013
entire network: 1,617 Posts
KitMaker Network: 66 Posts
Posted: Wednesday, December 18, 2013 - 05:08 AM UTC
A little update.
Worked on the left frontdoor panel. Found the fabric I needed( all is in de house) collector as I am. Glued it with some Tabsheet.
Cutting - scratching - painting - weathering
Results.


3 to go. All will be different. Needs some contrast when it's dry. For the time being I'm happy with it.
Regards,
Robert Jan
Worked on the left frontdoor panel. Found the fabric I needed( all is in de house) collector as I am. Glued it with some Tabsheet.
Cutting - scratching - painting - weathering
Results.
3 to go. All will be different. Needs some contrast when it's dry. For the time being I'm happy with it.
Regards,
Robert Jan
noddy927
Member Since: February 15, 2013
entire network: 1,273 Posts
KitMaker Network: 149 Posts
Posted: Wednesday, December 18, 2013 - 04:20 PM UTC
Nice Robert very nice. You planning on trying to get this finished before xmas lol
Pete
Pete
SpeedyJ
Member Since: September 17, 2013
entire network: 1,617 Posts
KitMaker Network: 66 Posts
Posted: Wednesday, December 18, 2013 - 11:23 PM UTC
One could think it is. But no, I'm working random round the kit.
That is cool, but a risk is to forget about details.
This morning I discovered my rearsuspension got locked up. A little panic but I manaed to get it right. Now the car has a real working suspension. Weathering with spirits has a certain risk. Combination with powder and paint makes it rather sticky. Learned from it. Although the build is coming along now. Hoping Heller ships the roof and some other parts before Christmas.
Back to the workbench.
Regards,
Robert Jan
noddy927
Member Since: February 15, 2013
entire network: 1,273 Posts
KitMaker Network: 149 Posts
Posted: Thursday, December 19, 2013 - 12:33 AM UTC
Superb Robert keep posting pics, I am sure all the enlistees for this build are getting plenty of inspiration from them.
Cheers Pete
Cheers Pete
SpeedyJ
Member Since: September 17, 2013
entire network: 1,617 Posts
KitMaker Network: 66 Posts
Posted: Friday, December 20, 2013 - 10:57 AM UTC
Small update on the TA.
The big Tractions had excellent seats, comfort designed by Pullman. Optional were all sort of fabric and leather.
This one is gone...

Time flies when you're having fun.

Robert Jan
The big Tractions had excellent seats, comfort designed by Pullman. Optional were all sort of fabric and leather.
This one is gone...
Time flies when you're having fun.
Robert Jan

Quasimofo

Member Since: November 30, 2012
entire network: 105 Posts
KitMaker Network: 18 Posts

Posted: Friday, December 20, 2013 - 12:58 PM UTC
Hi all-
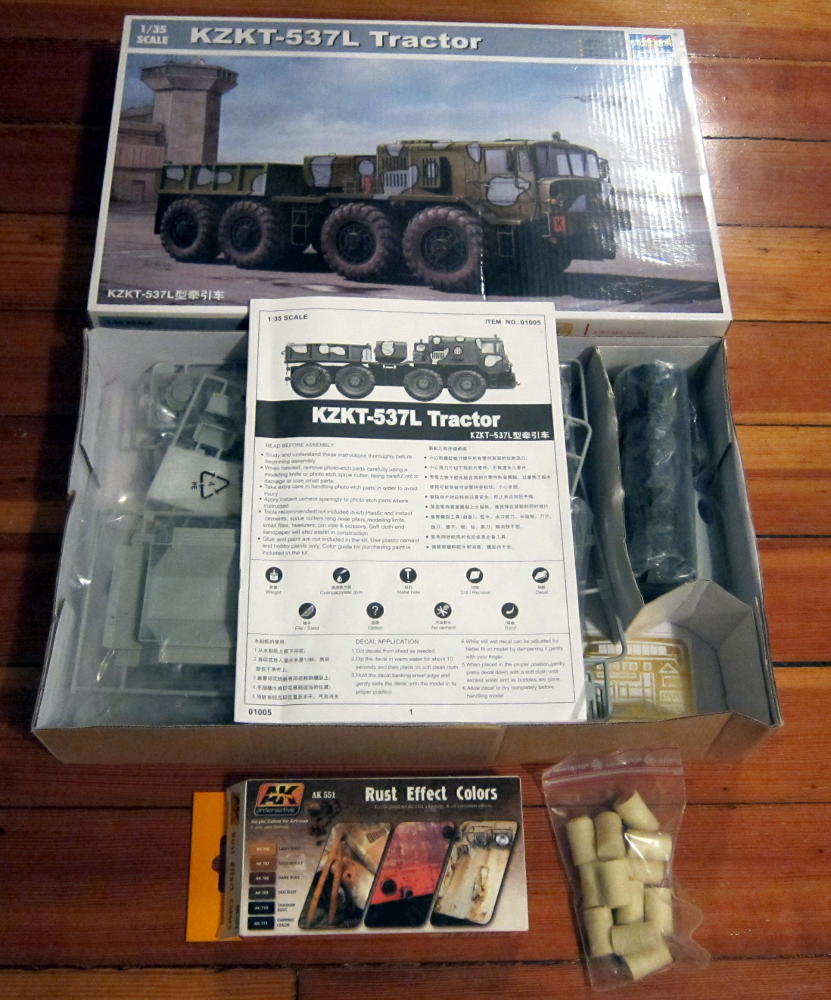
Just enlisted for the campaign (my second). My contribution will be the Trumpeter 1/35 MAZ-537L done up as an abandoned (and radioactive) vehicle on the outskirts of Chernobyl.
The model will be OOB with the addition of some MIG steel drums to be used as radioactive waste containers. I'm looking forward to using my new AK Interactive rust set on this one!
SpeedyJ
Member Since: September 17, 2013
entire network: 1,617 Posts
KitMaker Network: 66 Posts
Posted: Friday, December 20, 2013 - 07:15 PM UTC
Hey Bill.
Cool kit and I like the idea.
I'm interested in how the AK interactive works out.
Regards,
Robert Jan
Cool kit and I like the idea.
I'm interested in how the AK interactive works out.
Regards,
Robert Jan
noddy927
Member Since: February 15, 2013
entire network: 1,273 Posts
KitMaker Network: 149 Posts
Posted: Saturday, December 21, 2013 - 12:38 AM UTC
Nice or not so nice seats Robert lol.
Nice kit Bill, look forward to your build.
Pete
Nice kit Bill, look forward to your build.
Pete
SpeedyJ
Member Since: September 17, 2013
entire network: 1,617 Posts
KitMaker Network: 66 Posts
Posted: Monday, December 23, 2013 - 01:22 AM UTC
Update just before Christmas begins for you believers.
Put some things together and she even starts to look like a real car now.
Damage is done to the right front fender. Took me almost half a day to find out how to do it. But now I know how to make it, so...
8 pictures will show the progress so far.
Wish you all the very best, next updates after Christmas.


Next days I transform into the Christmas cook.
Everybody enjoy your Holidays.
Regards,
Robert Jan
Put some things together and she even starts to look like a real car now.
Damage is done to the right front fender. Took me almost half a day to find out how to do it. But now I know how to make it, so...
8 pictures will show the progress so far.
Wish you all the very best, next updates after Christmas.
Next days I transform into the Christmas cook.
Everybody enjoy your Holidays.
Regards,
Robert Jan
noddy927
Member Since: February 15, 2013
entire network: 1,273 Posts
KitMaker Network: 149 Posts
Posted: Monday, December 23, 2013 - 04:13 PM UTC
Great work as always Robert.
Merry Christmas everyone, see you all for a rusty new year.
Pete
Merry Christmas everyone, see you all for a rusty new year.
Pete
SpeedyJ
Member Since: September 17, 2013
entire network: 1,617 Posts
KitMaker Network: 66 Posts
Posted: Saturday, December 28, 2013 - 09:20 PM UTC
Hi all. Small update on the interior of the TA.
Furniture. A lot of scratchwork. I wrecked the rubber seat with a knife and filled the gaps with foam and a heavy medium gel. Covered it with fabric and give it a paintjob.
Here are some pictures.
Still lots of details to be added.
Second chair is on my bench, or what is left of it.


Back to the TA.
Robert Jan
Furniture. A lot of scratchwork. I wrecked the rubber seat with a knife and filled the gaps with foam and a heavy medium gel. Covered it with fabric and give it a paintjob.
Here are some pictures.
Still lots of details to be added.
Second chair is on my bench, or what is left of it.
Back to the TA.
Robert Jan
SpeedyJ
Member Since: September 17, 2013
entire network: 1,617 Posts
KitMaker Network: 66 Posts
Posted: Tuesday, December 31, 2013 - 04:53 AM UTC
First things first, a very good modelling year has passed. Hope for a very good one in 2014.
So a happy new year to everyone. I really enjoy this day. Last week of the year, as from the 26. of December I listen to the mythical Top 2000 on Radio 2. Old music mixed with new music, all classics. New speackers wanted.
Last update, see the pics.
Lets have a seat...


Next year I'm going abroad. Moving to Bangkok.
I'm going to work for my brother. Back to a normal everyday working life. So I'm going to give up living in the Netherlands, being expat in the Thai. My office is ready, house is ready, there is only some modelling business left over here. Could be 2 3 4 months, and then I'm off.
Regards,
Robert Jan
So a happy new year to everyone. I really enjoy this day. Last week of the year, as from the 26. of December I listen to the mythical Top 2000 on Radio 2. Old music mixed with new music, all classics. New speackers wanted.
Last update, see the pics.
Lets have a seat...
Next year I'm going abroad. Moving to Bangkok.
I'm going to work for my brother. Back to a normal everyday working life. So I'm going to give up living in the Netherlands, being expat in the Thai. My office is ready, house is ready, there is only some modelling business left over here. Could be 2 3 4 months, and then I'm off.
Regards,
Robert Jan
noddy927
Member Since: February 15, 2013
entire network: 1,273 Posts
KitMaker Network: 149 Posts
Posted: Wednesday, January 01, 2014 - 05:09 AM UTC
Happy New Year to you Robert and to all rusty fans. I like the seats they look so real. Attention to detail is superb.
I hope all goes well in Thailand and I hope you get plenty of build time. With the internet such a big part of our lives, I am sure we will still see your fantastic builds.
Pete
I hope all goes well in Thailand and I hope you get plenty of build time. With the internet such a big part of our lives, I am sure we will still see your fantastic builds.
Pete
SpeedyJ
Member Since: September 17, 2013
entire network: 1,617 Posts
KitMaker Network: 66 Posts
Posted: Wednesday, January 01, 2014 - 08:27 PM UTC
Pete, I wish you all the best too. Same to all rusty campaign builders. Let 2014 bring us the best in modelling.
Lets get back to work on the TA now, time is running out.
Regards,
Robert Jan
Lets get back to work on the TA now, time is running out.
Regards,
Robert Jan
Quasimofo
Member Since: November 30, 2012
entire network: 105 Posts
KitMaker Network: 18 Posts
Posted: Thursday, January 02, 2014 - 02:47 AM UTC
@Robert: Awesome work on that TA! The large scale really gives you a great canvas to work with!
I have some small progress on the soon-to-be rusted and radioactive MAZ-537. The chassis, suspension and transmission work is nearly done. As I move along, I'm adding texture to some parts using stippled Gunze Mr. Dissolved Putty to simulate the rough texture that rusted parts often have. But I'm not doing it on everything....just a few places so as to not overdo it.

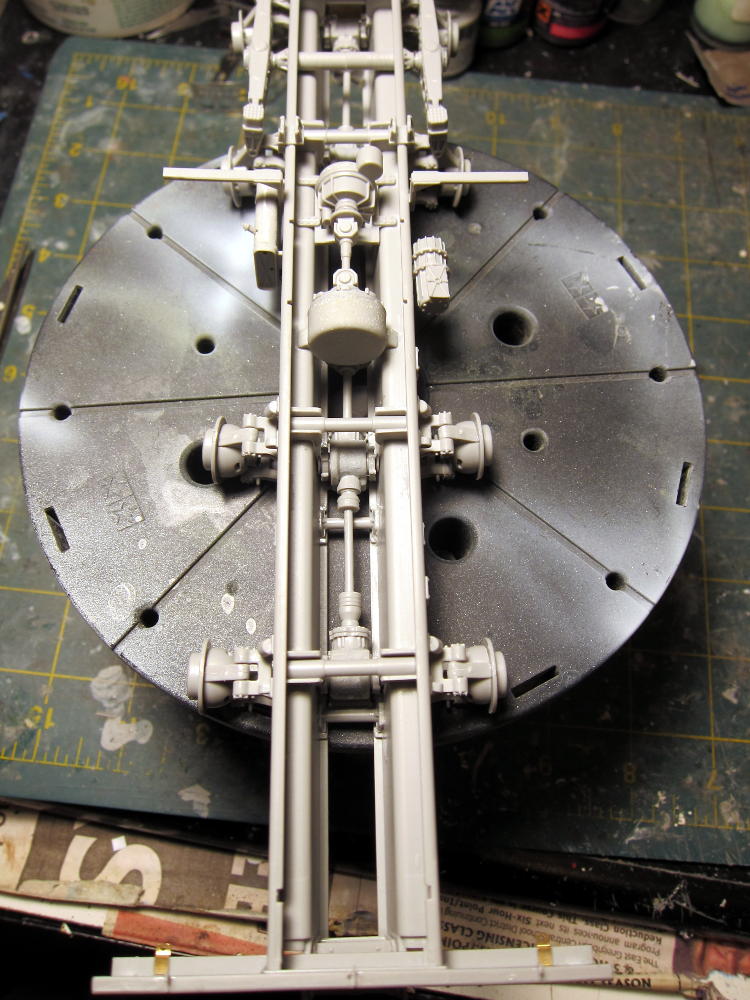
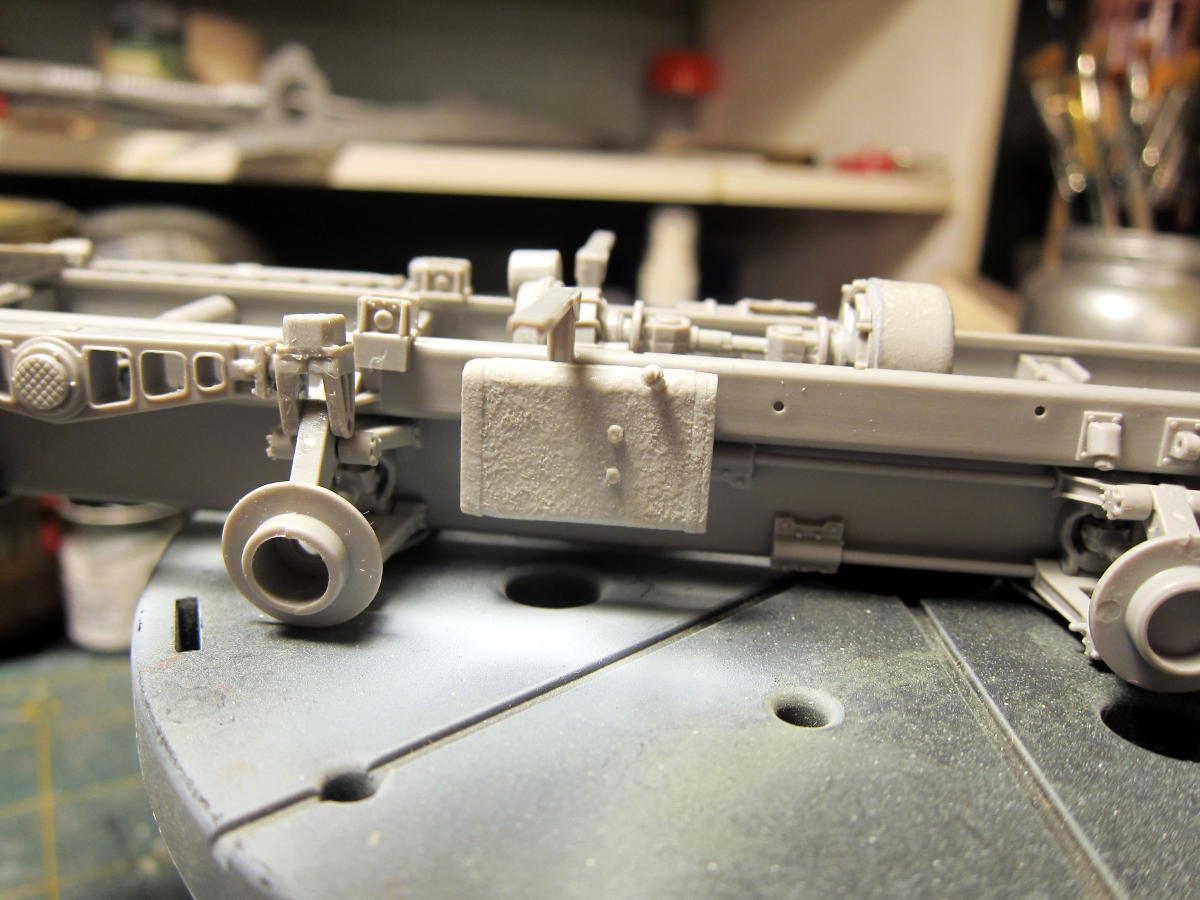
I have some small progress on the soon-to-be rusted and radioactive MAZ-537. The chassis, suspension and transmission work is nearly done. As I move along, I'm adding texture to some parts using stippled Gunze Mr. Dissolved Putty to simulate the rough texture that rusted parts often have. But I'm not doing it on everything....just a few places so as to not overdo it.
SpeedyJ
Member Since: September 17, 2013
entire network: 1,617 Posts
KitMaker Network: 66 Posts
Posted: Thursday, January 02, 2014 - 03:09 AM UTC
Hey Bill. Nice start with that monster you're building.
I like the technique you use to make a rough texture. I'm also using putty for texture. Thing I also do is to add dirt (flakes & dust from the paint after cleaning the airbrush cabine, very fine sand from the beach) just drop them in the fresh paint.
Regards,
Robert Jan
I like the technique you use to make a rough texture. I'm also using putty for texture. Thing I also do is to add dirt (flakes & dust from the paint after cleaning the airbrush cabine, very fine sand from the beach) just drop them in the fresh paint.
Regards,
Robert Jan
noddy927
Member Since: February 15, 2013
entire network: 1,273 Posts
KitMaker Network: 149 Posts
Posted: Thursday, January 02, 2014 - 09:11 AM UTC
A good start there Bill. Look forward to more.
pete
pete
SpeedyJ
Member Since: September 17, 2013
entire network: 1,617 Posts
KitMaker Network: 66 Posts
Posted: Tuesday, January 07, 2014 - 08:44 PM UTC
Seems to me the campaign is a real rusty one.
My project on the TA however is going all the way now.
I did some research on Cabriolets.
I have no complete kit and the main part I'm missing is the rooftop for my TA15. So why not make a Cabriolet out of it.
Lucky me, they were in production. Found a real cool picture.
It allows me with some minor scratchwork on the windscreen and the back of the car to make one.
Speacking of scratchbuilding. I also made hinges with some brass and a copper rod. Fixed the rear bumper by replacing thick plastic parts by brass. Added some resin bolts to it and a paintjob.
Some pictures.
Bumper. Springs inside and the brackets made out of brass.
Original parts were missing. Used the PDF cataloque to make new ones.


Hinges also made from brass strip. The old ones were broken and to thick. Still have to adjust the doorpanels to make them work like the real thing.

To find out the right position of the windscreen I had to study on the real thing. Photo shows the dry fit and it's allmost correct.

Ok so far a Cabriolet has no solid rooftop. This means the fabric needs to be attached some way. In this case the back of the TA is different. Lefthand side is allmost ready.


And a picture taken from the real car. this is probably a 1951 production of a TA15 Big Six. Details on the dashboard and upholstery tell the story.
Photo comes from a French TA Photo site

I immediatly fell in love with this.
Regards,
Robert Jan
My project on the TA however is going all the way now.
I did some research on Cabriolets.
I have no complete kit and the main part I'm missing is the rooftop for my TA15. So why not make a Cabriolet out of it.
Lucky me, they were in production. Found a real cool picture.
It allows me with some minor scratchwork on the windscreen and the back of the car to make one.
Speacking of scratchbuilding. I also made hinges with some brass and a copper rod. Fixed the rear bumper by replacing thick plastic parts by brass. Added some resin bolts to it and a paintjob.
Some pictures.
Bumper. Springs inside and the brackets made out of brass.
Original parts were missing. Used the PDF cataloque to make new ones.
Hinges also made from brass strip. The old ones were broken and to thick. Still have to adjust the doorpanels to make them work like the real thing.
To find out the right position of the windscreen I had to study on the real thing. Photo shows the dry fit and it's allmost correct.
Ok so far a Cabriolet has no solid rooftop. This means the fabric needs to be attached some way. In this case the back of the TA is different. Lefthand side is allmost ready.
And a picture taken from the real car. this is probably a 1951 production of a TA15 Big Six. Details on the dashboard and upholstery tell the story.
Photo comes from a French TA Photo site
I immediatly fell in love with this.
Regards,
Robert Jan
noddy927
Member Since: February 15, 2013
entire network: 1,273 Posts
KitMaker Network: 149 Posts
Posted: Wednesday, January 08, 2014 - 04:55 AM UTC
Hi Robert
I agree you have made the most posts on the blog so far, but I am hoping the rest of the guys will get fired into this campaign now xmas and new year are over. Your build is looking superb, the realism is top class. A hard act to follow......no pressure then guys lol.
Pete
I agree you have made the most posts on the blog so far, but I am hoping the rest of the guys will get fired into this campaign now xmas and new year are over. Your build is looking superb, the realism is top class. A hard act to follow......no pressure then guys lol.
Pete

JPTRR

#051
Member Since: December 21, 2002
entire network: 7,772 Posts
KitMaker Network: 802 Posts
Posted: Saturday, January 11, 2014 - 05:37 AM UTC
Hi Gang,
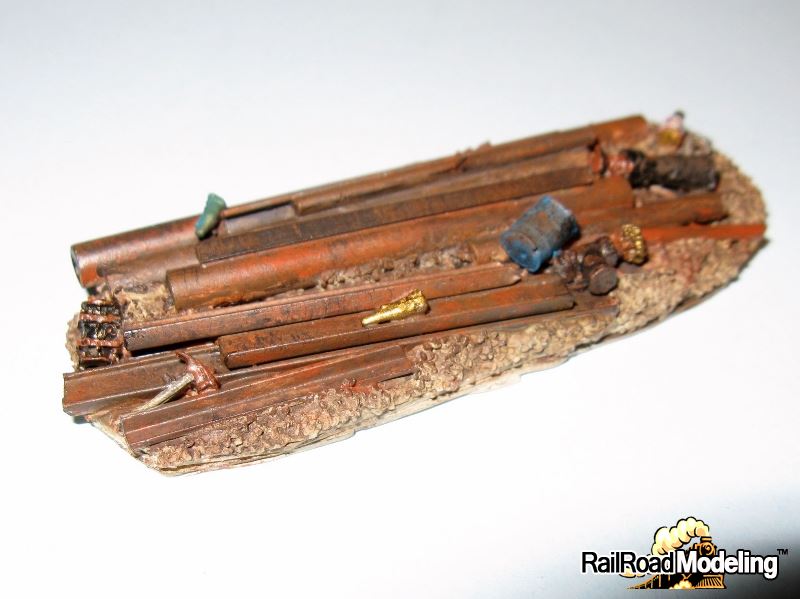
My submission is pretty modest (for now). It is Rusty Rail 1/48 scrap metal junk pile.
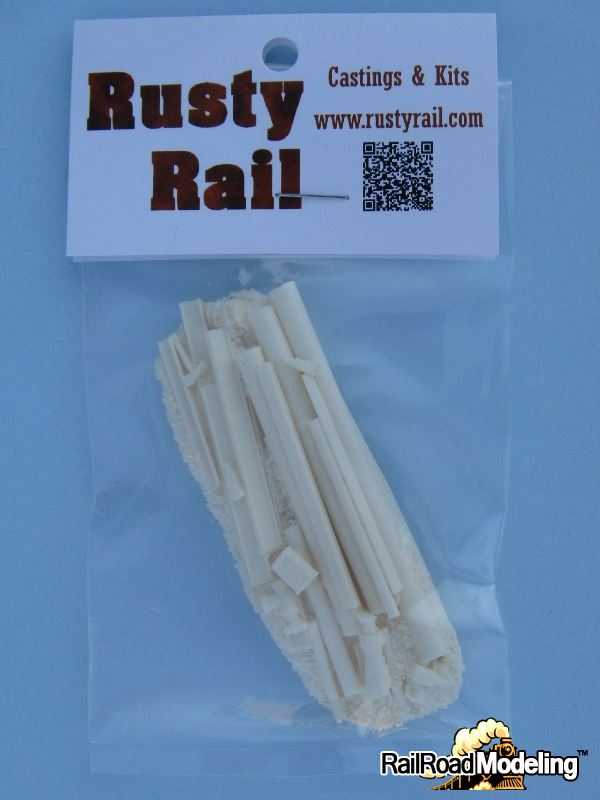


Complete!
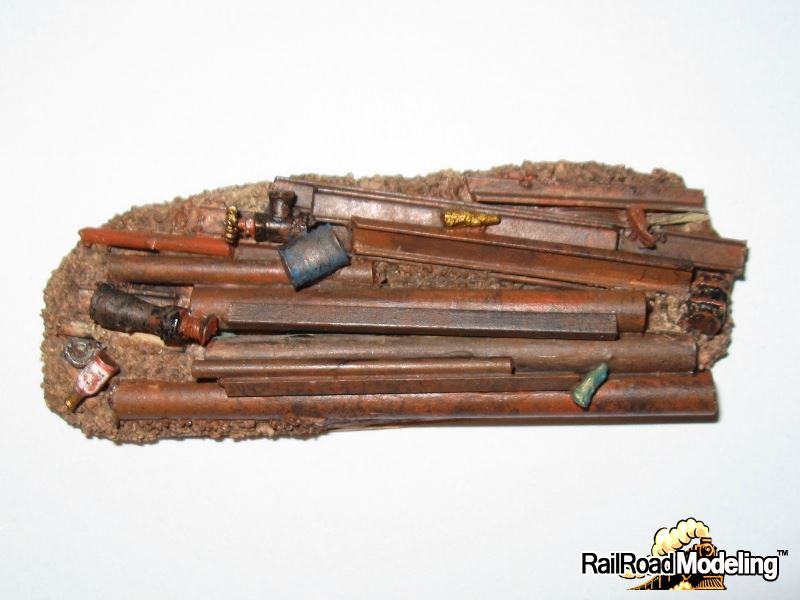
I'm planning some new rusted items. Keep watching.
My submission is pretty modest (for now). It is Rusty Rail 1/48 scrap metal junk pile.
Complete!
I'm planning some new rusted items. Keep watching.

JPTRR
#051
Member Since: December 21, 2002
entire network: 7,772 Posts
KitMaker Network: 802 Posts
Posted: Saturday, January 11, 2014 - 05:39 AM UTC
Robert,
Exceptional work! I am as impressed with the shredded upholstery as the rust!
Exceptional work! I am as impressed with the shredded upholstery as the rust!
 |

WEB HOSTING BY


Copyright ©2021 KitMaker Network and Kitmaker Network, a subsidiary of Silver Star Enterprises
All Rights Reserved. Please read our Conditions of Use and Privacy Policy.
All Rights Reserved. Please read our Conditions of Use and Privacy Policy.