Modeling in General
General discussions about modeling topics.
Official Rusty/Scrap campaign
JPTRR
Staff MemberManaging Editor
RAILROAD MODELING
#051
Visit this Community
Tennessee, United States
Member Since: December 21, 2002
entire network: 7,772 Posts
KitMaker Network: 802 Posts
Posted: Saturday, January 11, 2014 - 05:41 AM UTC
I wish the campaign had started BEFORE I made this model:


Here's the whole gallery: http://kitmaker.net/review/9399
SpeedyJ
Visit this Community
Bangkok, Thailand / ไทย
Member Since: September 17, 2013
entire network: 1,617 Posts
KitMaker Network: 66 Posts
Posted: Saturday, January 11, 2014 - 06:11 AM UTC
Thanks Frederick.
Working on this TA opens a new world in modeling for me.
Never had the experience working in 1/8 scale. Still a lot to do. My network in Citroënworld helps me a lot to solve problems whenever I have to build from scratch.
Almost finished the framework for my 'TA15 Decapotable'.
New word to me, but that's the name for this kind of Cabriolet.
It's a standard chasis with a soft - fabric - top. A Cabriolet is different by having a shortbase chasis with a soft - fabric - top.
The work you show reminds me working with train, another hobby. Looks great.

Regards,

Robert Jan
JPTRR
Staff MemberManaging Editor
RAILROAD MODELING
#051
Visit this Community
Tennessee, United States
Member Since: December 21, 2002
entire network: 7,772 Posts
KitMaker Network: 802 Posts
Posted: Saturday, January 11, 2014 - 08:13 AM UTC

Quoted Text

...a museum village called Oradour-sur-Glane


but just last week one a man was arrested for the war crime:
Quoted Text

German authorities have charged an 88-year-old man from Cologne with hundreds of counts of murder and accessory to murder in a 1944 Nazi massacre that killed more than 600 civilians in the French village of Oradour-sur-Glane.

German man, 88, charged in 1944 Nazi massacre in France
SpeedyJ
Visit this Community
Bangkok, Thailand / ไทย
Member Since: September 17, 2013
entire network: 1,617 Posts
KitMaker Network: 66 Posts
Posted: Saturday, January 11, 2014 - 11:28 AM UTC
So what?
Both my parents got bombed away by the English, just because the lived near the border. Who's to blame. Back on topic!!!
Show us a great build.

Not amused.

RJ
noddy927
Visit this Community
Scotland, United Kingdom
Member Since: February 15, 2013
entire network: 1,273 Posts
KitMaker Network: 149 Posts
Posted: Saturday, January 11, 2014 - 11:25 PM UTC

Quoted Text


Quoted Text

...a museum village called Oradour-sur-Glane


but just last week one a man was arrested for the war crime:
Quoted Text

German authorities have charged an 88-year-old man from Cologne with hundreds of counts of murder and accessory to murder in a 1944 Nazi massacre that killed more than 600 civilians in the French village of Oradour-sur-Glane.

German man, 88, charged in 1944 Nazi massacre in France


Correct Fred The only people to be prosecuted for the crimes before that was French Alsace soldiers who fought for the Nazis.

pete

But Robert is correct on topic please.
Quasimofo
Visit this Community
New York, United States
Member Since: November 30, 2012
entire network: 105 Posts
KitMaker Network: 18 Posts
Posted: Sunday, January 12, 2014 - 04:40 AM UTC
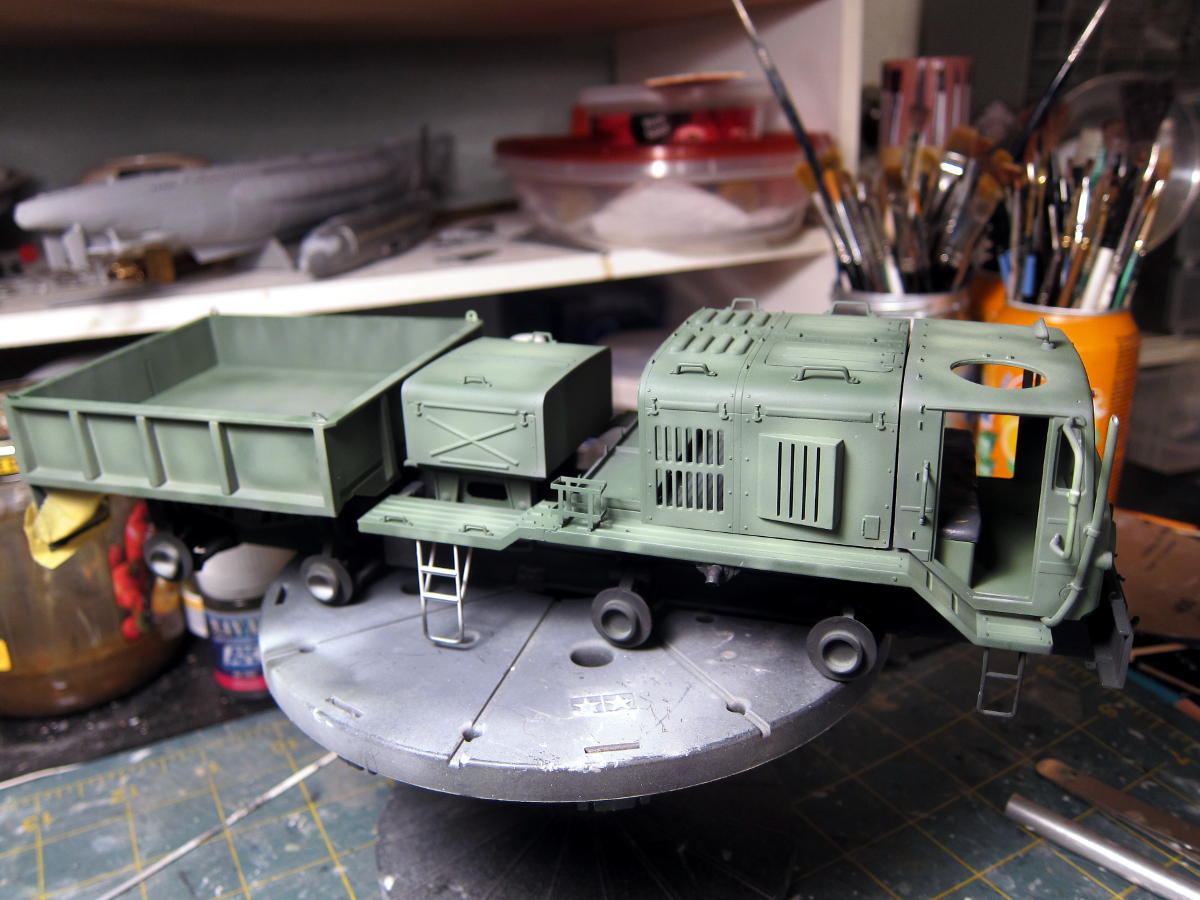
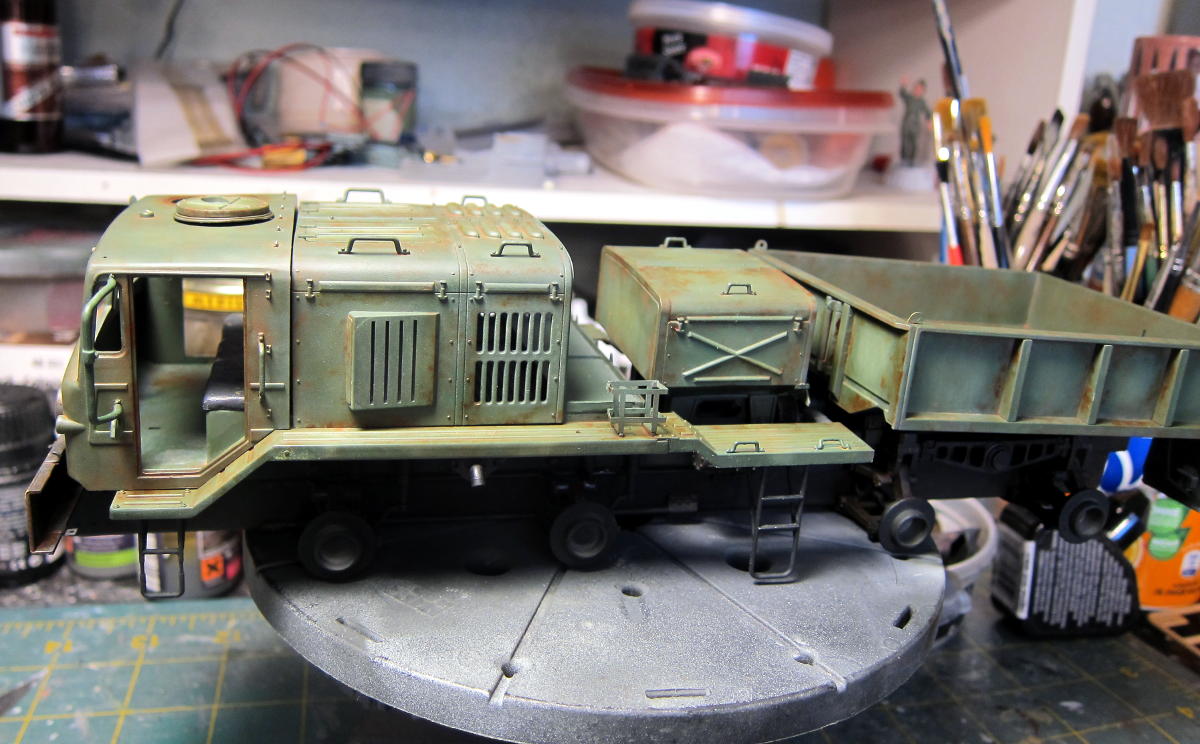
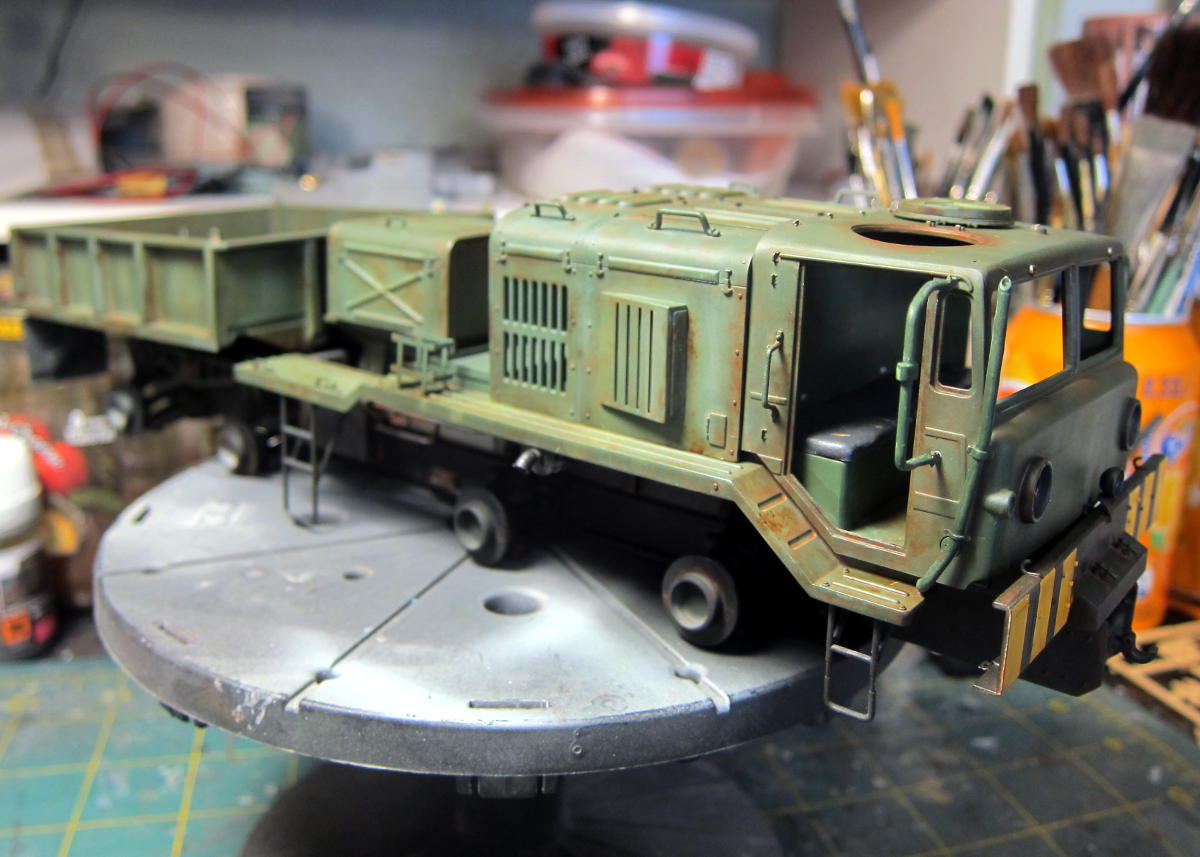
I've been making some slow progress on the MAZ-537. I sort of got sidetracked with it addressing a slight issue that came up, but am more or less back to my main assembly process.

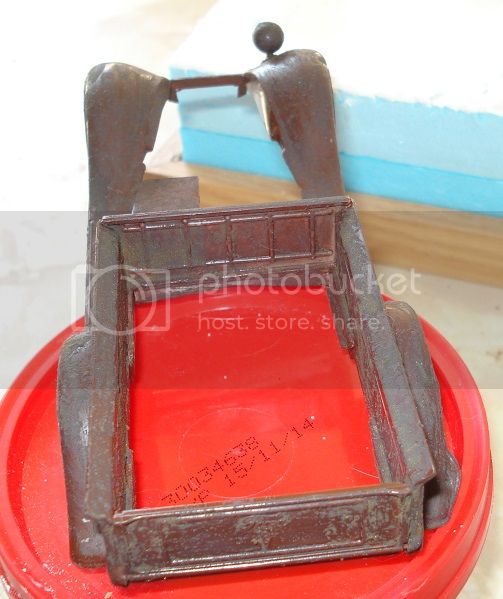
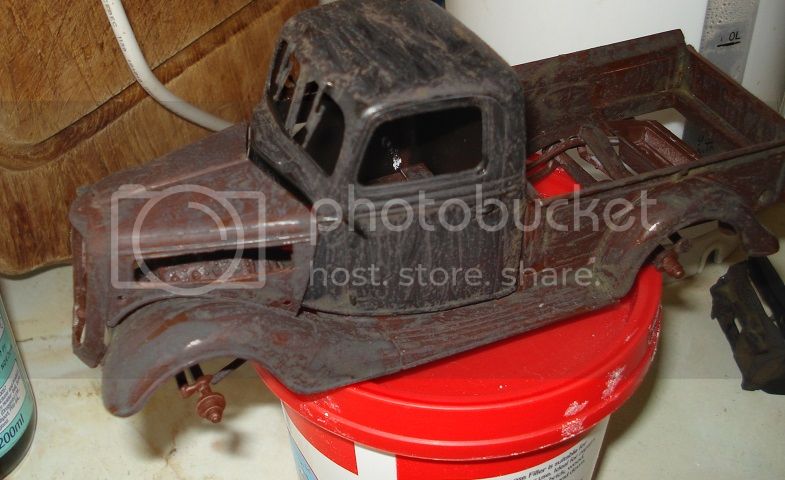
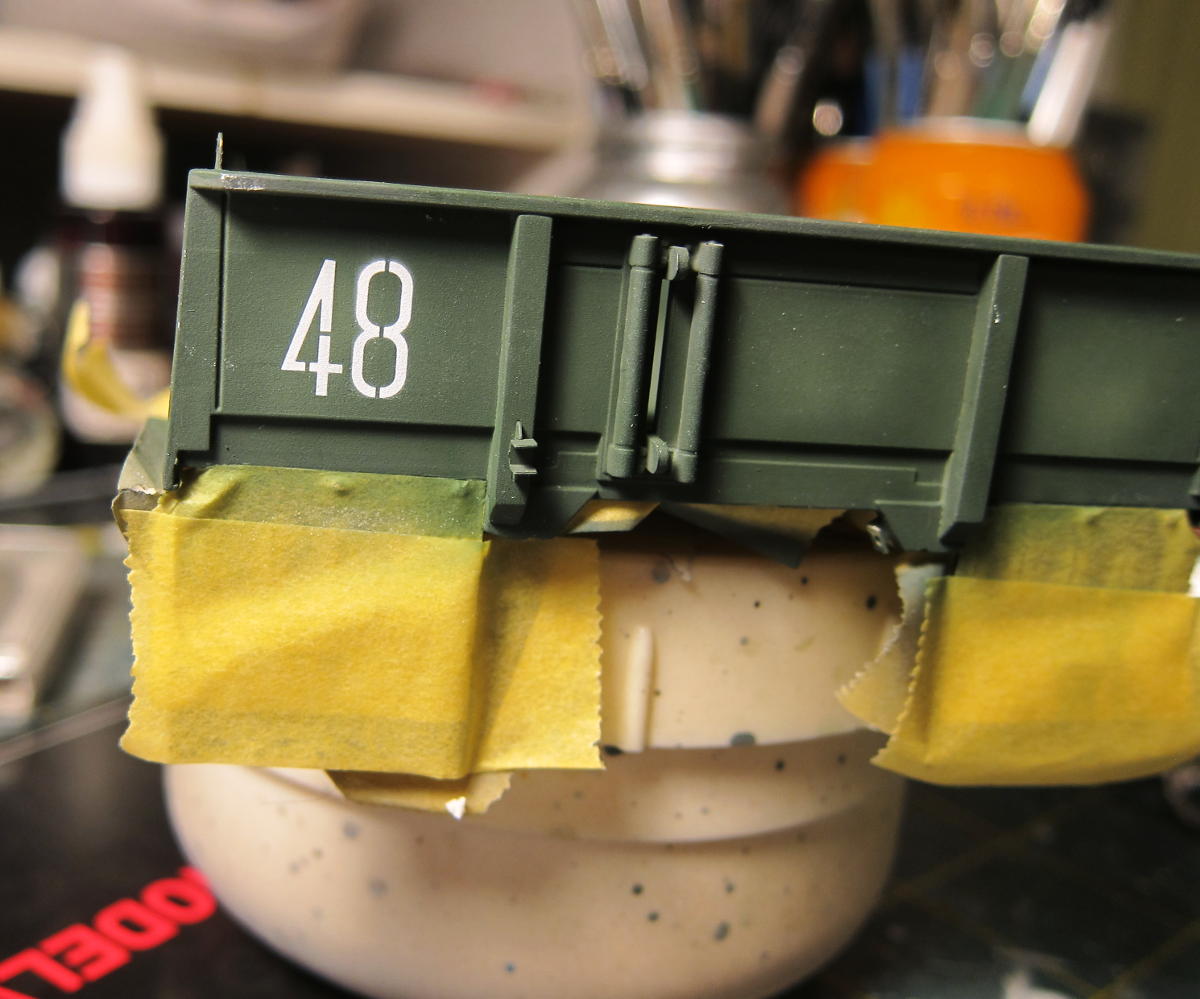
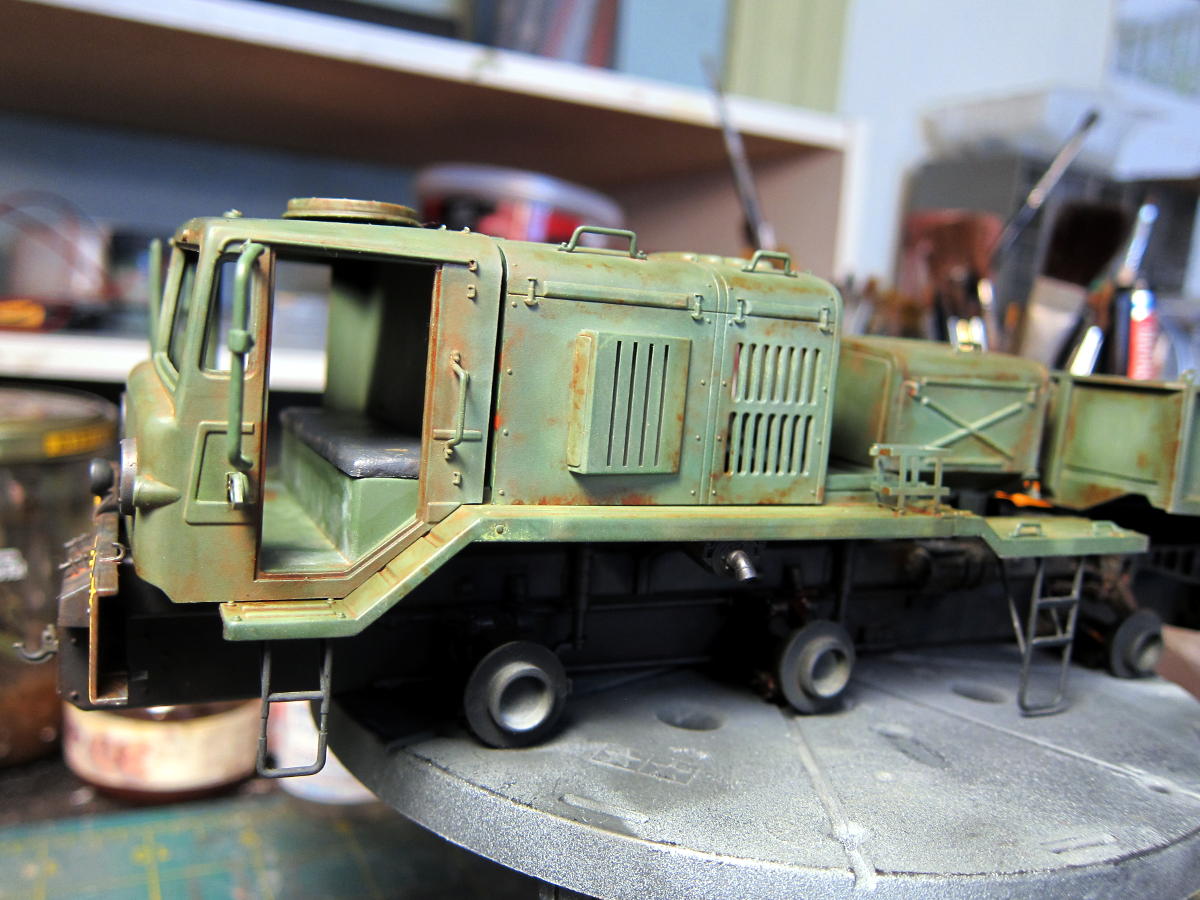
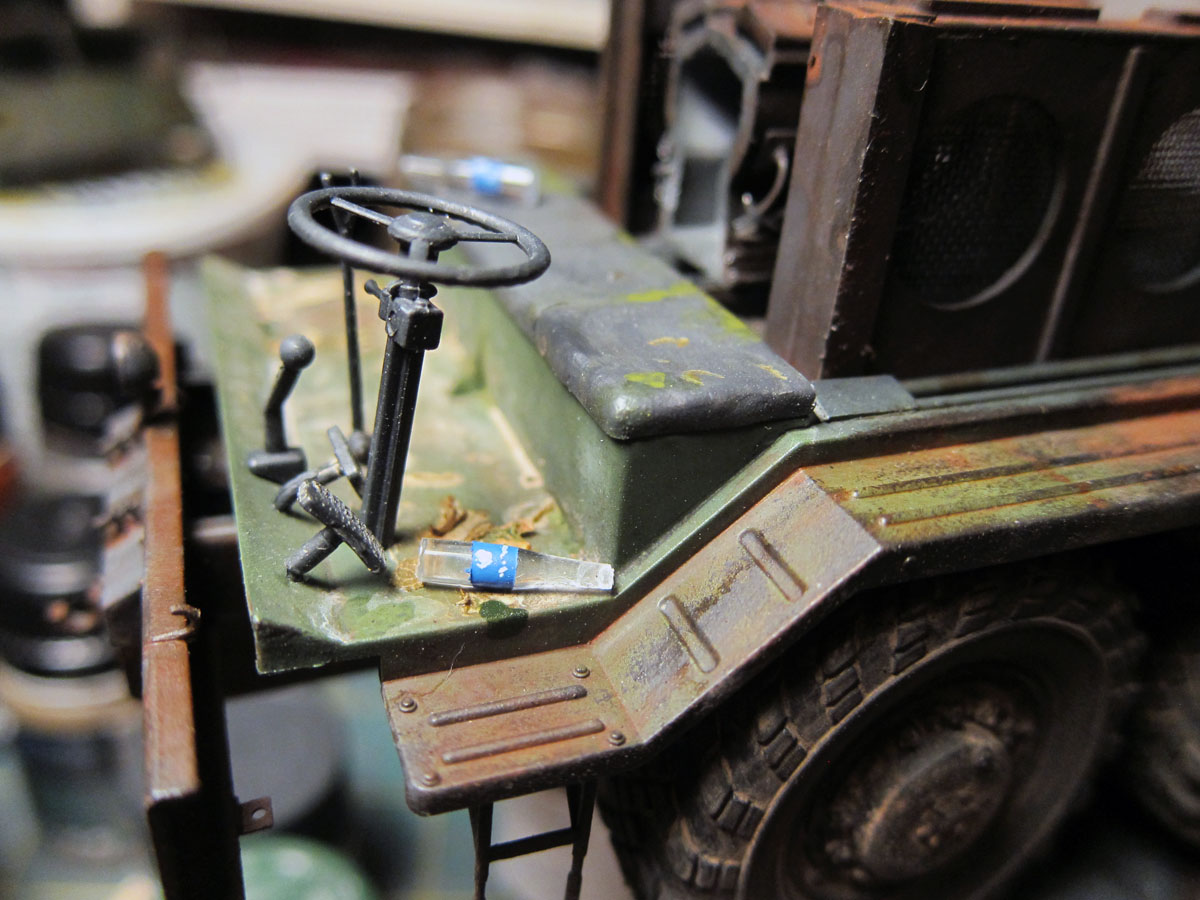
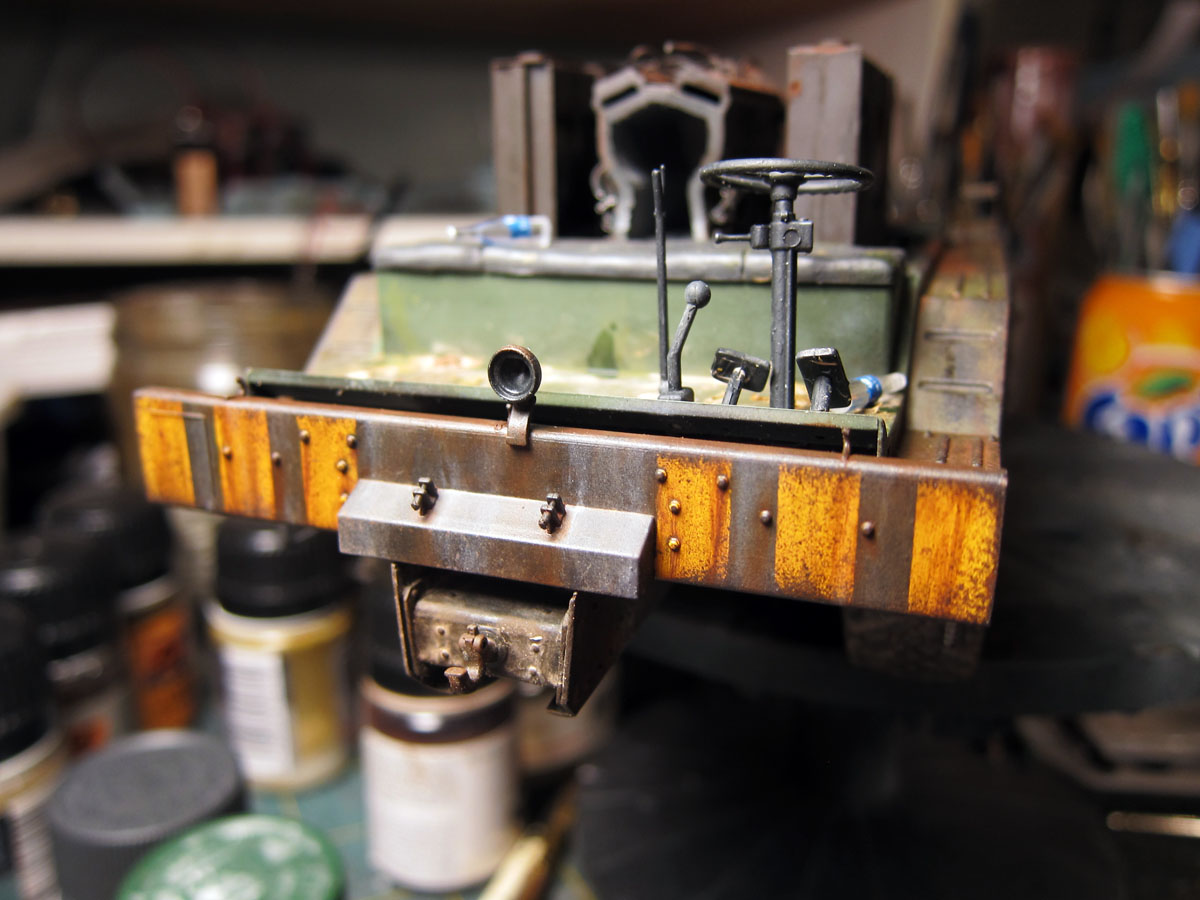
From the start, I intended to more or less build this thing put-of-box and place my emphasis on the weathering and base. One thing I did want to do was improve the look of the plain, flat cabin seats that came in the kit. I applied some Milliput to both parts and worked it to resemble seat cushions that had some actual texture and unevenness.


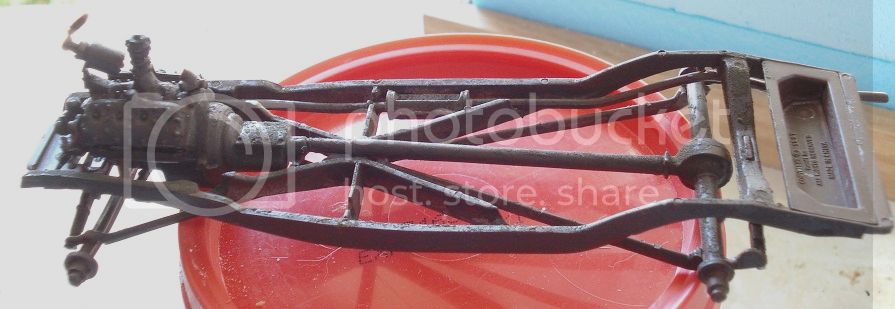
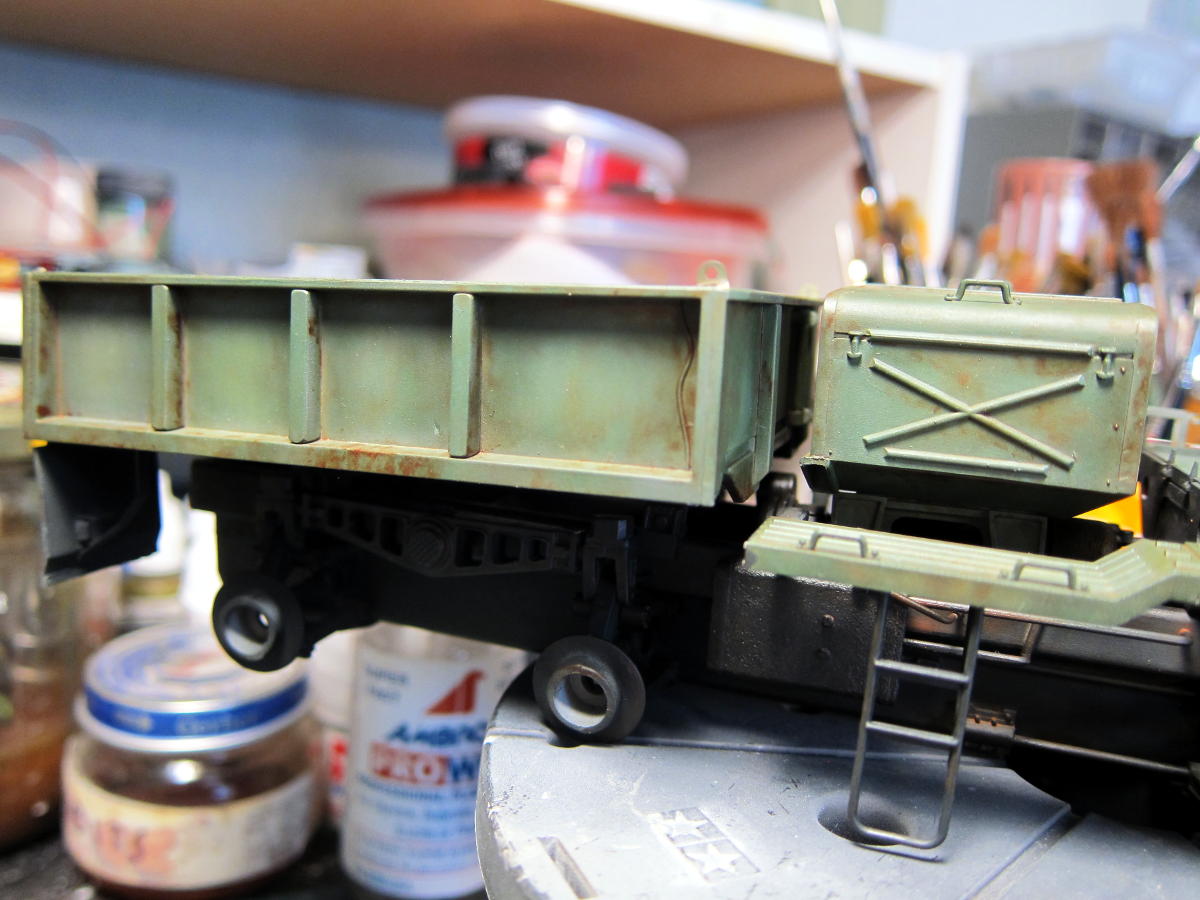
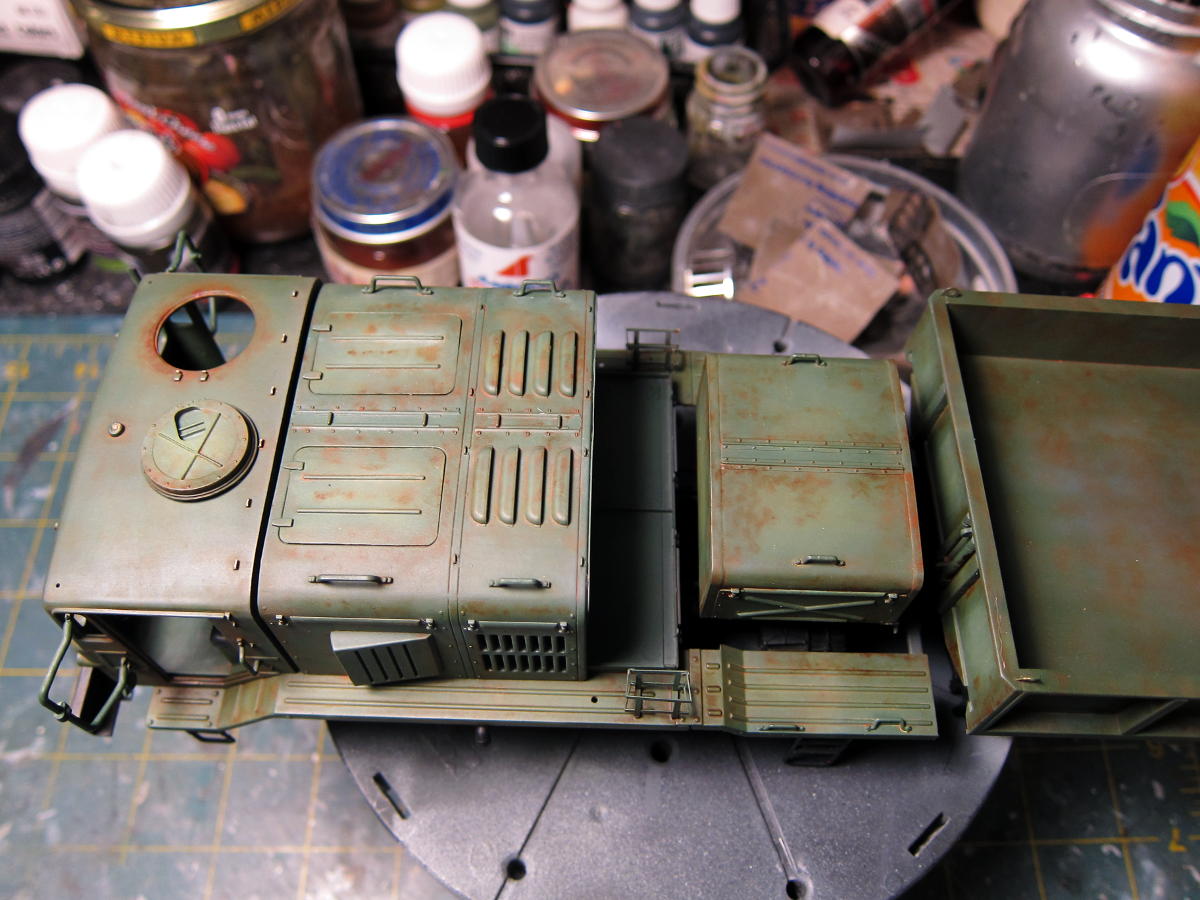
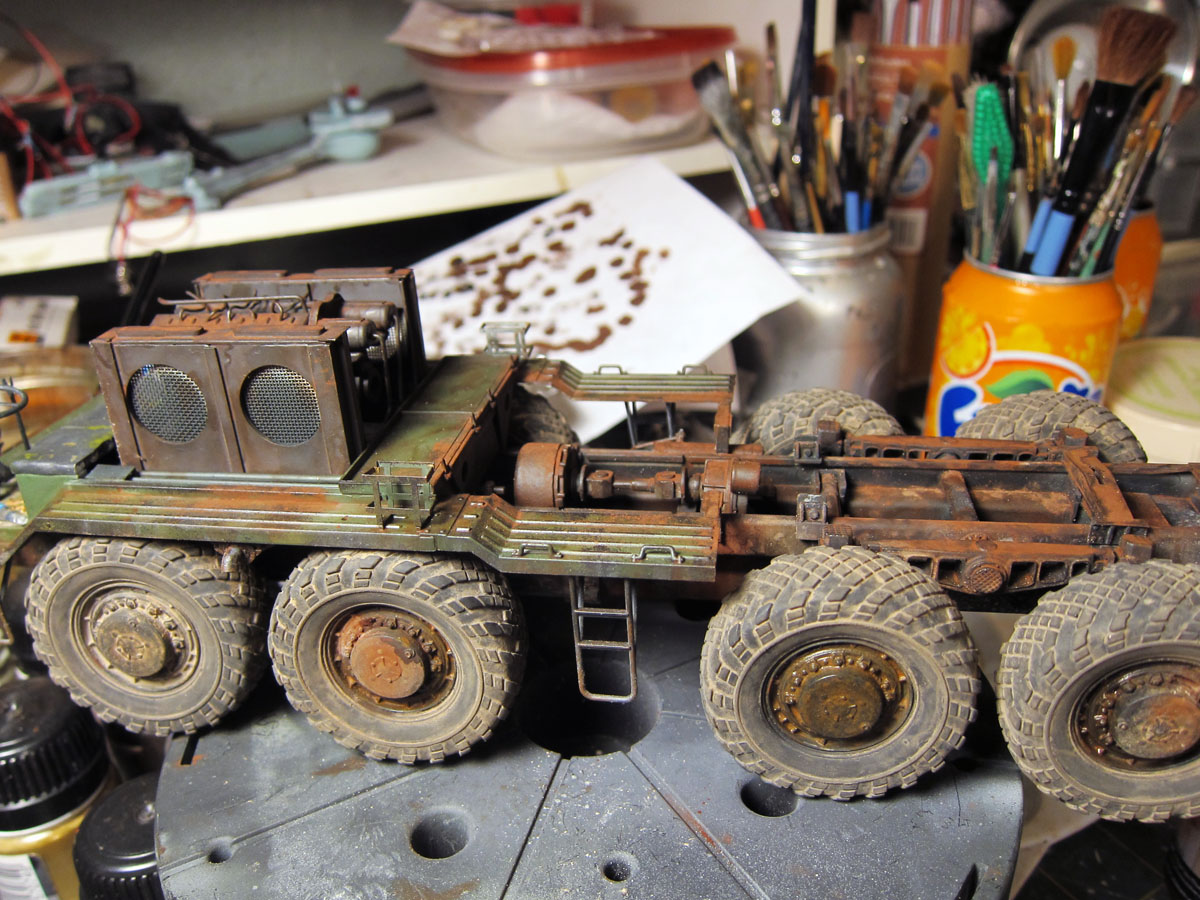
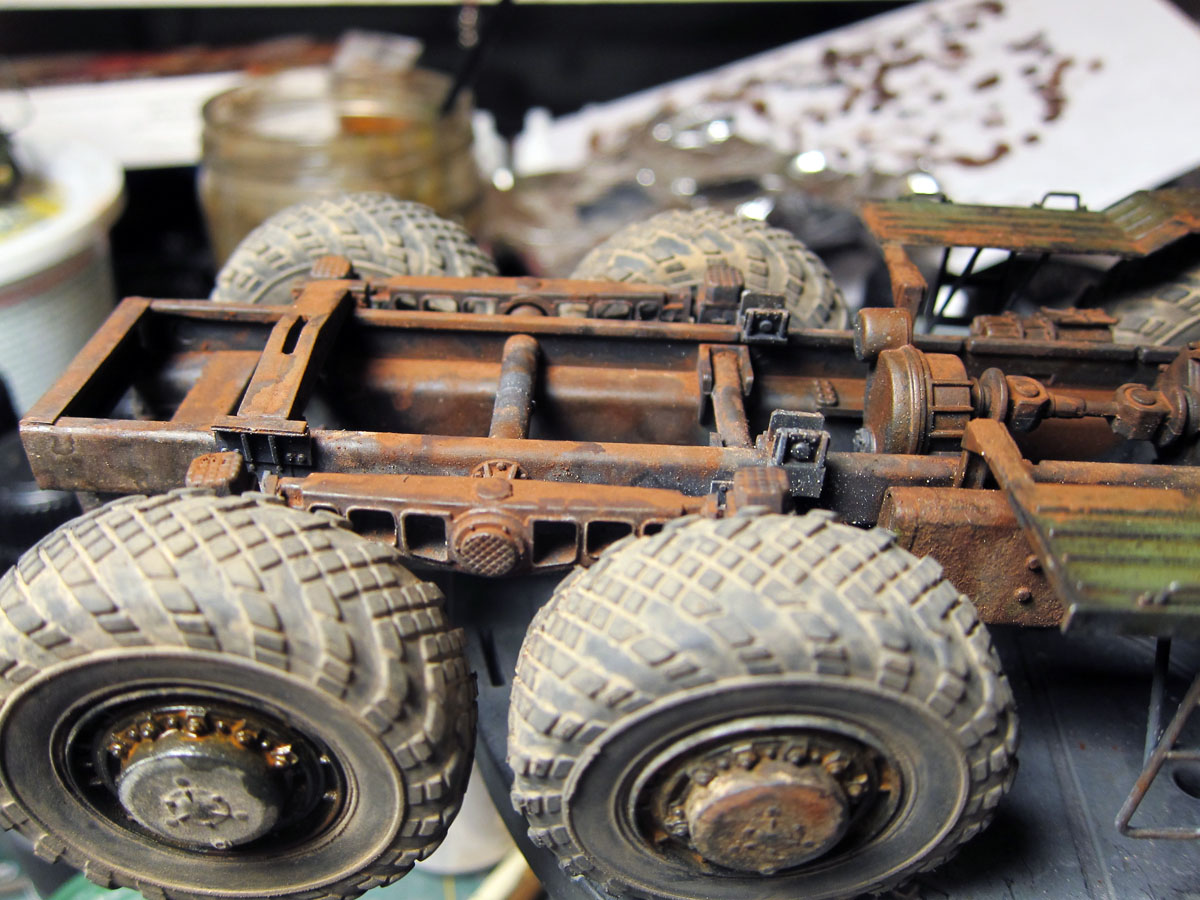
Here's where I got slightly off track for a couple of days. In test fitting the components I have assembled thus far to see how it all looks, I discovered one glaring issue with this kit: the rear of engine deck will be wide open with no engine inside, as Trumpeter doesn't include one. This leaves a big gaping hole.


My first thought was to just go out and buy a resin engine to drop in, but I really don't want to spend any money nor do I want to get my momentum on this thing interrupted waiting for parts to be delivered.

Besides, I just wanted something there to fill the empty space and I didn't care if it wasn't accurate. It will be barely seen behind the fuel tanks, so who cares if it's not really accurate. Well, someone might, but they'll just have to get over it.

Truth be told, I find myself all too often spending money on parts and such to solve modeling problems like this, rather than utilizing my skills, creativity and the stuff I have on hand. It's much more fun (and cheaper) to go the latter route, so that's what I decided on.

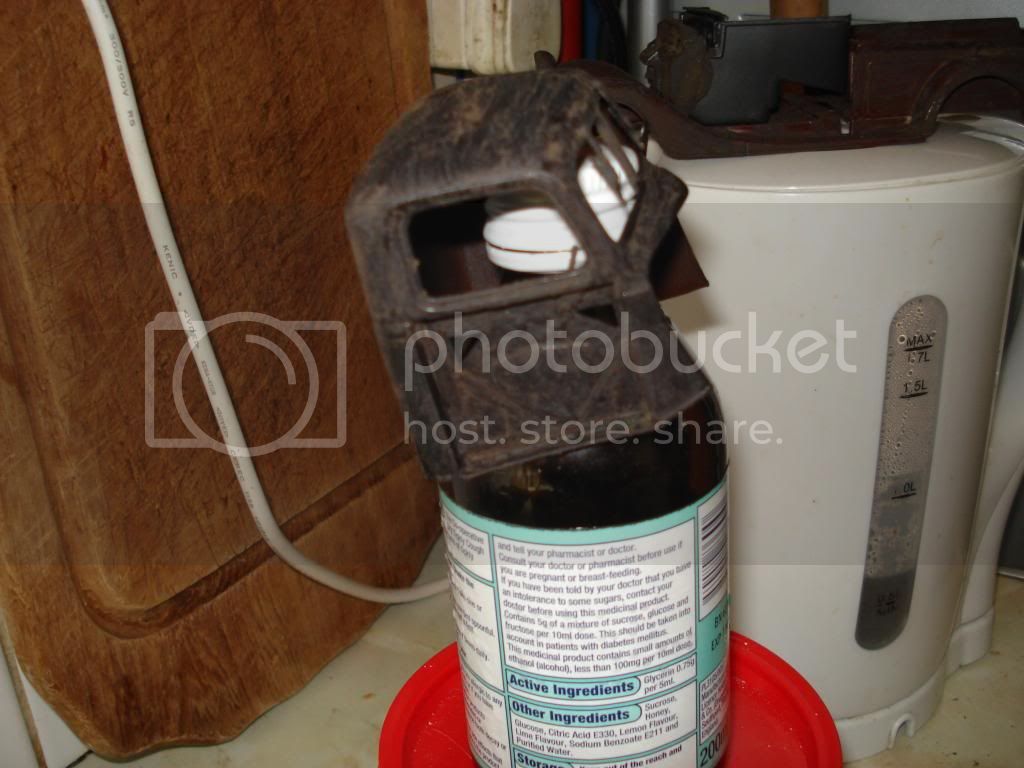
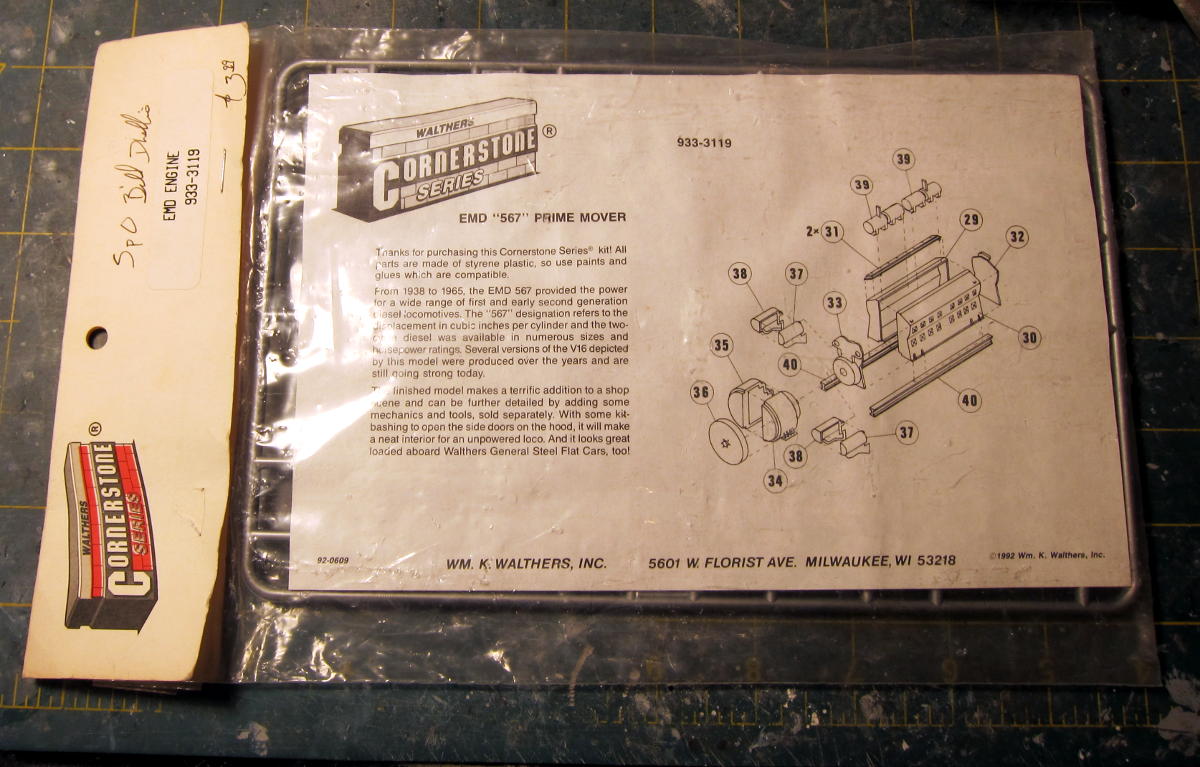
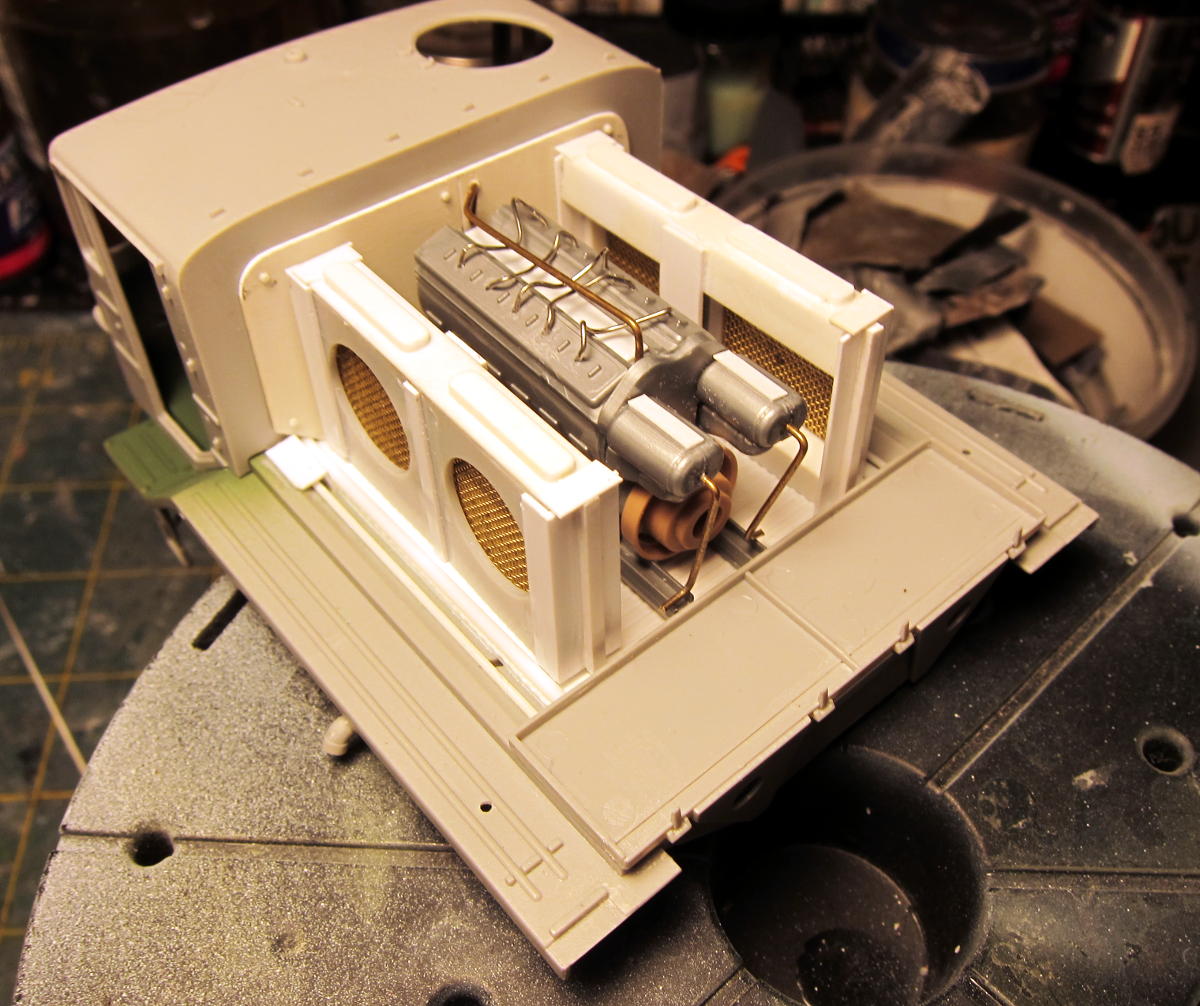
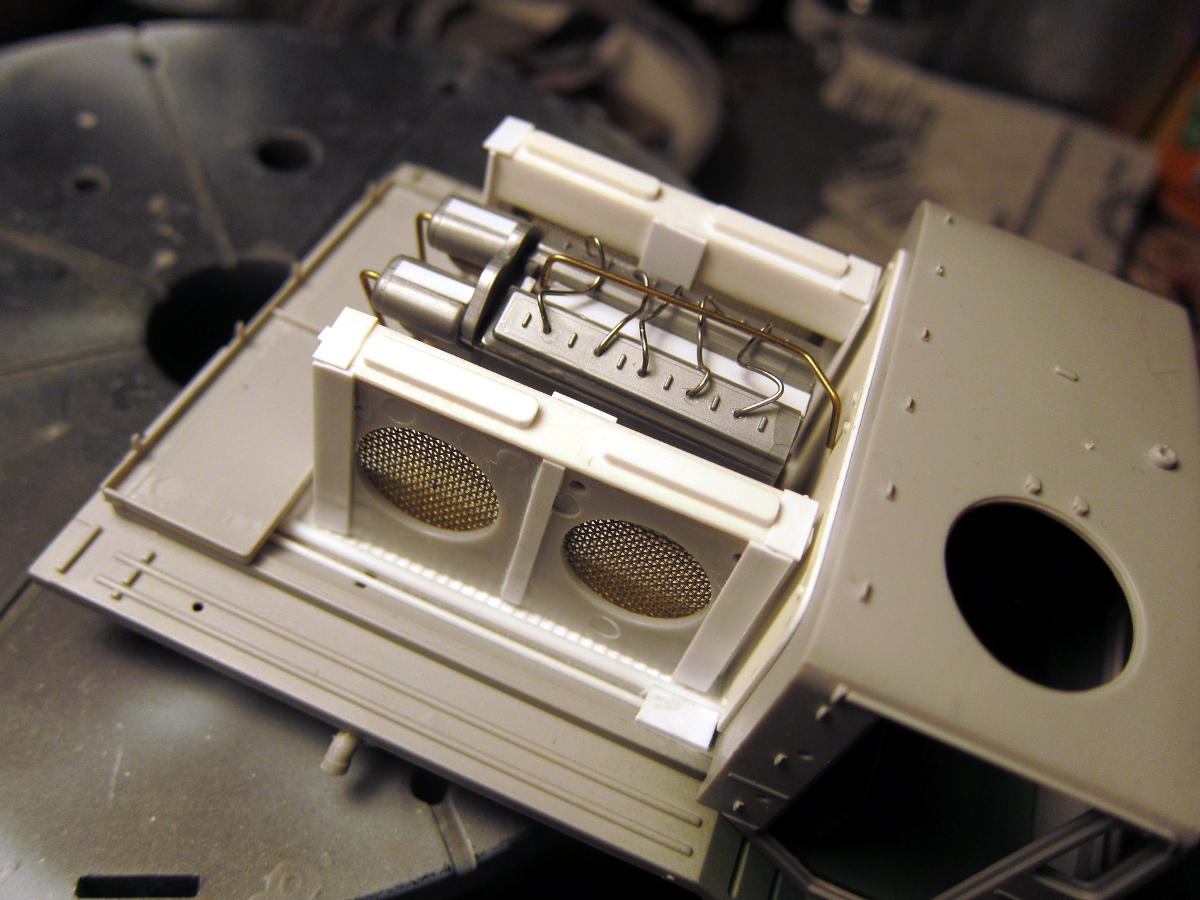
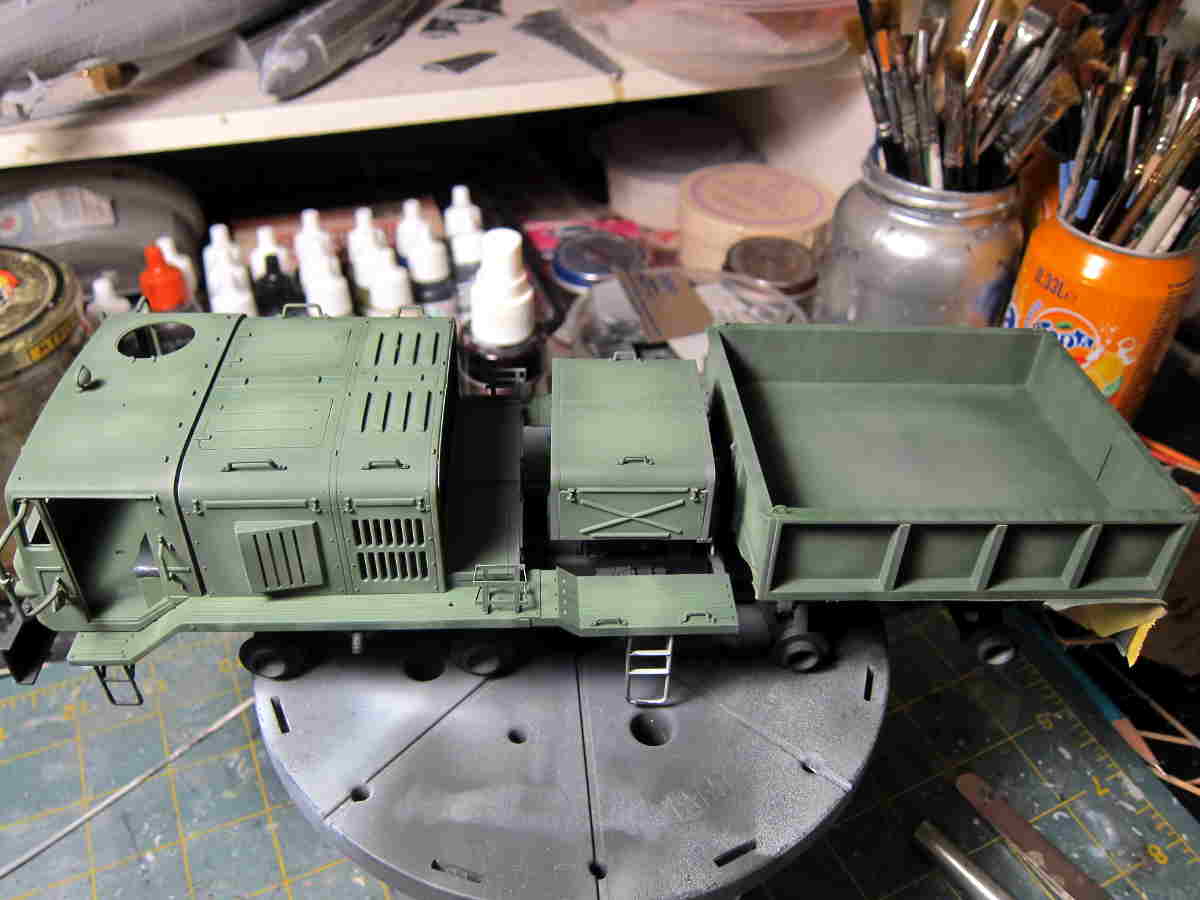
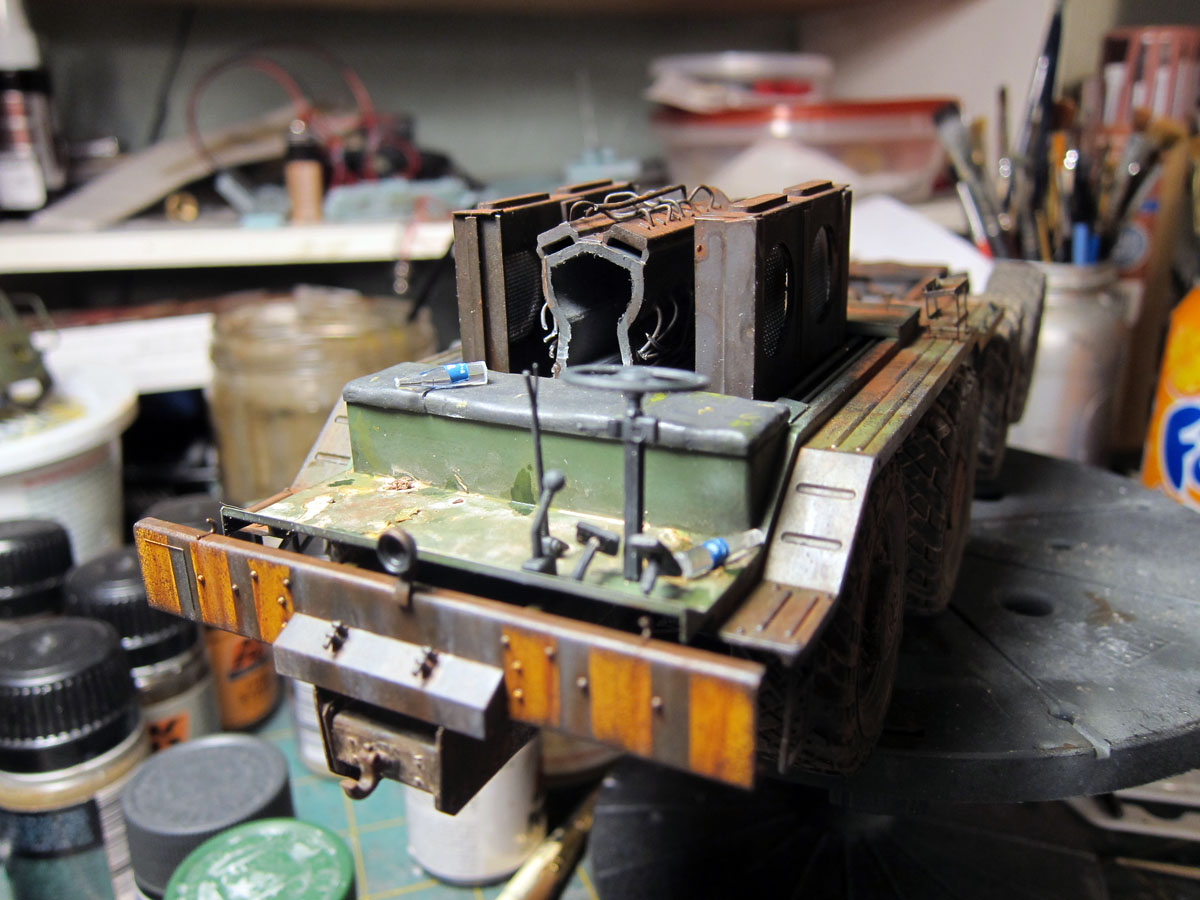
When thinking about this, the normally dim light bulb over my head suddenly came to life with a blinding flash. I remembered that among my multiple boxes of spare parts, I had an old HO scale diesel motor kit that I bought for a project in the early 90s. It's been kicking around ever since, still in the original package.


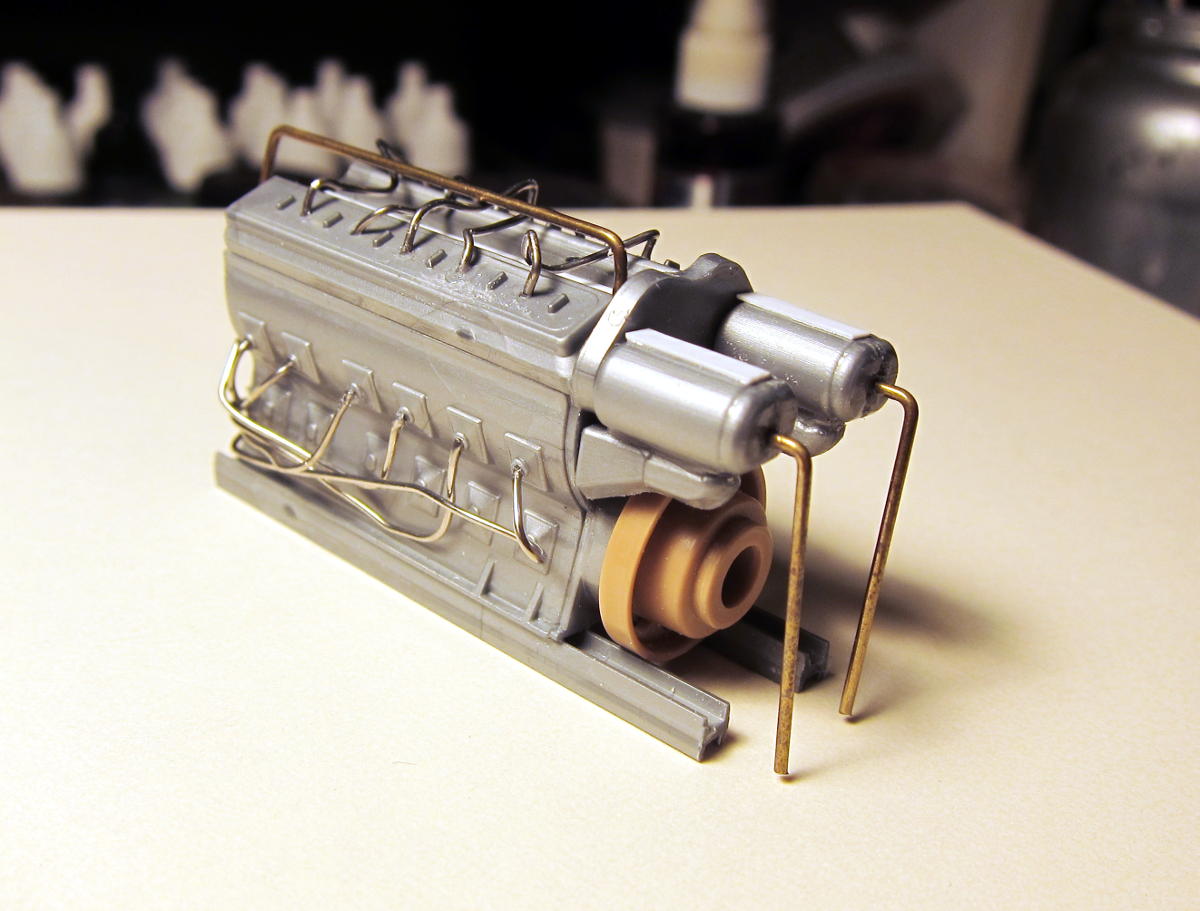
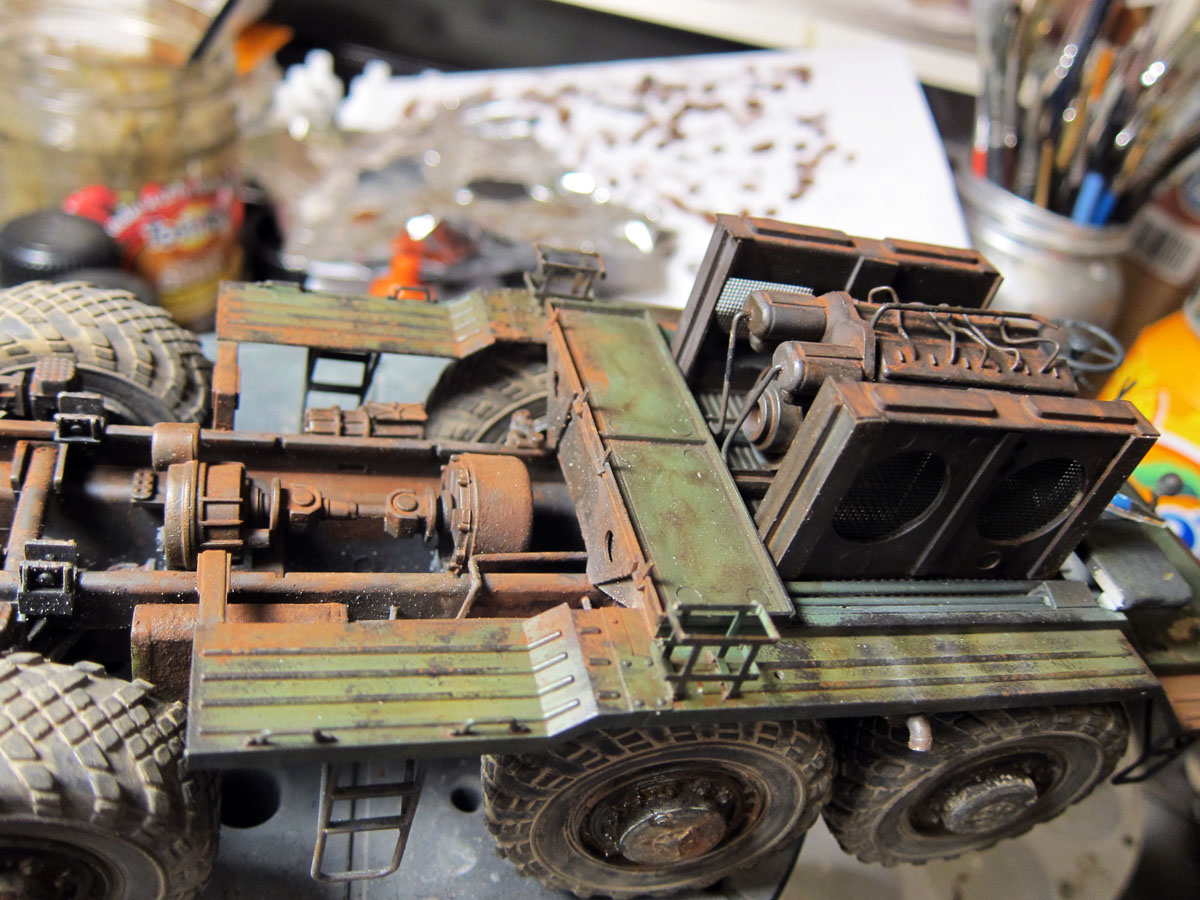
It looked about the right size for 1/35 and would fill the void of the engine deck nicely. Looking at some reference photos and what other have done in building this kit I realized I should also need to build some radiators.

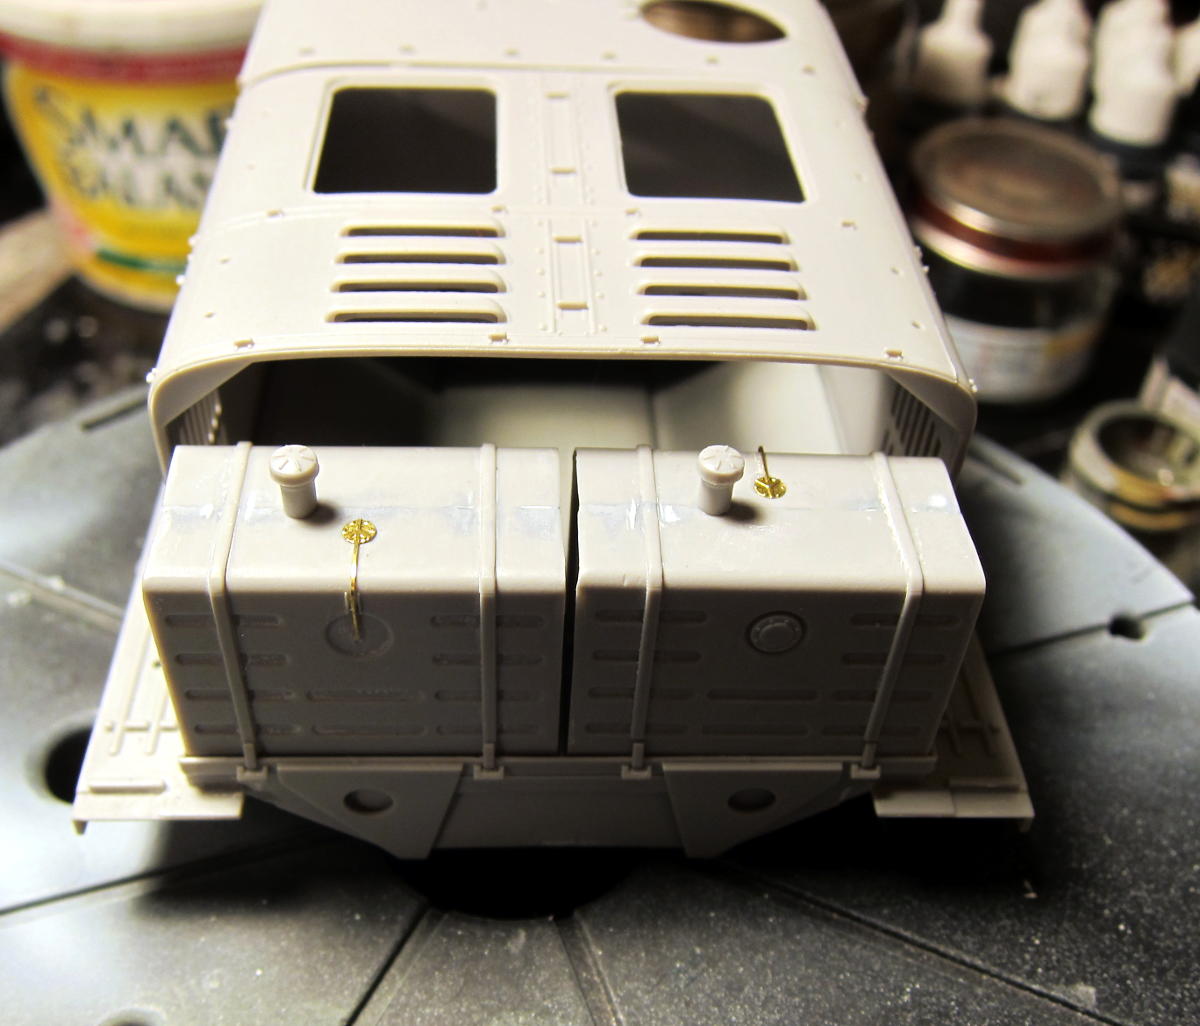
Again, I'm not going for accuracy on any level here....just some noise to fill a dead space. An HO scale EMD 567 diesel would just have to suffice for a Soviet D12A-525. So, here's what I ended up with. I had to cut off two cylinders worth of the engine block to get it to fit, but that brings it down to an actual 12 cylinders. I added a couple of odd & ends from the spares box, some random brass rod and wiring made from solder.

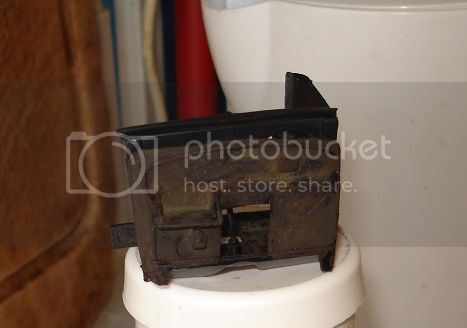
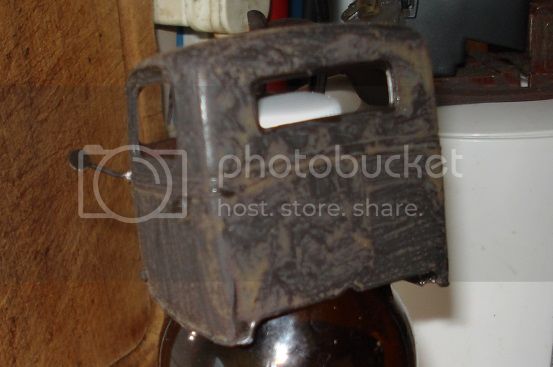
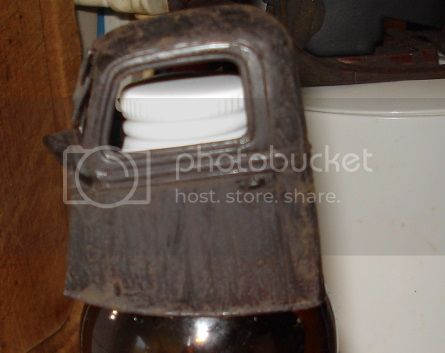
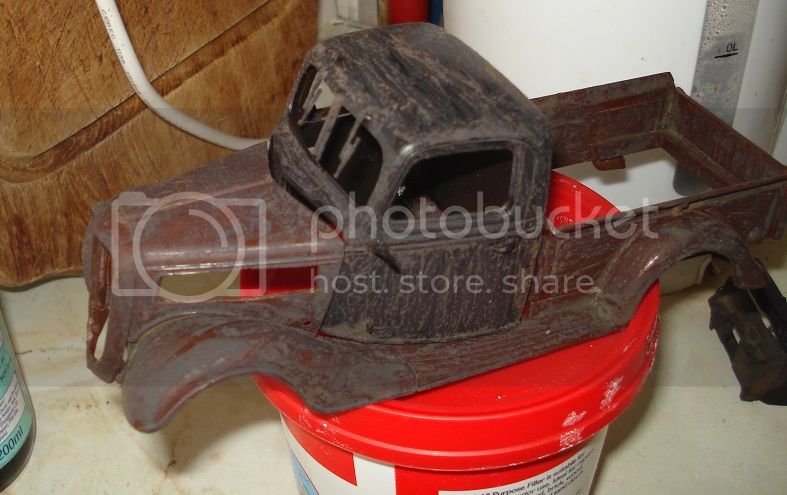
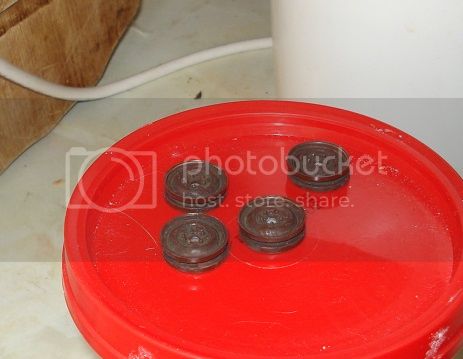
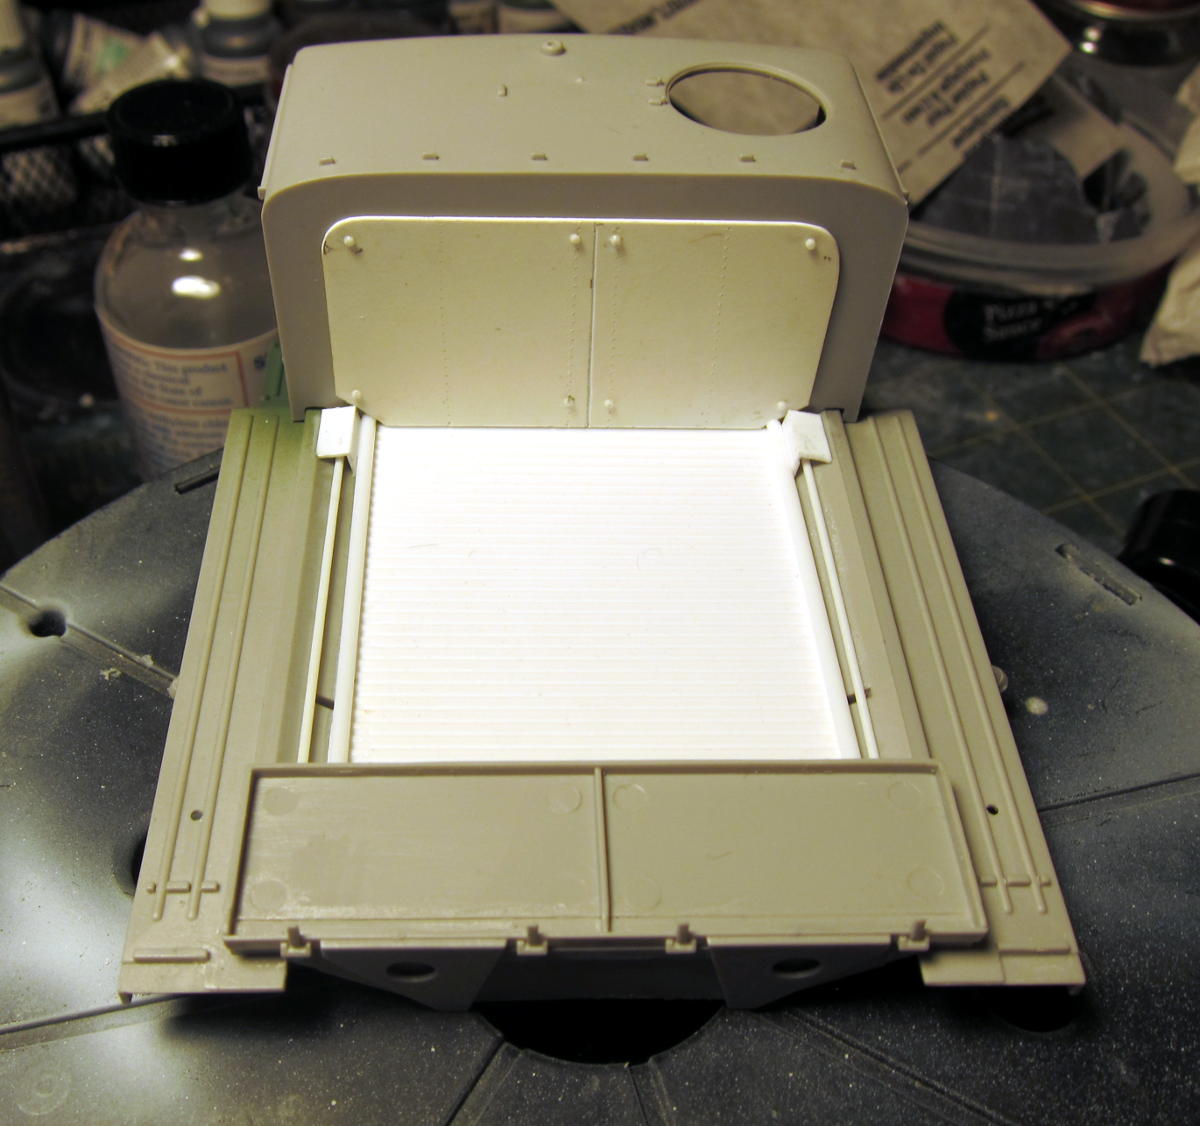
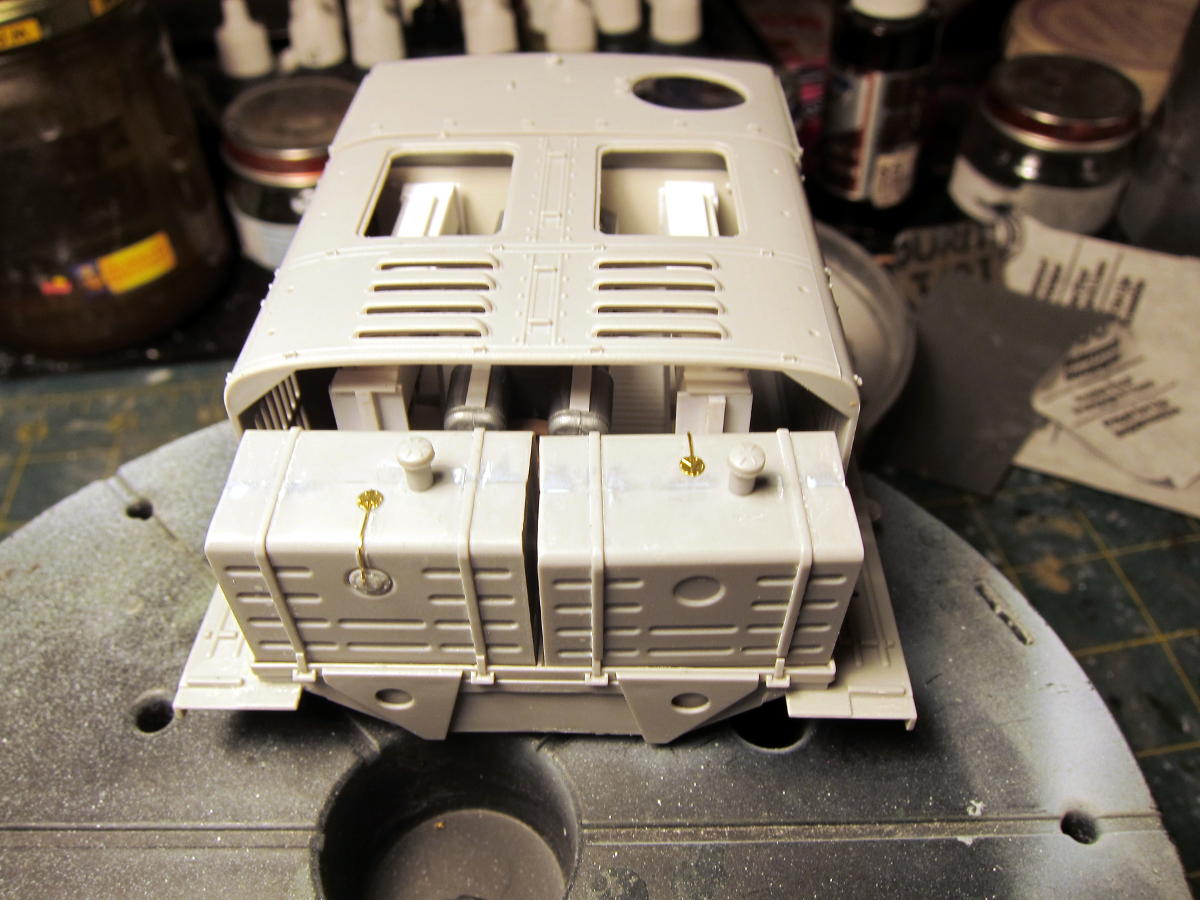
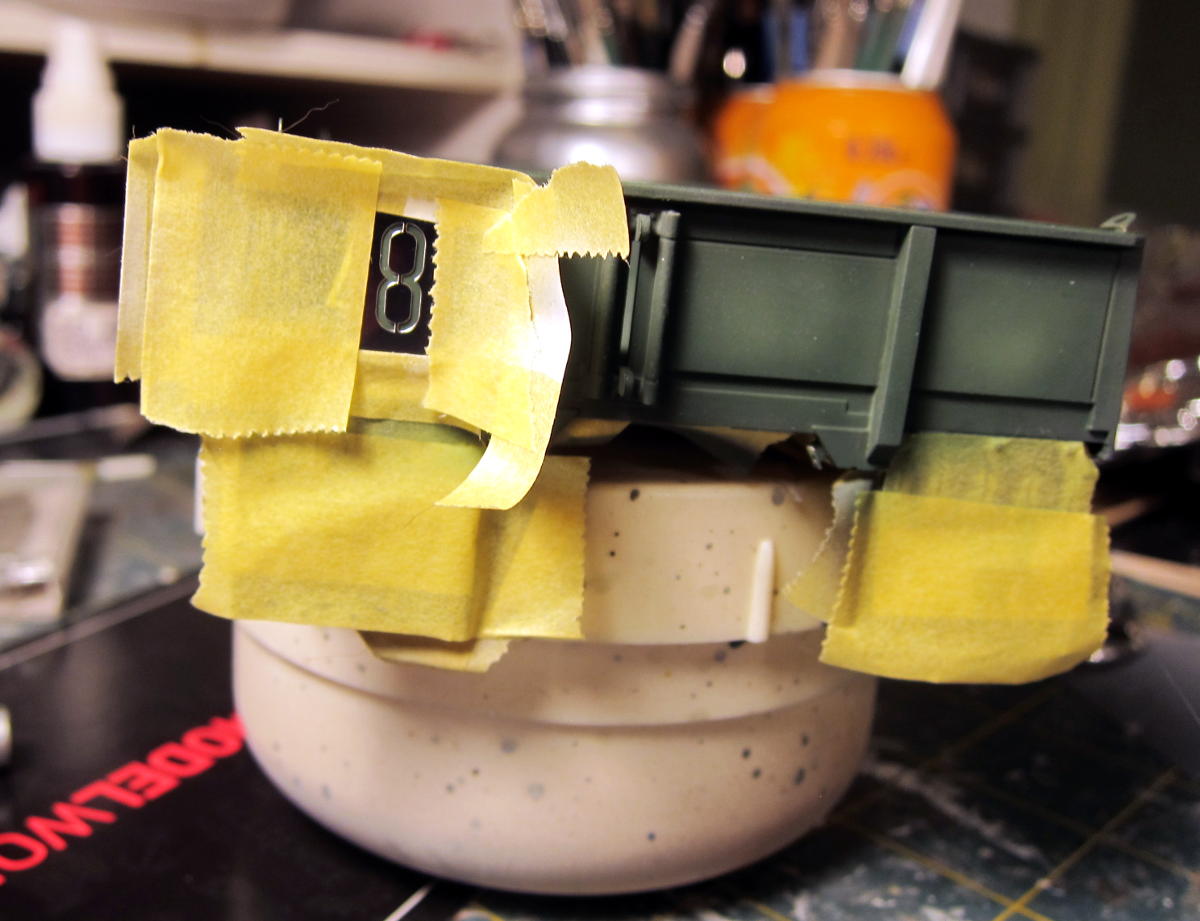
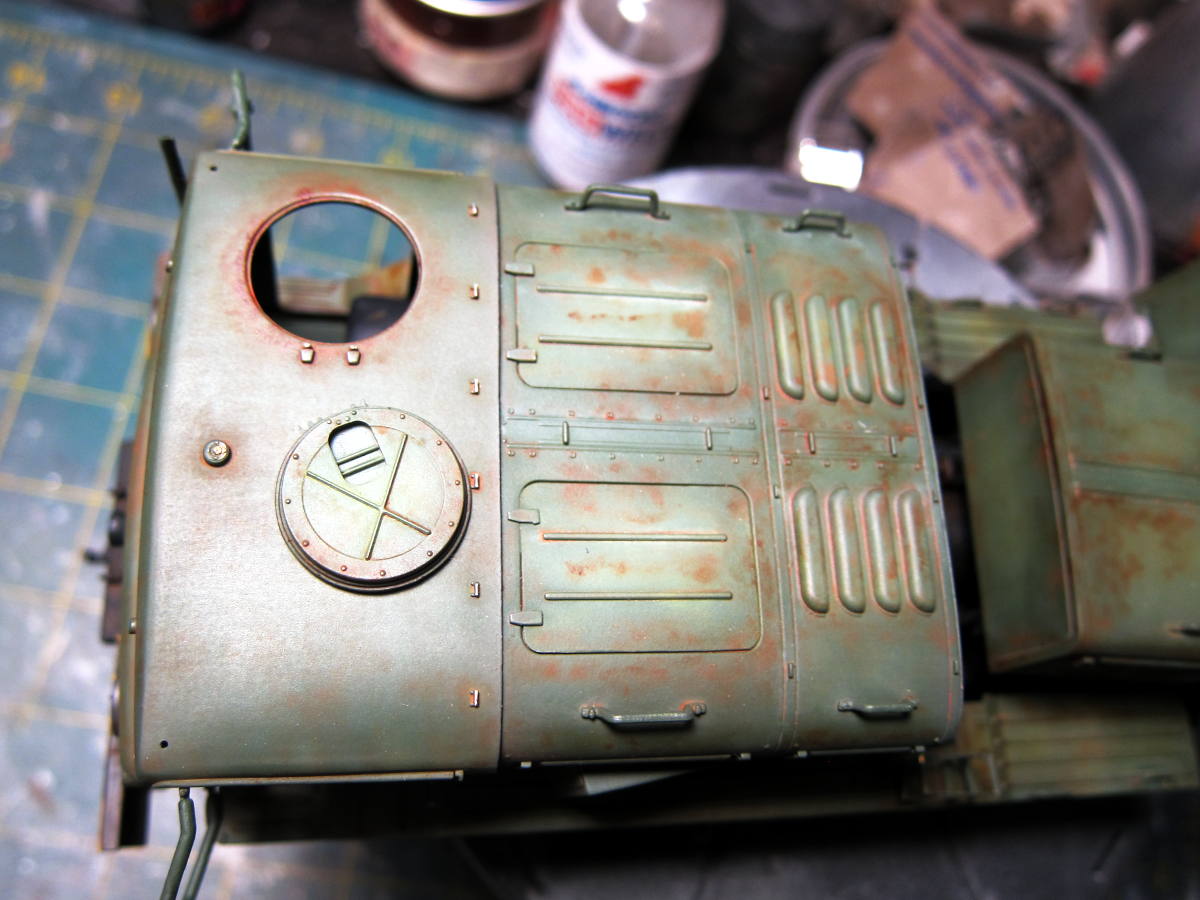
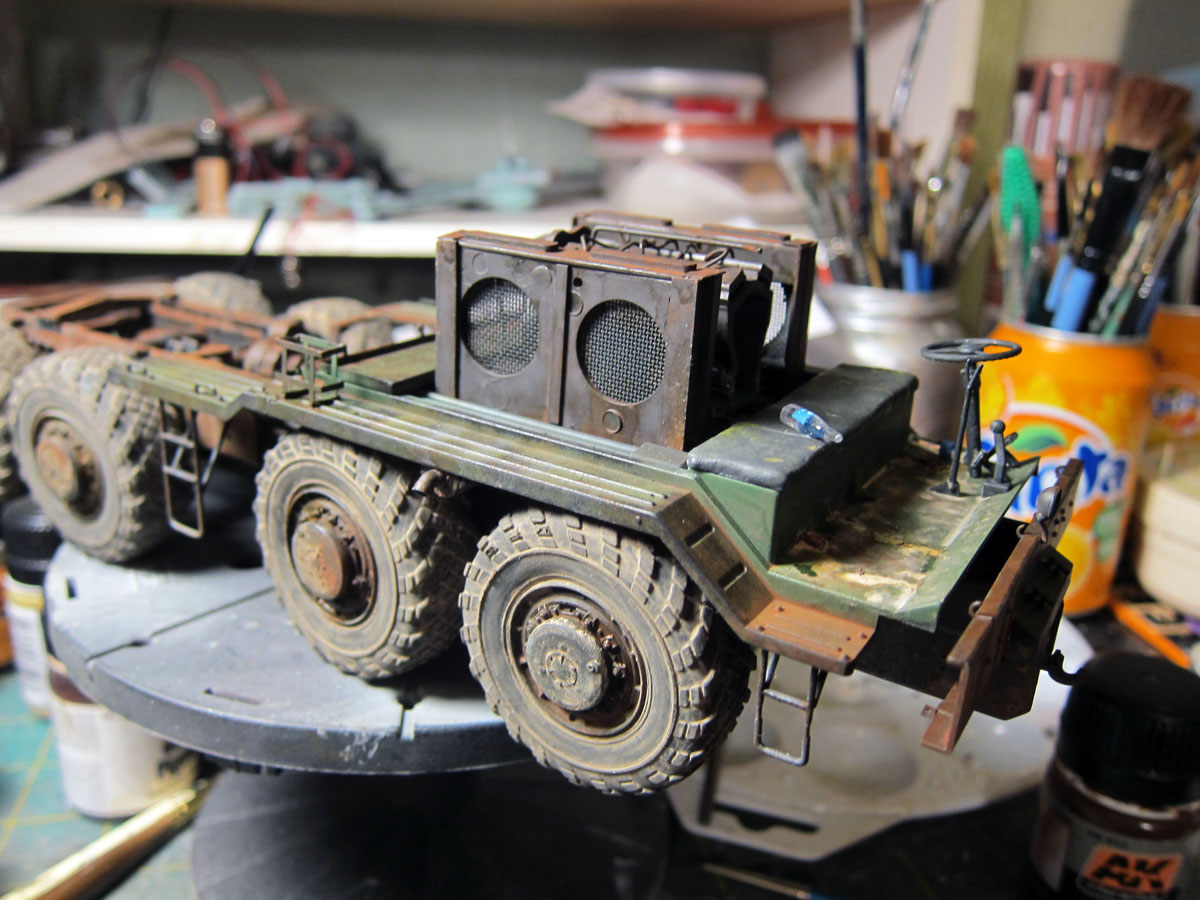
I also build bulkhead for the rear of the cab, making some faux mounting bolts by cutting styrene rod on my NWSL Chopper.

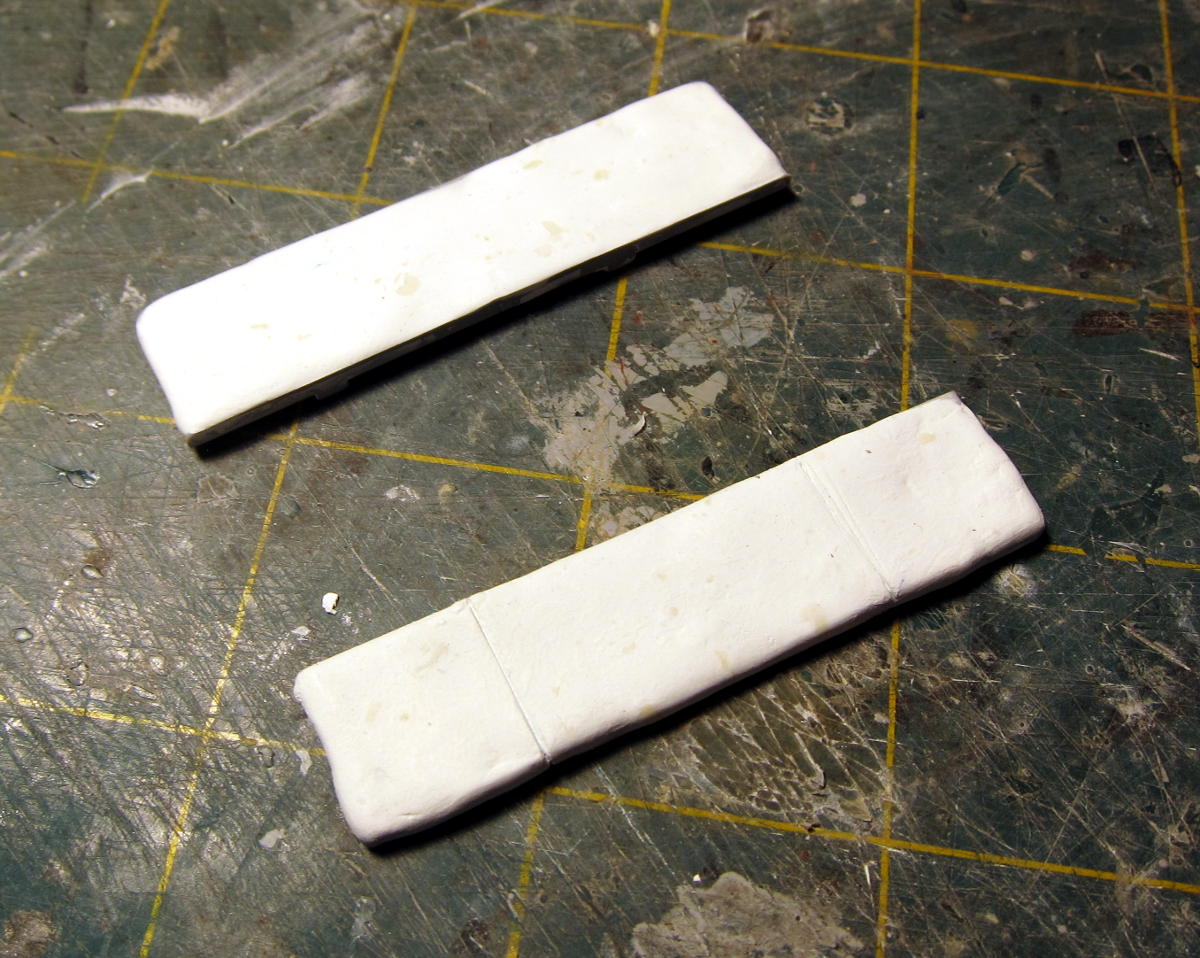
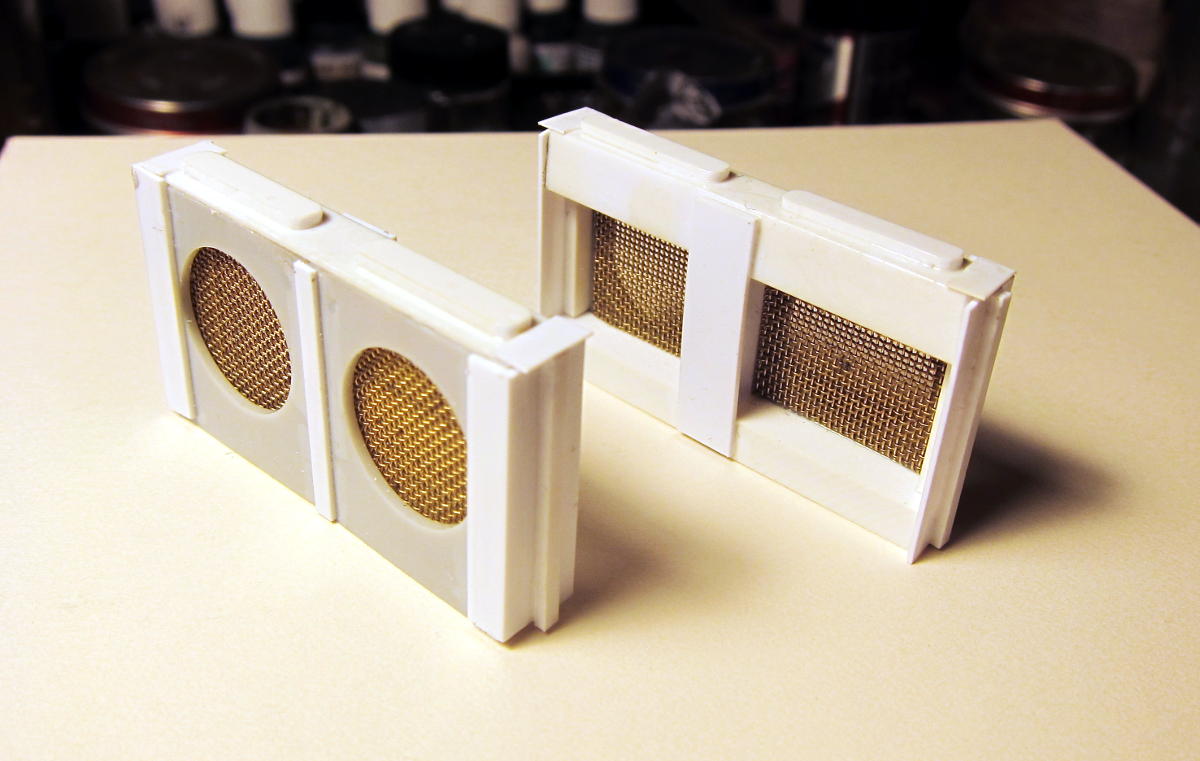
The radiators started out as turret mounts from an old 1/72 Airfix B-29 that were build up with sheet styrene and brash mesh. I think they look the part well enough for me.


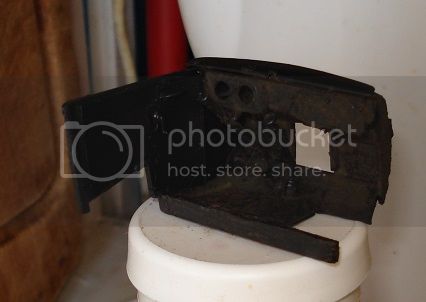
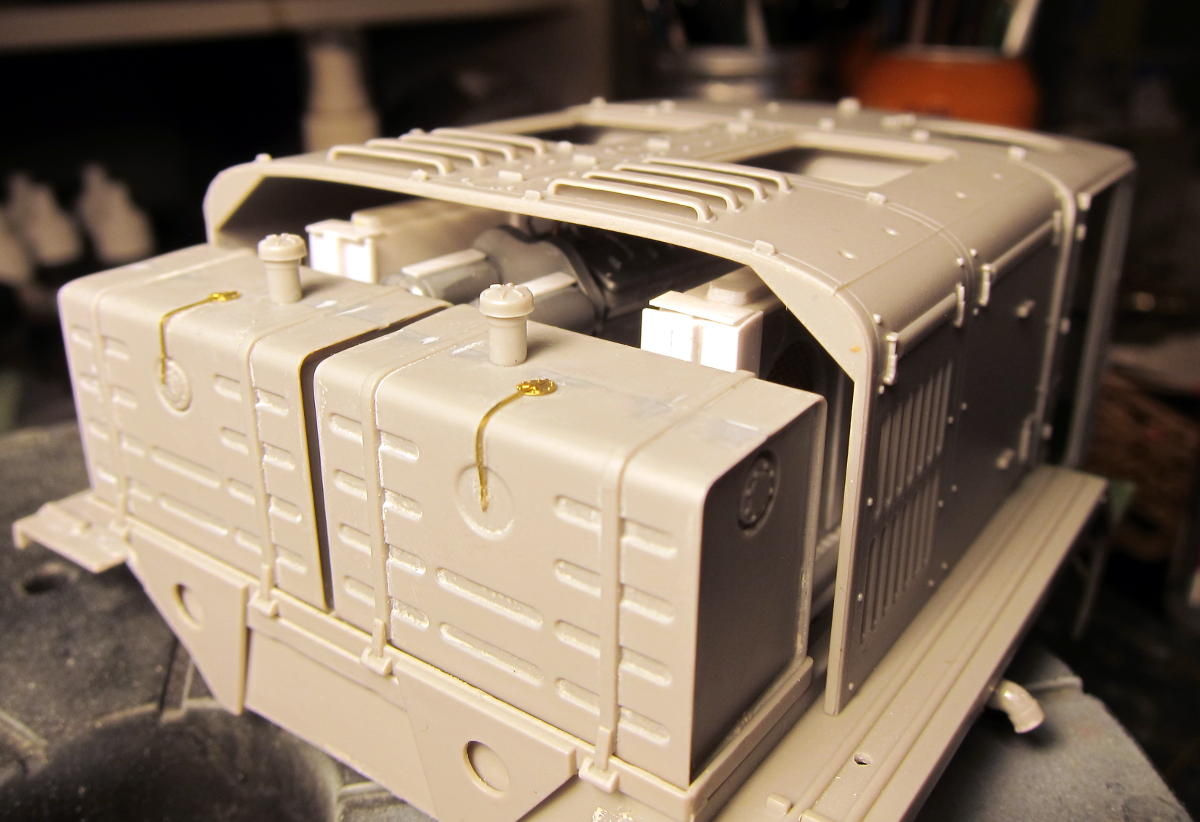
With the engine housing on and fuel tanks in place, you can barely see inside to know it's just cobbled together, but it sure beats having a big empty space.


SpeedyJ
Visit this Community
Bangkok, Thailand / ไทย
Member Since: September 17, 2013
entire network: 1,617 Posts
KitMaker Network: 66 Posts
Posted: Sunday, January 12, 2014 - 05:17 AM UTC
Clever build. That's what modeling is all about. Makes it just more interesting.
Keep up the good work.

Regards,

Robert Jan
noddy927
Visit this Community
Scotland, United Kingdom
Member Since: February 15, 2013
entire network: 1,273 Posts
KitMaker Network: 149 Posts
Posted: Sunday, January 12, 2014 - 09:13 AM UTC
Hi Bill
Very nice work there, scratch building is alot cheaper than buying resin or etch, and as you said it gets the old brain ticking over thinking how to overcome issues by using your own skills.

Keep going look forward to more.

Pete
SpeedyJ
Visit this Community
Bangkok, Thailand / ไทย
Member Since: September 17, 2013
entire network: 1,617 Posts
KitMaker Network: 66 Posts
Posted: Wednesday, January 15, 2014 - 06:16 AM UTC
Hi all. Step by step it is getting a real barnfind. Made the canvas top today.
Some pictures. Hope you enjoy.

Still a dry fit, but it looks like she's been out for a while.


The canvas will get some extra weathering. Also the strip to attach the canvas top will get some extra detail.


With the spare. Next step is to drill holes for the strip and brackets.


Nice evening to all of you.

Regards,

Robert Jan
noddy927
Visit this Community
Scotland, United Kingdom
Member Since: February 15, 2013
entire network: 1,273 Posts
KitMaker Network: 149 Posts
Posted: Thursday, January 16, 2014 - 12:09 AM UTC
Robert your build is really coming together now, and it looks superb, liking the softop, and the seats
great work.....more please

Pete
SpeedyJ
Visit this Community
Bangkok, Thailand / ไทย
Member Since: September 17, 2013
entire network: 1,617 Posts
KitMaker Network: 66 Posts
Posted: Thursday, January 16, 2014 - 01:03 AM UTC
Hi Pete. Still lots of things to do. Planning to finish the back of the car next week.
Which means the front will have my full attention after that.
The diorama setting will follow after she's on her wheels.
More pictures this weekend, first have to decide what will stay in my galery.
Back to the TA,

Robert Jan
SpeedyJ
Visit this Community
Bangkok, Thailand / ไทย
Member Since: September 17, 2013
entire network: 1,617 Posts
KitMaker Network: 66 Posts
Posted: Sunday, January 19, 2014 - 09:28 AM UTC
Hi all. She is standing on her wheels. Manual says put some wood under the car, because we from Heller [auto-censored]ed up. No problem, if you do some extra work.
Still not reached my goal for this week, but we have some time left.
My mom is not very well, so I take a break from building coming week. Old and fragile, just like the TA.

Some pictures


Happy so for, still a long way to go.

By for now,

Robert Jan


noddy927
Visit this Community
Scotland, United Kingdom
Member Since: February 15, 2013
entire network: 1,273 Posts
KitMaker Network: 149 Posts
Posted: Sunday, January 19, 2014 - 09:43 AM UTC
Looking very nice Robert, really outstanding build. Sorry to hear your Mum is not well. I am sure she wouldn't be impressed to be compared to an old car lol

Pete
SpeedyJ
Visit this Community
Bangkok, Thailand / ไทย
Member Since: September 17, 2013
entire network: 1,617 Posts
KitMaker Network: 66 Posts
Posted: Sunday, January 19, 2014 - 09:57 AM UTC
We are Citroën people. She'll understand.
Just before Christmas the centralheating had some 'winterproblems'. So 'Mr. Central Heating' comes for a visit, to see what's the problem. He almost fainted, entering the garage, discovering a beautifull DS21 from 1967.
She can be a real expert on these cars, when needed.
I know the guy, and also his father in law. Used to hangout in his bar, together with my brother when we were young. He married the most beautifull girl in town.

Thanks for watching and your concerns Pete.

Regards,

Robert Jan
Quasimofo
Visit this Community
New York, United States
Member Since: November 30, 2012
entire network: 105 Posts
KitMaker Network: 18 Posts
Posted: Monday, February 10, 2014 - 11:29 PM UTC
Robert: Hope your mom is doing better. In spite of the bad news (sorry to hear), the TA is looking wonderful.

I’ve been working on-and-off on the MAZ-537. I’ve made a bit more progress than these pics show, but not as much as I would like. I have a deadline of 8 March to have the dio ready for a local contest and I have alot more to do..and six other projects to try and complete.

Will post some updated pics as time permits, but here is where the model was about a week ago when these were taken.


noddy927
Visit this Community
Scotland, United Kingdom
Member Since: February 15, 2013
entire network: 1,273 Posts
KitMaker Network: 149 Posts
Posted: Tuesday, February 11, 2014 - 05:02 AM UTC
Nice work Bill. I am glad that someone is still here with this campaign, as Robert has been the soul builder. I plan to start mine shortly, just finishing off a couple of figure campaigns.

Pete
SpeedyJ
Visit this Community
Bangkok, Thailand / ไทย
Member Since: September 17, 2013
entire network: 1,617 Posts
KitMaker Network: 66 Posts
Posted: Wednesday, February 12, 2014 - 06:14 AM UTC
Hi.
The big truck is pretty nice. My compliments.
I'm still in with this campaign, so after a break I will be finished beginning of March I think.

Enjoy,

Robert Jan
Quasimofo
Visit this Community
New York, United States
Member Since: November 30, 2012
entire network: 105 Posts
KitMaker Network: 18 Posts
Posted: Sunday, February 16, 2014 - 04:02 AM UTC
Thanks, all! I've made some more progress. Some of the pigment washes were still wet when I took these:


The vodka bottles are made from clear stretched sprue. I'm going to tone down the pigments on the wheels a little bit...just a tad much there for my liking. I'm going to try and finish the truck off today or tomorrow as I don't have much left to do on it. But, I'll still have the base and the cargo to contend with. I've also gotten an ANT Miniatures STALKER figure that I'm going to use so I'll need to paint that too.

SpeedyJ
Visit this Community
Bangkok, Thailand / ไทย
Member Since: September 17, 2013
entire network: 1,617 Posts
KitMaker Network: 66 Posts
Posted: Sunday, February 16, 2014 - 04:33 AM UTC
That´s the way. Love the details on the chassis and front of the truck. Very realistic.

Enjoy,

Robert Jan
noddy927
Visit this Community
Scotland, United Kingdom
Member Since: February 15, 2013
entire network: 1,273 Posts
KitMaker Network: 149 Posts
Posted: Sunday, February 16, 2014 - 09:30 AM UTC
Very nice work Bill. Love the detailed rust on the chasis. Oh and the voddy bottle is a nice touch.

Pete
noddy927
Visit this Community
Scotland, United Kingdom
Member Since: February 15, 2013
entire network: 1,273 Posts
KitMaker Network: 149 Posts
Posted: Saturday, March 15, 2014 - 07:32 PM UTC
Well I finished my 2 campaigns I was in, now I can concerntrate on my Rusty.
Here is the kit I will use.
ou

As you can see it is not the correct car, but looks close. I intend to scratch it to look more like the one in the picture.


There will of course be a base.

Pete
SpeedyJ
Visit this Community
Bangkok, Thailand / ไทย
Member Since: September 17, 2013
entire network: 1,617 Posts
KitMaker Network: 66 Posts
Posted: Saturday, March 15, 2014 - 09:40 PM UTC
Hi Pete.
Lets get that thing on the road to ruin. Can't wait to see your build getting shape.
I'm on some side tracks, building a boat and train now, but later on this week I'll pick up the TA for the finals.

Regards,

Robert Jan
hofpig
Visit this Community
England - South East, United Kingdom
Member Since: March 04, 2007
entire network: 1,330 Posts
KitMaker Network: 56 Posts
Posted: Saturday, March 15, 2014 - 10:16 PM UTC
Just thought I should give an update to where I am.

All is base coated and I am just adding rust textures before adding final colours to surface. Just one minor problem remains, the fuel tank. Revell/the original monogram kit only sullies a fuel tank that can be see from below, so as I removed the cargo bed all you get is a hole any ideas as I did not want to scratch build one?


Here you can see the problem, large empty space which should be the top of the tank!


Here on this terrible pic shows the inside of the missing door skin I scratched. You can't see much but I think it looks ok.

IMG]http://i1262.photobucket.com/albums/ii614/hofpig/Rusty011.jpg[/IMG]


You can see the fuel tank problem again.


The funny looking texture is citadel colour Typhus Corrosion. It's pretty good stuff for making rust.

Paul
SpeedyJ
Visit this Community
Bangkok, Thailand / ไทย
Member Since: September 17, 2013
entire network: 1,617 Posts
KitMaker Network: 66 Posts
Posted: Saturday, March 15, 2014 - 10:32 PM UTC
Hi Paul.
Great you show your progress. It looks good so far.
About the gap/fueltank. Why don't you cover it with some crap, like a blanket or wood. When you plan to put it on a base, a certain kind of tree, hedge growing through the car.

Regards,

Robert Jan
noddy927
Visit this Community
Scotland, United Kingdom
Member Since: February 15, 2013
entire network: 1,273 Posts
KitMaker Network: 149 Posts
Posted: Sunday, March 16, 2014 - 09:28 AM UTC
Nice work Paul
I agree with Robert, using something as part of whats in the vehicle, which will add to the scene and hide the missing tank.
Glad to see your work on the blogs Paul, I was getting worried as this is the 1st campaign I have proposed and it had gone quiet.
Good work from you all so far, we have some time to go, but keep going guys.

Pete