


Scratchbuilders!
Built a model or part from your own materials lately?
Built a model or part from your own materials lately?
Hosted by Mike Kirchoff
Official EOD Campaign thread

adamsmasher

Member Since: June 27, 2009
entire network: 192 Posts
KitMaker Network: 135 Posts
Posted: Sunday, August 14, 2011 - 09:30 AM UTC
Looks like you will be killing the undead in style.

HARV

#012
Member Since: November 07, 2003
entire network: 3,098 Posts
KitMaker Network: 899 Posts
Posted: Sunday, August 14, 2011 - 12:00 PM UTC
Still our here killing and surviving. I found another safe haven of nutrition!!

Looking forward to more help!!
Randy
Looking forward to more help!!
Randy


Anirudharun

Member Since: February 16, 2008
entire network: 597 Posts
KitMaker Network: 35 Posts
Posted: Thursday, August 18, 2011 - 07:24 AM UTC
Hey all!
Been following this awesome campaign since I enlister, and I finally found some time in between the never-ending stream of humvees, to start my entry. I picked up a 1/35 Revell Unimog and am going to convert it into an armoured zombie slaying gun truck. No pics yet (too dark here) but I've started the cabin interior by adding new seats, radios, instruments and wiring.
Photos soon
Loving everyones work so far!!
Anirudh
Anirudharun
Member Since: February 16, 2008
entire network: 597 Posts
KitMaker Network: 35 Posts
Posted: Saturday, August 20, 2011 - 07:32 AM UTC
Some quick photos of the build so far. There'll be an armoured bed at the back with the m134 pictured and two m240s as well as all the needed supplies. The armour on the bed will be built/painted to look as if it has been scavenged from various sources; an apc, a boat hull etc.
I'm thinking of adding some sort of improvised obstacle blade up front as well.


Anirudh
I'm thinking of adding some sort of improvised obstacle blade up front as well.
Anirudh

old-dragon
Member Since: August 30, 2005
entire network: 3,289 Posts
KitMaker Network: 592 Posts

Posted: Saturday, August 20, 2011 - 09:12 AM UTC
Quoted Text
... but my job isn't to plow, but to tell you where the ghoulies are to GO PLOW.
Him Bob or me boB...I can handle the "plowing" stuff I guess!
Just got back to this build and it's nice to see an extention...guess I get to build a trailer after all! Time to add more nastyness to the semi!........

17741907

Member Since: December 05, 2007
entire network: 953 Posts
KitMaker Network: 50 Posts

Posted: Saturday, August 20, 2011 - 10:58 AM UTC
It's very inspirational work Anirudh...Looking great so far.... 

Anirudharun
Member Since: February 16, 2008
entire network: 597 Posts
KitMaker Network: 35 Posts
Posted: Sunday, August 21, 2011 - 03:01 AM UTC
Cheers Hakan.
A small update for today. I've painted the chassis, engine, wheels and cab interior and attached them together. I've also built some large stowage bins under the bed, and an air filtration unit for the cab.


The seats are painted differently to look like they were scavenged from separate vehicles.


The air filter to keep the cab air clean. I've also added a taller exhaust pipe.
Hows everyone elses build going?
Anirudh
A small update for today. I've painted the chassis, engine, wheels and cab interior and attached them together. I've also built some large stowage bins under the bed, and an air filtration unit for the cab.
The seats are painted differently to look like they were scavenged from separate vehicles.
The air filter to keep the cab air clean. I've also added a taller exhaust pipe.
Hows everyone elses build going?
Anirudh

AussieReg
#007

Member Since: June 09, 2009
entire network: 8,156 Posts
KitMaker Network: 593 Posts
Posted: Sunday, August 21, 2011 - 03:37 AM UTC
Hi Anirudh, and thanks for joining the fun ! You have made an excellent start to your build, and the great progress pictures show some impressive detail work going on.
Keep fighting the good fight guys, I'll be back working on my GAZ as soon as I get a couple more aircraft off the bench !
Cheers, D
Keep fighting the good fight guys, I'll be back working on my GAZ as soon as I get a couple more aircraft off the bench !
Cheers, D


Tonyfr
Member Since: June 12, 2009
entire network: 516 Posts
KitMaker Network: 96 Posts

Posted: Sunday, August 21, 2011 - 05:23 AM UTC
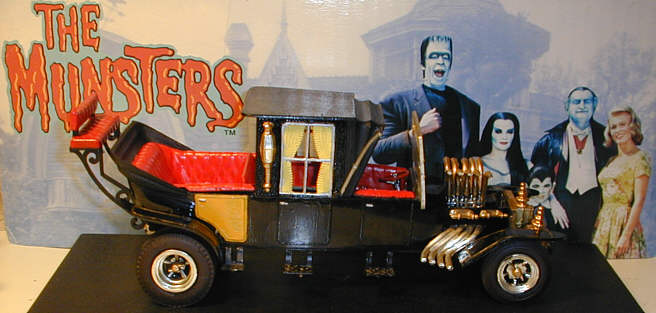
Went to start on building my WIlly hot rod zombie machine and remembered I have an extra The Munsters Koach. I have decided to turn the Munsters Koach into a zombie killing machine. Photo from munsterskoach.com
Anirudharun
Member Since: February 16, 2008
entire network: 597 Posts
KitMaker Network: 35 Posts
Posted: Thursday, September 08, 2011 - 07:31 AM UTC
Another update tonight guys. Its a bit dark to take good photos now but hopefully you get the idea. I've sort of changed the idea a bit; now the truck will be abandoned by its crew as if it ran out of fuel or they were over run. No photos of the truck yet, just some of the base.


Shutter doors down:

Shutter doors up:

And the "mechanism"

Nothing special here, just some slats, a roller, a frame to mount it and some detailing. Photos of the truck tomorrow!
Anirudh
Shutter doors down:
Shutter doors up:
And the "mechanism"
Nothing special here, just some slats, a roller, a frame to mount it and some detailing. Photos of the truck tomorrow!
Anirudh
AussieReg
#007
Member Since: June 09, 2009
entire network: 8,156 Posts
KitMaker Network: 593 Posts
Posted: Friday, September 16, 2011 - 12:41 PM UTC
Hey guys, I just found this build trawling through one of my local Aussie forums HELL CAMINO
Niiiiiiice
Niiiiiiice
adamsmasher
Member Since: June 27, 2009
entire network: 192 Posts
KitMaker Network: 135 Posts
Posted: Friday, September 16, 2011 - 05:41 PM UTC
Nice work on that link you posted, Damian.
Finally finished this beast! Per a suggestion from my Wife, I discovered that shrinky-dinks make great glass (especially if you want that look of old warped glass).


I really should have put something in the photos to show scale. This thing is huge!

Finally finished this beast! Per a suggestion from my Wife, I discovered that shrinky-dinks make great glass (especially if you want that look of old warped glass).
I really should have put something in the photos to show scale. This thing is huge!
AussieReg
#007
Member Since: June 09, 2009
entire network: 8,156 Posts
KitMaker Network: 593 Posts
Posted: Friday, September 16, 2011 - 06:16 PM UTC
Man that thing is AWESOME Adam, it looks primed and ready to walk out and do some serious carnage ! Superb work my friend, a real touch of "Jules Verne meets George Lucas" about it. Your wife is spot on as well, the glass looks great. Now why don't you climb inside it and fire it up, get your wife to take a pic with you at the helm, then we can see the scale.
Cheers, D
Cheers, D

Keeperofsouls2099
Member Since: January 14, 2009
entire network: 2,798 Posts
KitMaker Network: 286 Posts
Posted: Saturday, September 17, 2011 - 10:58 AM UTC
Ive been waiting for you to finish this since day one!Great inspiring work Adam very good job I love the weathered metal look Auss said it right with Jules Vern I just wander what elese is up there walking around in that mind of yours 


Bigrip74
Member Since: February 22, 2008
entire network: 5,026 Posts
KitMaker Network: 461 Posts

Posted: Saturday, September 17, 2011 - 12:22 PM UTC
Adam,
I can not add any thing that Damian and Justin have already said." JUST TOTALLY AWSOME".
Bob
I can not add any thing that Damian and Justin have already said." JUST TOTALLY AWSOME".
Bob
adamsmasher
Member Since: June 27, 2009
entire network: 192 Posts
KitMaker Network: 135 Posts
Posted: Sunday, September 18, 2011 - 08:45 AM UTC
Thanks guys! There has been a lot of amazing stuff posted here, so I'll take that compliment highly! I was definitely going for something Vernes-esque, so I guess I succeeded.
Already started on something new
Already started on something new

Bluestab
Member Since: December 03, 2009
entire network: 2,160 Posts
KitMaker Network: 123 Posts
Posted: Wednesday, October 19, 2011 - 06:29 PM UTC
With campaign end date extended I am thinking about trying to do my original concept vehicle...the scout and the tow half-track vehicle. My boat is done but I've lost some of my under construction pictures I'm going to have to retake the finished pictures. I know I've said it before but I'll try to get some pics up on the boat soon.
@Adam, your walker looks great. You definitely got the Vernesque look to show through. Just oodles of detail work to take in. I really like the look of the beast. The driver's canopy really looks great.
@Adam, your walker looks great. You definitely got the Vernesque look to show through. Just oodles of detail work to take in. I really like the look of the beast. The driver's canopy really looks great.
17741907
Member Since: December 05, 2007
entire network: 953 Posts
KitMaker Network: 50 Posts
Posted: Wednesday, October 19, 2011 - 11:12 PM UTC
This is very unique Adam...Well done....

DickyF

Member Since: February 01, 2010
entire network: 54 Posts
KitMaker Network: 29 Posts
Posted: Sunday, October 23, 2011 - 08:12 AM UTC
Hi all - my first post hereabouts spent a very pleasant evenin' trolling thru this Campaign - congrats to all, some stunning builds here, finished and in progress. I'm a scratchbuilder and thought I'd post some pics of my near future build....Riot Control 2031
Not too sure how the piccy posting thing goes on around here, here goes....

Not too sure how the piccy posting thing goes on around here, here goes....

DickyF
Member Since: February 01, 2010
entire network: 54 Posts
KitMaker Network: 29 Posts
Posted: Sunday, October 23, 2011 - 08:18 AM UTC
OK that worked...... By the way that last picture was of some toes!
Feet, with toes not yet added:

Lower legs with armour plate added and 'ankles' drilled for pins:

and attached to completed feet:

Feet connected to back of lower leg with rams:

Thigh frames:

...as you've probably gathered this build is already completed and was done as fun/what if and it was only seeing this thread that prompted me that some people might like to see it...
All comments and ?s welcome
Dicky
17741907
Member Since: December 05, 2007
entire network: 953 Posts
KitMaker Network: 50 Posts
Posted: Sunday, October 23, 2011 - 12:08 PM UTC
Fine work Richard....Looking very good....
DickyF
Member Since: February 01, 2010
entire network: 54 Posts
KitMaker Network: 29 Posts
Posted: Monday, October 24, 2011 - 05:38 AM UTC
Thank you very much Hakan
Bulked out the thigh frames and attached the knee hinges:

Right leg:

Then made up the pelvis block - this is the rough form note oversized plating ready for sanding back - this saves time with accurate cutting and ensures parts fit exactly:

Sanded to shape and detailed - exhaust fitted:

Then made a start on the right arm weaponry - a minigun: First the barrels, solid rod drilled out:

and body:

and complete:

Hope you like.....
Dicky
adamsmasher
Member Since: June 27, 2009
entire network: 192 Posts
KitMaker Network: 135 Posts
Posted: Monday, October 24, 2011 - 06:20 AM UTC
Fantastic work Richard! Love all of the detail.
DickyF
Member Since: February 01, 2010
entire network: 54 Posts
KitMaker Network: 29 Posts
Posted: Tuesday, October 25, 2011 - 09:37 AM UTC
Thanks v.much Adam - glad u like it
Next up was the right upper arm including ammo case:

and then an ammo belt for the minigun:

and assembled......

I then cut the panels for the upper torso:

I assembled the upper torso and as with the pelvis detailed with 1mm hex rod bolts and various exhausts and panels I also added shoulder armour:

More later............
adamsmasher
Member Since: June 27, 2009
entire network: 192 Posts
KitMaker Network: 135 Posts
Posted: Tuesday, October 25, 2011 - 10:21 AM UTC
@Richard: Did you have this all drawn up and planned out, or just build it as you go?
 |

WEB HOSTING BY


Copyright ©2021 KitMaker Network and Kitmaker Network, a subsidiary of Silver Star Enterprises
All Rights Reserved. Please read our Conditions of Use and Privacy Policy.
All Rights Reserved. Please read our Conditions of Use and Privacy Policy.