Scratchbuilders!
Built a model or part from your own materials lately?
Hosted by Mike Kirchoff
Official EOD Campaign thread
grimmo
Visit this Community
Queensland, Australia
Member Since: January 17, 2006
entire network: 752 Posts
KitMaker Network: 94 Posts
Posted: Sunday, January 02, 2011 - 10:09 PM UTC
Heres an update: Got the turret on my hummer:


randyd
Visit this Community
United States
Member Since: July 04, 2009
entire network: 241 Posts
KitMaker Network: 29 Posts
Posted: Monday, January 03, 2011 - 04:50 PM UTC

Matt, ALLLRRRight!! Got some guns on the Hummer, looks good and nasty now

Thanks for the kind words, guys ( just another styrene junkie, Bob ! )

D and Matt, primed the foam first, Cheap rattlecan acrylic. First try used Tamiya, big mistake as a heavy coat started to eat the foam. Whoops!

Randy
Bluestab
Visit this Community
South Carolina, United States
Member Since: December 03, 2009
entire network: 2,160 Posts
KitMaker Network: 123 Posts
Posted: Wednesday, January 05, 2011 - 11:09 AM UTC
Update time.

This is the boat's cab...front and rear views. It's intentionally crude in appearance. Its designed so that it can be removed. I went with a smaller cabin due to the kit's raised engine deck. The extended cabin design appeared very top heavy. I'm going to add some lights to the front, in addition to the lights on top of the cabin. The back has not been enclosed in those pictures. There's some added detail to the cabin's ceiling. Note the right side of the cabin wall has been raised and leveled off to match the driver's side.


Cabin shot with the top removed and the captain at the helm. The figure is the kit's captain with some modifications. You can see some of the added cab detail as well as the shielding on the engine deck. There's a gap between the shields and the cabin to allow passage between the bow and stern. You can see the modification made to the right side to level out the bulkhead. That seam will be covered by a gun rack. Don't ask why I picked blue for the hatch cover.


The lazy crew and a side shot of the boat. The crew will have to pull themselves together. However, they've come along way since the spares box.


Next up is to finish up the figures, weathering, and stocking the boat with loot. At the present, I am not planning on putting it in a diorama. I really don't want to tangle with a water base right now. Plus, I still have the original campaign idea to work on.
AussieReg
Staff MemberAssociate Editor
AUTOMODELER
#007
Visit this Community
Victoria, Australia
Member Since: June 09, 2009
entire network: 8,156 Posts
KitMaker Network: 593 Posts
Posted: Wednesday, January 05, 2011 - 12:46 PM UTC
Hi all. Unfortunately I am the bearer of bad news this morning. I got a message from Hermon that he has been in hospital with his wife Selena who has taken quite ill. I don't need to go into any detail but Hermon has asked me to let everybody know that he won't be around for a while, and I'm sure that you will join with me in praying for a speedy recovery for Selena.

Our thoughts are with you guys 'Cuda.

Cheers, D
grimmo
Visit this Community
Queensland, Australia
Member Since: January 17, 2006
entire network: 752 Posts
KitMaker Network: 94 Posts
Posted: Wednesday, January 05, 2011 - 01:22 PM UTC
Hope Selina gets better!

Hey Alex, what are the figures and the hummer for in the backgound?

the boat is looking sweet! I modified a PBR once, with the UG turret from a LTVP, and the top deck and turret from a spare bradley once. looked awesome, but i didnt get any pics, and had to pull it apart for a paid gig. then the artist didnt even use it!
randyd
Visit this Community
United States
Member Since: July 04, 2009
entire network: 241 Posts
KitMaker Network: 29 Posts
Posted: Wednesday, January 05, 2011 - 05:41 PM UTC
Hey D, We will be thinking of Selina. Hope things get better quickly.


Alex, Nice to see the boat!!! Looks great, feel better about waterway security now

Randy
Bluestab
Visit this Community
South Carolina, United States
Member Since: December 03, 2009
entire network: 2,160 Posts
KitMaker Network: 123 Posts
Posted: Wednesday, January 05, 2011 - 05:58 PM UTC
Damian, Thanks for the heads up. Best wishes for Herm and his family and hopefully a speedy recovery.

Matt, thanks but the boat hasn't lived up to my own expectations, mainly as I really didn't think out the design before I committed to the the boat as my vehicle. I'm hoping the figures will add alot to the finished project.

The figures and Humvee in the background are from a EOD style project I began about a year or so ago. Actually the Humvee was assembled about 10 years ago and has been sitting in a box since then. I figured I'd use it for something. If the humvee hadn't been assembled I might have held out and used it for this EOD campaign. It never fails, I finish a kit and a campaign for it is announced.

They're one of my Zombie Fast Reaction Teams. The figures are actually heliborne troopers. They're a mixture of parts, but I borrowed alot from Dragon's line of SWAT style figures.Their whirlybird is a Panda UH-1N. I can see them jumping off in a WalMart parking lot to fight an outbreak.

The humvee is part of the Fast Reaction Teams' ground element. I'm still toying with what I'll do with it. A checkpoint at a quarantine zone maybe.
grimmo
Visit this Community
Queensland, Australia
Member Since: January 17, 2006
entire network: 752 Posts
KitMaker Network: 94 Posts
Posted: Sunday, January 09, 2011 - 12:47 AM UTC
Alex, thats awesome. i've done the same with a very old hummer, and made a zombie rescue team with some dragon swat figures. would you post some pics of yours up?
adamsmasher
Visit this Community
Illinois, United States
Member Since: June 27, 2009
entire network: 192 Posts
KitMaker Network: 135 Posts
Posted: Sunday, January 09, 2011 - 06:31 AM UTC
We're all rooting for Selena, Hermon. Here's to a speedy recovery!
Keeperofsouls2099
Visit this Community
Florida, United States
Member Since: January 14, 2009
entire network: 2,798 Posts
KitMaker Network: 286 Posts
Posted: Wednesday, January 19, 2011 - 01:29 PM UTC
Well this one grinded to a halt. How's everybody's progress
Loobes
Visit this Community
England - South West, United Kingdom
Member Since: August 20, 2007
entire network: 409 Posts
KitMaker Network: 33 Posts
Posted: Wednesday, January 19, 2011 - 07:41 PM UTC
Haha i have barely started :/ Gonna start up again once the Lotus is done at the weekend...
Bigrip74
Visit this Community
Texas, United States
Member Since: February 22, 2008
entire network: 5,026 Posts
KitMaker Network: 461 Posts
Posted: Wednesday, January 19, 2011 - 08:05 PM UTC

Quoted Text

Well this one grinded to a halt. How's everybody's progress


Nah just getting ready for the the real hard stuff (painting and weathering) and drawing out a template for the teeth on the from bumper plate.

Bob
randyd
Visit this Community
United States
Member Since: July 04, 2009
entire network: 241 Posts
KitMaker Network: 29 Posts
Posted: Thursday, January 20, 2011 - 03:50 AM UTC
When you're right, your right Justin!!

Time to show some progress...

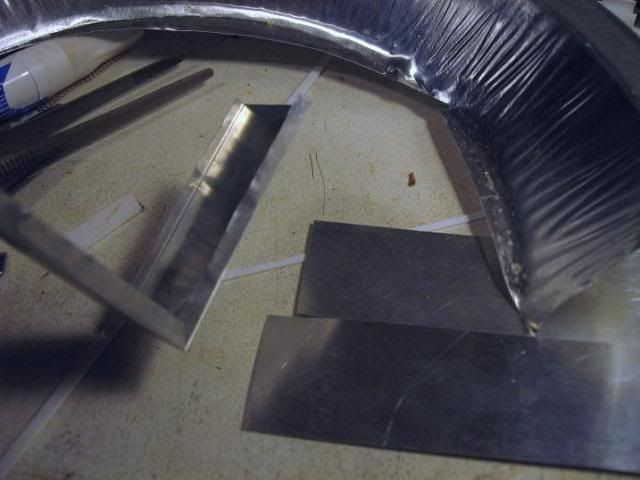
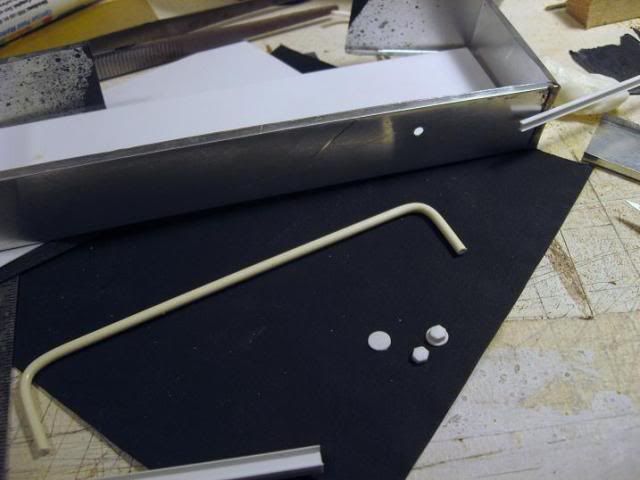
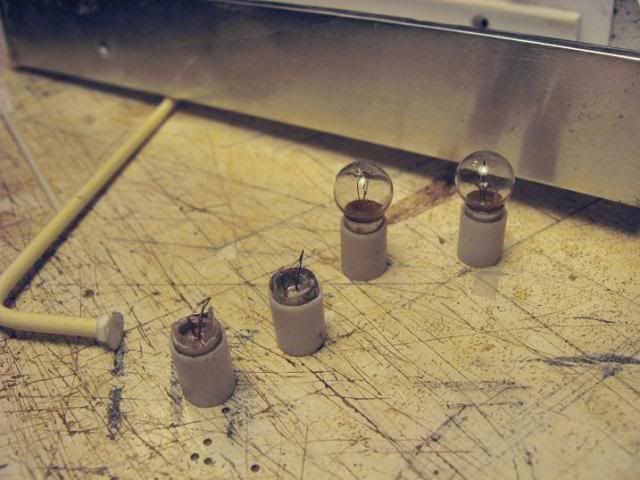
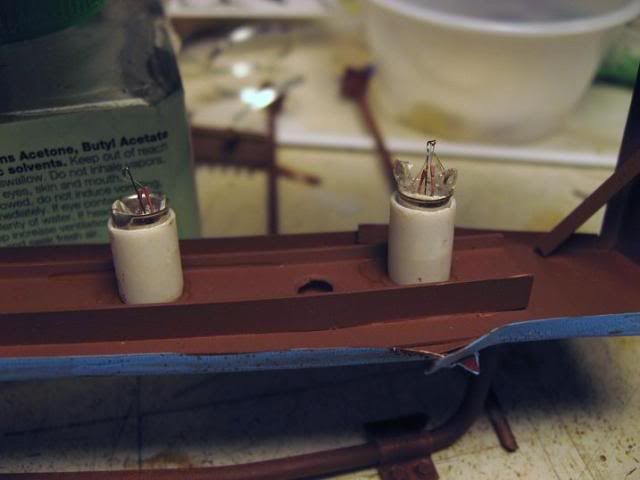
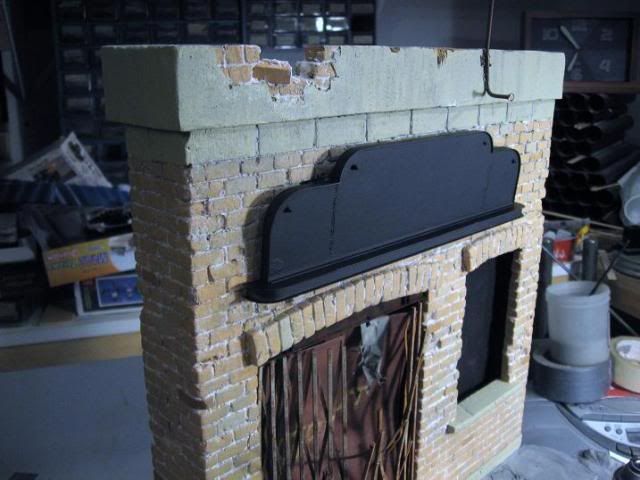
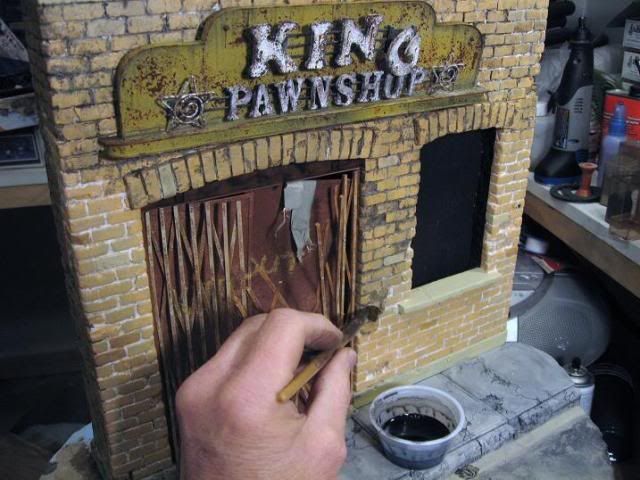
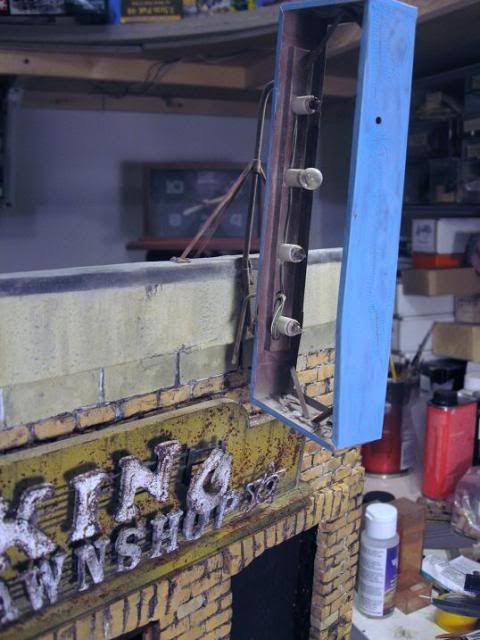
Working on the building and base in this update, Needed some signage, will use some metal from pie tins and some light bulbs from the train section...


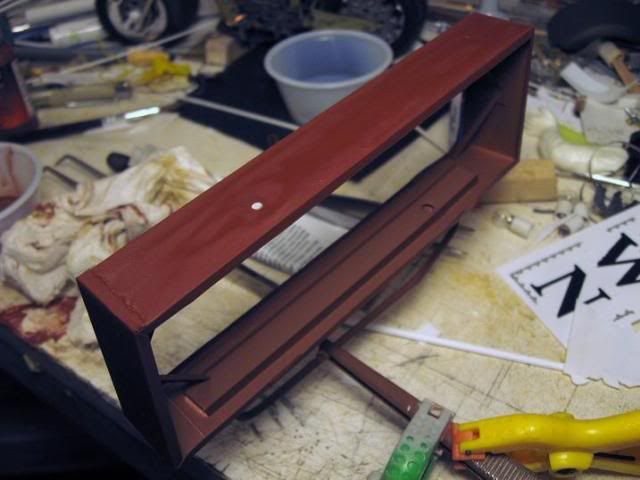
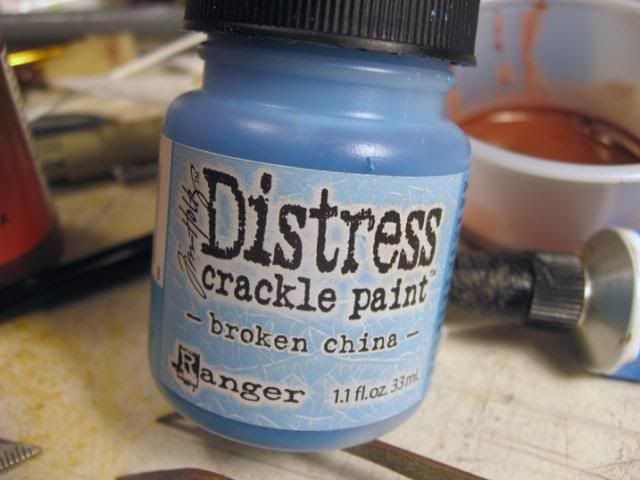
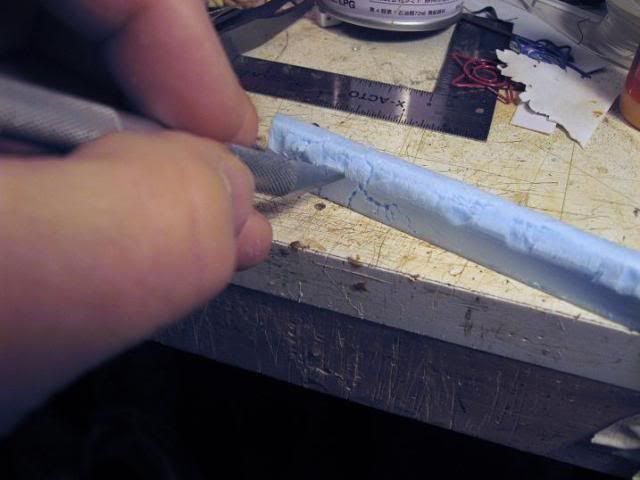
Wanted a little color and wanted to try some new stuff. One of my favorite car modeler's named Virgil had posted his results with a crackle paint product that I thought was pretty neat.
He was using it to reproduce a scale chipped and aged look on wood with great results.
Figured I would try it on metal for a flaking aged paint look...


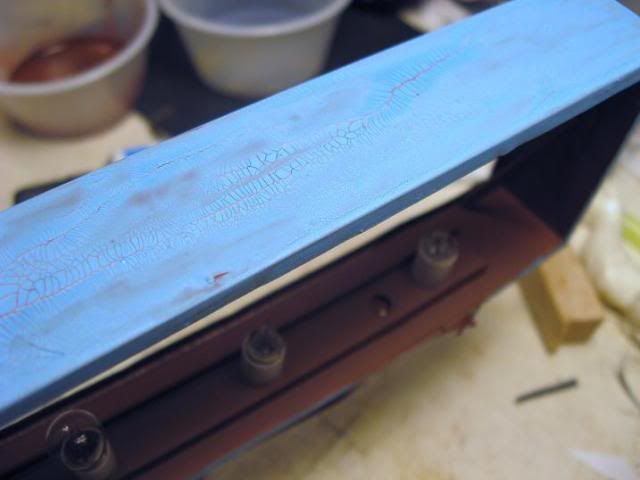
I was kinda disappointed with my results, think it works better simulating damage to paint on a wood surface, but I'll live with it for now.

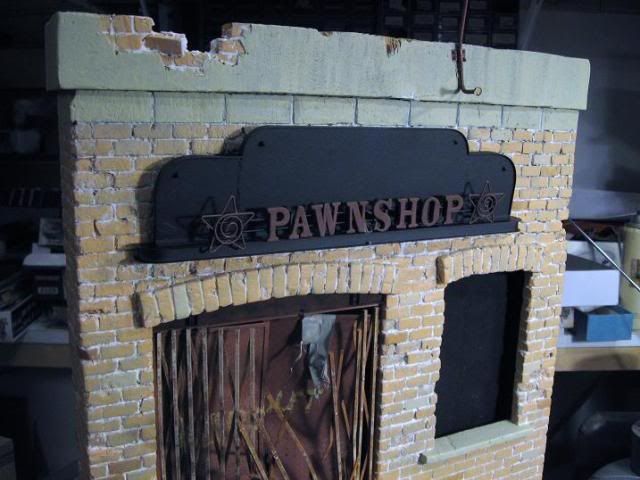
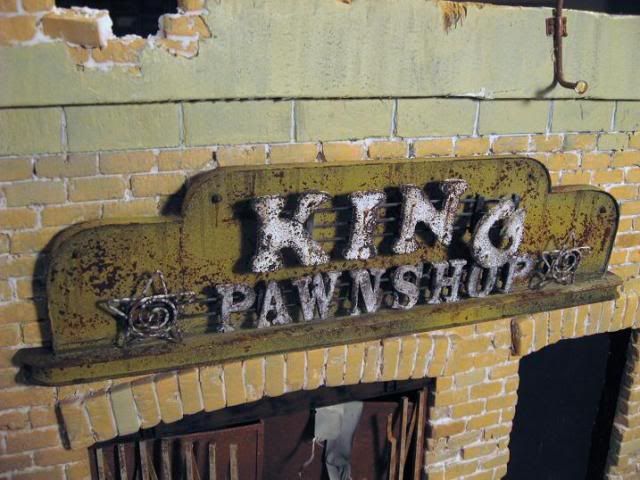
More signs, this time going for a kinda Art Deco style and going back to the usual paint chipping and rusting.

The lettering I found in the scrapbooking section at the local craft store, some is cork and some is foam.


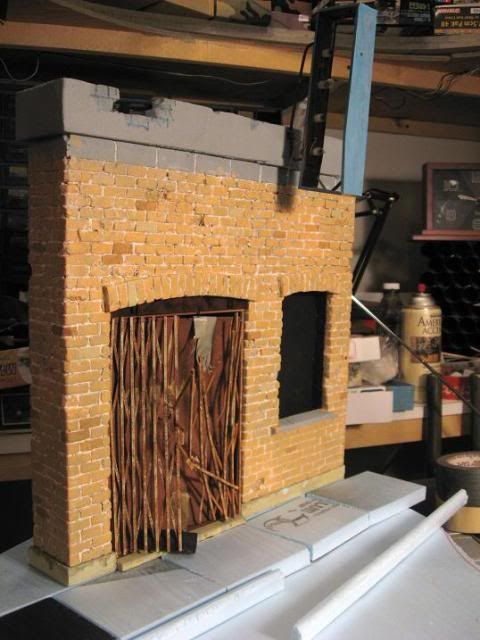
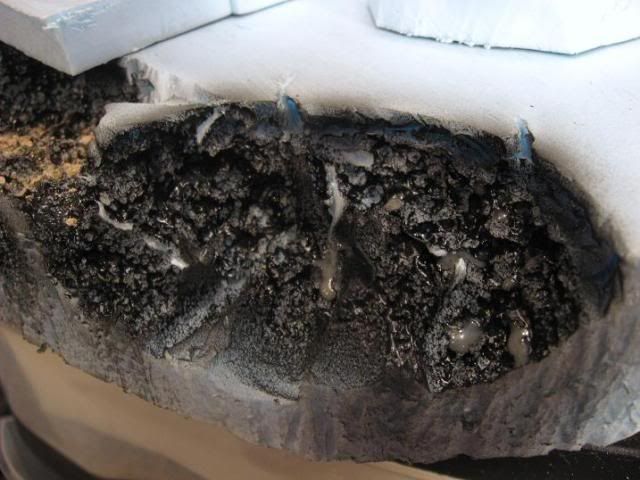
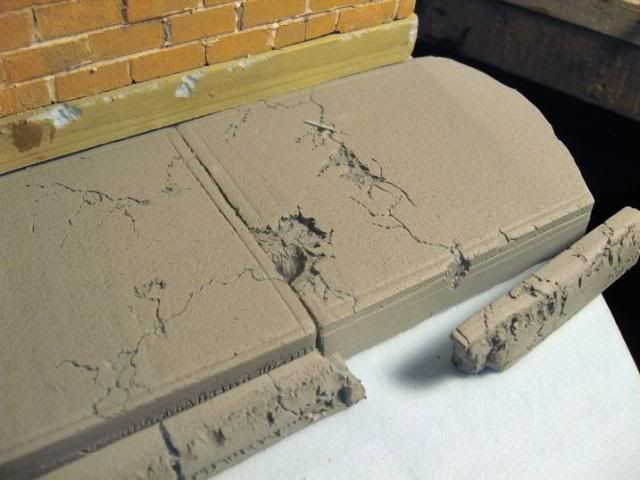
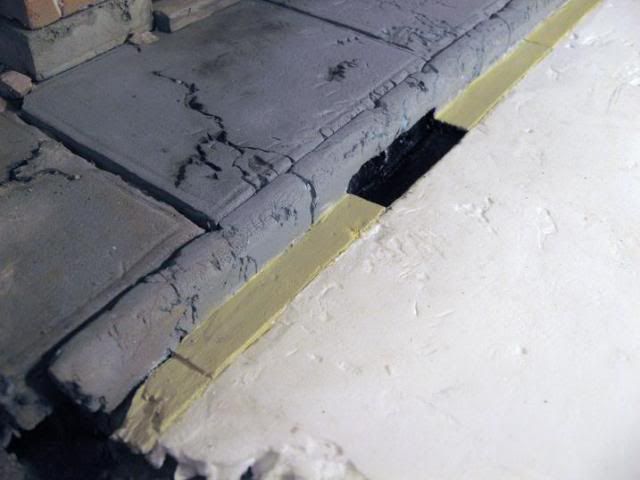
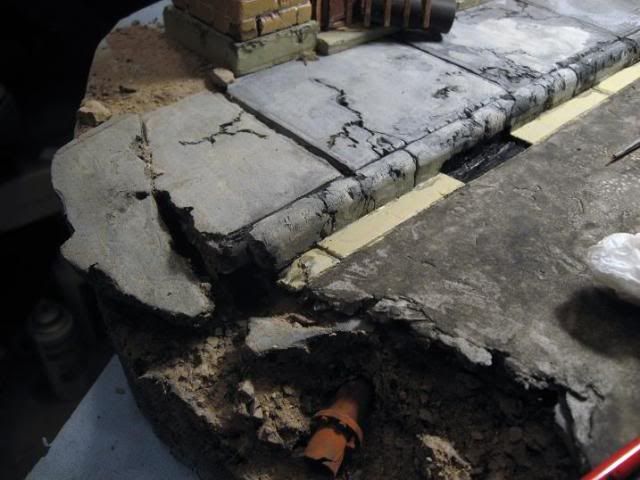
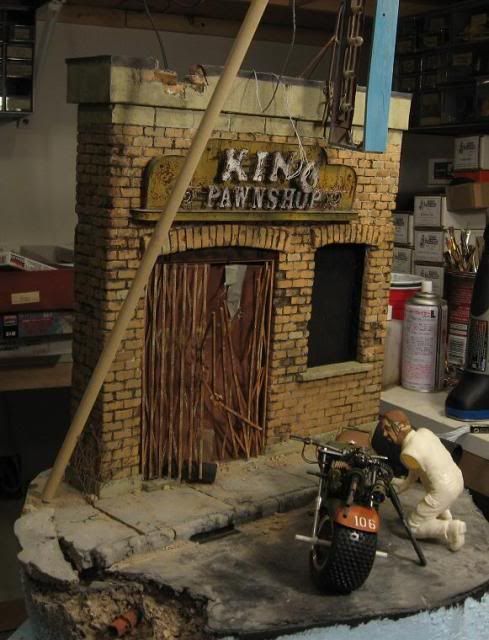
Adding the street, sidewalks, curbs and gutters.....and one big pothole..


These last couple of pics show a mock up of a leaning power pole and the bike in the scene .
The idea is the lone scout working on his bike, hearing a noise, reaching for his gun.

They also show a first look at a figure!! O'kay kinda of a fig. The body is a Tamiya 1/12th guy from a 70's? kit and is probably the worst piece of plastic I've ever seen!


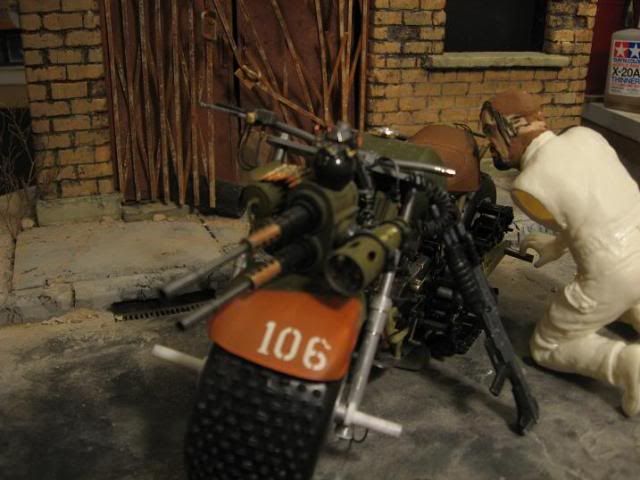
So far I've chopped his head off and replaced it with a head that came from a plastic action figure, let just say it is a work in progress!!

That is all for now, feel free to comment.

Randy


BigSmitty
Visit this Community
Minnesota, United States
Member Since: October 01, 2008
entire network: 597 Posts
KitMaker Network: 140 Posts
Posted: Thursday, January 20, 2011 - 05:12 AM UTC
OK guys, seriously...I've been lurking in this thread since November. I'm throwing my hat in. I see lots of "heavy movers" with the exception of Randy's bike, so I think for our army we're going to need some fast recon types. In that vein, my first offering will be VERY loosely based on this:


Lightly armed, lightly armored, with a heavy dose of comm gear and TV/vision systems. Being able to shift in 150 milliseconds means those zombies shouldn't get too close anyways. I will assume for this build the zombies have not taken out all our satellite stations so uplink/downlink options are still available. Also, as this is a rear engined vehicle, I have lots of space "under the hood" for stuff. I'll probably fab a roll cage, steel tubing around the body, some sort of "zombie cleaver" on the front, spikes on the wheels, and all the audio/visual stuff.

I haven't done anything outside of armor since coming back to modeling in November of 2010 so your comments and criticisms are welcome... well mostly.
Bigrip74
Visit this Community
Texas, United States
Member Since: February 22, 2008
entire network: 5,026 Posts
KitMaker Network: 461 Posts
Posted: Thursday, January 20, 2011 - 05:22 AM UTC
Welcome to EOD Matt, I guess there will be some rich people left. Build on and let us see that elite recon vehicle.

Bob
randyd
Visit this Community
United States
Member Since: July 04, 2009
entire network: 241 Posts
KitMaker Network: 29 Posts
Posted: Thursday, January 20, 2011 - 06:56 AM UTC
Hey Matt, Good to have you on board! Could use some recon help, the uglies are gettin' thick out there.

Like your choice of ride! For ideas , check out this build. He used the 350.

http://dqscaleworks.blogspot.com/

Look foward to see pics.

Randy
BigSmitty
Visit this Community
Minnesota, United States
Member Since: October 01, 2008
entire network: 597 Posts
KitMaker Network: 140 Posts
Posted: Thursday, January 20, 2011 - 07:46 AM UTC
Randy,

Something similar to that, but with a little less "cow" and more 21st century. I just thought about this... I need new tires, these slicks aren't gonna last long running over all those zombies.
VonCuda
Visit this Community
North Carolina, United States
Member Since: November 28, 2005
entire network: 2,216 Posts
KitMaker Network: 399 Posts
Posted: Thursday, January 20, 2011 - 07:47 AM UTC
Matt, welcome to the party. An armored fast mover is always welcome.

Randy, your dio is looking fantastic. The sidewalk and signs really bring out the desolate look to the landscape. I'd have to say my favorite part though is that busted storm water/sewer pipe under the road. Friggin' awsome details man. Bravo!
I've had a few setbacks in the last couple weeks but as soon as I get things at home more orderly and get a couple of airplane campaigns buttoned up I'll move back to my 8 wheel drive monster.


Hermon
randyd
Visit this Community
United States
Member Since: July 04, 2009
entire network: 241 Posts
KitMaker Network: 29 Posts
Posted: Thursday, January 20, 2011 - 10:09 AM UTC


Hey Hermon, Good to see you back!!!!! That dam Damien xo drank all the beer again

Take care of home and post when you can!

Thanks, Randy
BigSmitty
Visit this Community
Minnesota, United States
Member Since: October 01, 2008
entire network: 597 Posts
KitMaker Network: 140 Posts
Posted: Thursday, January 20, 2011 - 11:42 AM UTC
Let me preface this by saying...

I am NOT a car model guy. Last one I built was probably 25 years ago when I was in high school. Nevertheless, this engine is featured prominently in the kit, so I did my best:

Here's the lower engine:


Here is the upper half of the engine, along with a bit of "color" that will be hanging from somewhere inside the interior:


I thought it would add a bit of humor. Starting to get a formulation of some ideas for this; I keep a notepad next to me and jot them down.

So far I have:

Roll Cage

Fuel Drum (behind the driver's seat)

Rally Car Headlamps (donated by a Tamiya Repsol Ford Escort R/C)

Modified Steering Wheel

Scratchbuilt Spare Battery Rack with Batteries

Scratchbuilt Comm Center (to occupy the passenger seat area)

Laptop with swivel arm from dash

Open Driver's Door with "NASCAR" type netting draped over it

"6 pack" rocket launcher mounted over passenger side of hood

Targeting Pod for the "heavy movers"

Visual Detection System mounted over passenger side roof

Those are about all I came up with while waiting for paint to dry.
VonCuda
Visit this Community
North Carolina, United States
Member Since: November 28, 2005
entire network: 2,216 Posts
KitMaker Network: 399 Posts
Posted: Thursday, January 20, 2011 - 12:21 PM UTC
Matt, I always get a kick outta someone saying "I ain't a (fill in the blank) guy"....and then posting pic's of seriously cool model.

As for your list I'd change one thing and add one other. I'd switch out the NASCAR net for the passanger side and replace it with some round bars welded to the roll cage....or even some chain link.
Two, you're gonna have to put some kind of bad a** beefed up bumber on the front of that rig just incase you have to make a quick get away in a crowd of zombies. A winch is always a good idea on a fast mover too......to get the wrecked cars out of the way.

That's just me. You build it - you have fun. Those are the rules.

Hermon
VonCuda
Visit this Community
North Carolina, United States
Member Since: November 28, 2005
entire network: 2,216 Posts
KitMaker Network: 399 Posts
Posted: Thursday, January 20, 2011 - 12:23 PM UTC
Oh, and Randy.....who the hell gave Damian the keys to the liquor cabinet?

Hermon
BigSmitty
Visit this Community
Minnesota, United States
Member Since: October 01, 2008
entire network: 597 Posts
KitMaker Network: 140 Posts
Posted: Thursday, January 20, 2011 - 12:26 PM UTC
Yeah, I think I'm gonna keep the door closed, so that will allow me to use something more "beefier" for the door, like steel tubing. With all the work on the interior, I hate to have it all hidden behind heavy mesh.

I like the winch idea. I found some wheels courtesy of my M1128 Stryker AFV kit. Dual wheels in the back, singles in the front, but I'm keeping the rims

I'll have to lengthen both axles, so the car will sit low with "dune buggy" style wheels outside the body, fab up some welded on steel mudguards, etc.
AussieReg
Staff MemberAssociate Editor
AUTOMODELER
#007
Visit this Community
Victoria, Australia
Member Since: June 09, 2009
entire network: 8,156 Posts
KitMaker Network: 593 Posts
Posted: Thursday, January 20, 2011 - 02:25 PM UTC

Quoted Text

That dam Damian xo drank all the beer again


Quoted Text

Oh, and Randy.....who the hell gave Damian the keys to the liquor cabinet?


hic . . . . . . hey guys, look what I found . . . . . . . hic . . . . . . .. keys . . . . . . . .


shweeeeeet
Keeperofsouls2099
Visit this Community
Florida, United States
Member Since: January 14, 2009
entire network: 2,798 Posts
KitMaker Network: 286 Posts
Posted: Thursday, January 20, 2011 - 03:30 PM UTC