Official EOD Campaign thread
Illinois, United States
Member Since: June 27, 2009
entire network: 192 Posts
KitMaker Network: 135 Posts
Posted: Saturday, December 18, 2010 - 06:18 AM UTC
Texas, United States
Member Since: February 22, 2008
entire network: 5,026 Posts
KitMaker Network: 461 Posts
Posted: Saturday, December 18, 2010 - 07:36 AM UTC
Adam, your mind is sick,

but that build is even sickier

those zombies have no chance with the crew here. Great building so far and I agree with the dented brass.
Bob
If it aint broke dont fix it.
AussieReg
 Associate Editor
#007
Victoria, Australia
Member Since: June 09, 2009
entire network: 8,156 Posts
KitMaker Network: 593 Posts
Posted: Saturday, December 18, 2010 - 10:29 AM UTC
Adam, that critter is AWESOME !! I can't wait to see what sort of colour scheme you've got cooking for it.
Cheers, D
ON the bench
Revell 1/24 '53 Corvette (building as '54)
Revell 1/24 BMW 507 Coupe and Cabrio
Italeri 1/48 Me262 B-1a/U1 Nightfighter
Monogram 1/24 '57 Chevy Nomad
Dragon 1/350 USS Frank Knox DD-742
Florida, United States
Member Since: January 14, 2009
entire network: 2,798 Posts
KitMaker Network: 286 Posts
Posted: Saturday, December 18, 2010 - 11:54 AM UTC
looking very death bringish there Adam totally awesome

"From time to time, the tree of liberty must be watered with the blood of
tyrants and patriots."
- Thomas Jefferson
IPMS#47611
United States
Member Since: July 04, 2009
entire network: 241 Posts
KitMaker Network: 29 Posts
Posted: Sunday, December 19, 2010 - 06:56 PM UTC
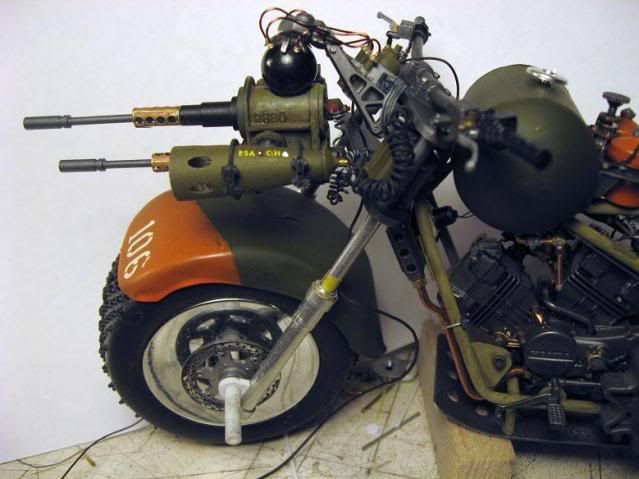
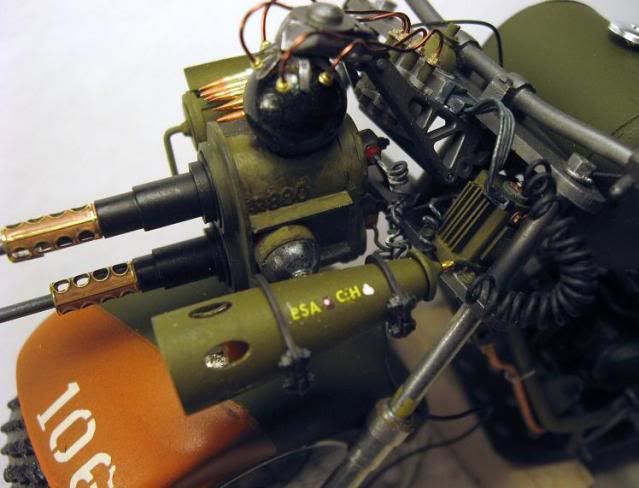
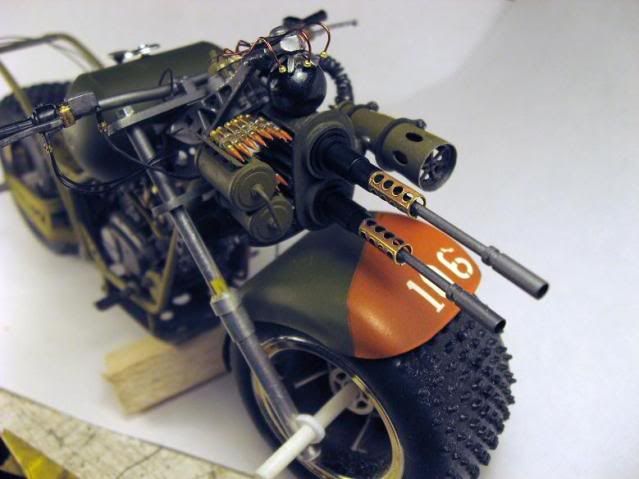
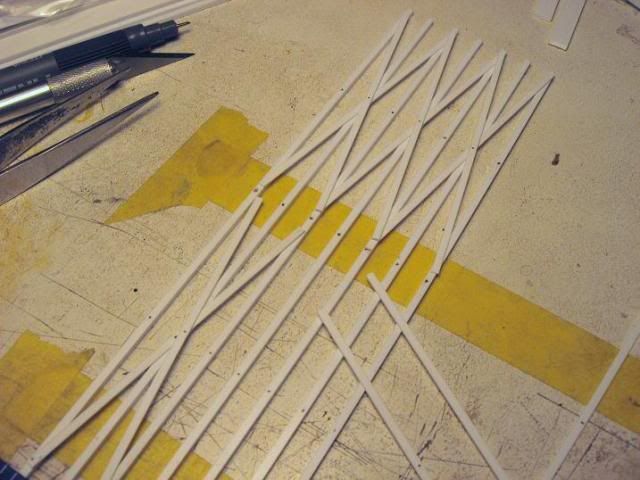
Adam, That is a killer update!!! What great scratch work, love the effort on the double saw blades. This is soooooo cool, gotta go look some more.....Randy
North Carolina, United States
Member Since: November 28, 2005
entire network: 2,216 Posts
KitMaker Network: 399 Posts
Posted: Monday, December 20, 2010 - 12:52 AM UTC
Ditto what everyone else has already said Adam. You're showing not only serious building skills but one hell of an imagination. Freakin' cool stuff man!
ps: The louvers aren't sloppy. They look great.
Hermon

"Those who would give up Essential Liberty
to purchase a little Temporary Safety,
deserve neither Liberty nor Safety."
Benjamin Franklin
South Carolina, United States
Member Since: December 03, 2009
entire network: 2,160 Posts
KitMaker Network: 123 Posts
Posted: Monday, December 20, 2010 - 07:15 PM UTC
Just an update since I've not done that in a bit. The Pibber is basically done. I'm doing figures and crew now. Another thing is that I've been thinking too hard again.
Originally I was going to give it a 90mm recoilless rifle from the spares but then I figured that because of stability issues hitting anything would be near impossible. And I was thinking that it wouldn't really have a use against the skin bags. On that note, being out on the water would really remove the crew from direct harm from zombies so there really wouldn't be alot of need for heavy plating. Besides, I'm looking at the Pibber as a patrol and raider delivery vehicle, not an ironclad.
I am putting together a bit of a background story to sort of explain the boat. I also plan to do the halftrack wrecker recovering the Mutt. Minus the backtracking and changes, the work on the Pibber is pretty minimal. As is, I don't think it really earns a campaign badge. Plus I want to follow through on the original kits.
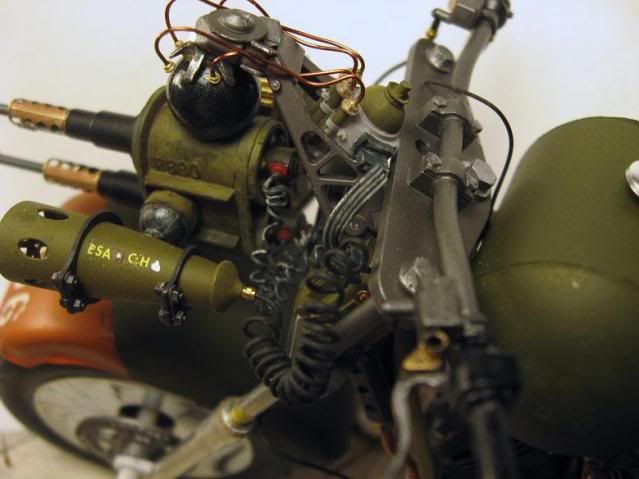
Adam, that thing is looking great. Love the detail on the arms. The louvers look battle worn.
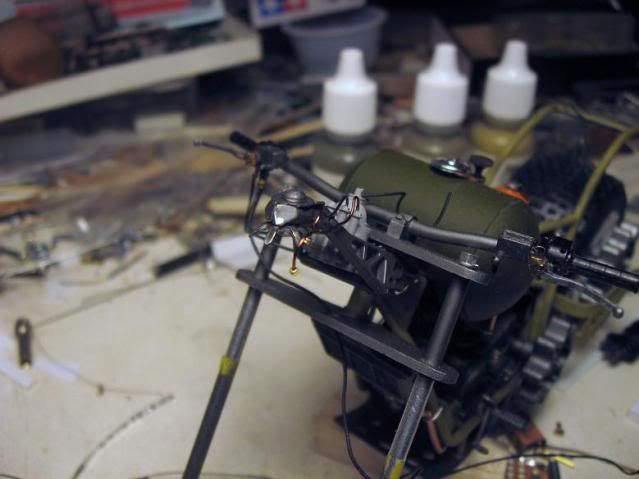
Randy, nice work on the bike.
Queensland, Australia
Member Since: January 17, 2006
entire network: 752 Posts
KitMaker Network: 94 Posts
Posted: Tuesday, December 21, 2010 - 09:12 PM UTC
Alex, the 90mm wouldn't be too bad. If you loaded it with canister!
United States
Member Since: July 04, 2009
entire network: 241 Posts
KitMaker Network: 29 Posts
Posted: Wednesday, December 22, 2010 - 05:25 AM UTC
Texas, United States
Member Since: February 22, 2008
entire network: 5,026 Posts
KitMaker Network: 461 Posts
Posted: Wednesday, December 22, 2010 - 06:41 AM UTC
"BRAVO"!!!!!!!!!!!!!!!!! Randy D. fantastic job.
Bob
If it aint broke dont fix it.
South Carolina, United States
Member Since: December 03, 2009
entire network: 2,160 Posts
KitMaker Network: 123 Posts
Posted: Wednesday, December 22, 2010 - 08:51 AM UTC
Matt, given the current layout the 90mm would take up alot of room and it's field of fire would be limited to the rear and sides of the boat. I'd have to makes some modifications to the waste gunners positions as well to get those side shots. I do have a pair of 57mm recoilless rifles from Tamiya's US Weapons Set that I might try to include.
The figures are coming out alright. They're spares box compilations. I'm using tissue paper and white glue instead of putty for some of the modifications. I wish I had taken some pictures of them before the base paint went on. They looked like they were wearing orange leg warmers. I am going for a mixed and motley looking group.
Anyway, I'll try to get some pictures up in the next few days. I don't want to put anything up and then change it.
Florida, United States
Member Since: January 14, 2009
entire network: 2,798 Posts
KitMaker Network: 286 Posts
Posted: Wednesday, December 22, 2010 - 01:08 PM UTC
randy im speachless amazing work my friend.you gotta get out more

by the way you must have a pc.of everything laying around.It looks like scratch builders paradise on you bench.
"From time to time, the tree of liberty must be watered with the blood of
tyrants and patriots."
- Thomas Jefferson
IPMS#47611
United States
Member Since: July 04, 2009
entire network: 241 Posts
KitMaker Network: 29 Posts
Posted: Wednesday, December 22, 2010 - 04:39 PM UTC
Thanks Bob

Hi Justin, Thanks for the kind words!! you know how it is, you keep finding those little bits and you just know that someday you'll need it!!
Randy
North Carolina, United States
Member Since: November 28, 2005
entire network: 2,216 Posts
KitMaker Network: 399 Posts
Posted: Wednesday, December 22, 2010 - 05:16 PM UTC
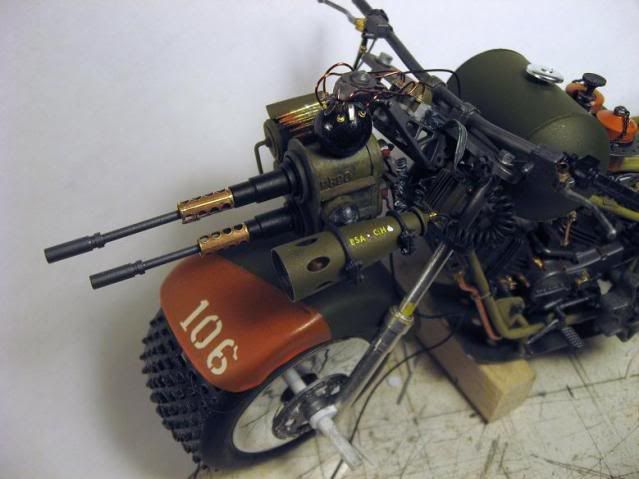
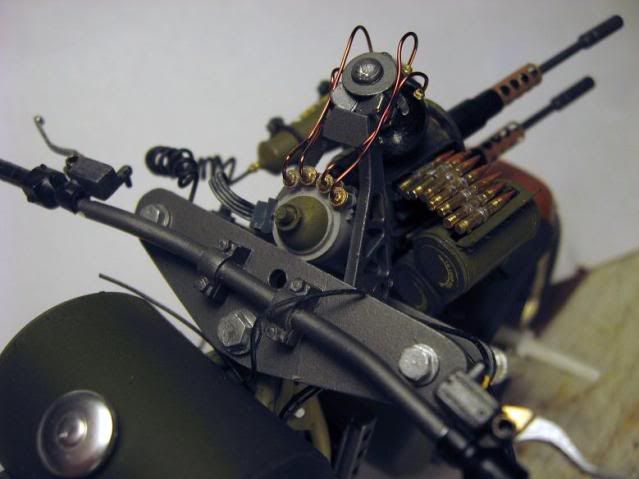
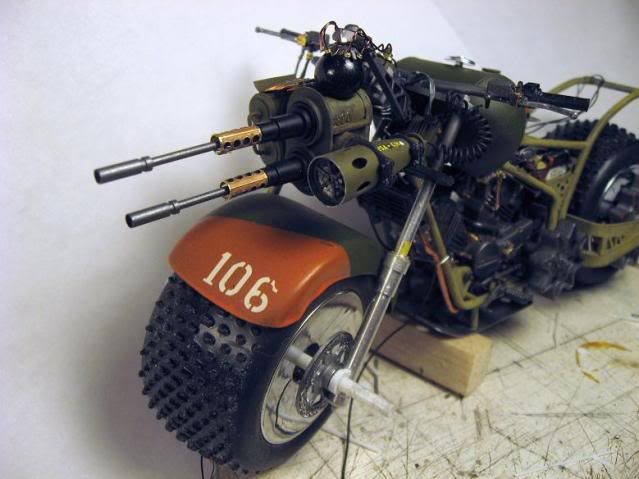
Randy, I've been looking at your latest pictures for 45 minutes now. Man, you are awsome! The detail is amazing and I'm for sure gonna steal the "brass nails for ammo" idea.
That thing belongs in a model magazine. Seriously nice work man.

Hermon
"Those who would give up Essential Liberty
to purchase a little Temporary Safety,
deserve neither Liberty nor Safety."
Benjamin Franklin
Illinois, United States
Member Since: June 27, 2009
entire network: 192 Posts
KitMaker Network: 135 Posts
Posted: Wednesday, December 22, 2010 - 05:33 PM UTC
Thanks for the comment, guys!

Randy, that thing is incredible. How long until we see a life-size one?
South Carolina, United States
Member Since: December 03, 2009
entire network: 2,160 Posts
KitMaker Network: 123 Posts
Posted: Wednesday, December 22, 2010 - 05:55 PM UTC
Randy, You've put together one impressive build. The amount of detail you crammed in there is still hard to take all in. The guns, the tank...all I can say is well done. I've seen people use the tips of pins for ammo belts, gluing them to a length of thread to hold them together but also afford some flexibility. But I've never seen brass nails used, much less turned like that.
AussieReg
Associate Editor #007
Victoria, Australia
Member Since: June 09, 2009
entire network: 8,156 Posts
KitMaker Network: 593 Posts
Posted: Wednesday, December 22, 2010 - 07:55 PM UTC
Randy, man that bike is

Awesome job, concept, details, colours, excecution are all perfect.
Like Hermon, I've been sitting here (with a cold beer) going over and over your pics looking for ideas to steal, and picking up another cool little detail everywhere I look !
Cheers, D
ON the bench
Revell 1/24 '53 Corvette (building as '54)
Revell 1/24 BMW 507 Coupe and Cabrio
Italeri 1/48 Me262 B-1a/U1 Nightfighter
Monogram 1/24 '57 Chevy Nomad
Dragon 1/350 USS Frank Knox DD-742
United States
Member Since: July 04, 2009
entire network: 241 Posts
KitMaker Network: 29 Posts
Posted: Thursday, December 23, 2010 - 02:17 PM UTC
Hermon, Thanks Boss, appreciate the kind words
Adam, That would mean I would have to clean out the garage for room to build, I can't even find 6 inches of clear space on my work bench!!
Alex, Thanks for the comment !!
Hey D, Glad you're liking it !!
Have some great holidays everyone, Maybe an eggnog or two!!!
Randy
Queensland, Australia
Member Since: January 17, 2006
entire network: 752 Posts
KitMaker Network: 94 Posts
Posted: Friday, December 31, 2010 - 02:35 PM UTC
Happy New Year everyone!
Randy, that bike is killer awesome!
I havent done done much to the vehicles, as i started working on some figures to go with the, The crew of the hummer will be a special "snatch and grab" team for rescueing people. Most of their weapons are silenced, and they are equiped for stealth and all out assault. I've also put a turret onto the hummer for added firepower. Pics will be up soon.
United States
Member Since: July 04, 2009
entire network: 241 Posts
KitMaker Network: 29 Posts
Posted: Sunday, January 02, 2011 - 06:50 AM UTC
Florida, United States
Member Since: January 14, 2009
entire network: 2,798 Posts
KitMaker Network: 286 Posts
Posted: Sunday, January 02, 2011 - 07:53 AM UTC
"From time to time, the tree of liberty must be watered with the blood of
tyrants and patriots."
- Thomas Jefferson
IPMS#47611
AussieReg
Associate Editor #007
Victoria, Australia
Member Since: June 09, 2009
entire network: 8,156 Posts
KitMaker Network: 593 Posts
Posted: Sunday, January 02, 2011 - 10:48 AM UTC
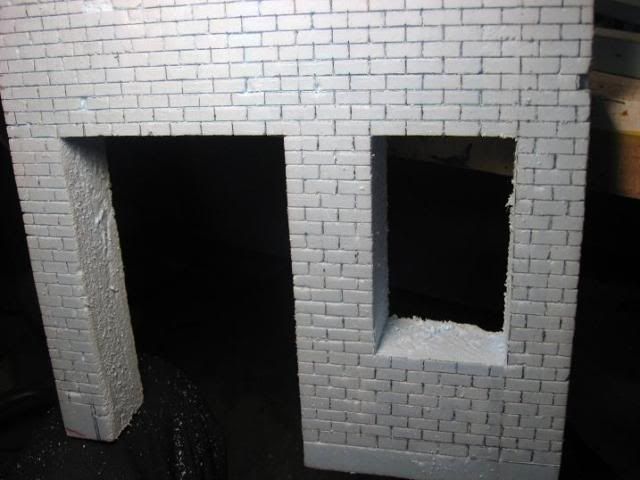
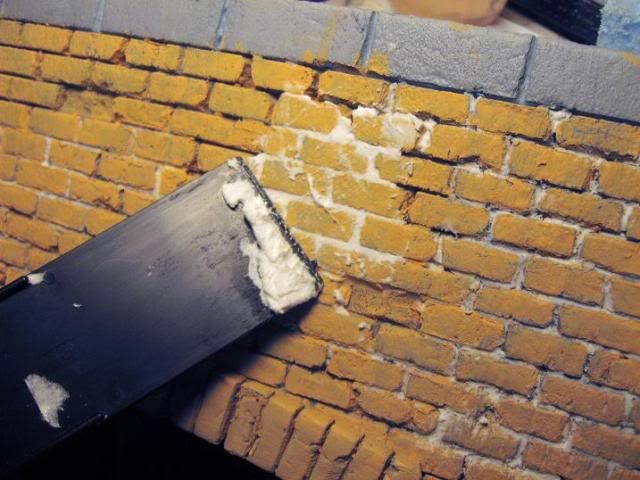
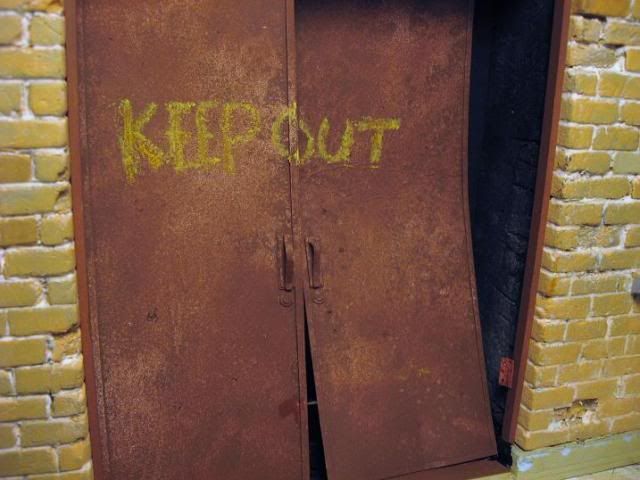
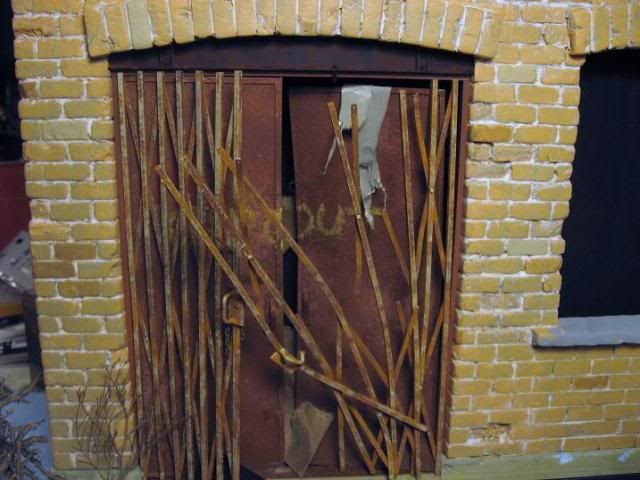
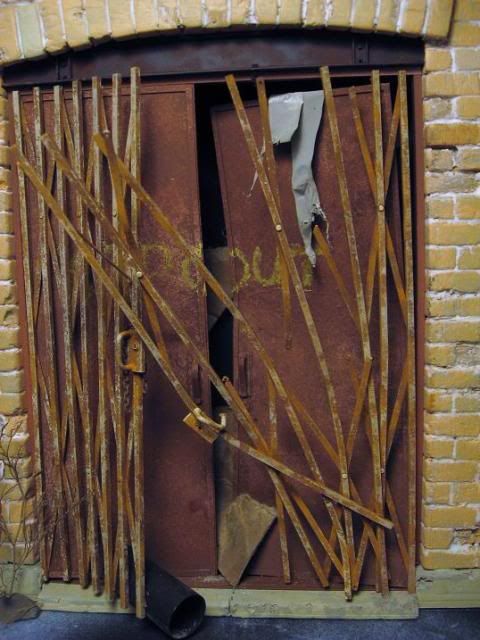
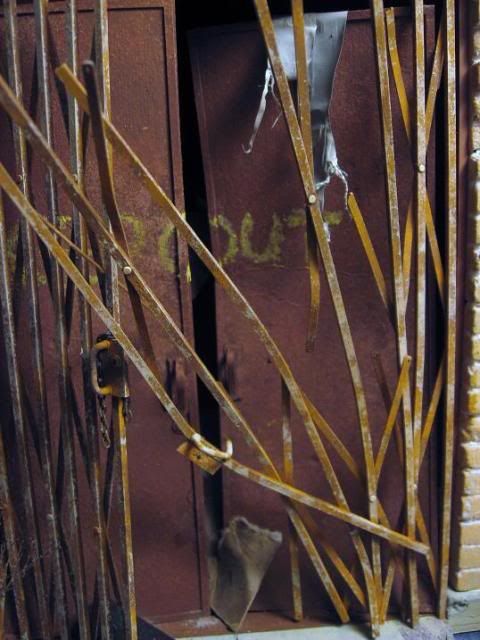
Randy that building looks AMAZING mate. Did you prime the foam board before the acrylics went on?
Great idea for a dio as well, a nervous outrider looking over his shoulder as he tries to re-attach some loose wire while the evil bad dudes close in . . . how will he get out of this one . . . . will he get that wire repaired and fire it up or will he end up just another casualty ??
Stay tuned folks, this is getting tense !
ON the bench
Revell 1/24 '53 Corvette (building as '54)
Revell 1/24 BMW 507 Coupe and Cabrio
Italeri 1/48 Me262 B-1a/U1 Nightfighter
Monogram 1/24 '57 Chevy Nomad
Dragon 1/350 USS Frank Knox DD-742
Texas, United States
Member Since: February 22, 2008
entire network: 5,026 Posts
KitMaker Network: 461 Posts
Posted: Sunday, January 02, 2011 - 10:52 AM UTC
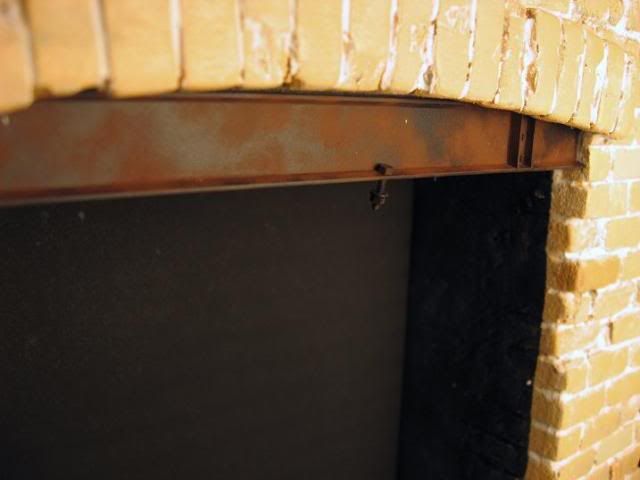
Randy: is your occupation a professional model builder? This is great stuff, the iron gate assembly gave me so many ideas. Thanks for the photos, it was like an instruction / tutorial in my case.
Bob
If it aint broke dont fix it.
North Carolina, United States
Member Since: November 28, 2005
entire network: 2,216 Posts
KitMaker Network: 399 Posts
Posted: Sunday, January 02, 2011 - 01:01 PM UTC
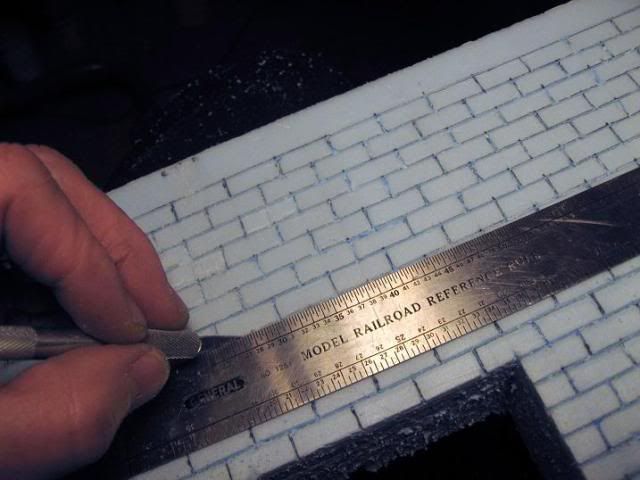
DITTO what everyone else said Randy. The bike itself with it's amazing detail was awsome enough, but that dio is off the chart. Working with foam is not an easy task, I know, I've tried it. This dio is gonna belong in a model magazine when it's finished.
Hermon
"Those who would give up Essential Liberty
to purchase a little Temporary Safety,
deserve neither Liberty nor Safety."
Benjamin Franklin
South Carolina, United States
Member Since: December 03, 2009
entire network: 2,160 Posts
KitMaker Network: 123 Posts
Posted: Sunday, January 02, 2011 - 06:03 PM UTC
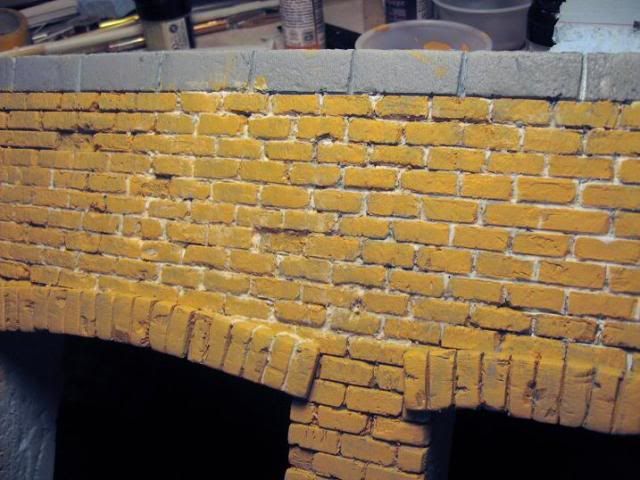
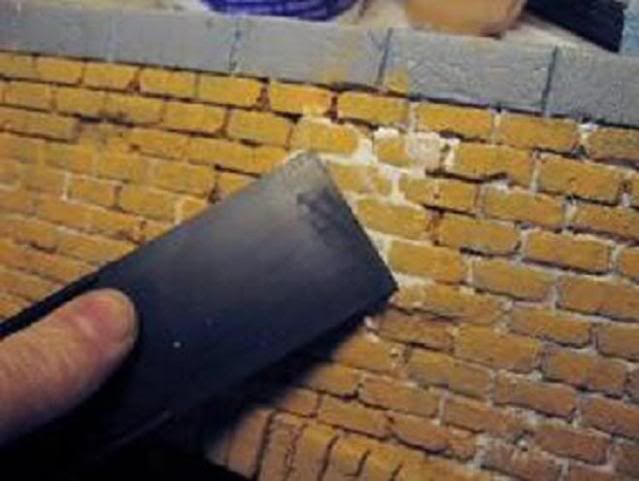
Alright Randy now you're just showing off. Nice work on the bricks...foam can be a real pain to scribe, at least for me. And that gate really sets it off. Nice damage too.
I'm also interested about the priming and any prep work.