Official EOD Campaign thread
Illinois, United States
Member Since: June 27, 2009
entire network: 192 Posts
KitMaker Network: 135 Posts
Posted: Monday, November 22, 2010 - 02:52 PM UTC
Florida, United States
Member Since: January 14, 2009
entire network: 2,798 Posts
KitMaker Network: 286 Posts
Posted: Monday, November 22, 2010 - 04:29 PM UTC
Adam that's some serious injunity there looking very cool.
Hermon how nice of you to join us with your rolling big dog you got there looking sweet.lots of options on that one.will it have a cup holder

I am also interested in the technique for the brass sheets plz share

Progress soon

"From time to time, the tree of liberty must be watered with the blood of
tyrants and patriots."
- Thomas Jefferson
IPMS#47611
South Carolina, United States
Member Since: December 03, 2009
entire network: 2,160 Posts
KitMaker Network: 123 Posts
Posted: Monday, November 22, 2010 - 04:46 PM UTC
Quoted Text
I have no idea where in the house I will put this when it's finished.
I'd say...where ever it wants.
Most impressive work so far. So is this project part of humanity's stand against whatever has caused the EOD? Or is this part of the forces that have brought about the EOD?
Texas, United States
Member Since: February 22, 2008
entire network: 5,026 Posts
KitMaker Network: 461 Posts
Posted: Monday, November 22, 2010 - 05:18 PM UTC
Ok! Oh! Fearless leader, nice to see that those evil hordes

did not get you. And after looking at your build I know why, it is too massive for their little oozie brains

to figure out how to climb aboard. Great work Hermon, what kind of stores will it carry and like Justin said where will the cup holder be?
Bob
If it aint broke dont fix it.
Moscow, Russia
Member Since: October 04, 2010
entire network: 9 Posts
KitMaker Network: 8 Posts
Posted: Monday, November 22, 2010 - 05:23 PM UTC
@Randy
@Justin
I etched brass sheets at Iron(III) chloride FeCl3. I used laser jet technic.
United States
Member Since: July 04, 2009
entire network: 241 Posts
KitMaker Network: 29 Posts
Posted: Wednesday, November 24, 2010 - 09:29 AM UTC
Florida, United States
Member Since: January 14, 2009
entire network: 2,798 Posts
KitMaker Network: 286 Posts
Posted: Wednesday, November 24, 2010 - 10:52 AM UTC
Happy Turkey day

Randy that thing is

"From time to time, the tree of liberty must be watered with the blood of
tyrants and patriots."
- Thomas Jefferson
IPMS#47611
AussieReg
 Associate Editor
#007
Victoria, Australia
Member Since: June 09, 2009
entire network: 8,156 Posts
KitMaker Network: 593 Posts
Posted: Wednesday, November 24, 2010 - 11:37 AM UTC
Randy. I'll see Justin's
and raise by a
or two. That scooter is NUTS !!
Quoted Text
Hermon, Cool build but how is it going to fit in the drive thru when it's your turn to get the coffee and donuts?????? Really neat stretch job and I love the tires, welcome back
Part of Hermon's plan is to have the last remaining drive-thru in civilization, and it's inside this rig. He wants to take over the world via our stomachs. I hope his coffee is good !!
Cheers, D
ON the bench
Revell 1/24 '53 Corvette (building as '54)
Revell 1/24 BMW 507 Coupe and Cabrio
Italeri 1/48 Me262 B-1a/U1 Nightfighter
Monogram 1/24 '57 Chevy Nomad
Dragon 1/350 USS Frank Knox DD-742
Texas, United States
Member Since: February 22, 2008
entire network: 5,026 Posts
KitMaker Network: 461 Posts
Posted: Wednesday, November 24, 2010 - 12:03 PM UTC
Randy I will see Damians
and raise
and it is in company with the rest of us "NUTS"
Bob
If it aint broke dont fix it.
Queensland, Australia
Member Since: January 17, 2006
entire network: 752 Posts
KitMaker Network: 94 Posts
Posted: Wednesday, November 24, 2010 - 10:18 PM UTC
Florida, United States
Member Since: January 14, 2009
entire network: 2,798 Posts
KitMaker Network: 286 Posts
Posted: Thursday, November 25, 2010 - 03:58 AM UTC
Good job grimmo looking

"From time to time, the tree of liberty must be watered with the blood of
tyrants and patriots."
- Thomas Jefferson
IPMS#47611
North Carolina, United States
Member Since: November 28, 2005
entire network: 2,216 Posts
KitMaker Network: 399 Posts
Posted: Thursday, November 25, 2010 - 12:38 PM UTC
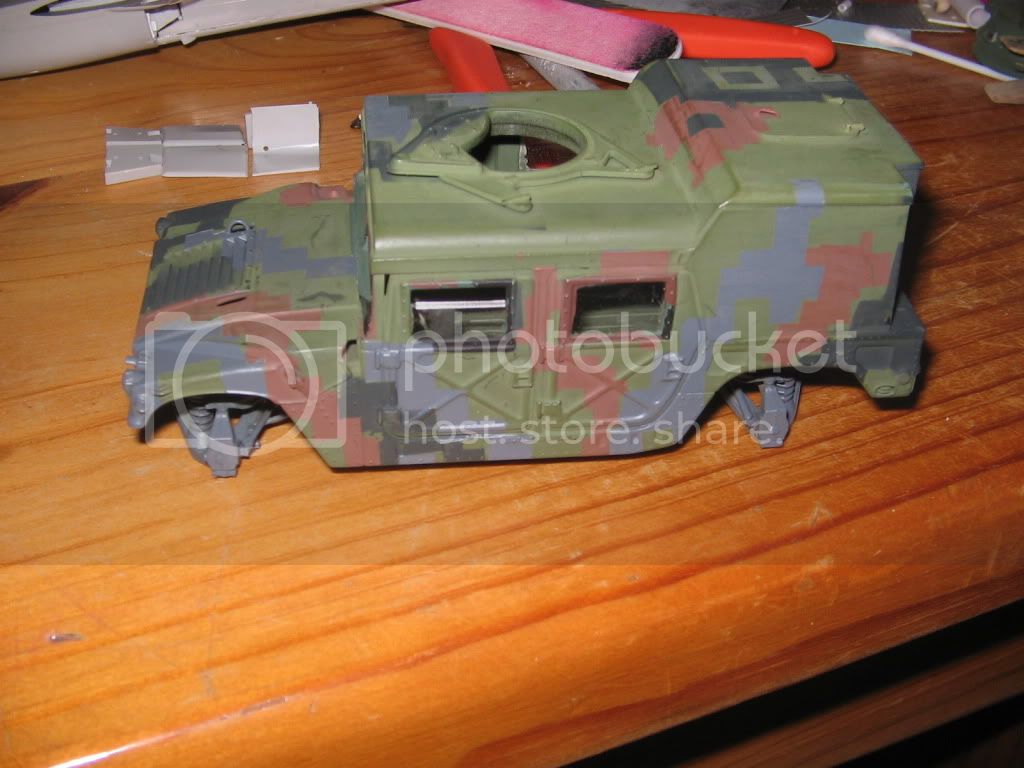
Nice job Matt. I'm diggin' that camo scheme on the HUMMER.
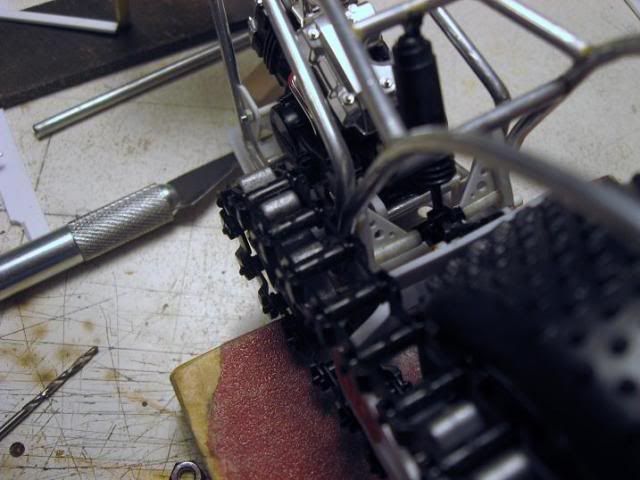
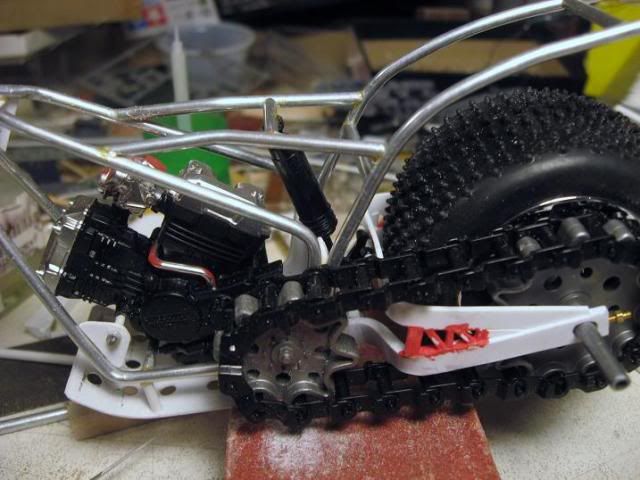
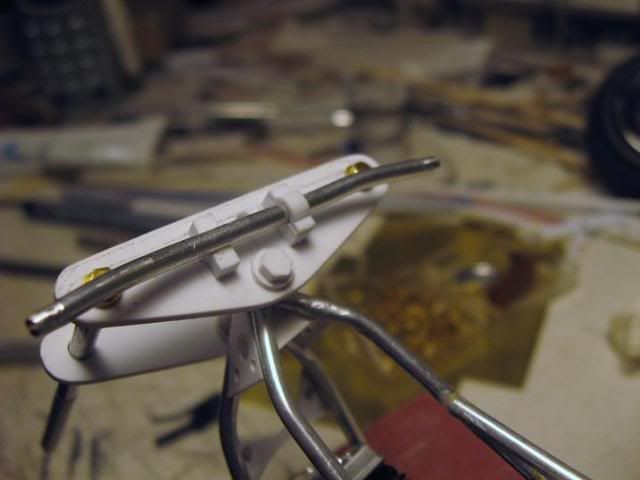
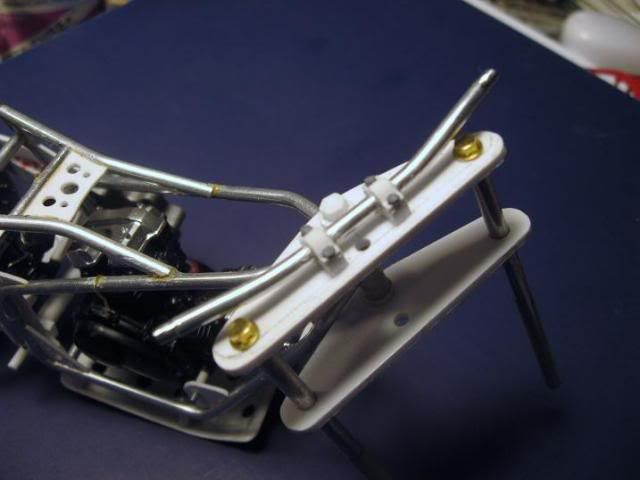
I'm using my 2 days off from work to get my armored semi going. I still have to make 4 custom driveshafts and various support stiffeners for the suspension, but for now I've moved on to the armored bed.
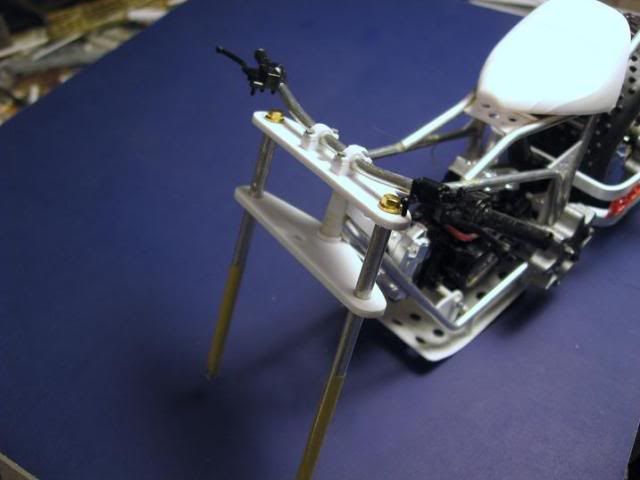
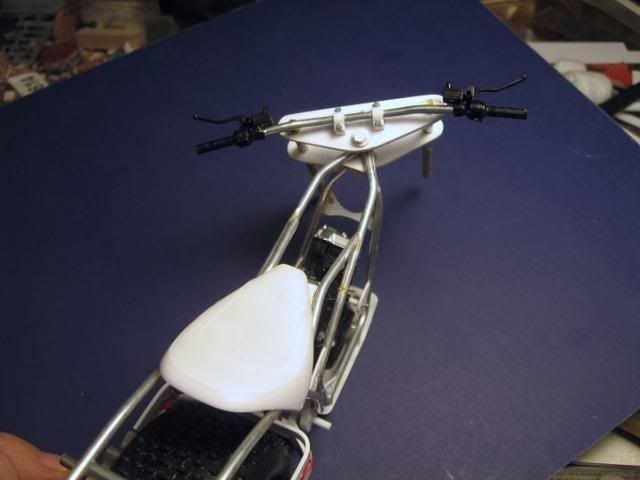
This is a moc-up of the armored bed which will sport "port hole" style windows along the sides along with plenty of storage boxes bolted to the hull here and there. I'll scratch up a radar guided mini-gun later for the top as well as some top mounted solar panels to run the radar and guidence systems at night.


I also got to work on the 3406 CAT engine that will motivate this beast. Yeah, I know.......if my life depended on this truck I would opt for a CUMMINS but hey, the CAT is what I had. Pic is a little blurry, but most of you guys are probably drunk right now anyways.


I also have a few other goodies in mind for later on. The most important being a large rotating drum wich will mount on the front of the rig. It'll have sections of heavy chain welded on at various points and act like a giant "flail" sort of like the old WWII rigs that were bolted onto the front of Sherman tanks to detonate mines.
Hermon

"Those who would give up Essential Liberty
to purchase a little Temporary Safety,
deserve neither Liberty nor Safety."
Benjamin Franklin
AussieReg
Associate Editor #007
Victoria, Australia
Member Since: June 09, 2009
entire network: 8,156 Posts
KitMaker Network: 593 Posts
Posted: Thursday, November 25, 2010 - 12:47 PM UTC
Looking good Boss-man !! That chain-flail idea sounds pretty cool too
Cheers, D
ON the bench
Revell 1/24 '53 Corvette (building as '54)
Revell 1/24 BMW 507 Coupe and Cabrio
Italeri 1/48 Me262 B-1a/U1 Nightfighter
Monogram 1/24 '57 Chevy Nomad
Dragon 1/350 USS Frank Knox DD-742
Texas, United States
Member Since: February 22, 2008
entire network: 5,026 Posts
KitMaker Network: 461 Posts
Posted: Thursday, November 25, 2010 - 12:52 PM UTC
@ Randy: at first I did not really see a two wheeler being able to take care of it self, but your bike is just plain mean
and will do major damage to those slime balls
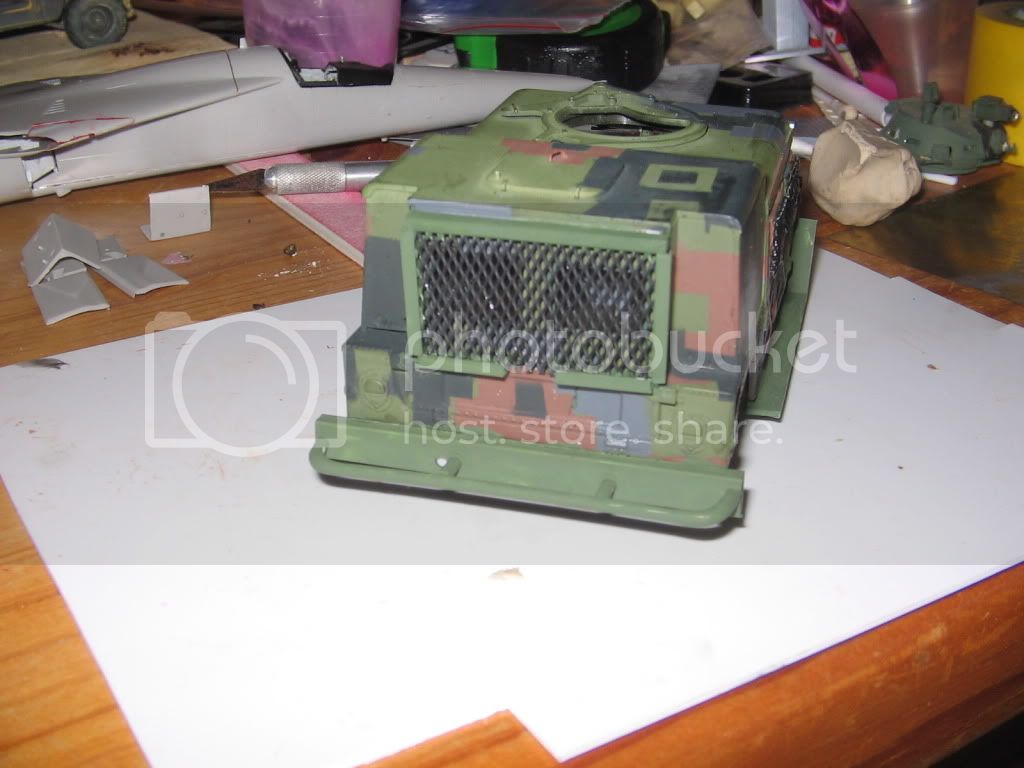
@ Matt: nice job so far, what are you using for the screen, I need to steal another idea guys
@ Hermon: now that you have put the cab on, and with those wheels it makes the build look more massive than I thought.
Ya'll make me want to pick "TINKER BELL", and "CAPTAIN HOOK" up and do some destruction, but study forbids it at the moment

Bob
If it aint broke dont fix it.
Florida, United States
Member Since: January 14, 2009
entire network: 2,798 Posts
KitMaker Network: 286 Posts
Posted: Thursday, November 25, 2010 - 03:06 PM UTC
Hermon that thing gets sicker by the moment looking very cool.And the cup holder?
Ok an update from me the dio continues.Got some paint done today and the barn mounted to the base.....

I also started painting pablo.Camera lets you see what i missed

Oh well easy fix......
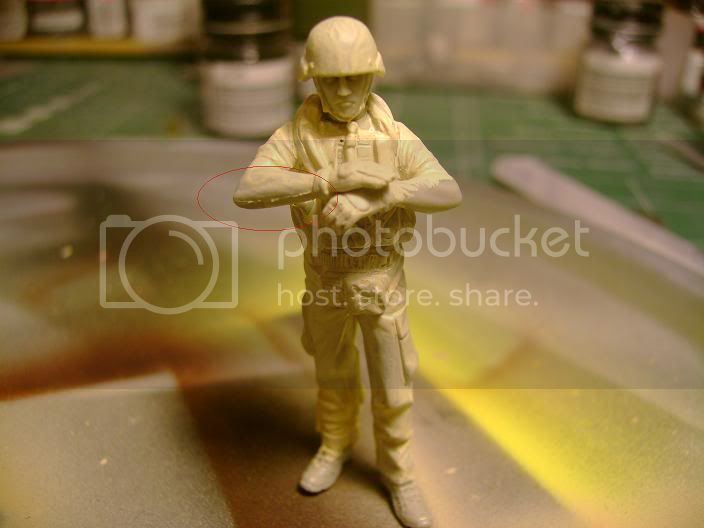
almost there....
"From time to time, the tree of liberty must be watered with the blood of
tyrants and patriots."
- Thomas Jefferson
IPMS#47611
South Carolina, United States
Member Since: December 03, 2009
entire network: 2,160 Posts
KitMaker Network: 123 Posts
Posted: Thursday, November 25, 2010 - 07:00 PM UTC
@Matt, that's the Italeri Commando Humvee right? I've used it for my Federal response teams.The camo scheme looks nice. I tried to do a grey urban scheme and it looked funky. The rear bumper looks nice and "crowd-trollish". Are you going to do smithing similar for the front?
Queensland, Australia
Member Since: January 17, 2006
entire network: 752 Posts
KitMaker Network: 94 Posts
Posted: Thursday, November 25, 2010 - 10:55 PM UTC
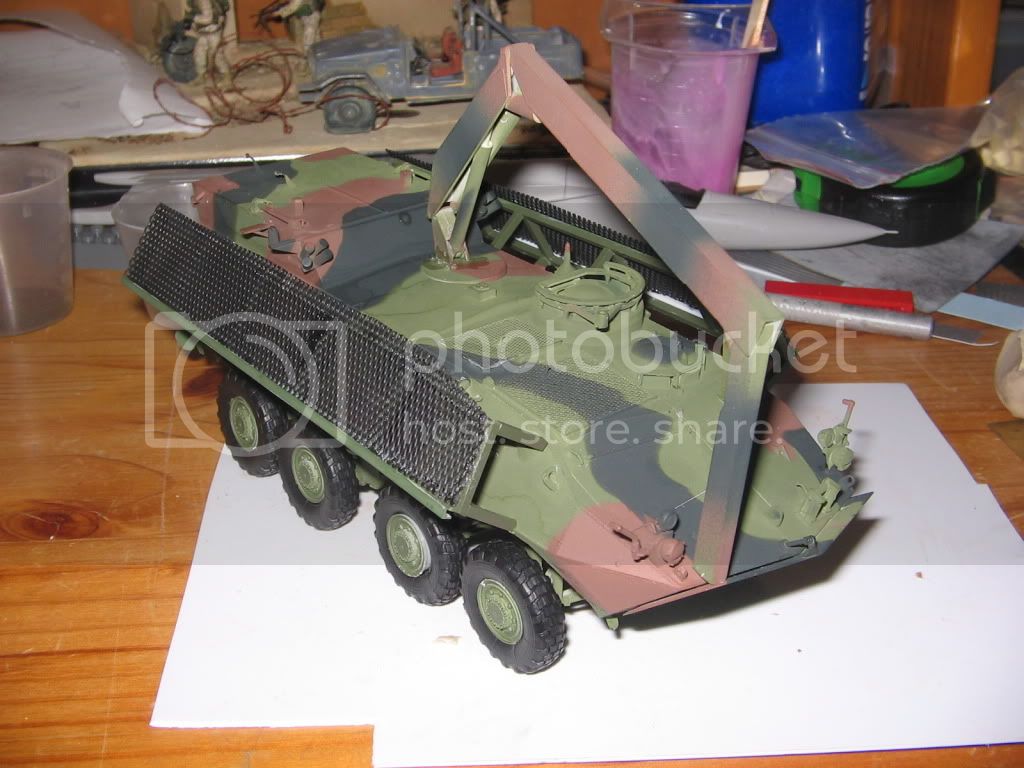
@Bluestab: yep. got a nice solid looking bash bar made. It is the old desert patrol hummer, i made it years ago, with a pretty poor paint job, so decided to repaint it in something more modern. i did the 3 colors, but it looked a plain, so i added the grey to add something to it.
@Bigrip74: the mesh is from AMRI product no AA 614. Exp aluminium 149X190 A=3mm. I've had it for around 12 months now. It is a minature version of expanded metal mesh commonly used for flooring. I had no idea of what i was going to use it for, but luckily i bought the last sheet! it's a great scale for 1/35 flooring, or as i used it, window screen.
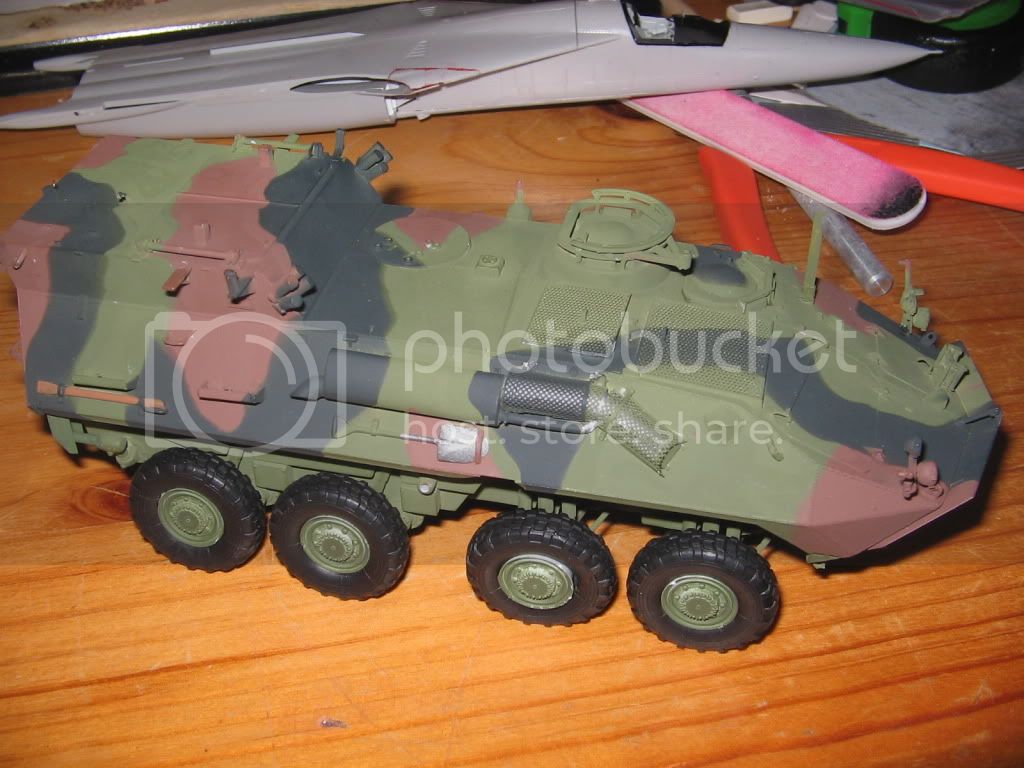
The screens on the LAV have been finished, have to finish off the crane attatchments and the hummer weapons. I'm going to make some figures too.
@Hermon: that truck is looking awesome! great idea! can't wait to see more on it!
AussieReg
Associate Editor #007
Victoria, Australia
Member Since: June 09, 2009
entire network: 8,156 Posts
KitMaker Network: 593 Posts
Posted: Thursday, November 25, 2010 - 11:55 PM UTC
Quoted Text
@Bigrip74: the mesh is from AMRI product no AA 614. Exp aluminium 149X190 A=3mm. I've had it for around 12 months now. It is a minature version of expanded metal mesh commonly used for flooring. I had no idea of what i was going to use it for, but luckily i bought the last sheet! it's a great scale for 1/35 flooring, or as i used it, window screen.
Here you go guys, my secret online stash of expanded metal mesh . . .
Art Supplies Online $1.43 Aussie for a 150x150mm sheet if you buy it in lots of 10, fast shipment, good quality stuff.
Hope this helps some of you out. Cheers, D
ON the bench
Revell 1/24 '53 Corvette (building as '54)
Revell 1/24 BMW 507 Coupe and Cabrio
Italeri 1/48 Me262 B-1a/U1 Nightfighter
Monogram 1/24 '57 Chevy Nomad
Dragon 1/350 USS Frank Knox DD-742
Moscow, Russia
Member Since: October 04, 2010
entire network: 9 Posts
KitMaker Network: 8 Posts
Posted: Friday, November 26, 2010 - 10:18 AM UTC
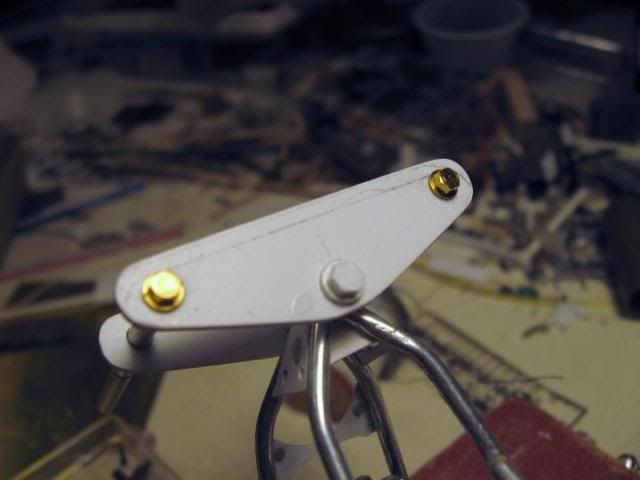
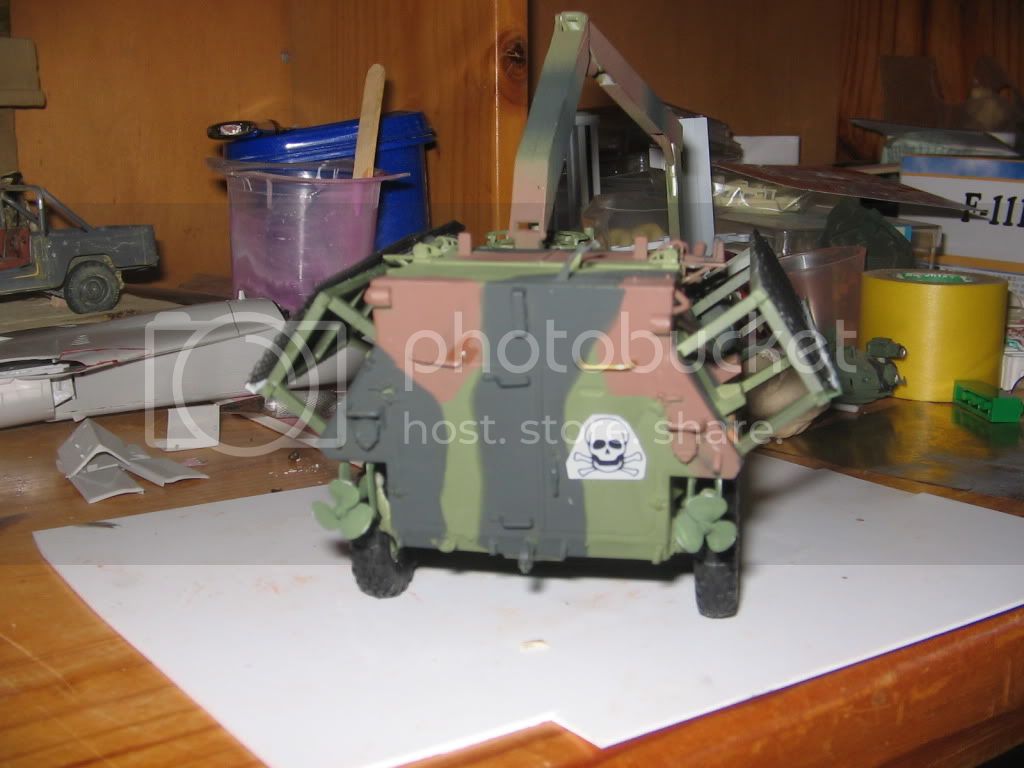
I continue with armor plates on HMMWVy's doors. The top part of armor can rotating.

United States
Member Since: July 04, 2009
entire network: 241 Posts
KitMaker Network: 29 Posts
Posted: Saturday, November 27, 2010 - 03:44 AM UTC
Morning All, WOW , This thread just keeps getting better!!
Justin, Thank you ! The barn is looking good but where's the girl????
Thanks Damian, and thanks for the link.
Hi Bob, Glad you like it so far!
Matt, Nice looking additions to our army!!
Hermon, That thing is a BEAST!!!
Alexander, Great job on those hinges!!!!!!
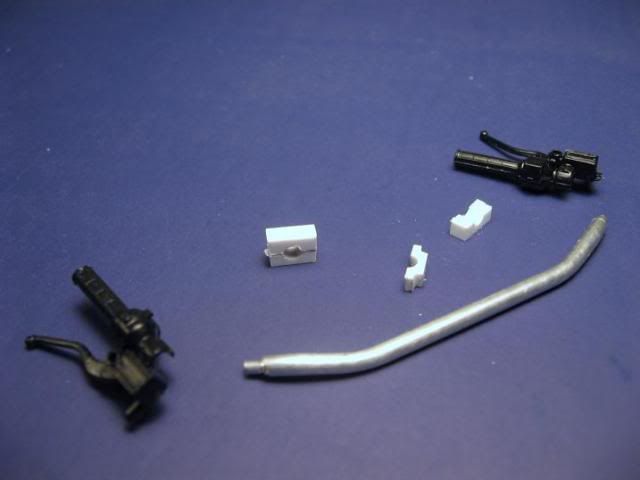
No progress to report on the scooter but did find a possible weapon system...
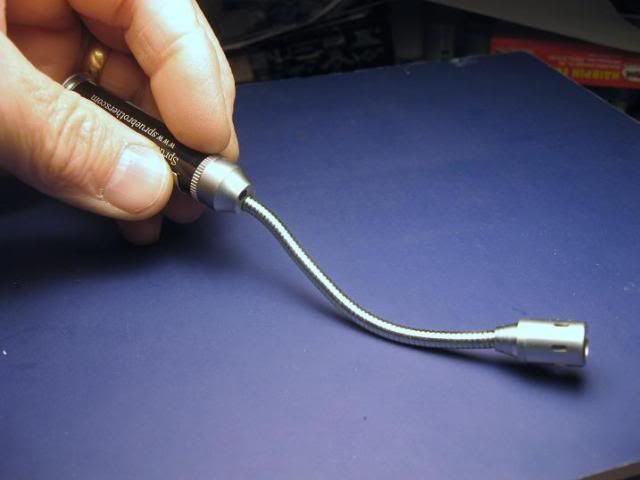
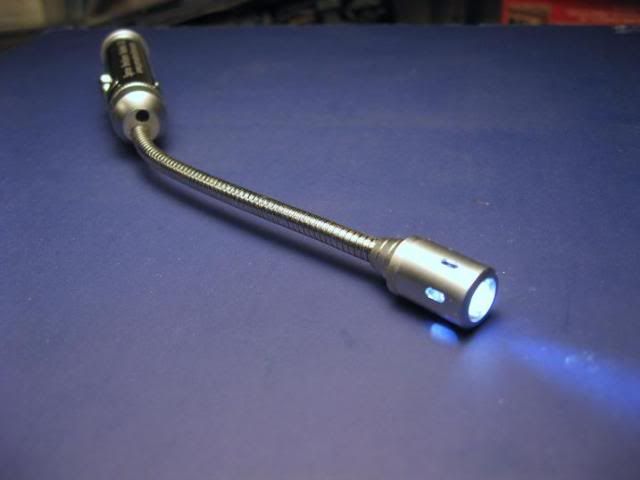
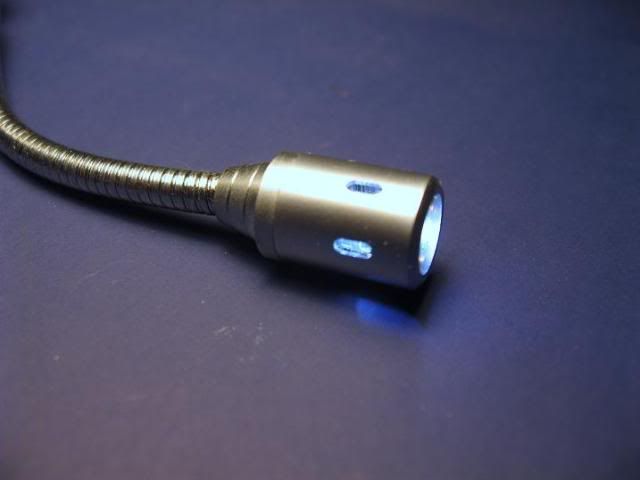
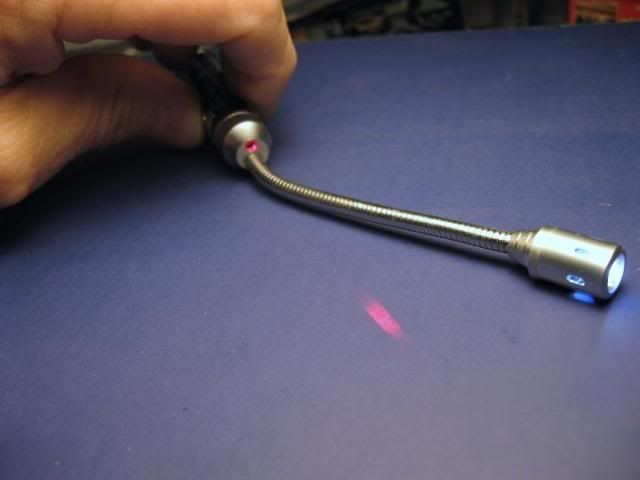
Cool little gadget that is crying to get used. Maybe a back pack weapon or mounted on the bike????
Randy
Texas, United States
Member Since: February 22, 2008
entire network: 5,026 Posts
KitMaker Network: 461 Posts
Posted: Saturday, November 27, 2010 - 05:01 AM UTC
"TINKER BELL" is painted and has a coat of future on, Next to paint on some teeth on that front bumper and to put something that looks like Tinker Bell on the side
the photos are not the best for now, I will break out the photo booth when she is all dirtied up and has a coat of flat.


I will paint some nice BIG TEETH here.

My back door.

This is for Hermon

Bob
If it aint broke dont fix it.
North Carolina, United States
Member Since: November 28, 2005
entire network: 2,216 Posts
KitMaker Network: 399 Posts
Posted: Saturday, November 27, 2010 - 06:25 AM UTC
Tinker Bell is lookin' bad to the bone Bob! I just hope you never have to use that bottom rocket.....it may take your front wheel off.
BTW, did I miss something? How did you do the bolt heads on the front of your plow blade? I need to figure out something like that for my truck.
Hermon
"Those who would give up Essential Liberty
to purchase a little Temporary Safety,
deserve neither Liberty nor Safety."
Benjamin Franklin
Texas, United States
Member Since: February 22, 2008
entire network: 5,026 Posts
KitMaker Network: 461 Posts
Posted: Saturday, November 27, 2010 - 08:48 AM UTC
@ Hermon: the wheels will kolidascope when any tall obsticle appears
(honestly I was just gluing things on that looked good and got carried away) anyway this is fantasy and that big box will drag any goolies along with the vechicle
> The bolt heads are round plastic rod cut to what looks like a bolt size then placed on the plow with Tamiya Extra Thin glue and allowed to dry, then I brushed some more glue over the bolts and allowed them to dry again before a second coat of glue to shape them by taking any cut marks or sharp edges away..
Bob
If it aint broke dont fix it.
Florida, United States
Member Since: January 14, 2009
entire network: 2,798 Posts
KitMaker Network: 286 Posts
Posted: Saturday, November 27, 2010 - 01:16 PM UTC
looking good bob
The girl got made into a meal by zombies.
Actually the casting was so bad I just scrapped her.Wont buy legend again.
"From time to time, the tree of liberty must be watered with the blood of
tyrants and patriots."
- Thomas Jefferson
IPMS#47611
Texas, United States
Member Since: February 22, 2008
entire network: 5,026 Posts
KitMaker Network: 461 Posts
Posted: Saturday, November 27, 2010 - 01:53 PM UTC
Thanks for the boost Justin, I am trying to keep up with everyone here. This I know that has been said before (by me) but all of the building is on a par that keeps me on my toes and YES I STEAL YOUR IDEAS its the only way that this old brain can keep up with the younger set.
(Actually I am enjoying my self treamendously with the sharing of building techniques and I wait anxsiously for each photo that every one posts. )
I vote for Hermon and Damian to put this shindig on every year.
Bob
If it aint broke dont fix it.