

Scratchbuilders!
Built a model or part from your own materials lately?
Built a model or part from your own materials lately?
Hosted by Mike Kirchoff
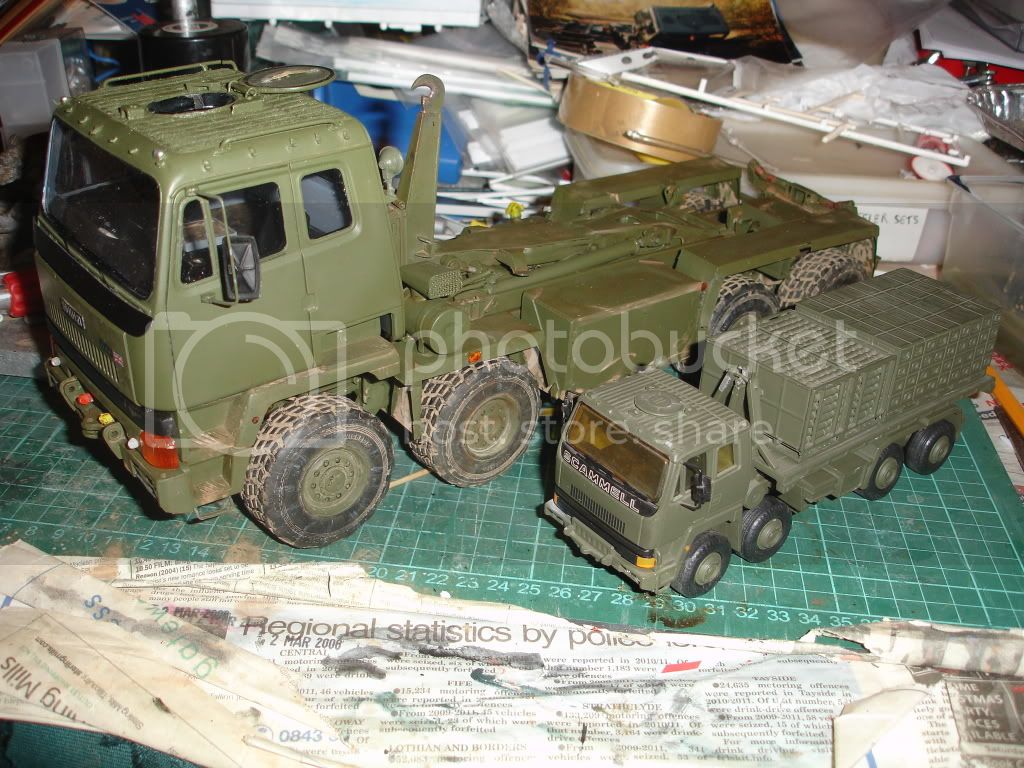
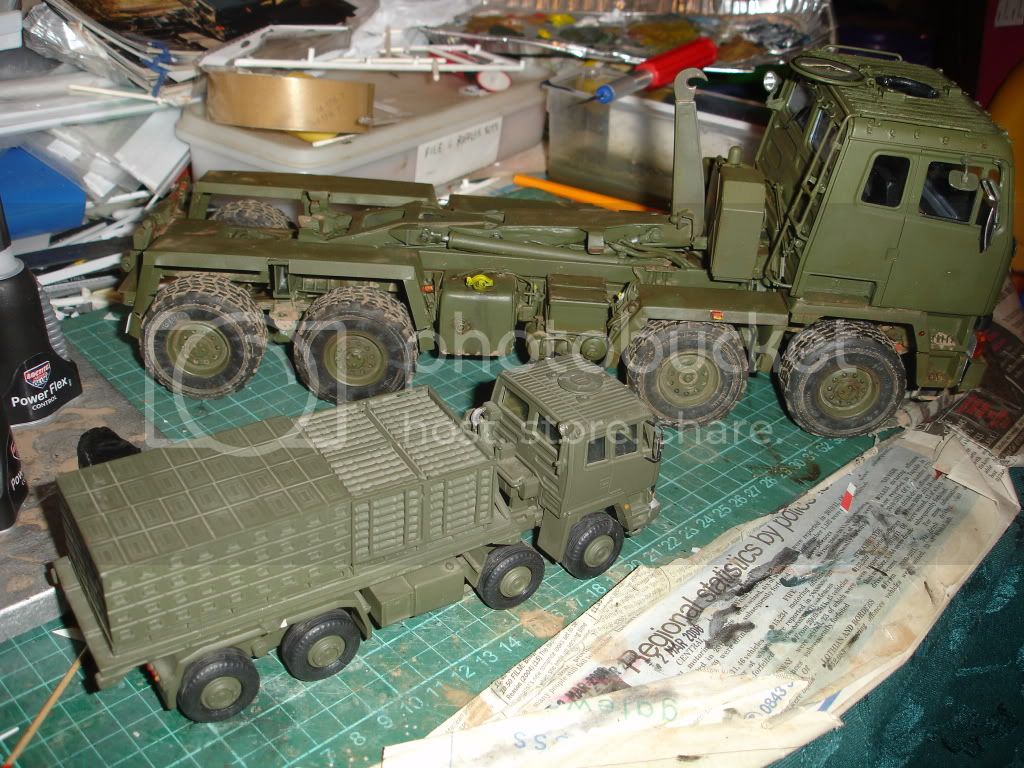
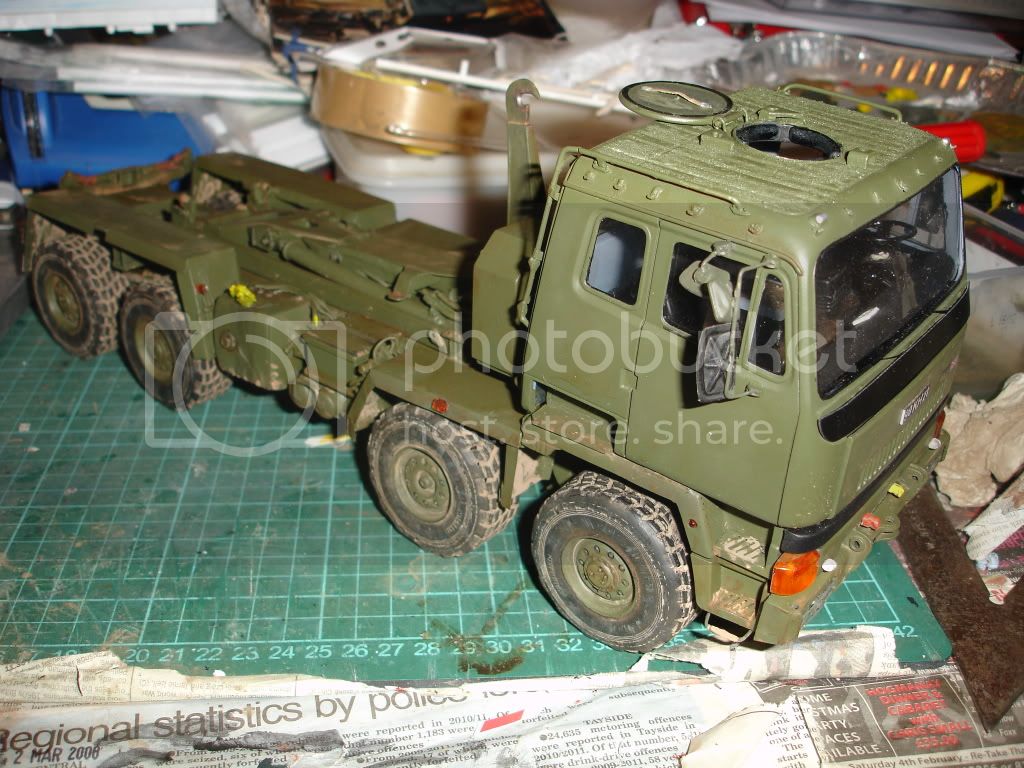
1/24 Leyland DAF DROPS Update

HEINE-07

Member Since: February 28, 2007
entire network: 392 Posts
KitMaker Network: 35 Posts

Posted: Tuesday, May 01, 2012 - 05:46 PM UTC
Incredible work, Nige. The strongest glue I know of is a mixture of 1/2 part of the thin kind of superglue with 1/2 part Testors tube glue for plastic models. By 1/2 parts, I mean something like seven drops of superglue and seven drops of Testors, mixed together. You will have about five minutes to finesse the parts into place and hold them with tweezers or alligator clamps or clothes pins or fingers or something...To make this mix hard as steel, mix in metal filings from a flat file. Maybe a hole can be drilled into each of the two parts to be glued, and pinned by using one of your thin drill bits, dipped into this glue mix.

Murdo

Member Since: May 25, 2005
entire network: 2,218 Posts
KitMaker Network: 760 Posts

Posted: Wednesday, May 02, 2012 - 09:43 AM UTC
Man! Haven't you finished that yet Nige???


okdoky
Member Since: April 30, 2007
entire network: 1,597 Posts
KitMaker Network: 673 Posts

Posted: Monday, May 07, 2012 - 10:09 AM UTC
Quoted Text
Man! Haven't you finished that yet Nige???
Hi Murdo
Had a chance to add bits of bling to it over past couple of days and will need to post some pics tomorrow.
Nearly there
Nige
okdoky
Member Since: April 30, 2007
entire network: 1,597 Posts
KitMaker Network: 673 Posts
Posted: Tuesday, May 08, 2012 - 11:16 AM UTC
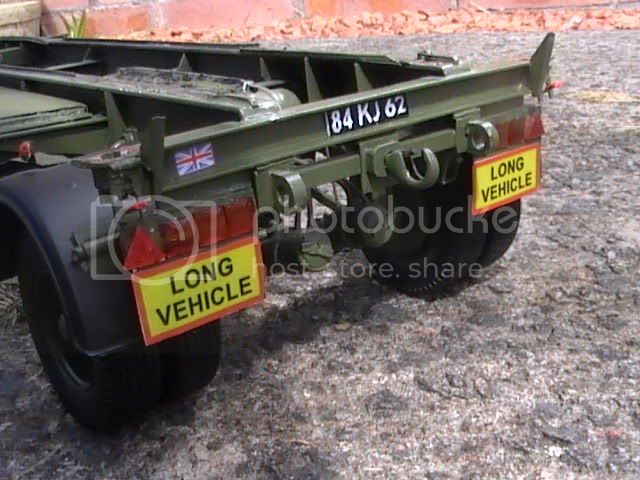
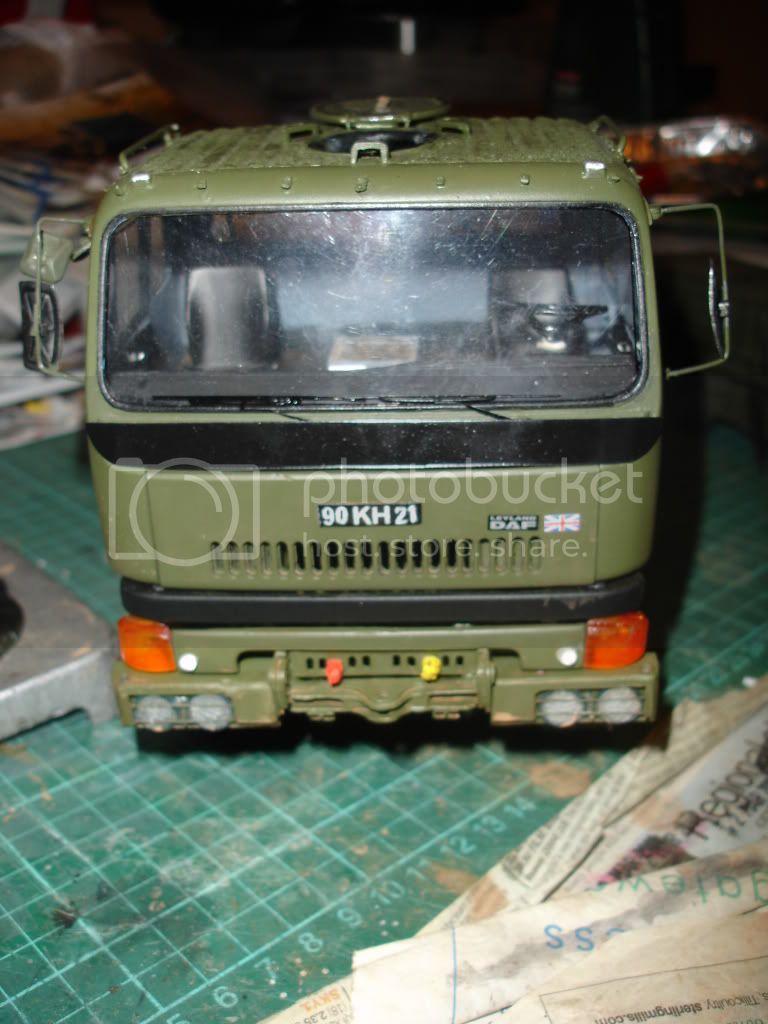
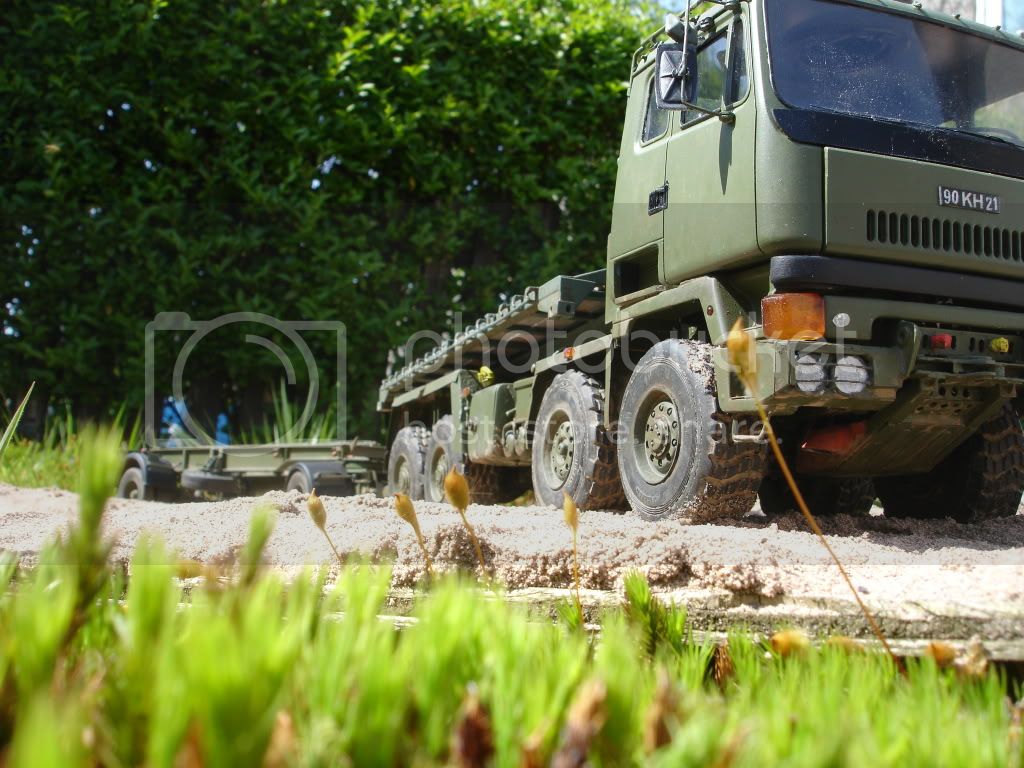
My attempt at number plates with old fashioned Letraset. Only problem was that the sheets I have in the correct font were only in black and lacked sufficient number two's for the registrations of the truck and trailer combinations I wanted for a trip I did in Germany.
Added the letraset to white plasticard then oversprayed in black
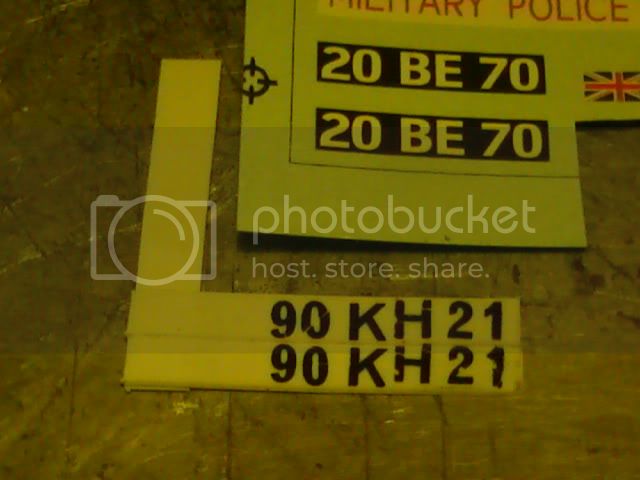
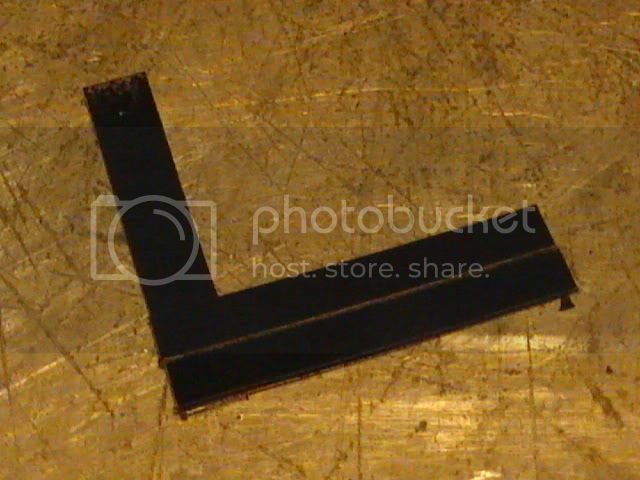
Once dry, I used sellotape to strip the letraset back off the plasticard. First attempt I had obviously rubbed the letraset down too well and ended up peeling as much paint off the card as I was peeling the letters. Problem is if you don't rub down well enough, you might end up with only half a letter taking hold and distortion trying to match the bits to transfer all the letter.
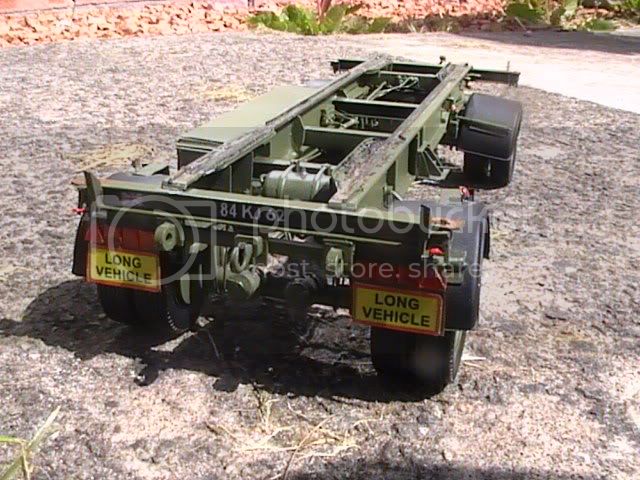
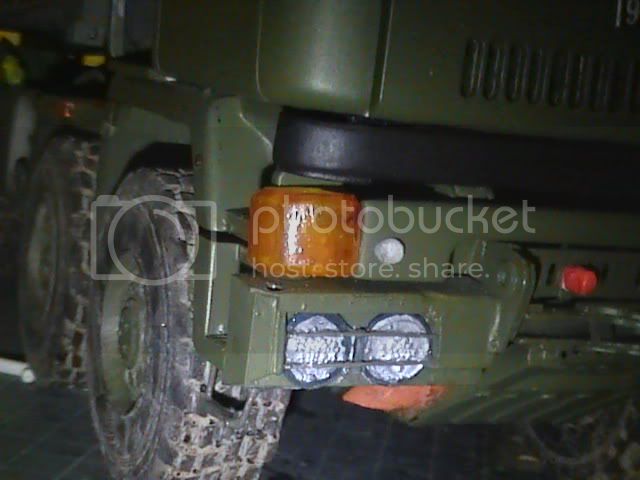
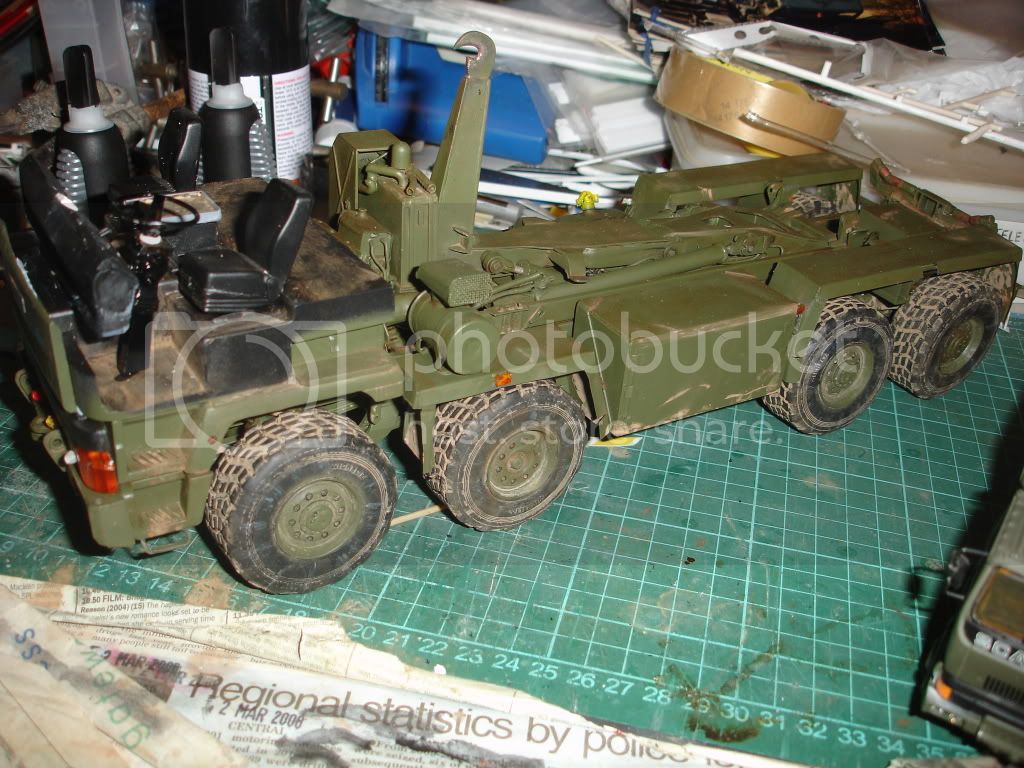
Park and release valves on the trailer brakes painted
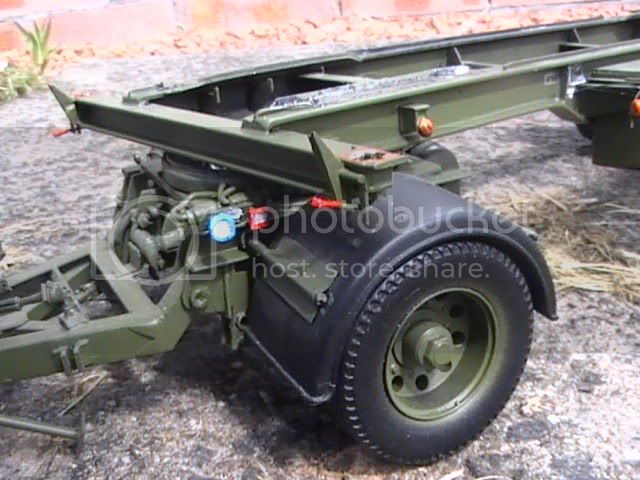
Marker lights, twist locks rust and light grease on the slide rails all painted
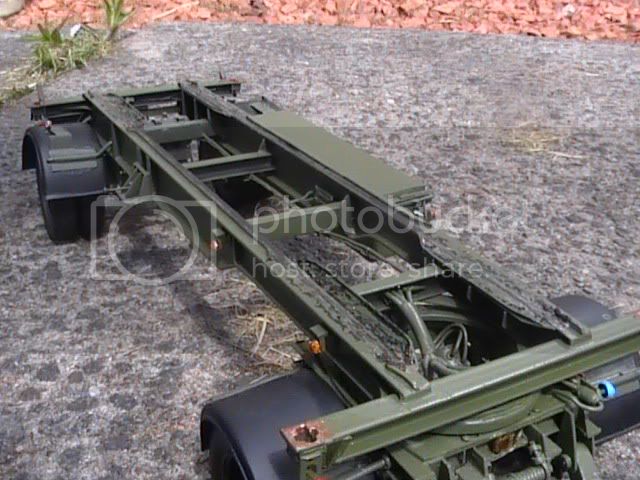
Rear light clusters, reflectors, union jack decal and long vehicle plates added
Still got to weather the wheels and chassis a little
Nige
Added the letraset to white plasticard then oversprayed in black
Once dry, I used sellotape to strip the letraset back off the plasticard. First attempt I had obviously rubbed the letraset down too well and ended up peeling as much paint off the card as I was peeling the letters. Problem is if you don't rub down well enough, you might end up with only half a letter taking hold and distortion trying to match the bits to transfer all the letter.
Park and release valves on the trailer brakes painted
Marker lights, twist locks rust and light grease on the slide rails all painted
Rear light clusters, reflectors, union jack decal and long vehicle plates added
Still got to weather the wheels and chassis a little
Nige
okdoky
Member Since: April 30, 2007
entire network: 1,597 Posts
KitMaker Network: 673 Posts
Posted: Friday, May 11, 2012 - 10:17 PM UTC
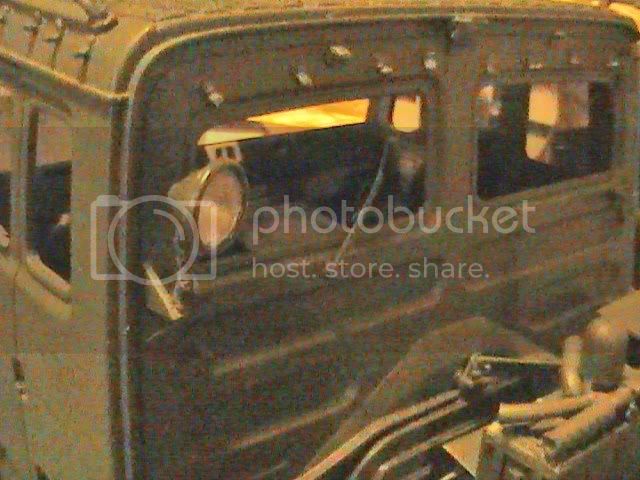
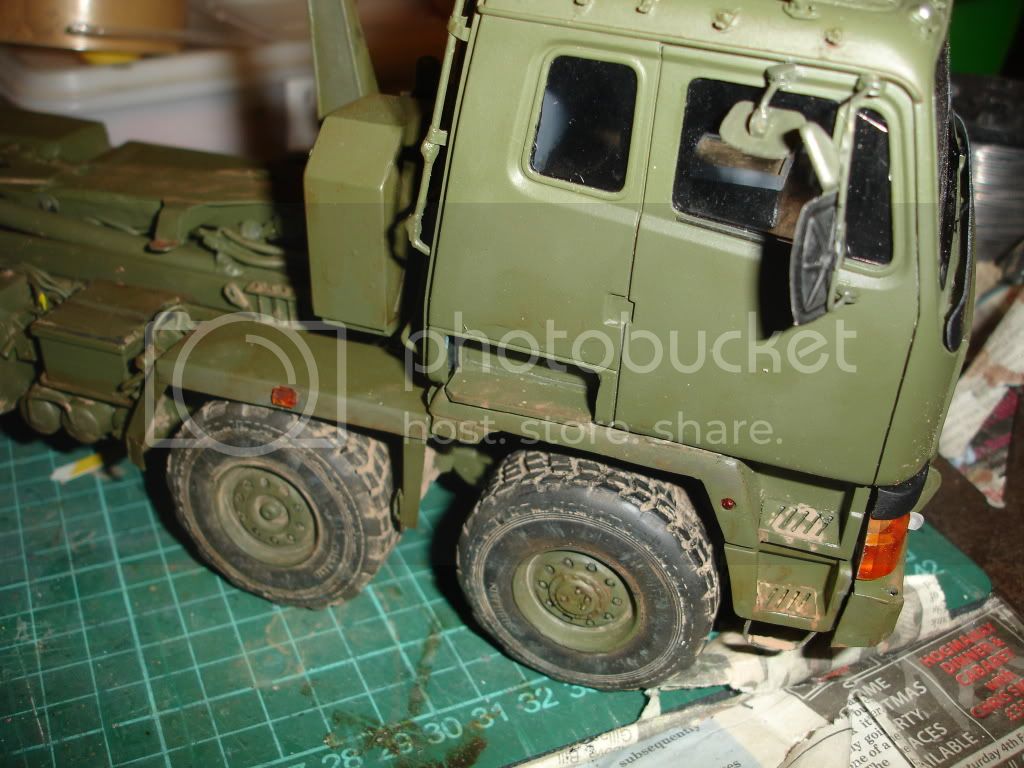
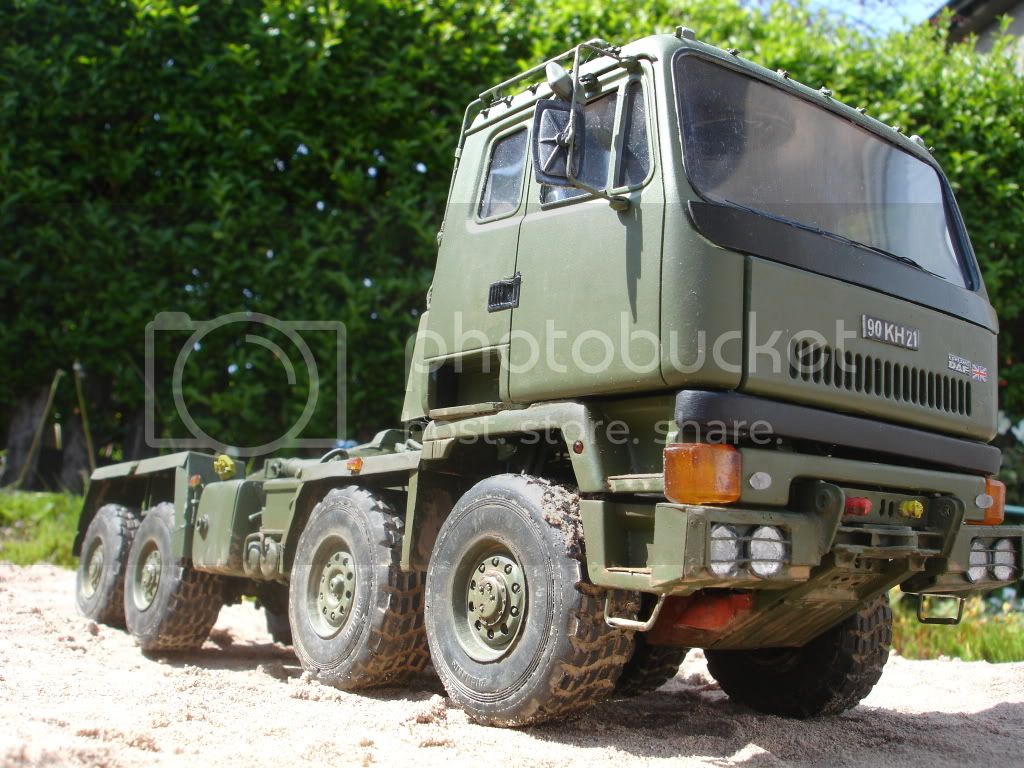
Thought of a way to make reasonable hinge brackets for the wing mirror mounts. A bit of sprue of the right diameter sanded half flat
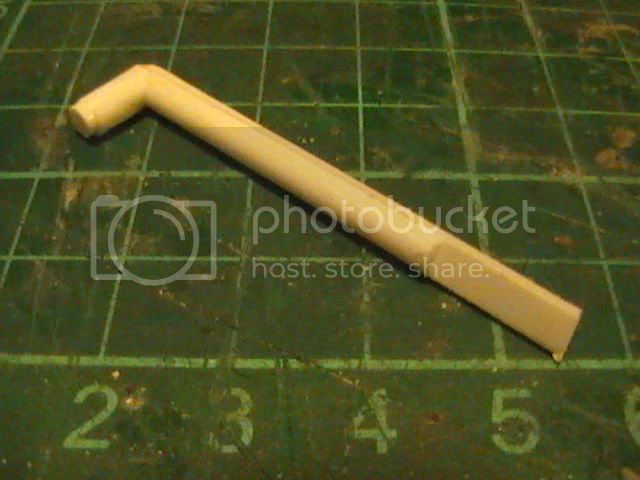

A single saw cut part way through
After a second full cut and using a mini drill to drill through centre. Stout wire cut and bent to shape and fed through
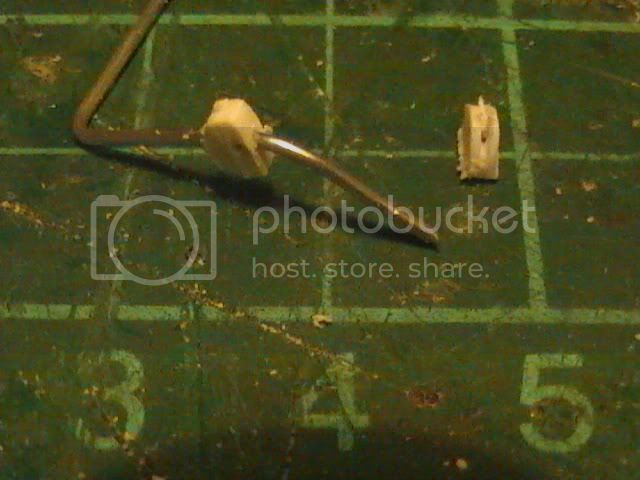
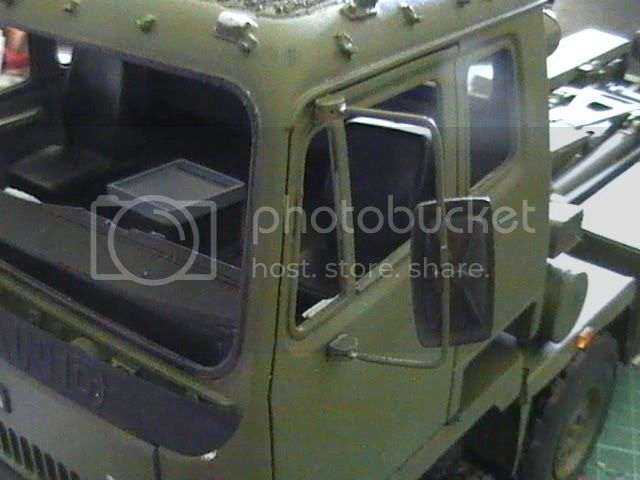
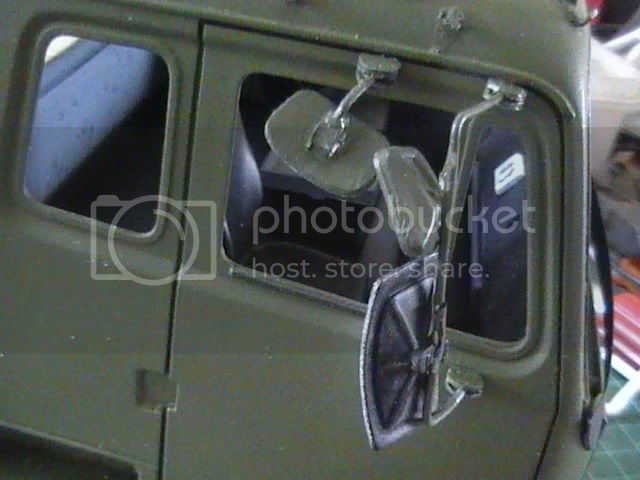
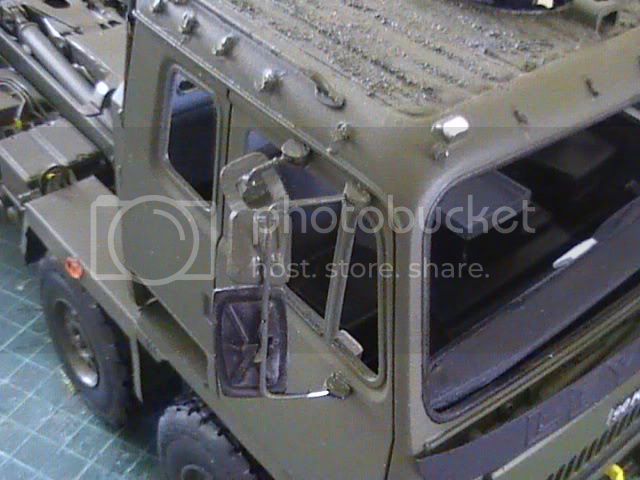
Cab drilled and mirrors mounted
Nige
A single saw cut part way through
After a second full cut and using a mini drill to drill through centre. Stout wire cut and bent to shape and fed through
Cab drilled and mirrors mounted
Nige
okdoky
Member Since: April 30, 2007
entire network: 1,597 Posts
KitMaker Network: 673 Posts
Posted: Sunday, May 13, 2012 - 11:50 AM UTC
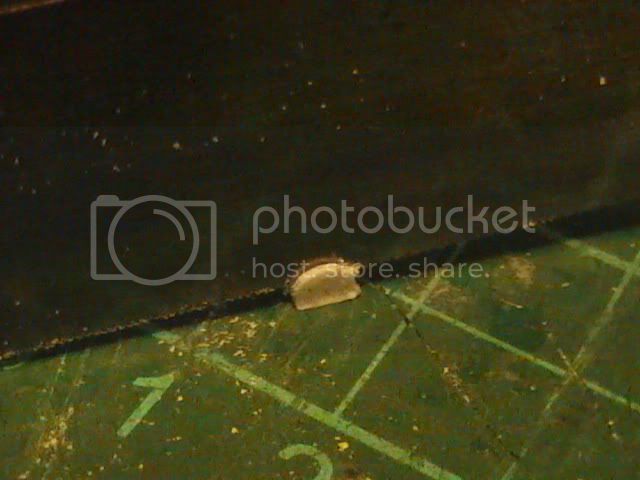
Bottom step added from wire and topped with flattened solder
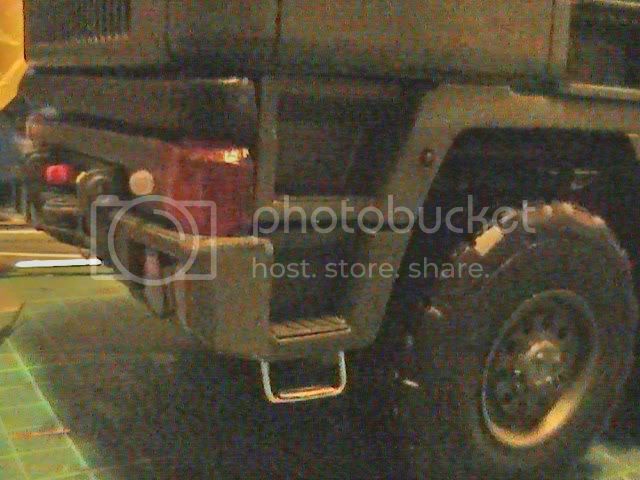
Rear window wiper and a spot light added from accessory sets
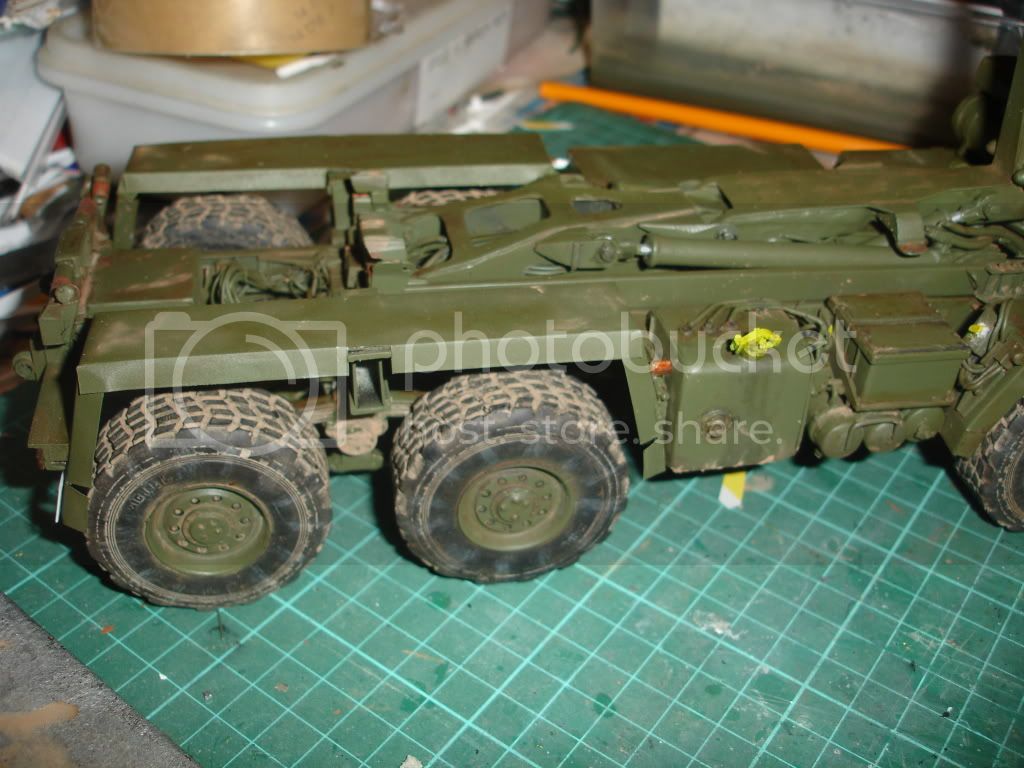
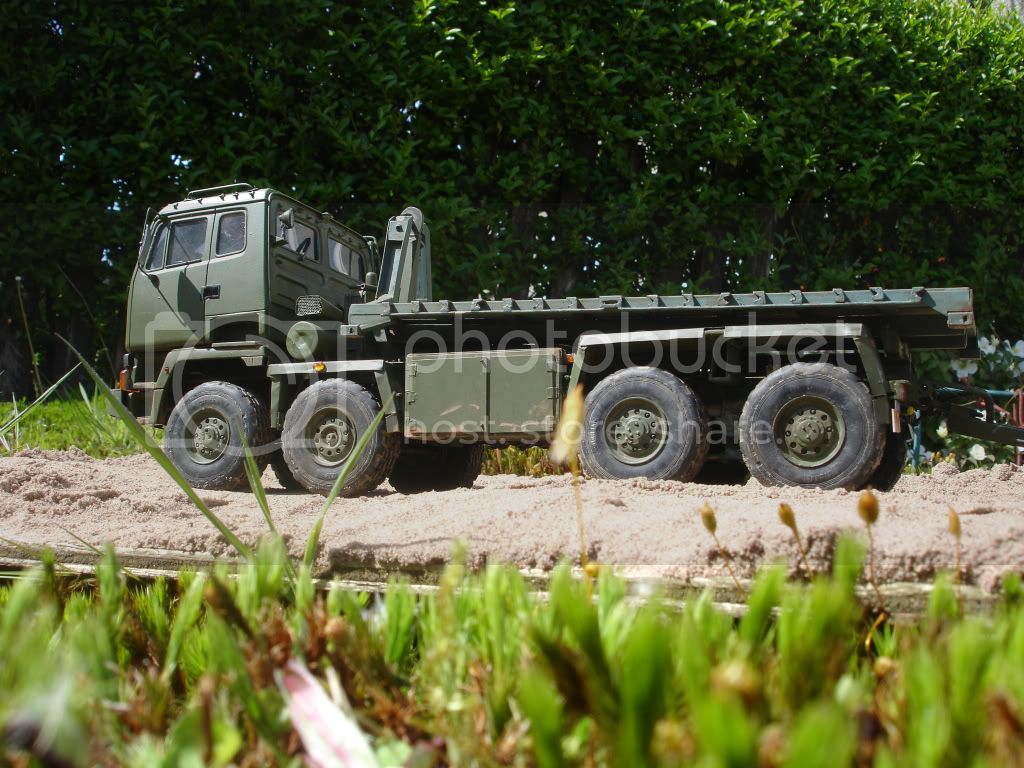
Now my first ever go at weathering wheels and tires. Main colour on the tire was a basic matt black, then a rough brush with tamiya nato black acrylic. I then added brush stokes on the tire from the hub rim outwards in nato black at intervals around it using a stippling brush. Once dry I added a little white to the nato black and very lightly dry brushed again at intervals.
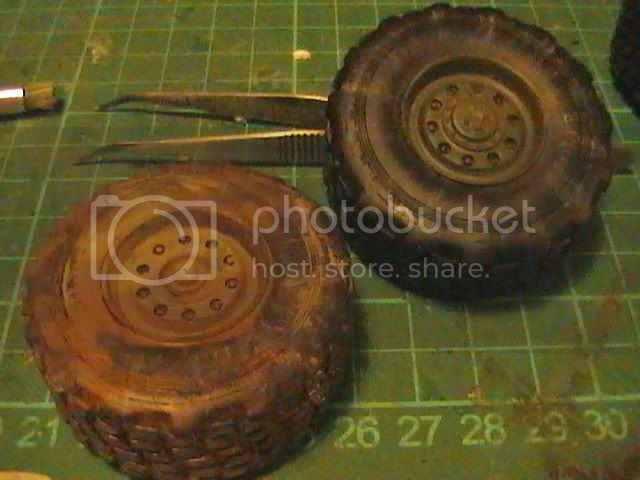
After that, I added a rough brushing of Europe dust PO28 by mig over the whole tire and hub and manipulated it with a wide brush into the treads and creases. Let it dry and then used the wide brush again to wash out and manipulate it again into areas I wanted it.
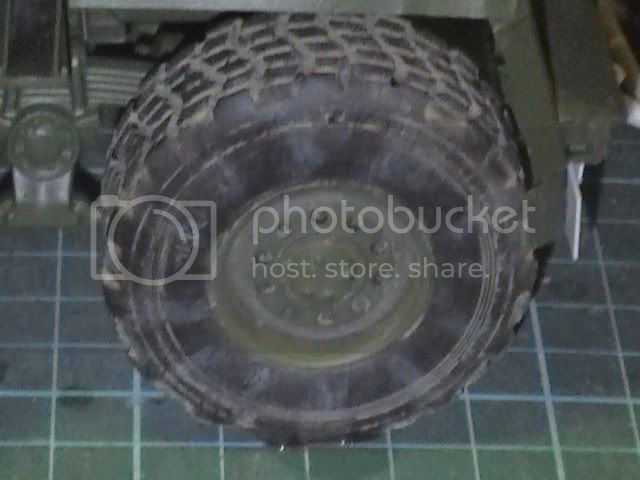
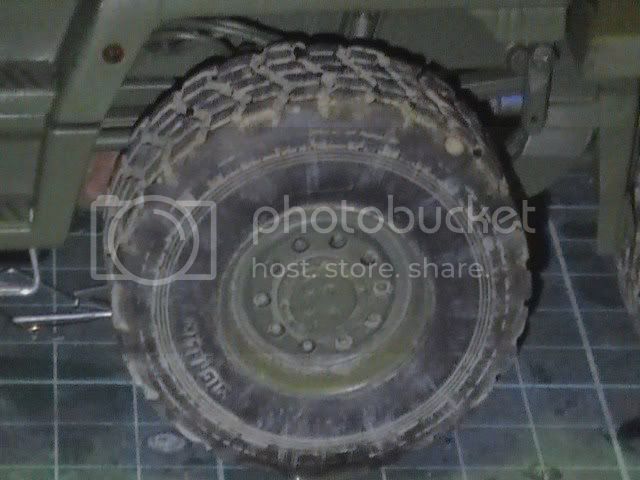


Going to try for some light oil and grease stains on the wheel nuts and lubrication points of the hubs too at some point and will freshen up the tread with a light dry brush on the areas in contact with the road.
Also added the protective bars to the headlights
Will do the same on the trailer wheels soon.
Still got the chassis and bodywork to weather but will likely start on the trailer first and practice on it.
Hope it looks ok and not too over done
Nige
Rear window wiper and a spot light added from accessory sets
Now my first ever go at weathering wheels and tires. Main colour on the tire was a basic matt black, then a rough brush with tamiya nato black acrylic. I then added brush stokes on the tire from the hub rim outwards in nato black at intervals around it using a stippling brush. Once dry I added a little white to the nato black and very lightly dry brushed again at intervals.
After that, I added a rough brushing of Europe dust PO28 by mig over the whole tire and hub and manipulated it with a wide brush into the treads and creases. Let it dry and then used the wide brush again to wash out and manipulate it again into areas I wanted it.
Going to try for some light oil and grease stains on the wheel nuts and lubrication points of the hubs too at some point and will freshen up the tread with a light dry brush on the areas in contact with the road.
Also added the protective bars to the headlights
Will do the same on the trailer wheels soon.
Still got the chassis and bodywork to weather but will likely start on the trailer first and practice on it.
Hope it looks ok and not too over done
Nige
okdoky
Member Since: April 30, 2007
entire network: 1,597 Posts
KitMaker Network: 673 Posts
Posted: Thursday, May 17, 2012 - 09:58 AM UTC
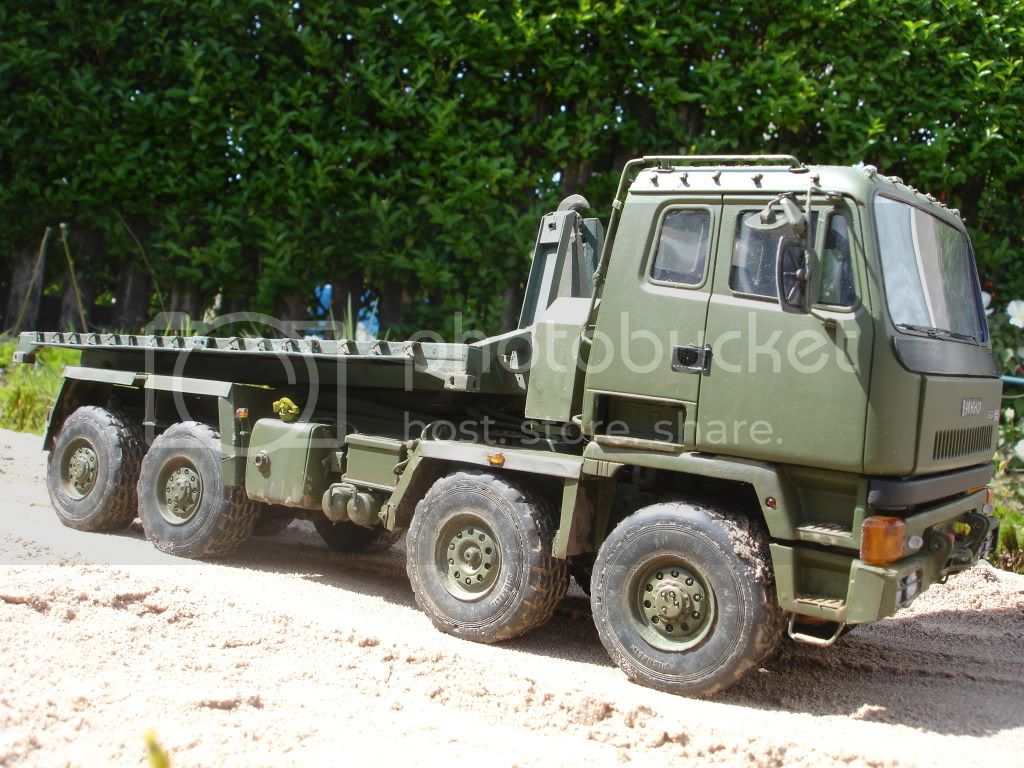
Steering wheel, badges, wipers and valance over the wipers. Decided to make a totally plain valance lacking the Scammell or Leyland branding on it using thin platicard!!!!!
Some dirt on the floors using a mix of burnt umber oils and Europe Dust from MIG.
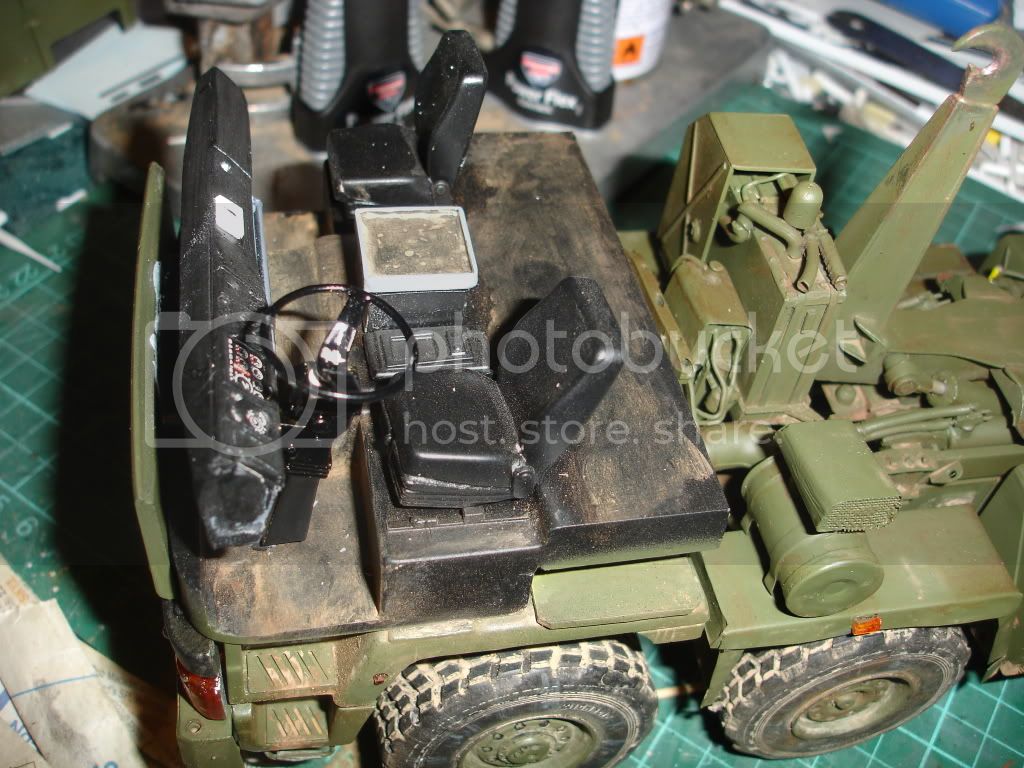
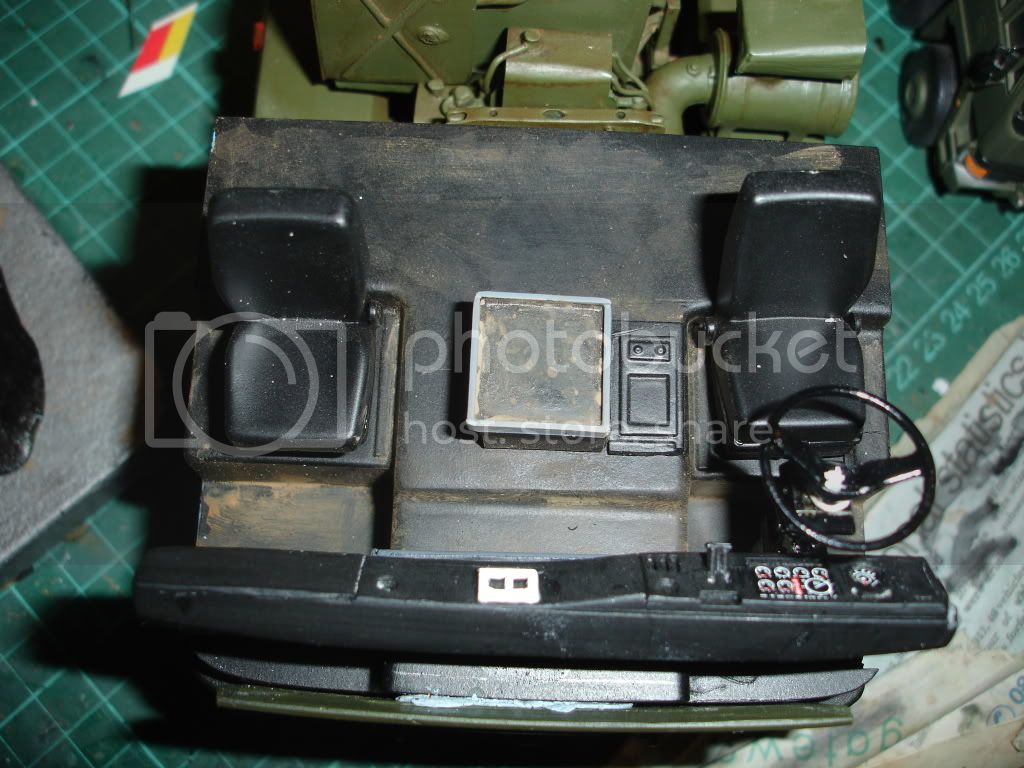
A weathered look of burnt umber oils and and the dust with a slight staining from the diesel on the fuel tank with black oil
And beside the wee brother ASAM 1/50 pre built and painted model
okdoky
Member Since: April 30, 2007
entire network: 1,597 Posts
KitMaker Network: 673 Posts
Posted: Sunday, May 20, 2012 - 05:09 AM UTC
Time to close this one up and get on to the next build !!!!!!!!
Finished model
Photobucket slide show
Finished model
Photobucket slide show

bat-213

Member Since: December 30, 2011
entire network: 902 Posts
KitMaker Network: 93 Posts
Posted: Sunday, July 15, 2012 - 11:54 AM UTC
 Nige,you never faul to amaze me,the work you do just
bolwse me away allthe work you do is great you are the master.


Plasticbattle

#003

Member Since: May 14, 2002
entire network: 9,763 Posts
KitMaker Network: 1,351 Posts

Posted: Sunday, December 16, 2012 - 03:30 AM UTC
I dont check too many of the modern builds, but Im glad to have happened upon this one. Fantastic build and attention to detail Nigel. Beautiful model. Nice one mate!! 

okdoky
Member Since: April 30, 2007
entire network: 1,597 Posts
KitMaker Network: 673 Posts
Posted: Sunday, December 16, 2012 - 04:15 AM UTC
Quoted Text
I dont check too many of the modern builds, but Im glad to have happened upon this one. Fantastic build and attention to detail Nigel. Beautiful model. Nice one mate!!
Thanks Frank for giving it a look over and glad you like it !!!!!!!
This is what I am working on now
Bedford TM 1/24 Scratchbuild
Hope you will look in on how this progresses.
All the best
Nige
 |

WEB HOSTING BY


Copyright ©2021 KitMaker Network and Kitmaker Network, a subsidiary of Silver Star Enterprises
All Rights Reserved. Please read our Conditions of Use and Privacy Policy.
All Rights Reserved. Please read our Conditions of Use and Privacy Policy.