_GOTOBOTTOM
Scratchbuilders!: Armor/AFV
This is a group for armor scratchbuilding questions, topics and projects.
Hosted by Mike Kirchoff
1/24 Scratchbuilt L/R Lightweight
okdoky
Visit this Community
Scotland, United Kingdom
Member Since: April 30, 2007
entire network: 1,597 Posts
KitMaker Network: 673 Posts
Posted: Sunday, February 13, 2011 - 10:41 AM UTC
A little something to tow my Sanky

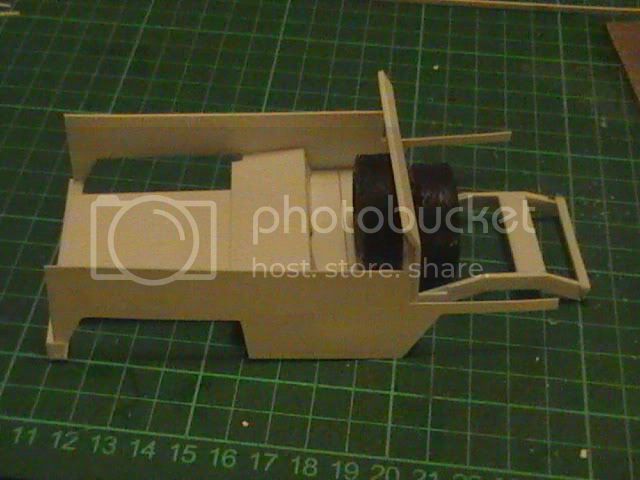
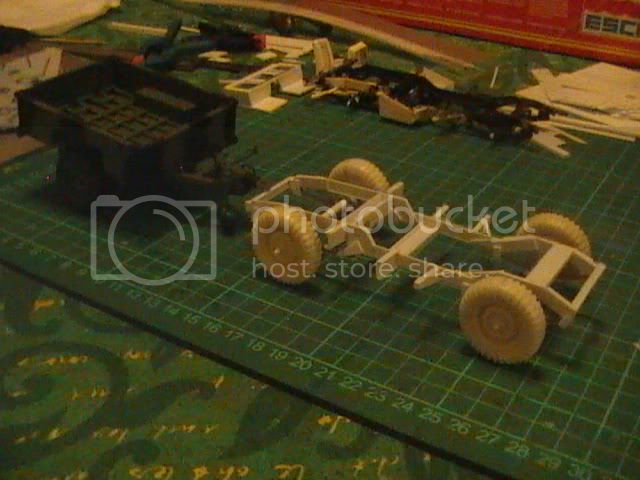
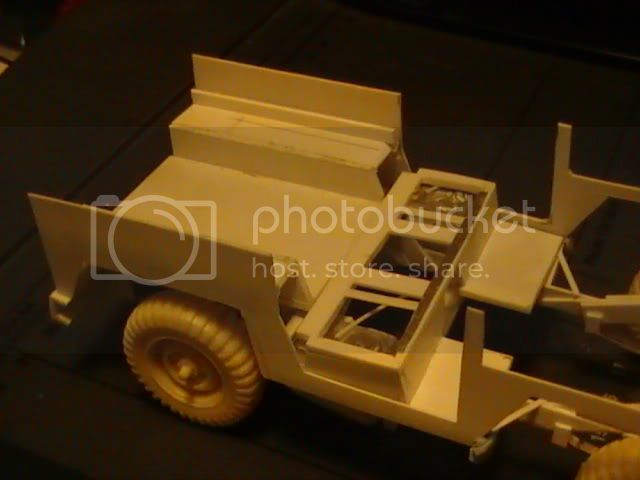
Had some time to make a start on a L/R lightweight chassis as the girls went to their ten pin bowling. Would have got more done if baby Arron had not decided to kick off every ten to 20mins. The joys !!!!!!

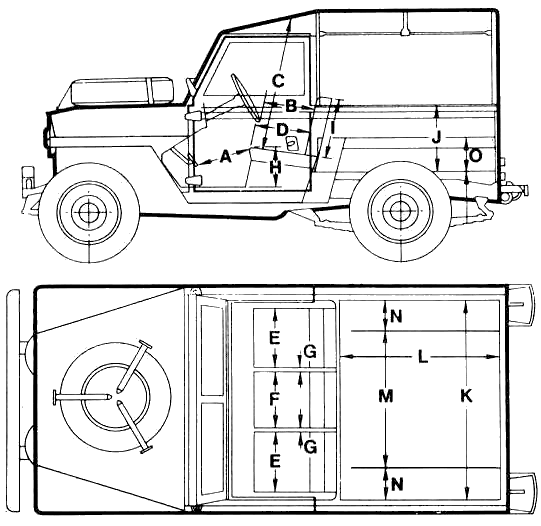
Using this drawing as my basis for the build


And a restoration blog on this site

[url]http://andy.photos.de.com/p67897481.html[url]

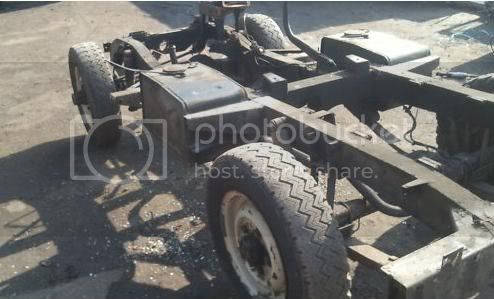
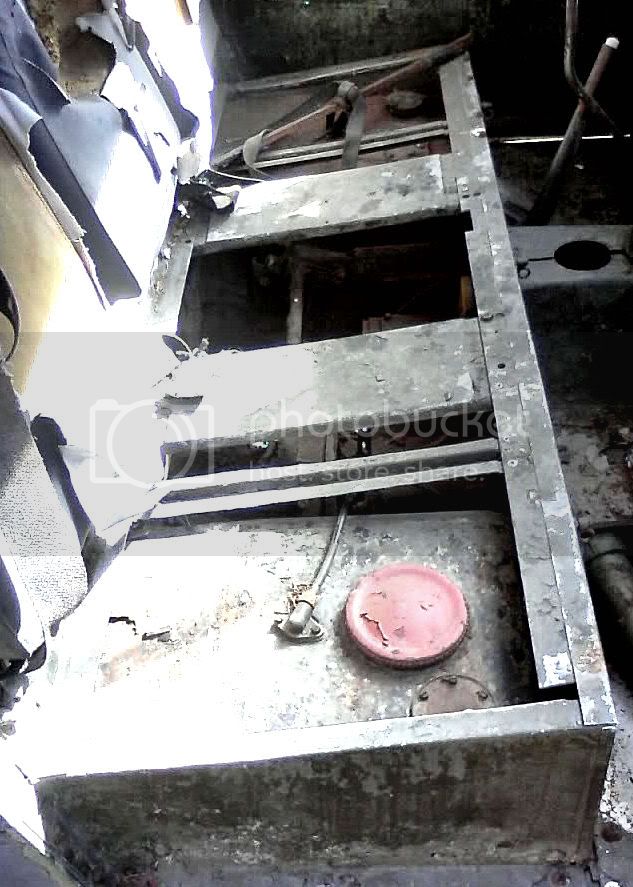
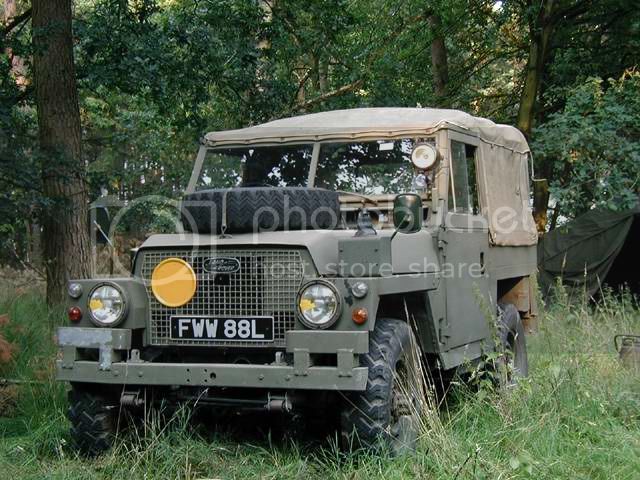
With it hopefully looking a lot like this


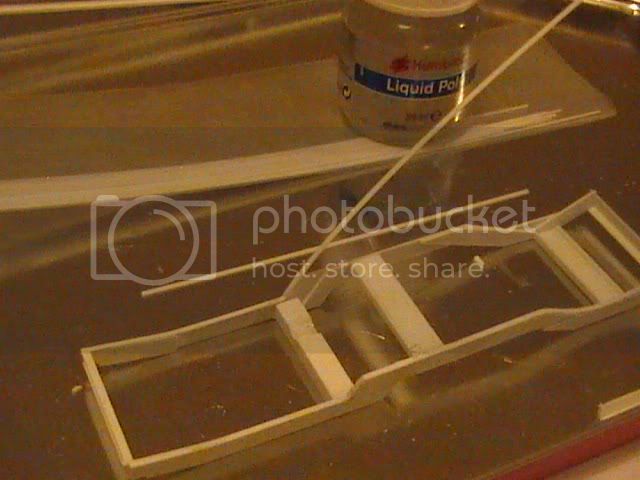
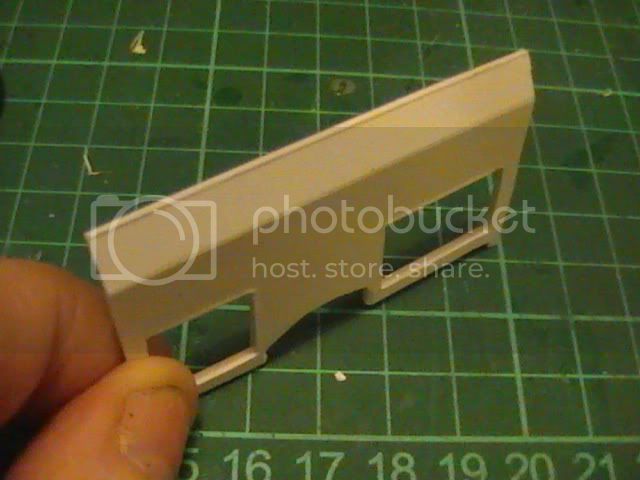
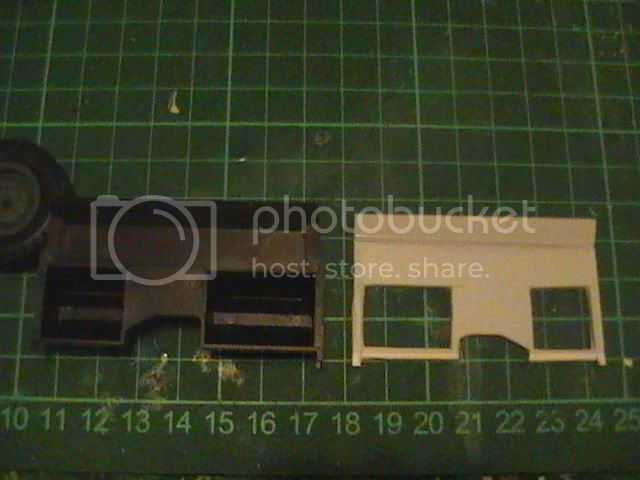
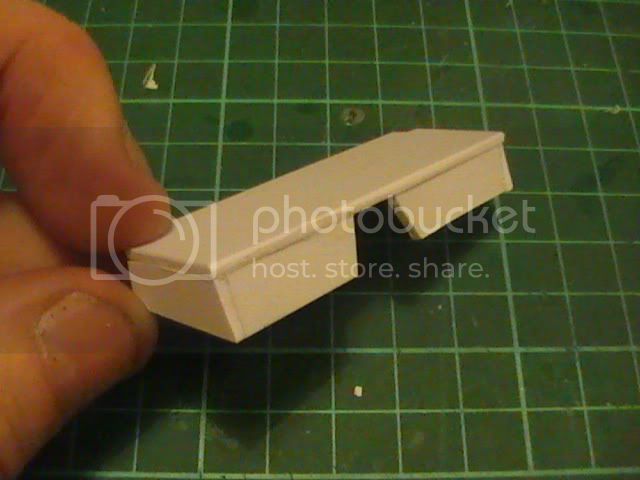
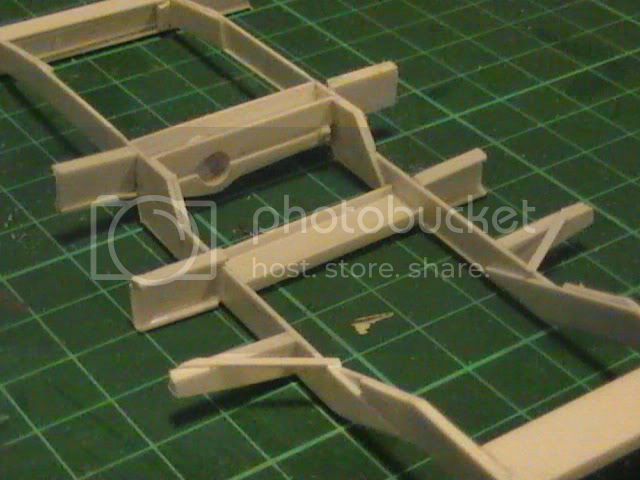
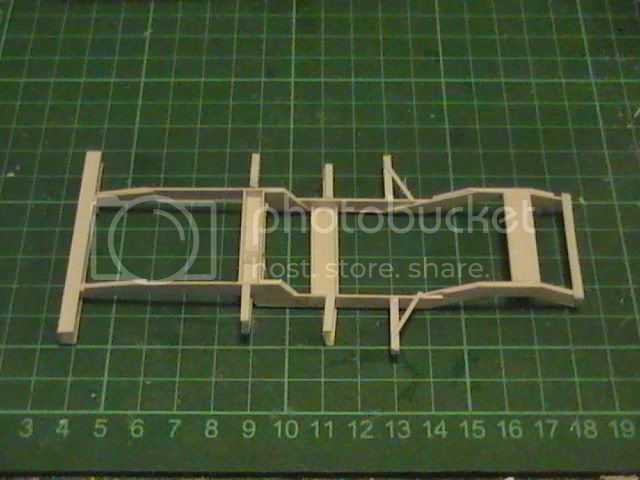
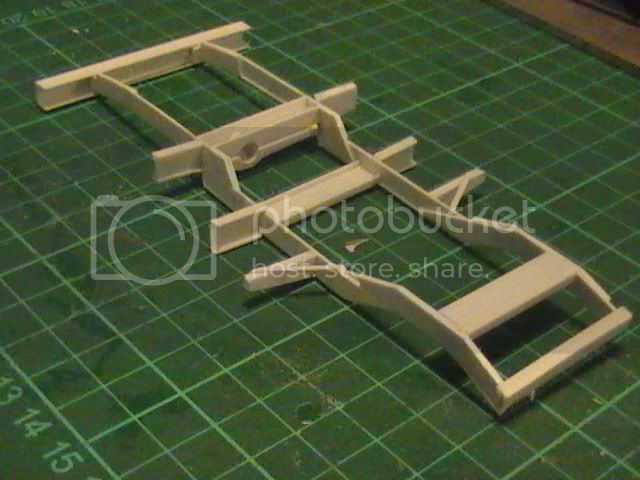
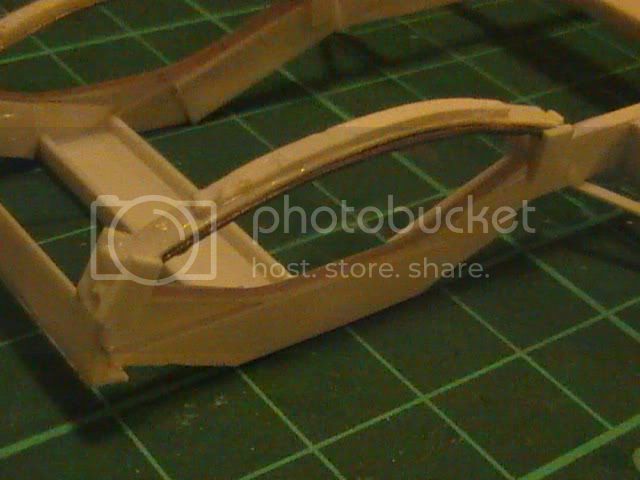
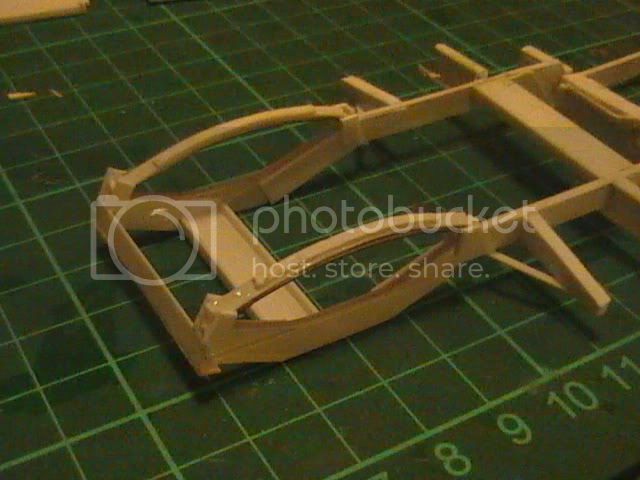
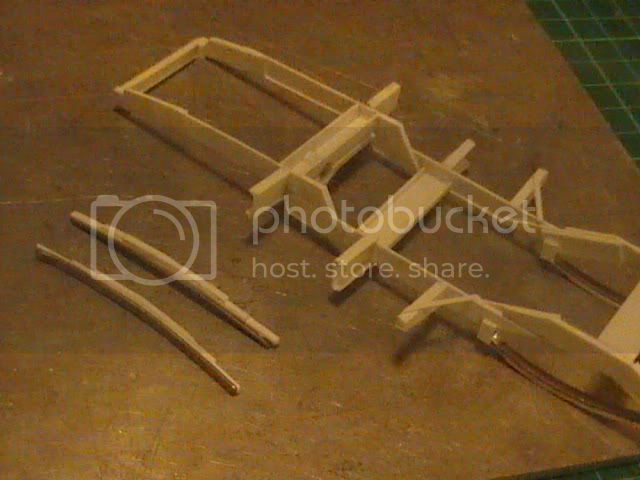
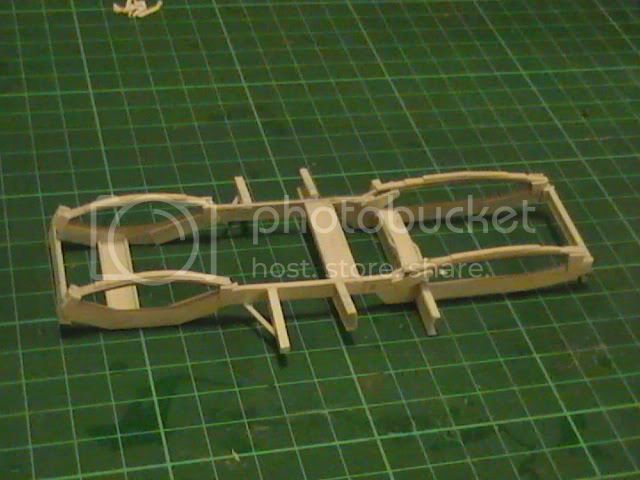
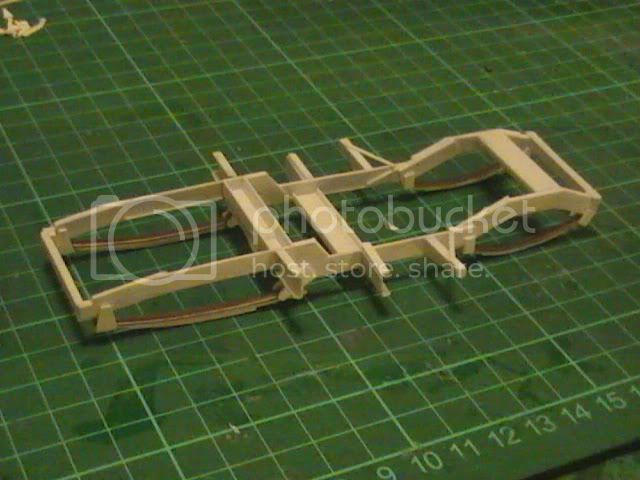
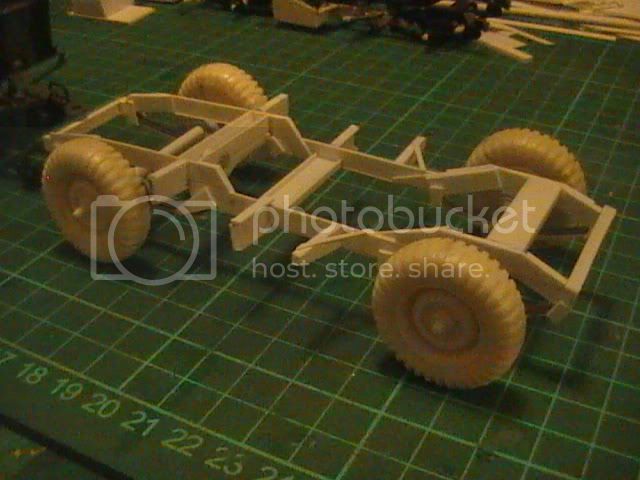
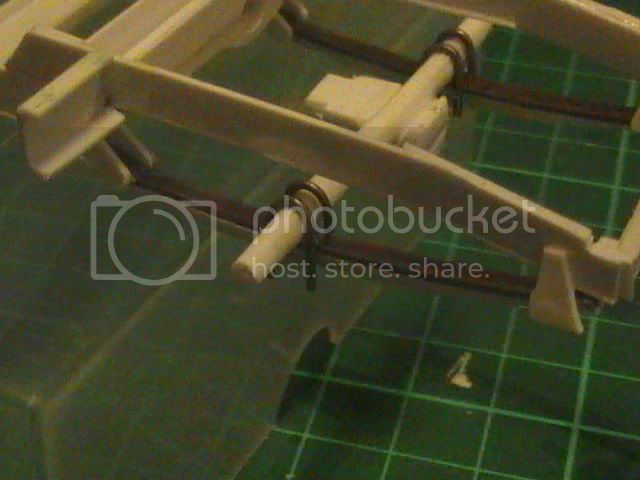
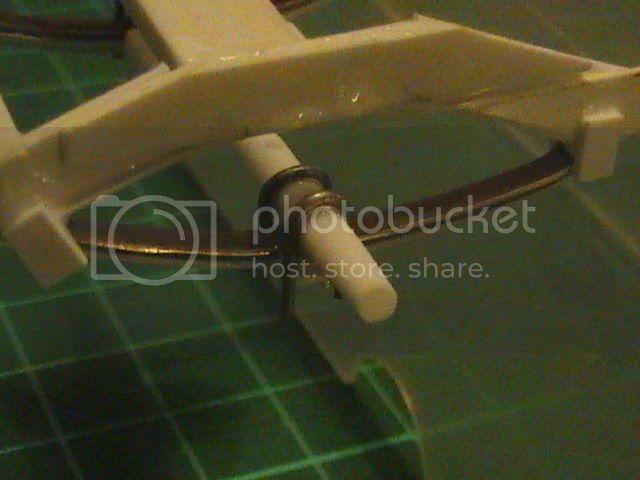
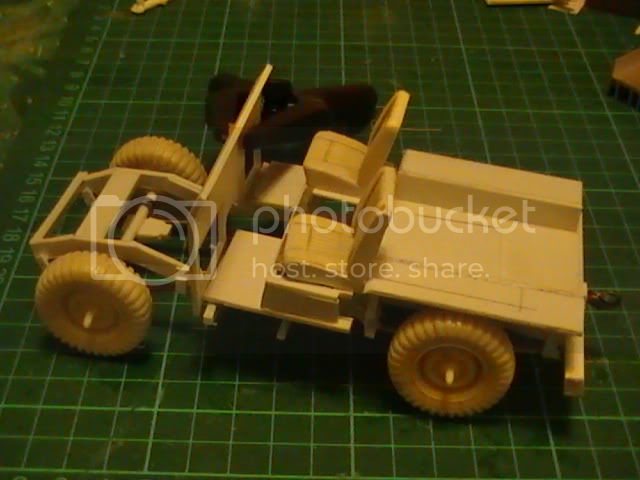
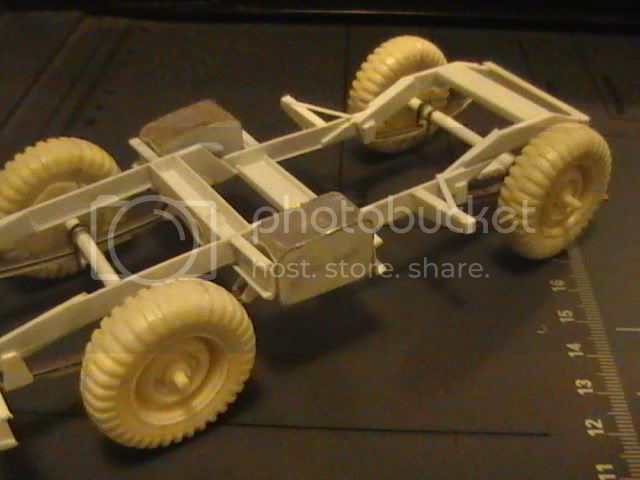
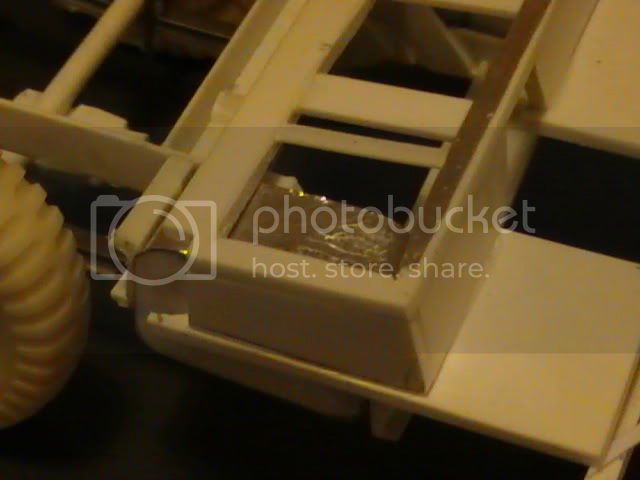
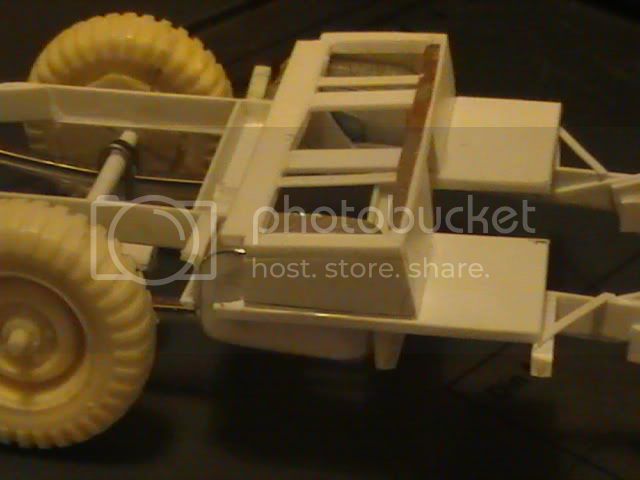
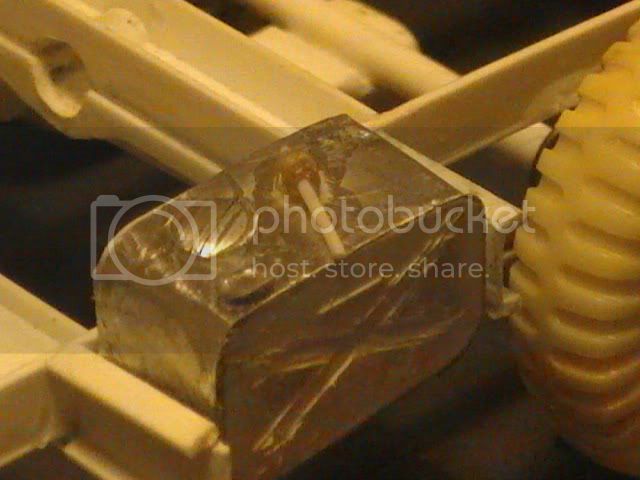
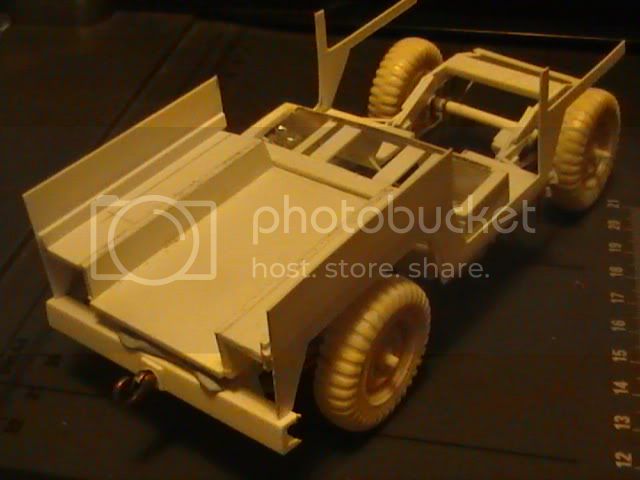
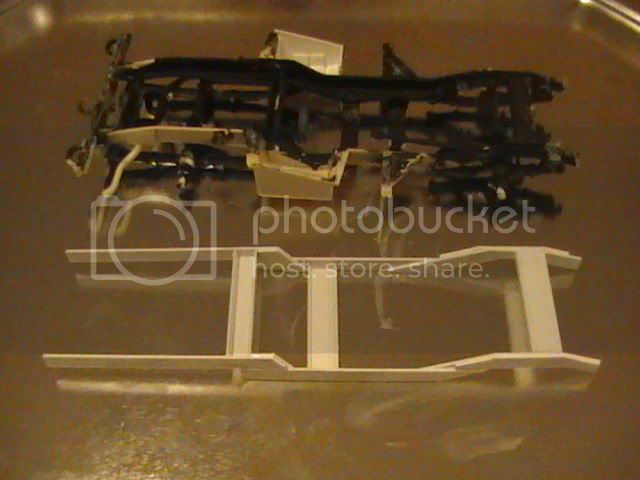
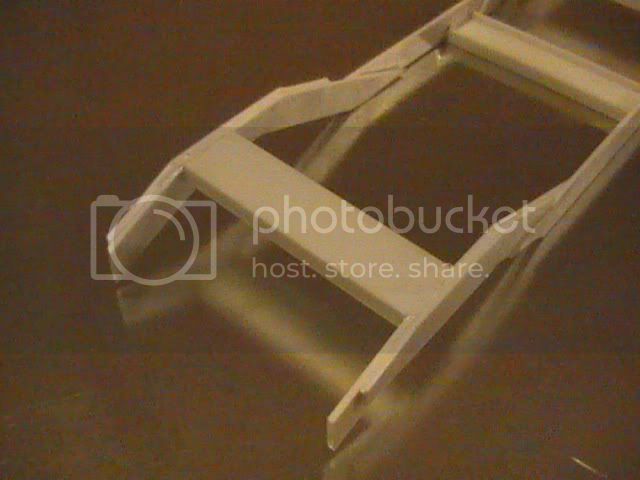
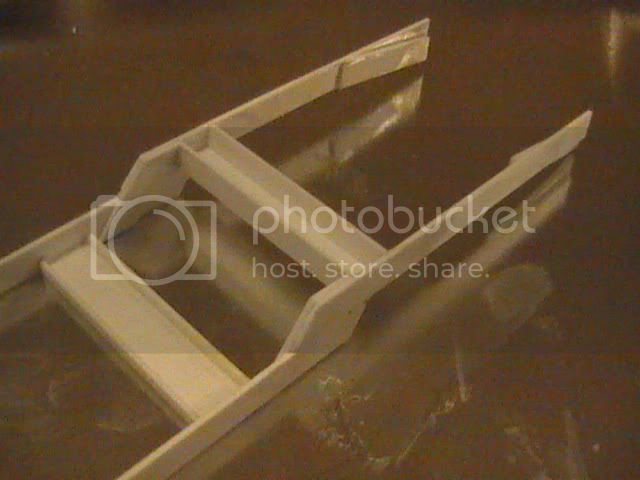
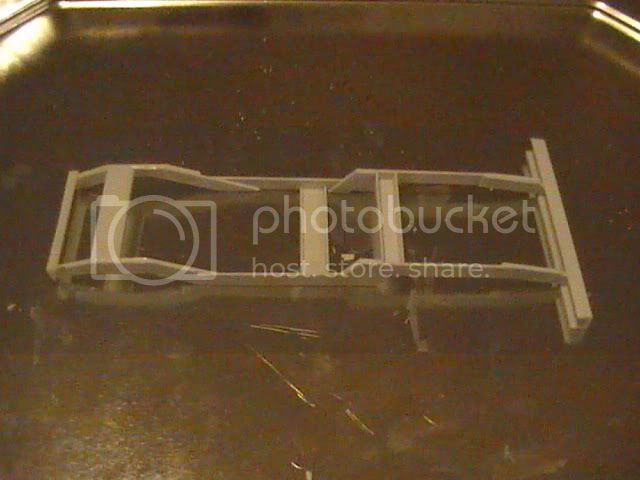
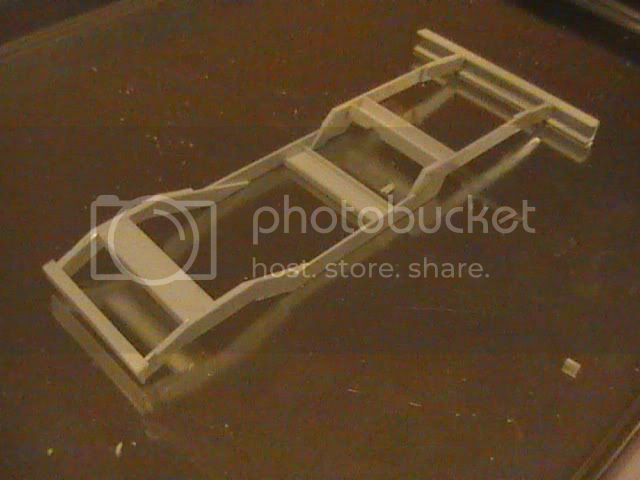
Chassis rails are simple stips of styrene cut and welded with glue having used the chassis of the Monogram kit to guage the shape, size and angles.


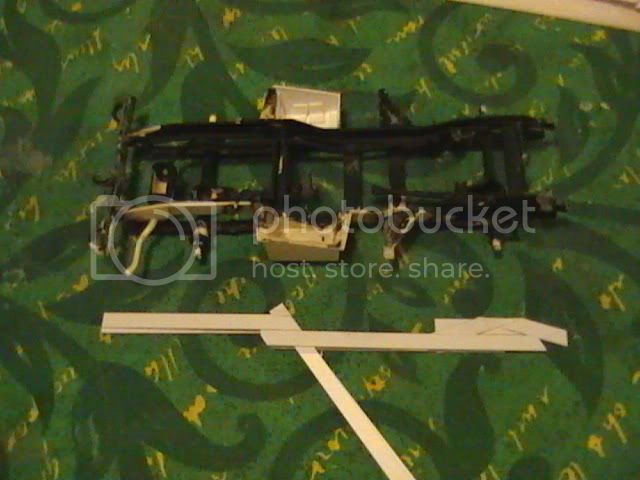
Left and right chassis rails formed together to make equal sized rails.


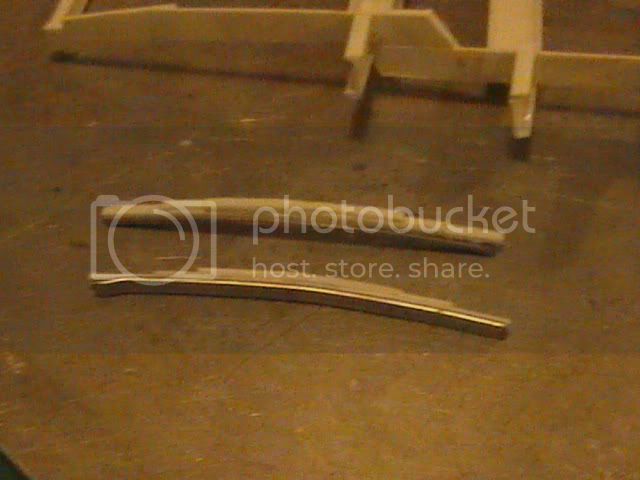
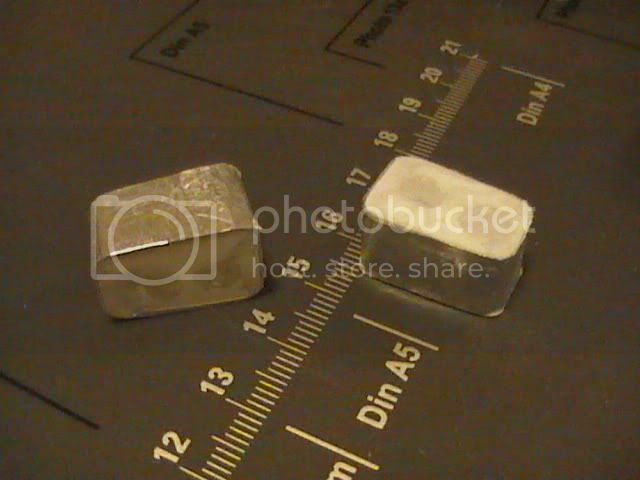
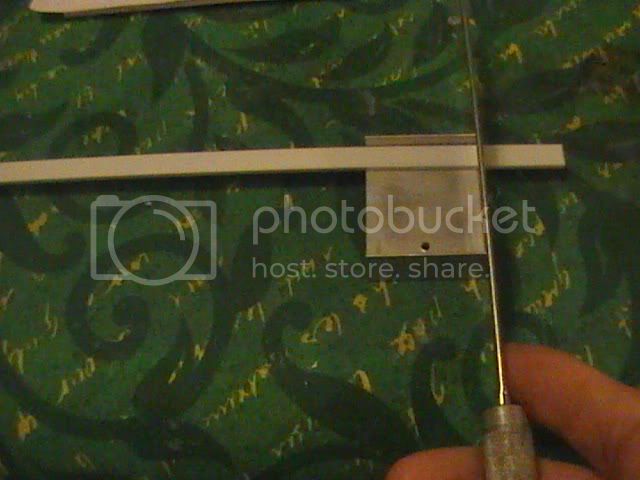
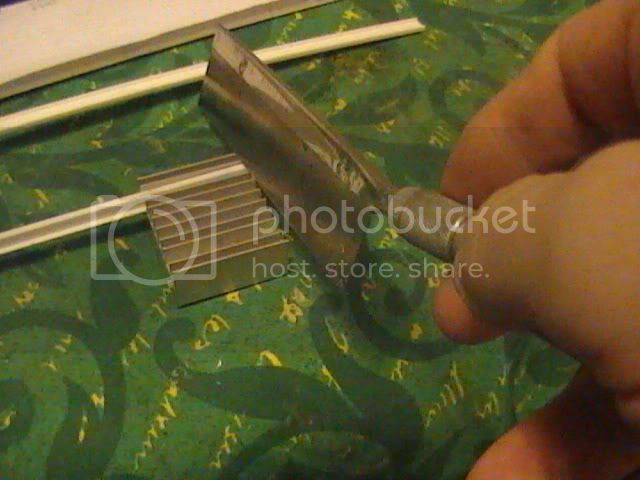
An old aluminum heat sink from an old electrical appliance (video player or summit else) is a handy tool for cutting strip or tube and sanding true. Fits in my chinese carry out tub tool boxes better than the big mitre tool.


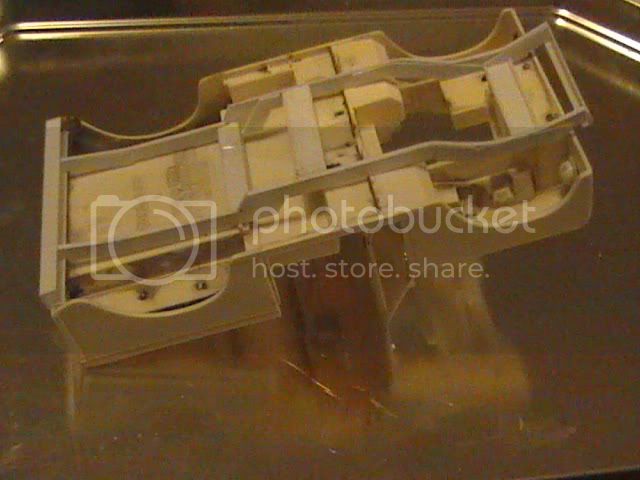
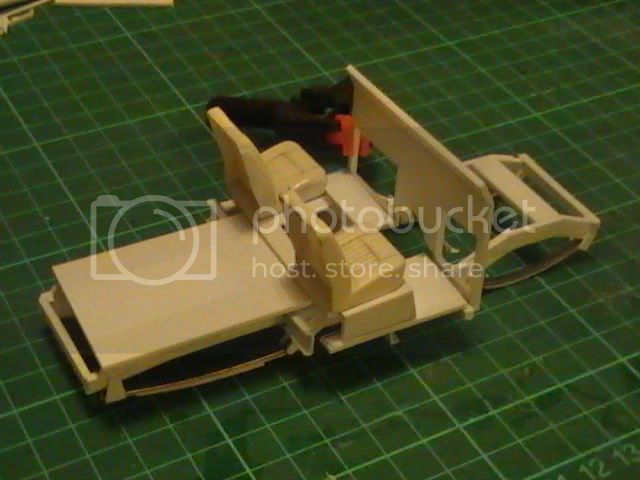
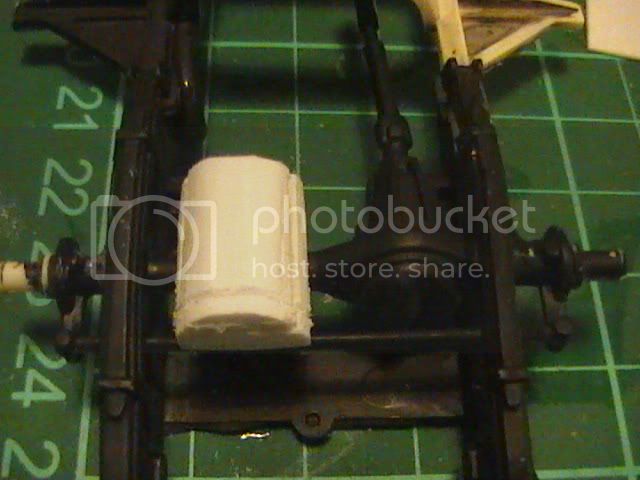
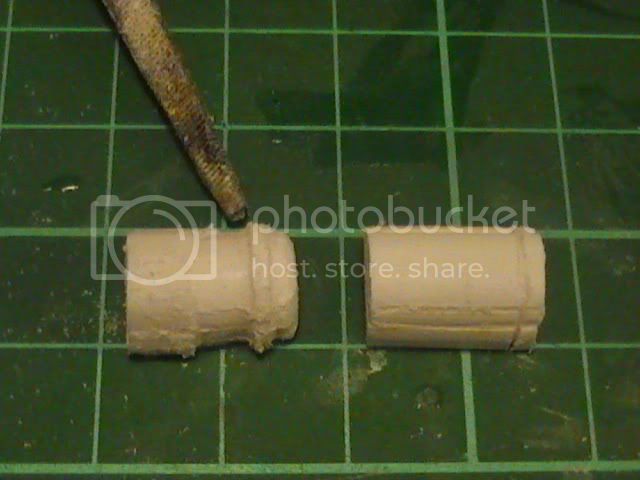
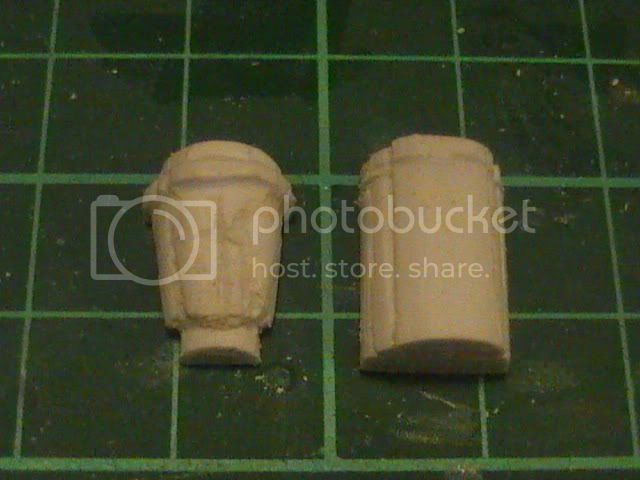
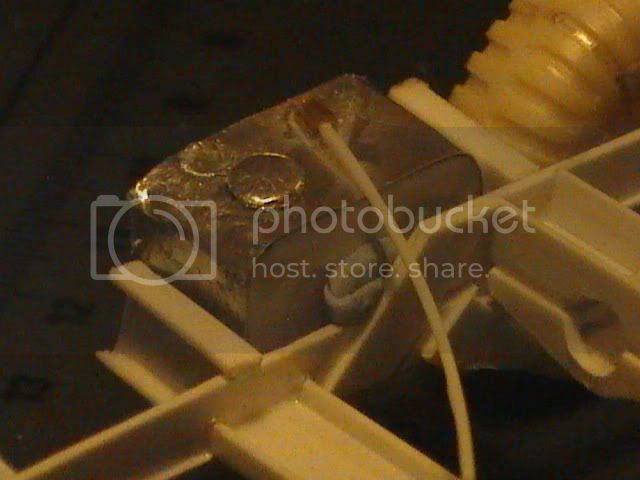
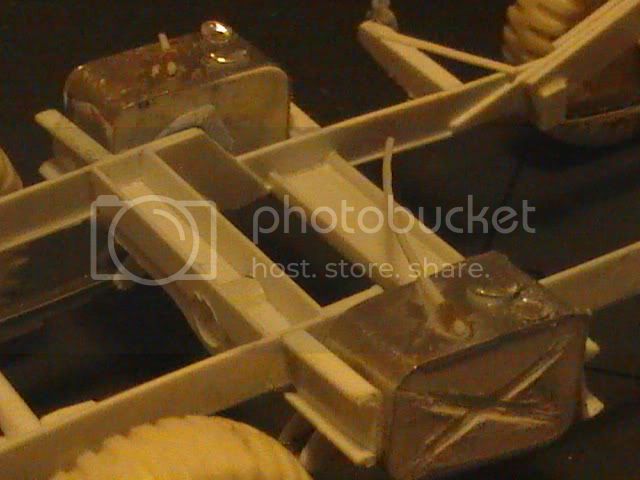
I am not being too fussy about chassis cross rail size or profile as I want to consentrate on the upper shape. I don't intend to be turning it upside down too often and would like to build this quickly and keep up momentum.


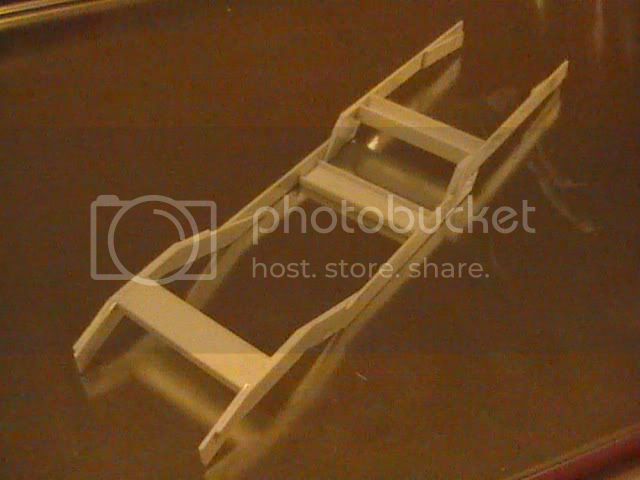
Using the strip profiles in my stash on "if it looks about right, it will do"


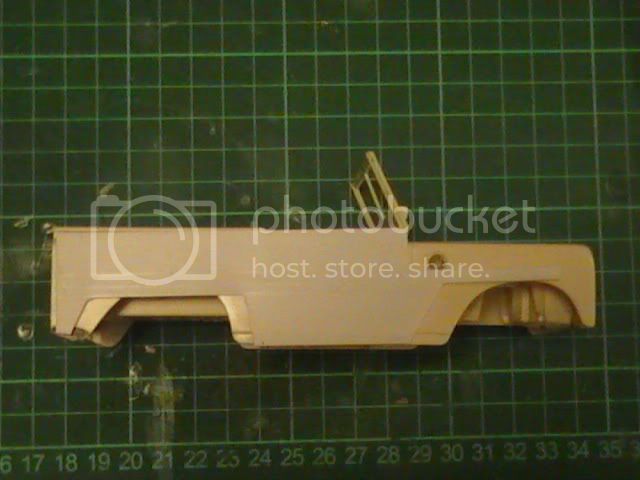
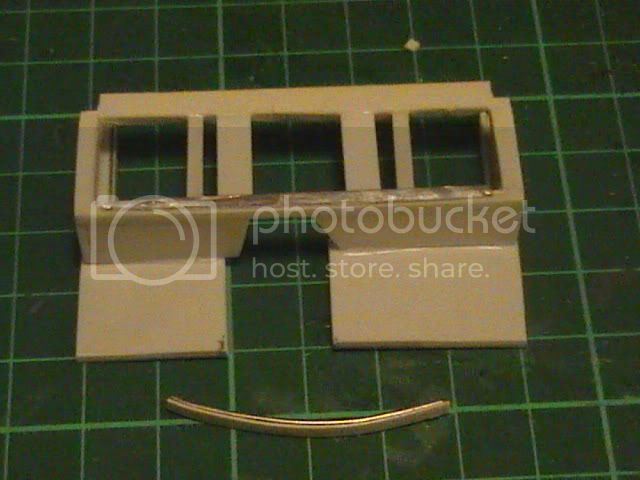
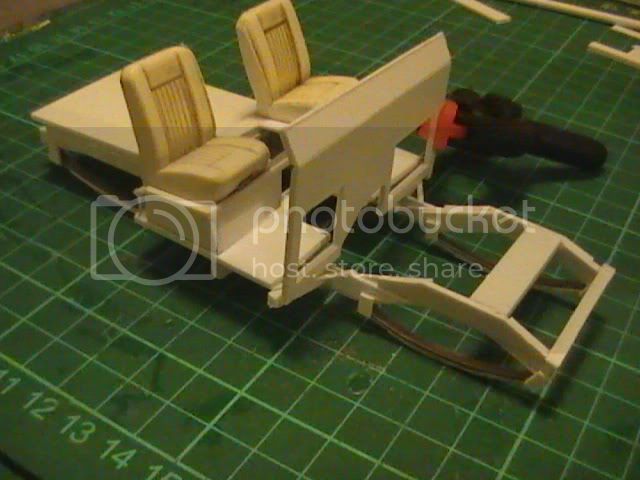
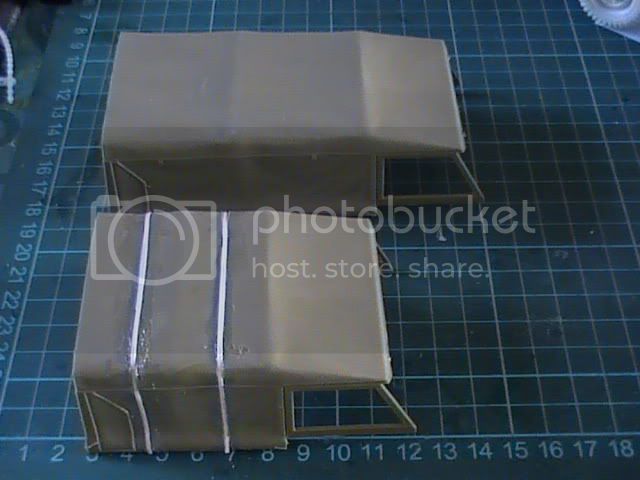
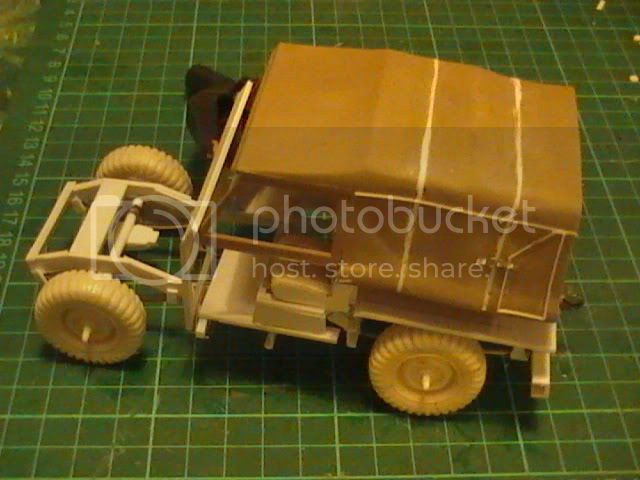
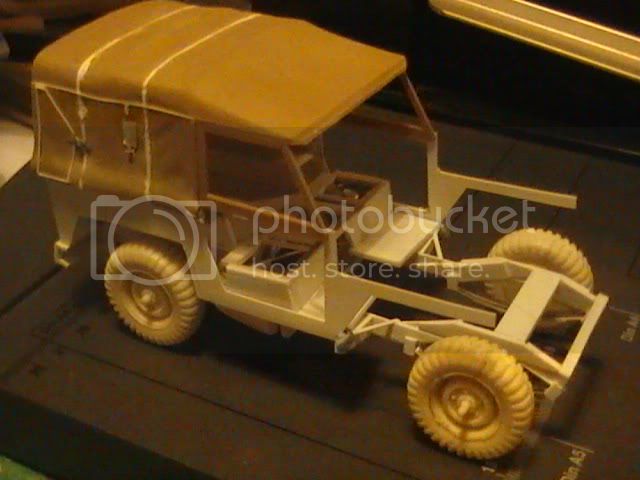
Hope you like !!!!!! I am hoping to make use of tin roast foil for the body panels, which will be rather appropriate for the Landy and should be very easy to manipulate into the very basic shapes of this great wee motor.

Nige
okdoky
Visit this Community
Scotland, United Kingdom
Member Since: April 30, 2007
entire network: 1,597 Posts
KitMaker Network: 673 Posts
Posted: Sunday, February 13, 2011 - 12:27 PM UTC
Added thin strip to unify the undersides of the rails from the outside view and will add some filler and as where visible to make the rails one.


Test fit of the rails on the monogram body to see the proportions are correct.


Now off to bed with the dregs of my man flu still lingering !!!!

Night all

nige
KoSprueOne
Visit this Community
Myanmar
Member Since: March 05, 2004
entire network: 4,011 Posts
KitMaker Network: 879 Posts
Posted: Monday, February 14, 2011 - 02:47 PM UTC
cool, very good start and progress on this one. When I first saw the title of your thread, I thought you meant Low Rider (L/R)


okdoky
Visit this Community
Scotland, United Kingdom
Member Since: April 30, 2007
entire network: 1,597 Posts
KitMaker Network: 673 Posts
Posted: Thursday, February 17, 2011 - 12:09 PM UTC

Quoted Text

cool, very good start and progress on this one. When I first saw the title of your thread, I thought you meant Low Rider (L/R)


Thanks Ko as always for looking in on my builds. Always appreciated.

Had a little time to have a go at some body panels using plastic at the moment as the tin foil would need a bit too much brasing in wrong places, but I have not given up the plan to use it within the build. I might have to be a bit selective where I am going to use it.

Knocked up some basic sides whch I am thinking of skinning with the tin foil when I have all the other panels formed. The doors may or may not stay attached, but panels and doors still have detail to add to them.


Side panel compared with L/R 88 to check for proportions.


Next is a basic firewall, foot well holes and upstand for windscreen. Holes for the two vent flaps and the flaps themselves to be drilled out and formed.


And for comparison the esci L/R 109 which is in left hand drive, whereas Lightweight will be right hand.


Seat box is next, again with no details added yet.


Where I am at for now.


If any body has interior pics of the lightweights in there original Army role they would be appreciated as my memory of all the little bits that should be there is not good enough and I am still going through restoration blogs of real vehicles.

I am consious that some restorations add on creature comforts and other bits and bobs from other L/R marks.

Cheers folks

Nige
okdoky
Visit this Community
Scotland, United Kingdom
Member Since: April 30, 2007
entire network: 1,597 Posts
KitMaker Network: 673 Posts
Posted: Saturday, February 19, 2011 - 06:38 AM UTC
Thanks folks for looking in on the build.

Added some of the side extentions on to the chassis that support the bodywork which gives the chassis a bit better look already.


More to follow soon

Thanks

Nige
okdoky
Visit this Community
Scotland, United Kingdom
Member Since: April 30, 2007
entire network: 1,597 Posts
KitMaker Network: 673 Posts
Posted: Monday, February 21, 2011 - 12:05 PM UTC
Was asked if I was going to make the seats removable to show off the fuel tanks under the seats and thought, why not?


Also visible above is the start of the leaf sprung suspension using a strip of metal lined with plastic trip to make up the front suspension as below


Nige
retiredyank
Visit this Community
Arkansas, United States
Member Since: June 29, 2009
entire network: 11,610 Posts
KitMaker Network: 3,657 Posts
Posted: Tuesday, February 22, 2011 - 02:26 AM UTC
Excellent work so far Nige. Amazing what stock can become in the hands of a professional
okdoky
Visit this Community
Scotland, United Kingdom
Member Since: April 30, 2007
entire network: 1,597 Posts
KitMaker Network: 673 Posts
Posted: Tuesday, February 22, 2011 - 11:07 AM UTC
Hi Matt

Not quite a professional ,,,,,,,,,,,,,, just a happy amature chopping away to see what comes together. If it works for me I will be happy !!!!

Here is my wee Arron supervising my work tonight. That is him ten weeks on Friday there !


Got my rear leaf springs fabricated


Thanks for looking in folks

Nige
okdoky
Visit this Community
Scotland, United Kingdom
Member Since: April 30, 2007
entire network: 1,597 Posts
KitMaker Network: 673 Posts
Posted: Tuesday, February 22, 2011 - 12:08 PM UTC
Wheels in place to check proportions. I think it is taking shape now !!!!


And with the Sanky trailer to see how it sits. Slight tail up look which I think is right.


Nige
KoSprueOne
Visit this Community
Myanmar
Member Since: March 05, 2004
entire network: 4,011 Posts
KitMaker Network: 879 Posts
Posted: Tuesday, February 22, 2011 - 03:06 PM UTC
very nice progress, okdoky. Your son Aaron is a future styrene head for sure


okdoky
Visit this Community
Scotland, United Kingdom
Member Since: April 30, 2007
entire network: 1,597 Posts
KitMaker Network: 673 Posts
Posted: Wednesday, February 23, 2011 - 07:31 AM UTC

Quoted Text

very nice progress, okdoky. Your son Aaron is a future styrene head for sure


Hi Ko

Hopefully Arron will get the bug like the girls did. I wish I could spend more time working with Jasmine and Holly on models too and keep their interest going.

Nige
okdoky
Visit this Community
Scotland, United Kingdom
Member Since: April 30, 2007
entire network: 1,597 Posts
KitMaker Network: 673 Posts
Posted: Wednesday, February 23, 2011 - 10:23 AM UTC
Made a start on the differentials on the axles. Started by laminating thick pieces of plastic card together and sanding to shape as blanks.


Blank on 88 inch chassis for comparison.


Using a mixture of chissel, files and sanding sticks started shaping.


Basic finished diff against the second blank still to be done.


Nige
okdoky
Visit this Community
Scotland, United Kingdom
Member Since: April 30, 2007
entire network: 1,597 Posts
KitMaker Network: 673 Posts
Posted: Sunday, February 27, 2011 - 02:26 AM UTC
Thanks to Dave (papasmurf) of IPMS and a speedy Royal Mail I now have the tilt for the lightweight.


A little cut and shut to get the middle tilt bow placed correctly for the short wheelbase.


Still has a bit of refinement to do blending in the joints.


Also added the rough axles and leaf spring U bolts.


Thanks again Dave for the tilt.

Nige
retiredyank
Visit this Community
Arkansas, United States
Member Since: June 29, 2009
entire network: 11,610 Posts
KitMaker Network: 3,657 Posts
Posted: Sunday, February 27, 2011 - 03:24 AM UTC
Looks like all you are keeping is the front end and the chassis. Everything else is masterful scratchbuilding.
okdoky
Visit this Community
Scotland, United Kingdom
Member Since: April 30, 2007
entire network: 1,597 Posts
KitMaker Network: 673 Posts
Posted: Sunday, February 27, 2011 - 09:28 AM UTC

Quoted Text

Looks like all you are keeping is the front end and the chassis. Everything else is masterful scratchbuilding.


Hi Matt

The way it is going, the only kit bits that will be used will be Dave's cut down tilt and the resin wheels. All other bits should be from scratch.

A rub down to smooth off the damaged detailing.


Stretched sprue, wire and tin foil to put the detailing back on.


Nige
okdoky
Visit this Community
Scotland, United Kingdom
Member Since: April 30, 2007
entire network: 1,597 Posts
KitMaker Network: 673 Posts
Posted: Sunday, February 27, 2011 - 12:18 PM UTC
Added a NATO style hitch using a necklace clasp.


Also formed the cargo bed.


Tilt added to check proportions


Nige
Bigrip74
Visit this Community
Texas, United States
Member Since: February 22, 2008
entire network: 5,026 Posts
KitMaker Network: 461 Posts
Posted: Thursday, March 03, 2011 - 09:16 AM UTC
Hello Nige, what is your source for the drawings. Looks like something I would like to look into.

Bob
okdoky
Visit this Community
Scotland, United Kingdom
Member Since: April 30, 2007
entire network: 1,597 Posts
KitMaker Network: 673 Posts
Posted: Saturday, March 12, 2011 - 12:19 PM UTC
Hi Bob

Sorry for not getting back to you. The wife ended up in hospital last weekend and been busy keeping house with the girls and baby Arron. Kaz back out and feeling loads better after an op last Saturday.

The drawings are off the web somewhere but if you pass me a PM I can send a copy of some of my references by e-mail.

Only got a couple of fuel tanks roughed up at the moment to add to the chassis and will post pics tomorrow if I get a chance.

Nige
okdoky
Visit this Community
Scotland, United Kingdom
Member Since: April 30, 2007
entire network: 1,597 Posts
KitMaker Network: 673 Posts
Posted: Sunday, March 13, 2011 - 11:36 AM UTC
Kaz and the kids are all doing fantastic now and to look at Kaz you would not think she had been through the wars. Taken everything in her stride as usual. What a gall !!!

Had a chance to do some little bits tonight. Fabricated two basic fuel tanks using this pic as reference


I cut four thick plastic pieces and temporarily glued them together to sand them to the shapes of the tanks profile. Then I added a section of square hollow section between two to give me the width. Then by cutting the tin foil to the width, I superglued the foil as a wrap around strip to form the tanks.


Still got the cross shaped indents to carve on the sides, fuel tank lids and pipework under the seats


Nige
okdoky
Visit this Community
Scotland, United Kingdom
Member Since: April 30, 2007
entire network: 1,597 Posts
KitMaker Network: 673 Posts
Posted: Sunday, March 13, 2011 - 04:45 PM UTC
Adding side impression


Fuel caps and pipes


Rear tub and side panels


Tilt on for proportions again


Nige
ti
Visit this Community
Dalarnas, Sweden
Member Since: May 08, 2002
entire network: 2,264 Posts
KitMaker Network: 254 Posts
Posted: Sunday, March 13, 2011 - 05:57 PM UTC
A true master at tvist craft. Well done.
okdoky
Visit this Community
Scotland, United Kingdom
Member Since: April 30, 2007
entire network: 1,597 Posts
KitMaker Network: 673 Posts
Posted: Monday, March 14, 2011 - 12:44 PM UTC
Hi Charles

Thanks for looking in on the build.

Cheers

Nige
okdoky
Visit this Community
Scotland, United Kingdom
Member Since: April 30, 2007
entire network: 1,597 Posts
KitMaker Network: 673 Posts
Posted: Monday, March 14, 2011 - 12:46 PM UTC
Hi Bob (Bigrip)

Pm and E-mail winging its way to you !!

Nige
Bigrip74
Visit this Community
Texas, United States
Member Since: February 22, 2008
entire network: 5,026 Posts
KitMaker Network: 461 Posts
Posted: Monday, March 14, 2011 - 01:35 PM UTC
Nige, thanks for the help. The PM and email are here.

Bob
okdoky
Visit this Community
Scotland, United Kingdom
Member Since: April 30, 2007
entire network: 1,597 Posts
KitMaker Network: 673 Posts
Posted: Tuesday, March 15, 2011 - 10:47 AM UTC

Quoted Text

Nige, thanks for the help. The PM and email are here.

Bob


Well Bob

No excuse not to see you crack out your very own lightweight now. Or you could wait to purchase a resin 1/24 Lightweight and a 101 Forward Control Landrover kit from Kit Form Services when they come out !!!!!!!!!

Build your own for now ,,,,,,,,,,,,,,,,,,, its fun !!!!!!

All the best

Nige
 _GOTOTOP