

Nige,
I still have that Cunningham armored car to finish first.
Bob
Scratchbuilders!: Armor/AFV
This is a group for armor scratchbuilding questions, topics and projects.
This is a group for armor scratchbuilding questions, topics and projects.
Hosted by Mike Kirchoff
1/24 Scratchbuilt L/R Lightweight

Bigrip74

Member Since: February 22, 2008
entire network: 5,026 Posts
KitMaker Network: 461 Posts

Posted: Tuesday, March 15, 2011 - 12:10 PM UTC

okdoky

Member Since: April 30, 2007
entire network: 1,597 Posts
KitMaker Network: 673 Posts

Posted: Thursday, March 17, 2011 - 10:40 AM UTC
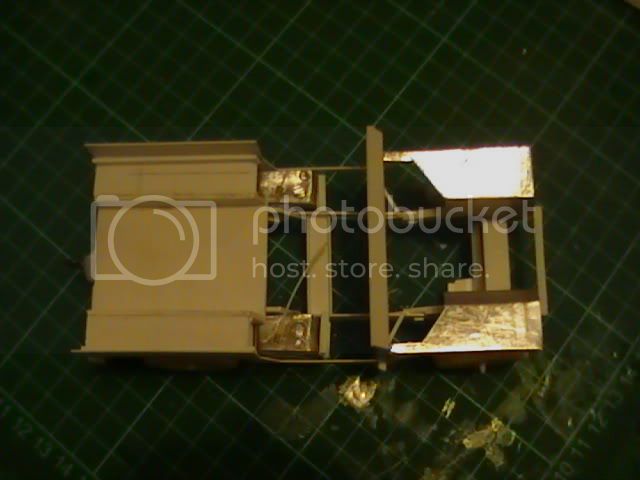
Second attempt at forming the front wheelarches with light clusters from folded tin foil. First attempt. went Pete Tong having used the craft nife to mark out the fold lines which led to premature fractures when folding.
This is as far as I got when the fold broke

Fresh tin cut to size and this time used a thin embossing tool from Hobbycraft to mark out the folds. Being a rounded head instead of a nife edge it did not over stress the folds.
Will do the other side and check the proportions after I feed Arron his last bottle of the day. One handed typing here.
Nige
This is as far as I got when the fold broke
Fresh tin cut to size and this time used a thin embossing tool from Hobbycraft to mark out the folds. Being a rounded head instead of a nife edge it did not over stress the folds.
Will do the other side and check the proportions after I feed Arron his last bottle of the day. One handed typing here.
Nige
okdoky
Member Since: April 30, 2007
entire network: 1,597 Posts
KitMaker Network: 673 Posts
Posted: Saturday, March 19, 2011 - 12:52 PM UTC
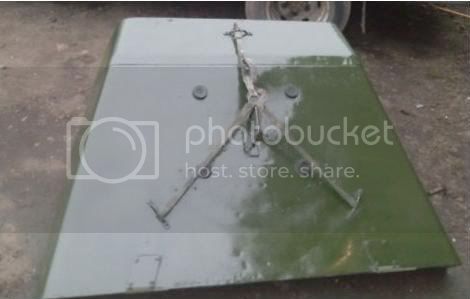
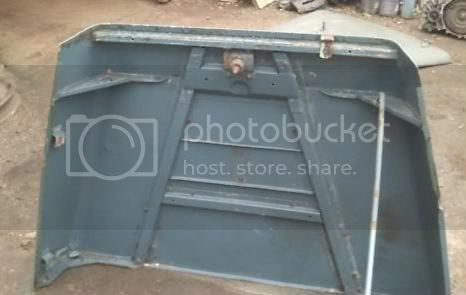
A couple of e-bay pics for reference
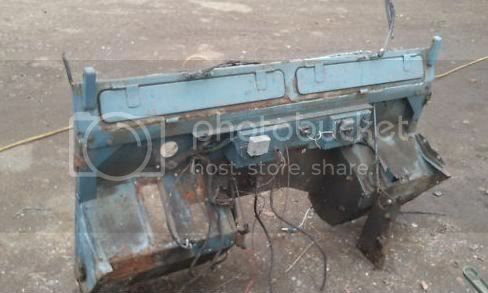
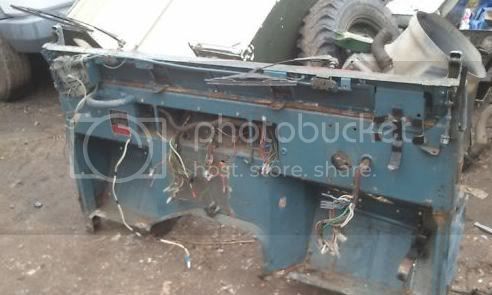
My folded tin foil wings added
Got the foot wells to sort out on the front bulkhead fire wall. Maybe get a start on that tomorrow.
Nige
My folded tin foil wings added
Got the foot wells to sort out on the front bulkhead fire wall. Maybe get a start on that tomorrow.
Nige
okdoky
Member Since: April 30, 2007
entire network: 1,597 Posts
KitMaker Network: 673 Posts
Posted: Saturday, March 19, 2011 - 01:42 PM UTC
okdoky
Member Since: April 30, 2007
entire network: 1,597 Posts
KitMaker Network: 673 Posts
Posted: Monday, March 21, 2011 - 11:20 AM UTC
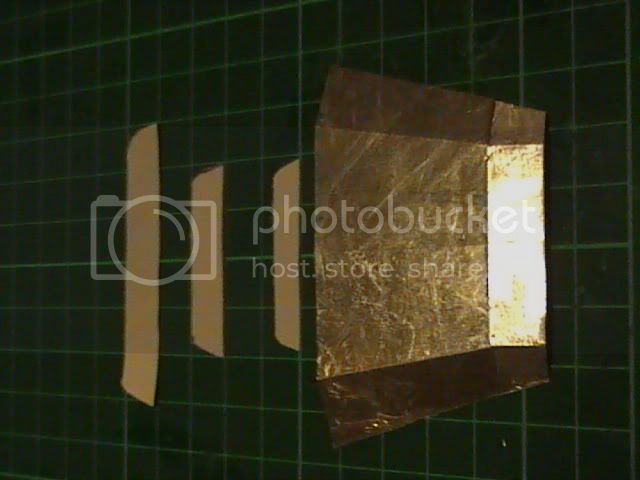
Going to have a go at building the bonnet next as this will give me a shabe to work on the front. If it don't work out will try to do the grill and radiator housing and build the bonnet around it.
First attempt at size and shape
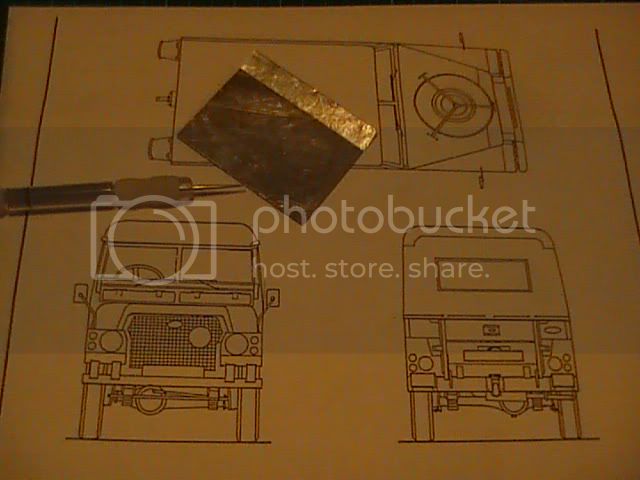
Needs tweeking on the dimensions as the wide end is far too narrow and the overall length is too long which I am putting down to the fact that I have not compensated for all the curves enough loosing vital mm's.
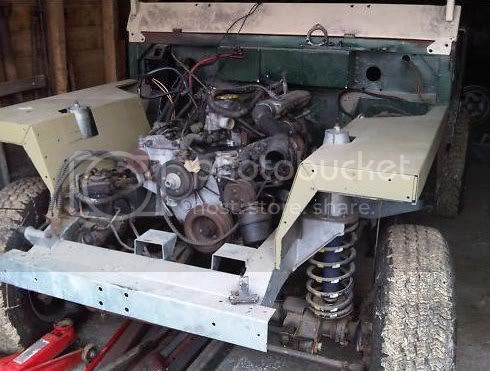
If any one has a real Landrover Lightweight in their drive way it would be great to get the real width measurements on all the curves and the length down the middle and along the sides. Would help me avoid cocking up too much. Though I have loads of carry out containers to keep stabbing away at it.
Nige
First attempt at size and shape
Needs tweeking on the dimensions as the wide end is far too narrow and the overall length is too long which I am putting down to the fact that I have not compensated for all the curves enough loosing vital mm's.
If any one has a real Landrover Lightweight in their drive way it would be great to get the real width measurements on all the curves and the length down the middle and along the sides. Would help me avoid cocking up too much. Though I have loads of carry out containers to keep stabbing away at it.
Nige
okdoky
Member Since: April 30, 2007
entire network: 1,597 Posts
KitMaker Network: 673 Posts
Posted: Tuesday, March 22, 2011 - 12:44 PM UTC
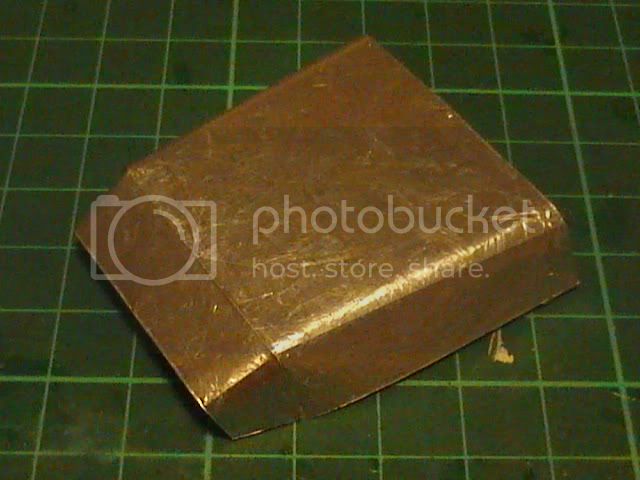
Second attempt and looking much better as I took the time to draw the profiles correctly this time.
"IT DOES HELP WHEN YOU MEASURE THE CORRECT LINES ON THE DRAWINGS" ,,,,,,,,,,,,,,,,,, "MEASURE TWICE ,,,,,,,,,,,,,,, CUT ONCE"

A bit more detailing to add top and bottom after a bit of tweeking on the curves to get the bonnet to sit flat and to profile, but that is where it is at for tonight.
Off to bed said Zebadi !!!!!!
Night
Nige
"IT DOES HELP WHEN YOU MEASURE THE CORRECT LINES ON THE DRAWINGS" ,,,,,,,,,,,,,,,,,, "MEASURE TWICE ,,,,,,,,,,,,,,, CUT ONCE"
A bit more detailing to add top and bottom after a bit of tweeking on the curves to get the bonnet to sit flat and to profile, but that is where it is at for tonight.
Off to bed said Zebadi !!!!!!
Night
Nige
okdoky
Member Since: April 30, 2007
entire network: 1,597 Posts
KitMaker Network: 673 Posts
Posted: Wednesday, March 23, 2011 - 10:44 AM UTC
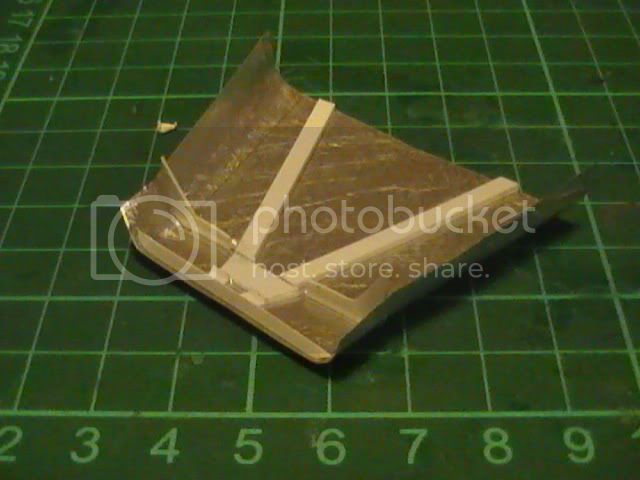
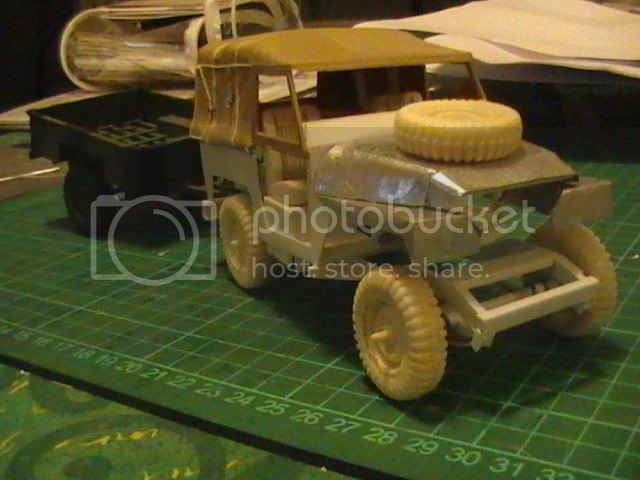
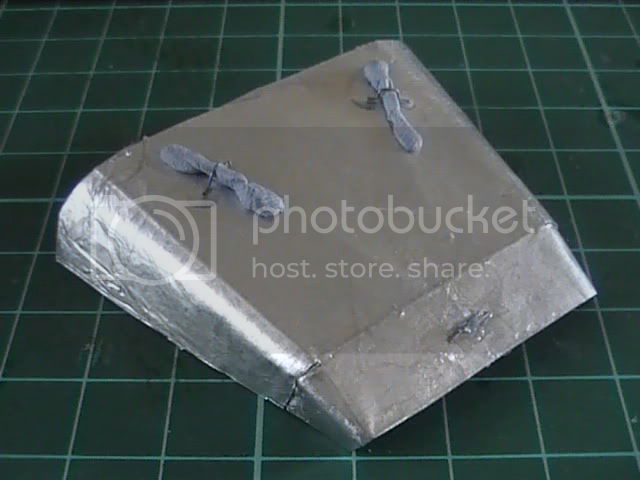
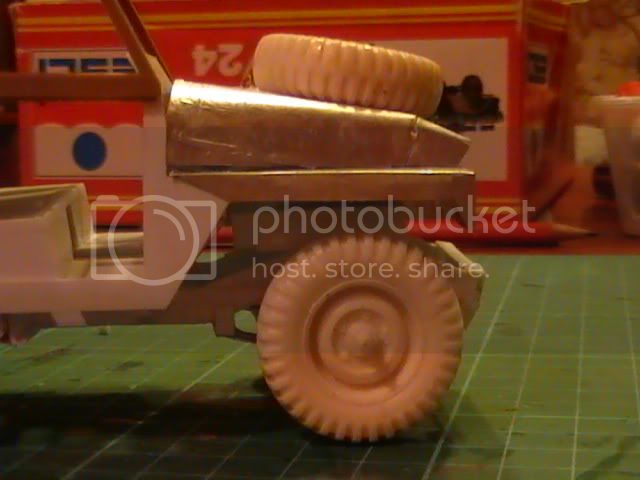
Added a little detailing to the underside including the curve reinforcement which will help strengthen the tin foil bonnet in the very same way as the original. Should easily support a resin spare wheel.
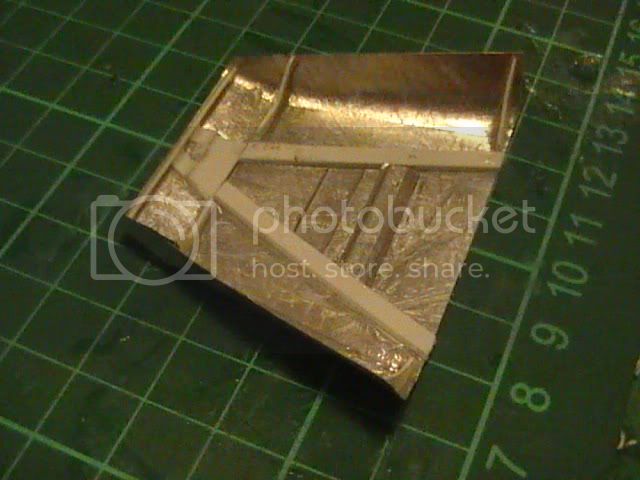
Getting to really enjoy this build as it seems to be going together quiet nicely now.
Nige
Getting to really enjoy this build as it seems to be going together quiet nicely now.
Nige

lespauljames

Member Since: January 06, 2007
entire network: 3,661 Posts
KitMaker Network: 399 Posts

Posted: Wednesday, March 23, 2011 - 11:24 AM UTC
looking very nice, the craftmanship is awesome.

okdoky
Member Since: April 30, 2007
entire network: 1,597 Posts
KitMaker Network: 673 Posts
Posted: Wednesday, March 23, 2011 - 12:19 PM UTC
Quoted Text
looking very nice, the craftmanship is awesome.
Thanks James ,,,,,,,,,,,,,, appreciated you looking in on the build.
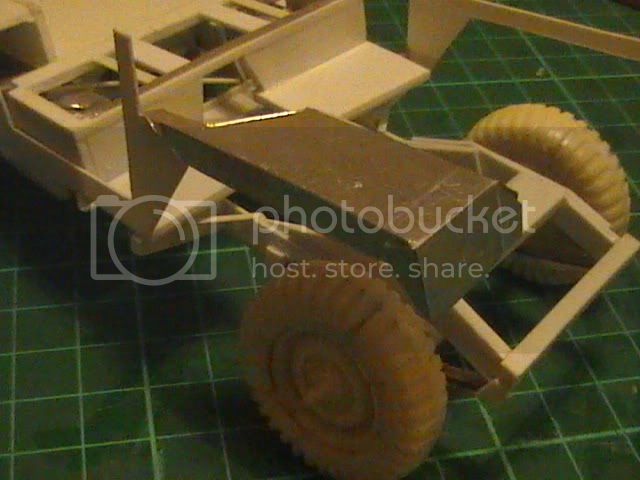
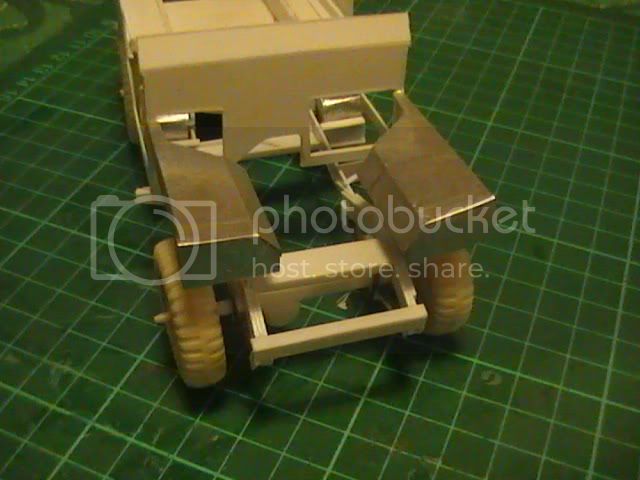
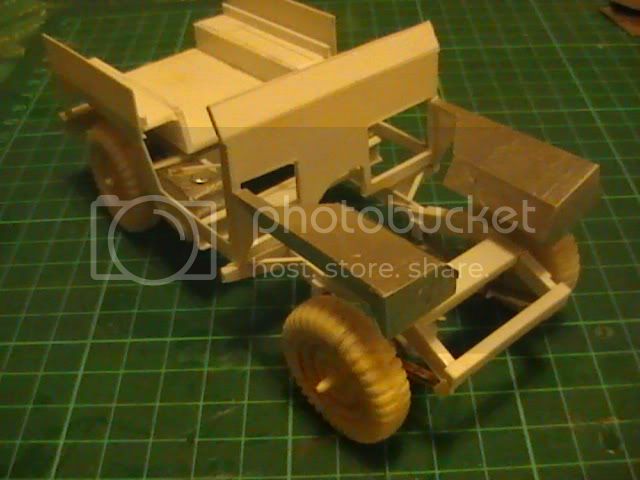
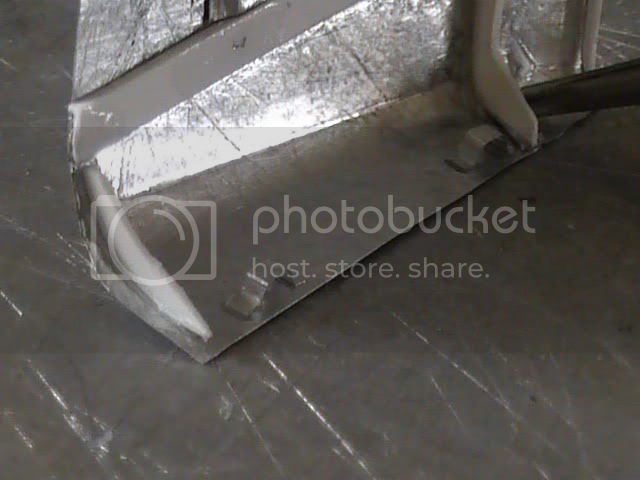
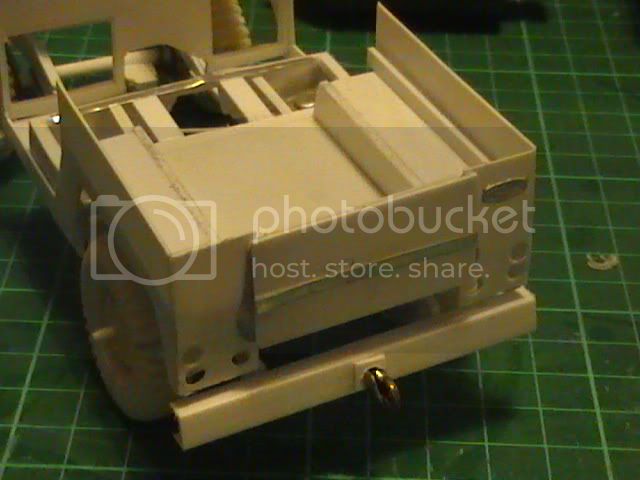
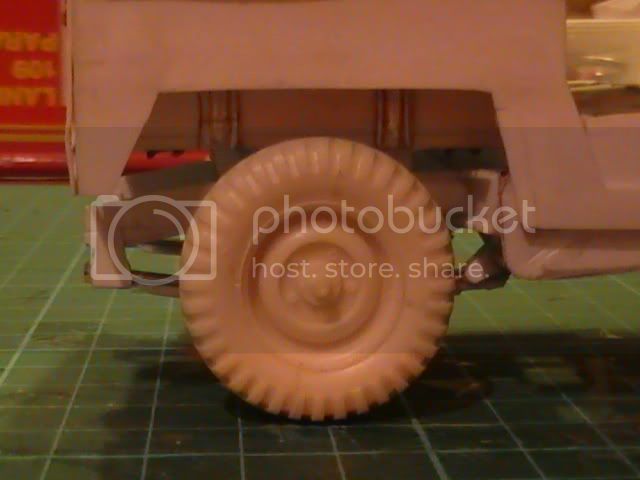
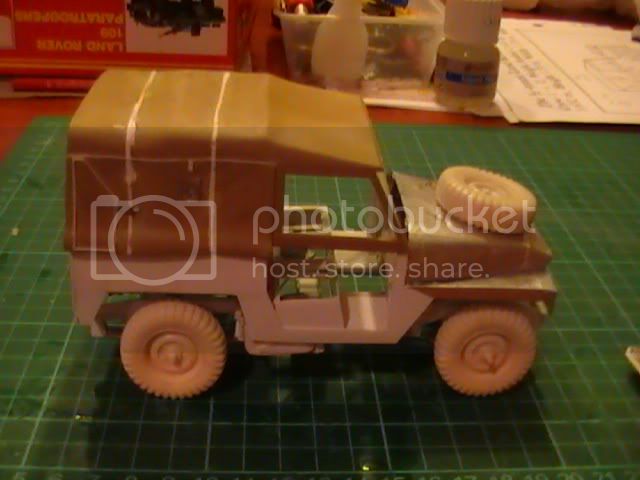
Had time to add in some rear tub support channels to sit fix down to the chassis. Made these by pressing tin foil over thin U channel to the approx size.
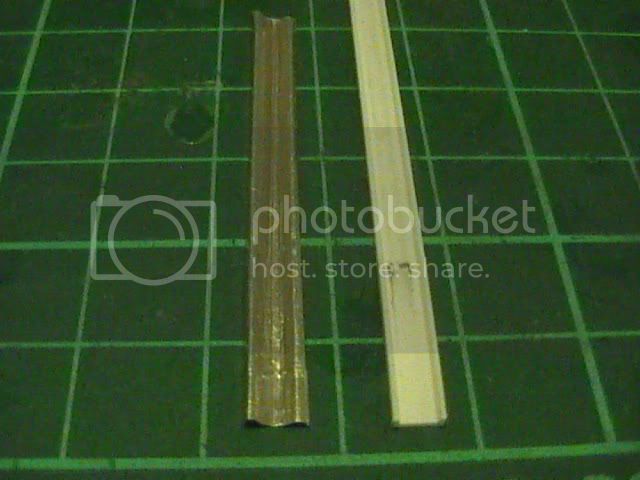
These will be seen quite easily from the side due to the wide open wheelarches
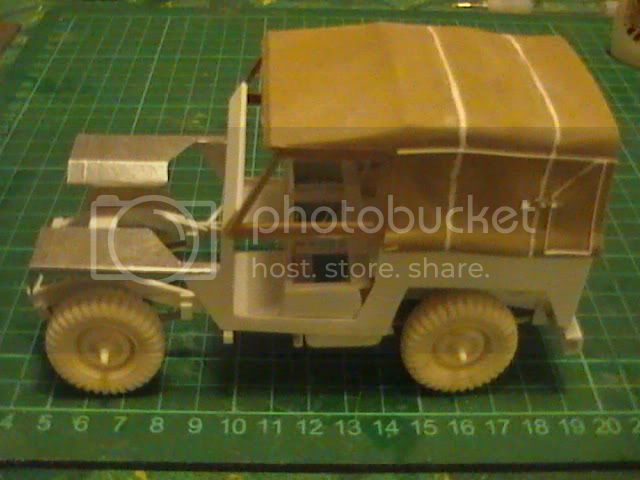
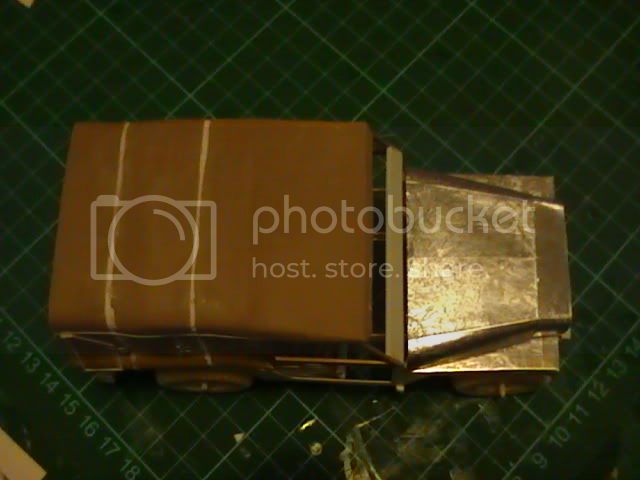
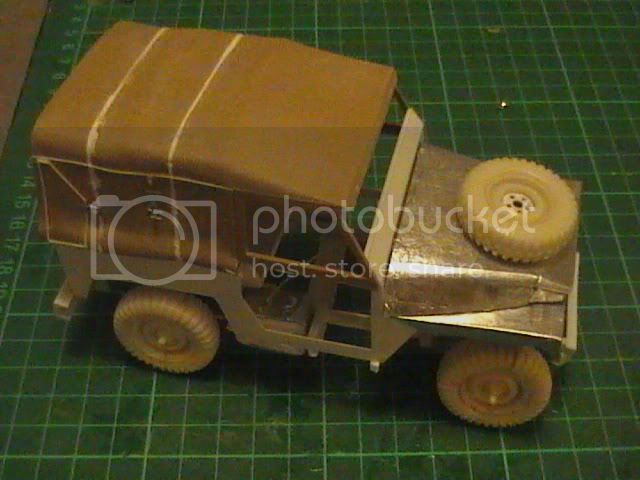
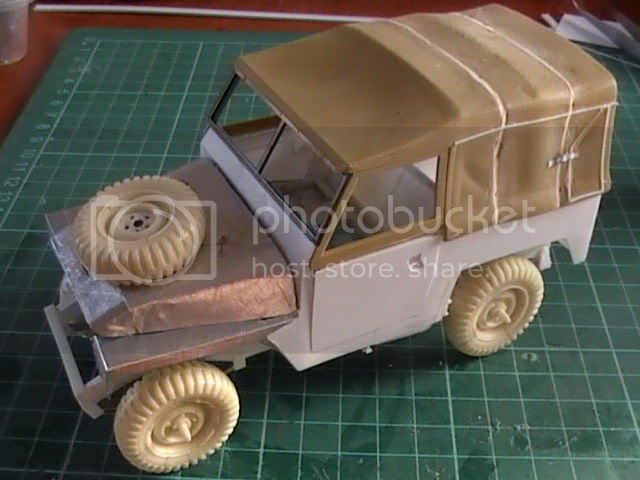
Lightweight/trailer combo for reference as to where I am so far.
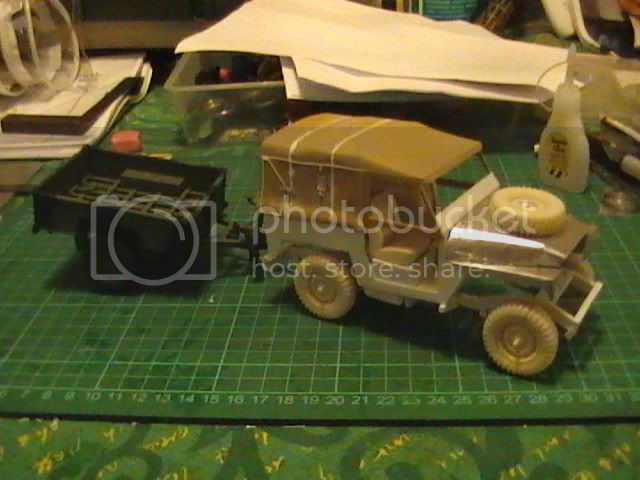
Nige

KoSprueOne

Member Since: March 05, 2004
entire network: 4,011 Posts
KitMaker Network: 879 Posts
Posted: Wednesday, March 23, 2011 - 12:28 PM UTC
outstanding, Nige!
incredible attention to details and accuracy. Good idea forming the foil over that channel material

incredible attention to details and accuracy. Good idea forming the foil over that channel material
okdoky
Member Since: April 30, 2007
entire network: 1,597 Posts
KitMaker Network: 673 Posts
Posted: Wednesday, March 23, 2011 - 08:16 PM UTC
Quoted Text
outstanding, Nige!
incredible attention to details and accuracy. Good idea forming the foil over that channel material
Hi Ko
The tin foil is quite a maliable and cheap material for this sort of job. You should look up Sandy's (Ian Sadler) work using tin foil as he does use it to its full potential.
Works well with styrenes and superglues.
Nige
okdoky
Member Since: April 30, 2007
entire network: 1,597 Posts
KitMaker Network: 673 Posts
Posted: Friday, March 25, 2011 - 03:55 AM UTC
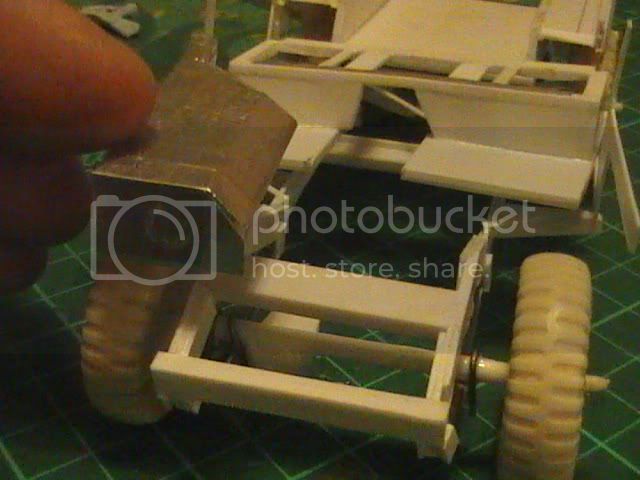
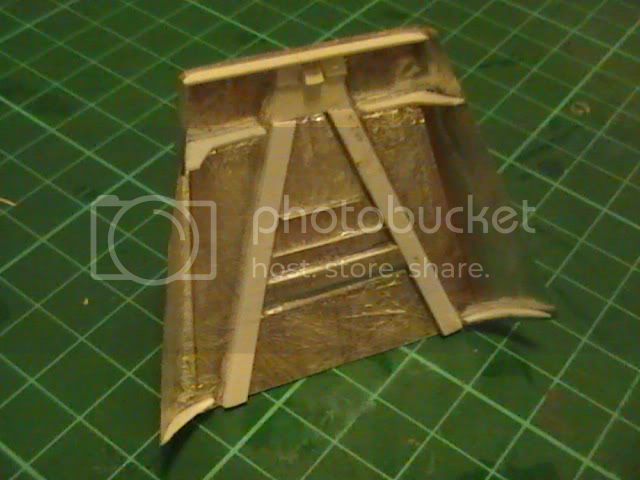
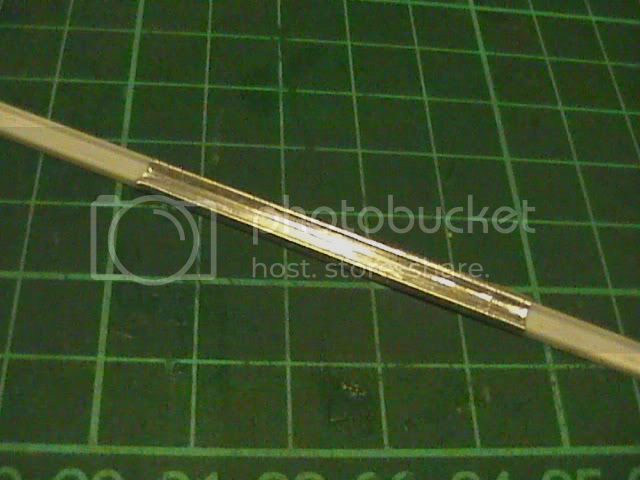
Making some brackets that are quite promenant under and on the bonnet.
First to form the brackets using tin foil, wide tweezers, a piece of old sprue of correct profile held on the work plate by a blob of blue tac.
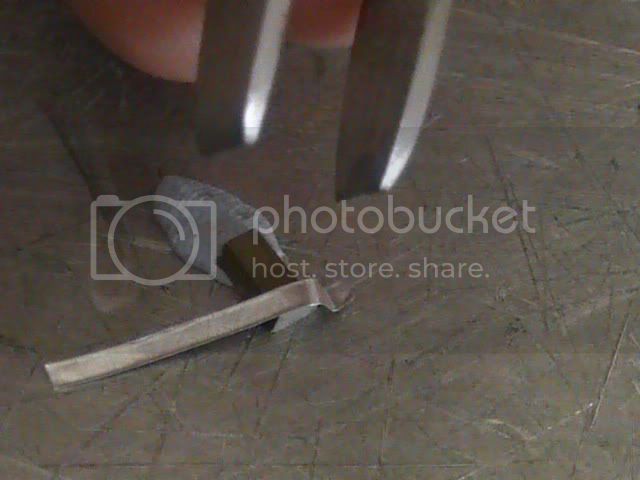
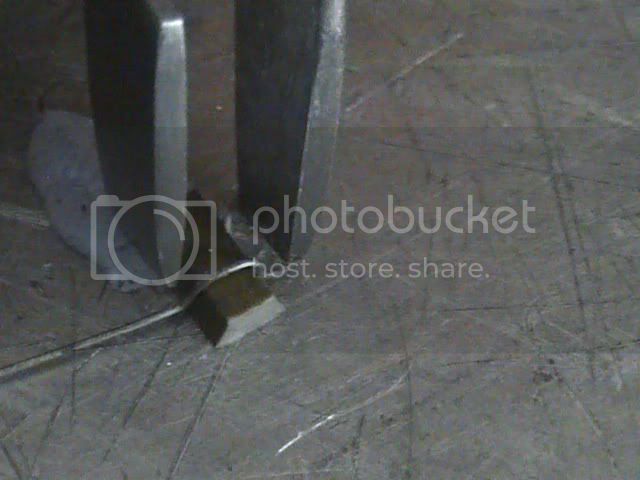
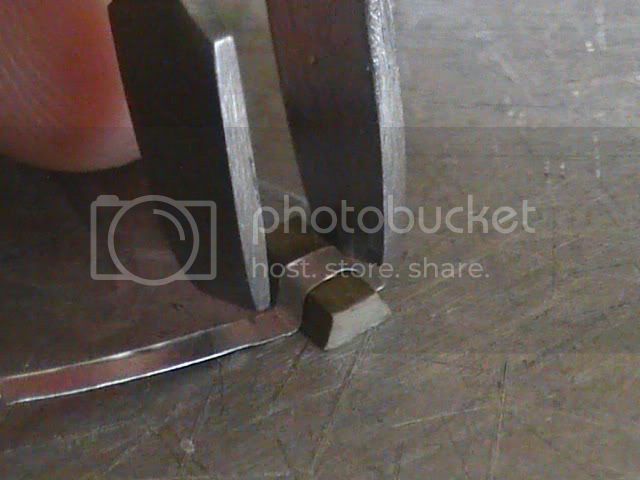
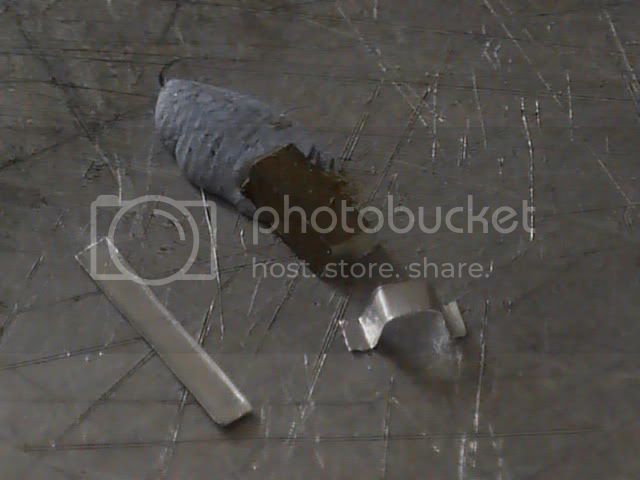
Same technique used with wire.
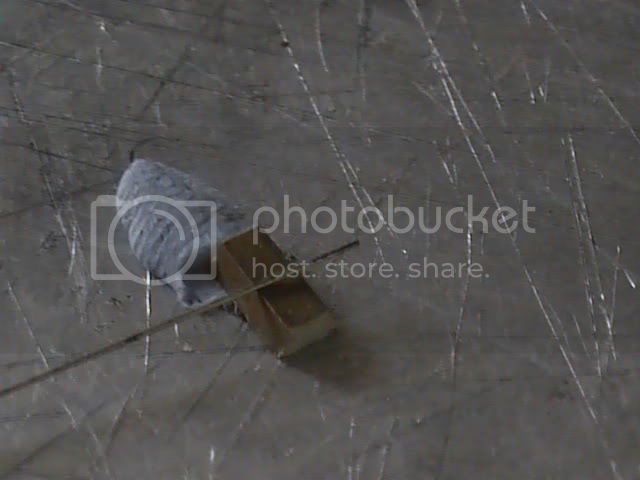
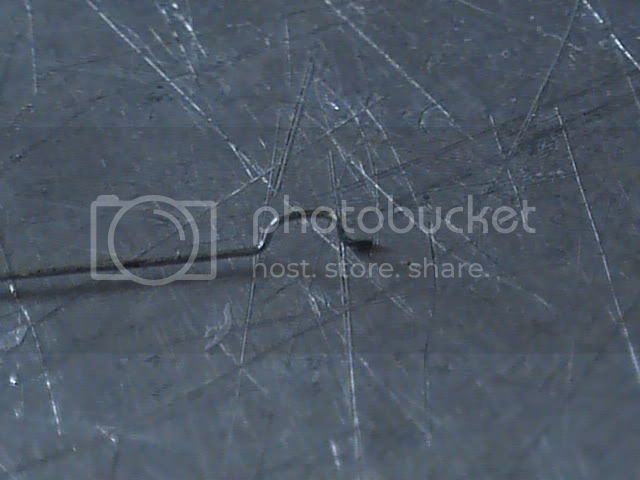
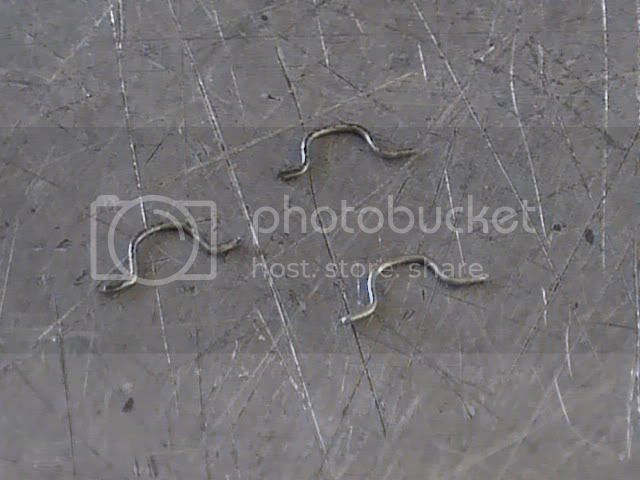
Brackets in place under
Placement of the wire helped by blue tac again to allow superglue to be dripped over the wire ends.
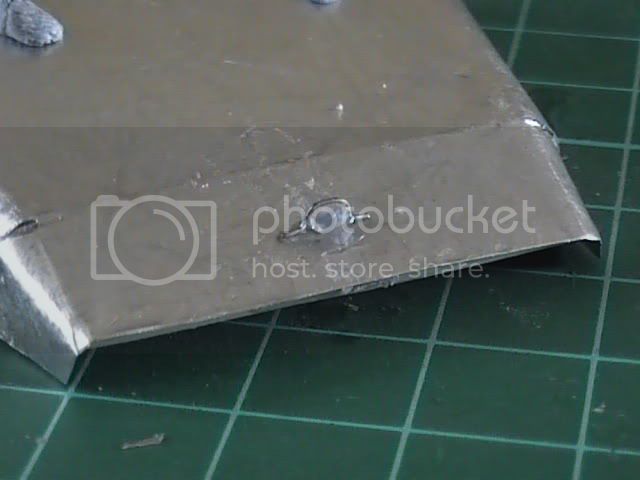
Just need to add straps to hold the spare wheel on, and to make a set of hinges to fix to the front bulkhead,
Nigel
First to form the brackets using tin foil, wide tweezers, a piece of old sprue of correct profile held on the work plate by a blob of blue tac.
Same technique used with wire.
Brackets in place under
Placement of the wire helped by blue tac again to allow superglue to be dripped over the wire ends.
Just need to add straps to hold the spare wheel on, and to make a set of hinges to fix to the front bulkhead,
Nigel

bigmal

Member Since: February 21, 2011
entire network: 211 Posts
KitMaker Network: 36 Posts

Posted: Friday, March 25, 2011 - 08:38 AM UTC
As a Land Rover fan i have been following your build with great interest and must say that i like what i am seeing.
I am trying to convert a 1/24 Hard-top into a piglet and i hope it comes out half as good as your model
regards
Malcolm
I am trying to convert a 1/24 Hard-top into a piglet and i hope it comes out half as good as your model
regards
Malcolm
okdoky
Member Since: April 30, 2007
entire network: 1,597 Posts
KitMaker Network: 673 Posts
Posted: Friday, March 25, 2011 - 11:17 AM UTC
Hi Malcolm
I do like Landies. Thanks for the compliments. I would love to see how your Piglet conversion is coming along. Have you got a build blog started?
Had a chance to do a little more at the club meet and will add some more pics tomorrow.
Nige
I do like Landies. Thanks for the compliments. I would love to see how your Piglet conversion is coming along. Have you got a build blog started?
Had a chance to do a little more at the club meet and will add some more pics tomorrow.
Nige
okdoky
Member Since: April 30, 2007
entire network: 1,597 Posts
KitMaker Network: 673 Posts
Posted: Saturday, March 26, 2011 - 09:56 AM UTC
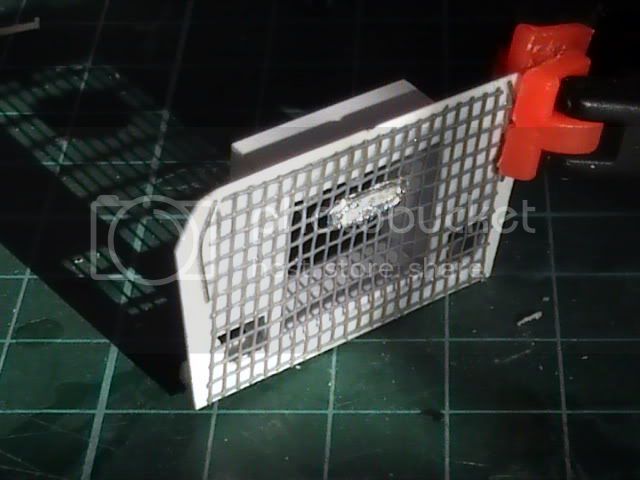
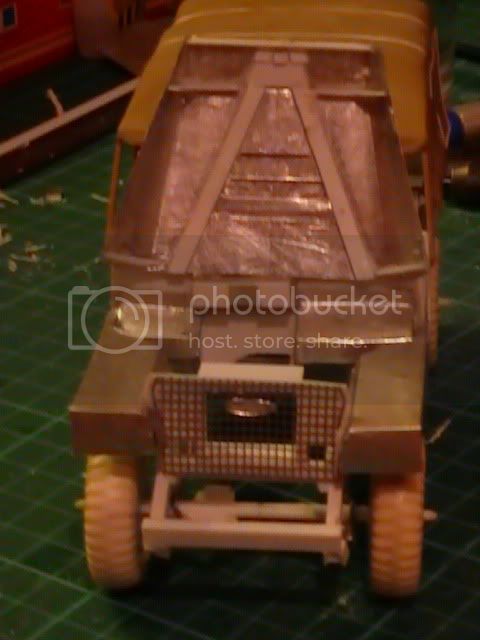
Time for the front grill.
Plastic sheet for rigidity this time as I will be working from the placement of this for almost everything else.

The mesh is from plastic fly screen which is a good match for the mesh size.
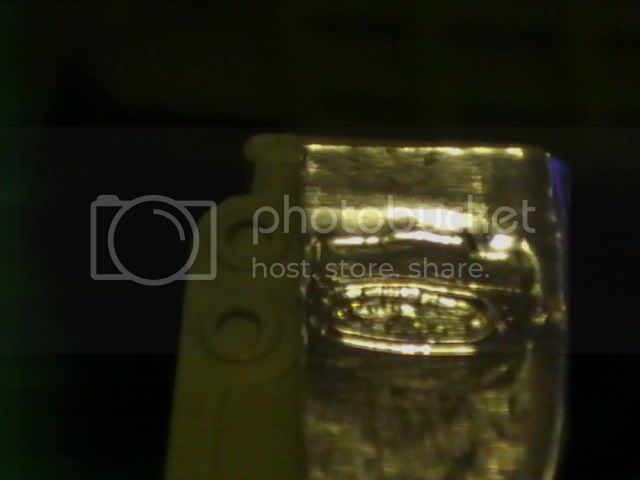
Some embossing of tin foil on the Landrover 109 from ESCI to gain a couple of Landrover badges, one front and one back.
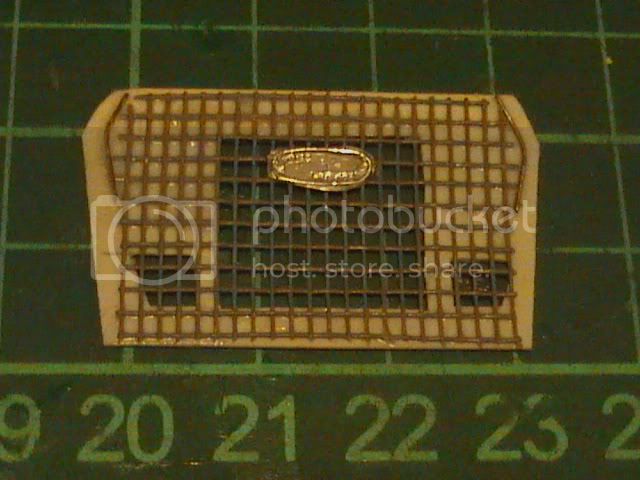
I will need to adjust the light clusterson the front wings to match up with the grill as they are a little oversized at the moment.
Nige
Plastic sheet for rigidity this time as I will be working from the placement of this for almost everything else.
The mesh is from plastic fly screen which is a good match for the mesh size.
Some embossing of tin foil on the Landrover 109 from ESCI to gain a couple of Landrover badges, one front and one back.
I will need to adjust the light clusterson the front wings to match up with the grill as they are a little oversized at the moment.
Nige
okdoky
Member Since: April 30, 2007
entire network: 1,597 Posts
KitMaker Network: 673 Posts
Posted: Saturday, March 26, 2011 - 10:47 AM UTC
Started on the rear tail gate
Sleepy head so time for bed.
Night folks
Sleepy head so time for bed.
Night folks
okdoky
Member Since: April 30, 2007
entire network: 1,597 Posts
KitMaker Network: 673 Posts
Posted: Sunday, March 27, 2011 - 11:35 AM UTC
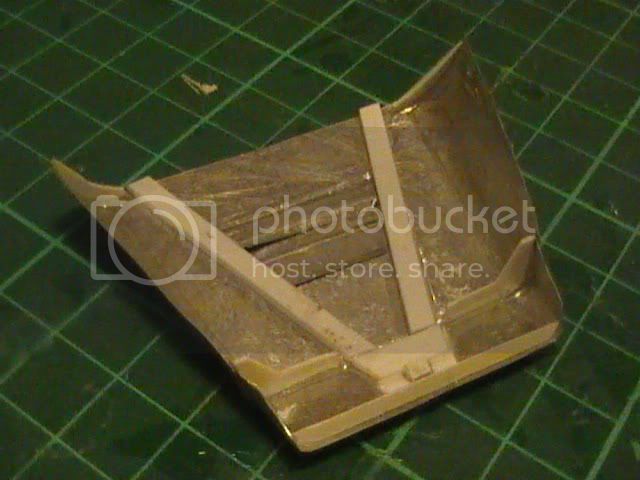
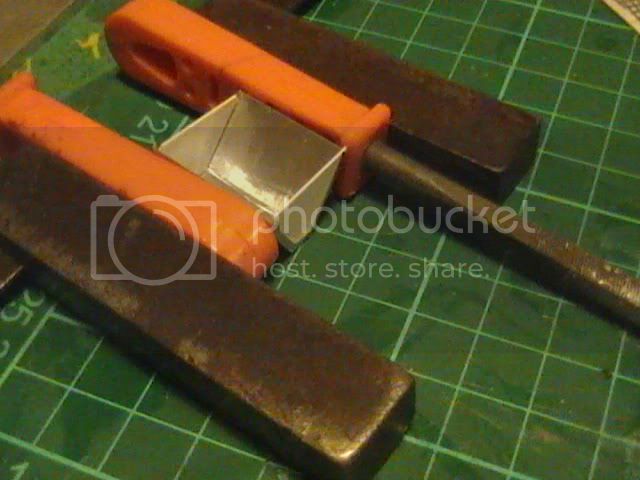
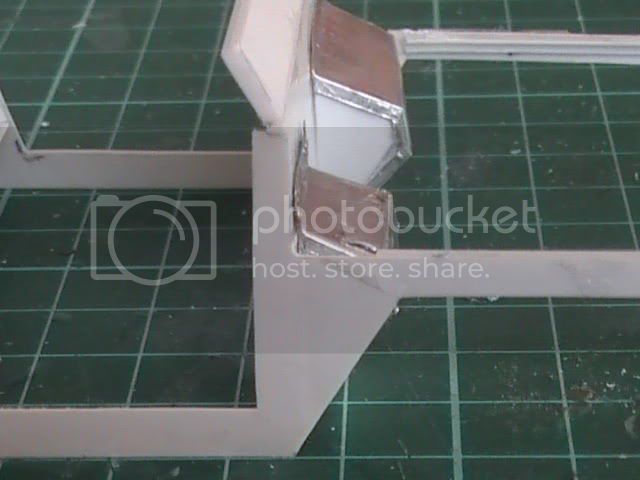
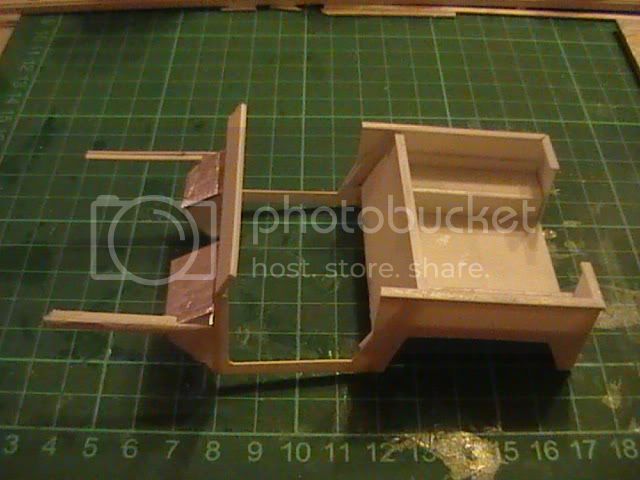
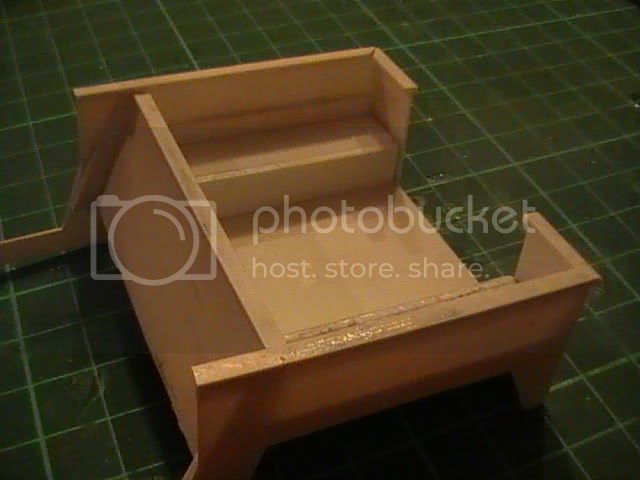
Start on the footwells
Plastic for the sides and tin foil for the fronts
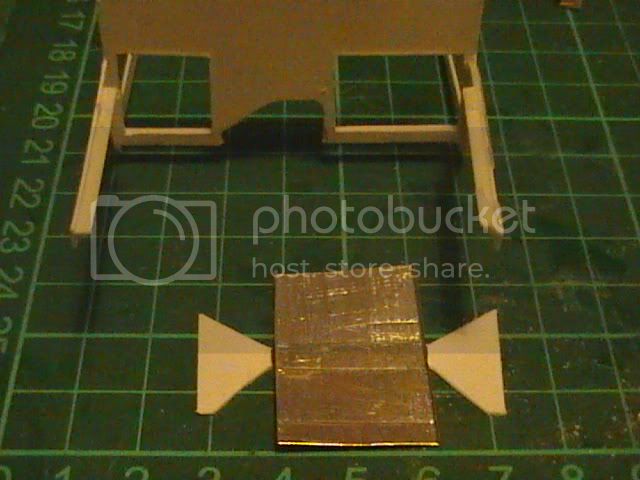
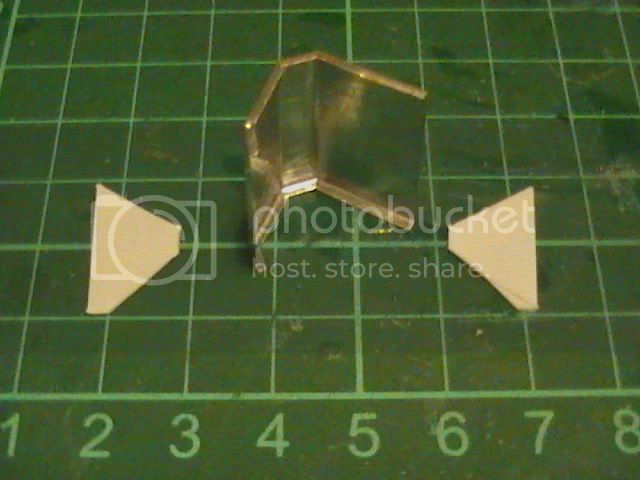
A bit of pressure to keep the folds from undoing
Passenger footwell in place
Working on the drivers side
Nige
Plastic for the sides and tin foil for the fronts
A bit of pressure to keep the folds from undoing
Passenger footwell in place
Working on the drivers side
Nige

montythefirst
Member Since: August 04, 2007
entire network: 1,055 Posts
KitMaker Network: 244 Posts

Posted: Monday, March 28, 2011 - 03:55 AM UTC
great work simply amazing detail
okdoky
Member Since: April 30, 2007
entire network: 1,597 Posts
KitMaker Network: 673 Posts
Posted: Tuesday, March 29, 2011 - 01:50 AM UTC
Quoted Text
great work simply amazing detail
Thanks Simon !!!!
Nige
bigmal
Member Since: February 21, 2011
entire network: 211 Posts
KitMaker Network: 36 Posts
Posted: Tuesday, March 29, 2011 - 07:18 AM UTC
Quoted Text
Hi Malcolm
I do like Landies. Thanks for the compliments. I would love to see how your Piglet conversion is coming along. Have you got a build blog started?
Had a chance to do a little more at the club meet and will add some more pics tomorrow.
Nige
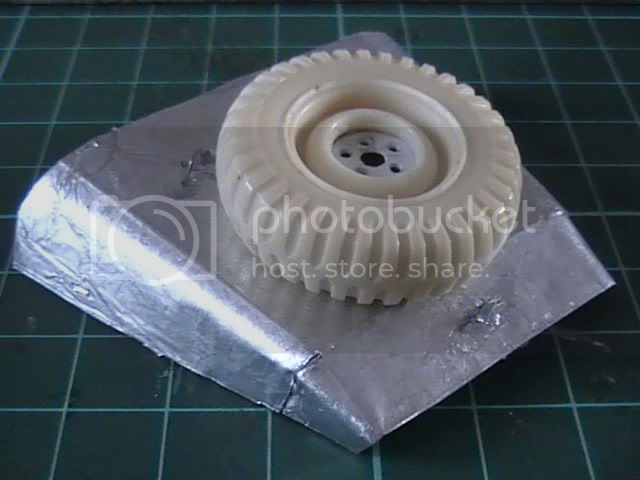
I don`t have a build blog as i don`t have my own computer, digital camera etc to start one but i will try to post some pictures when it is finished. it would be nice to have some 1/24 scale trackgrip tyres though don`t you agree?
okdoky
Member Since: April 30, 2007
entire network: 1,597 Posts
KitMaker Network: 673 Posts
Posted: Tuesday, April 05, 2011 - 12:28 PM UTC
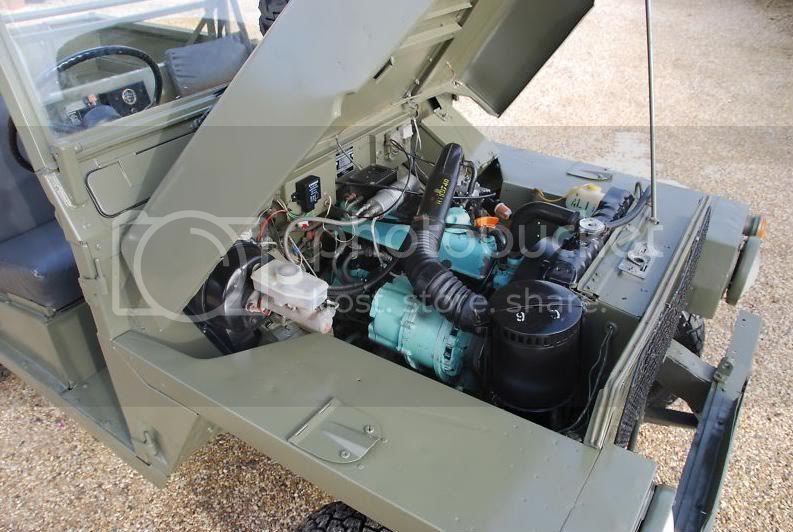
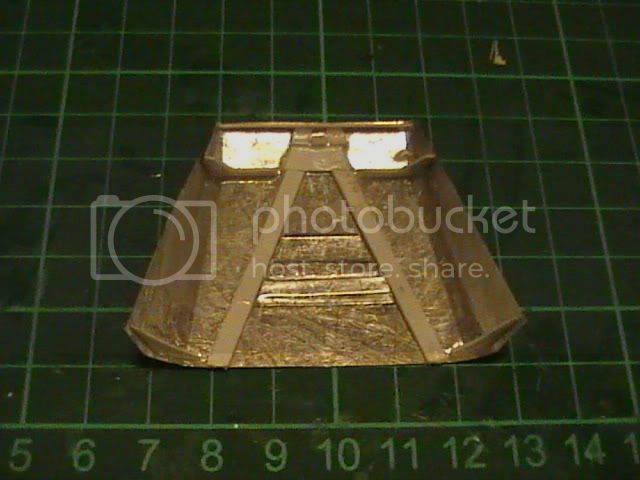
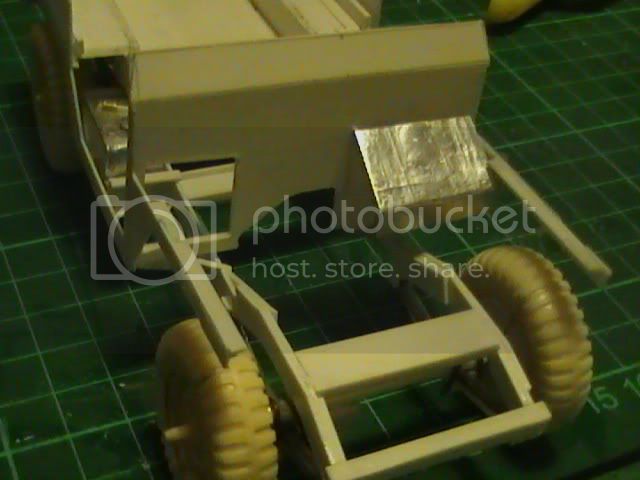
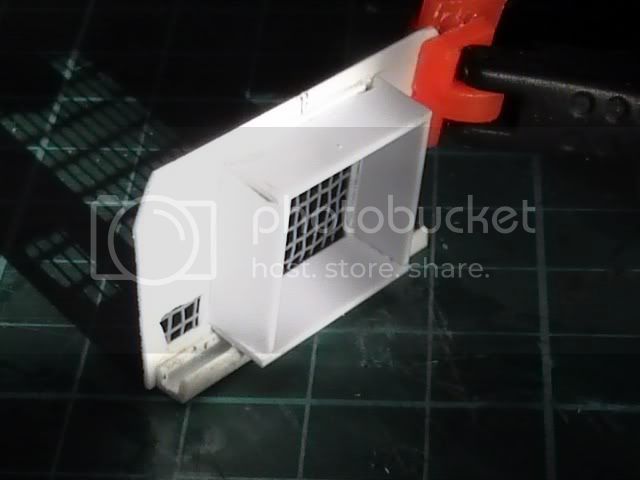
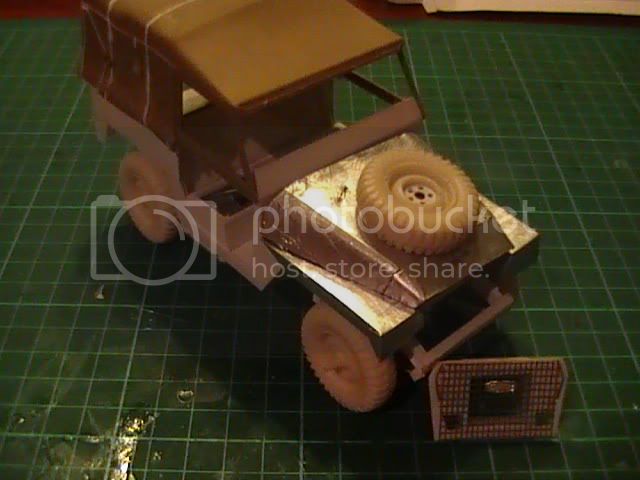
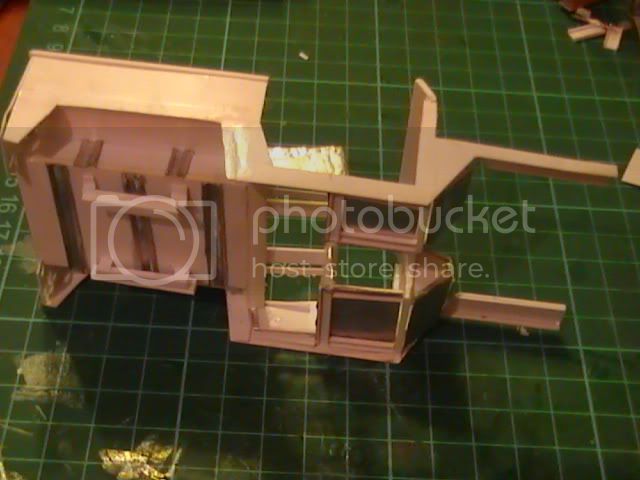
Oil cooler shroud that also directs air through the radiator
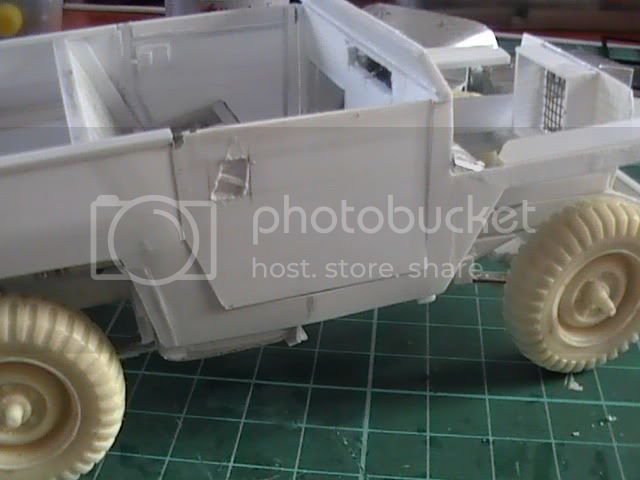
also had to adjust the footwells as I realised I had made them too deep and they extended too far beyond the wheelarches. They now match the wheel arch
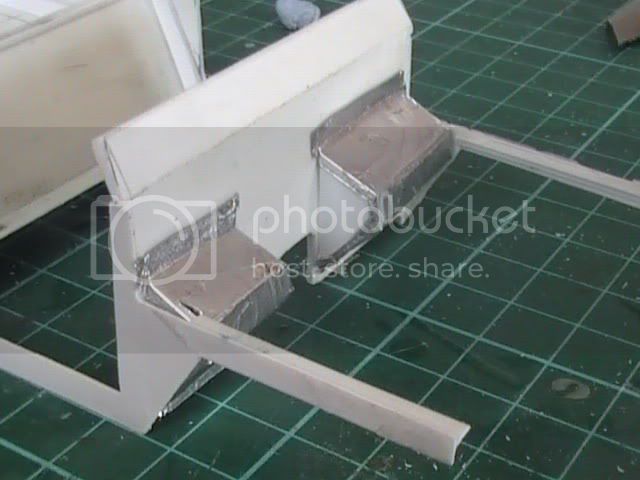
added the backing sheet to the front seats
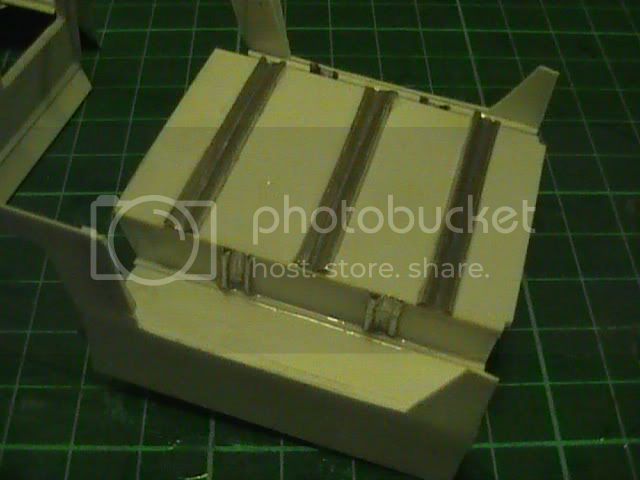
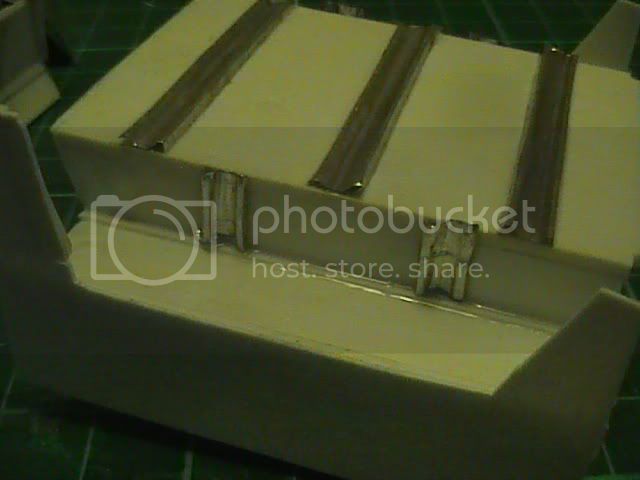
also topped off the sides and rear cargo area with thin U channel
added the stiffeners to the backing sheet also
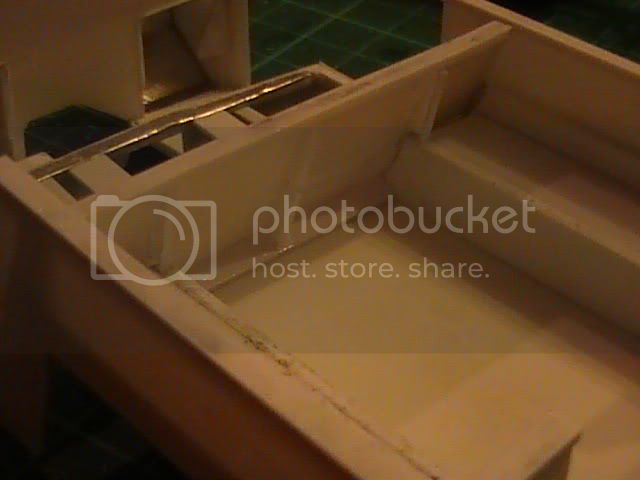
added some shims under the cargo area to try to get the correct ride height
made a start on lining the engine bay to accept the wheel arches, radiator and maybe a scratch engine, still to decide, unless someone has a spair sitting idle somewhere.
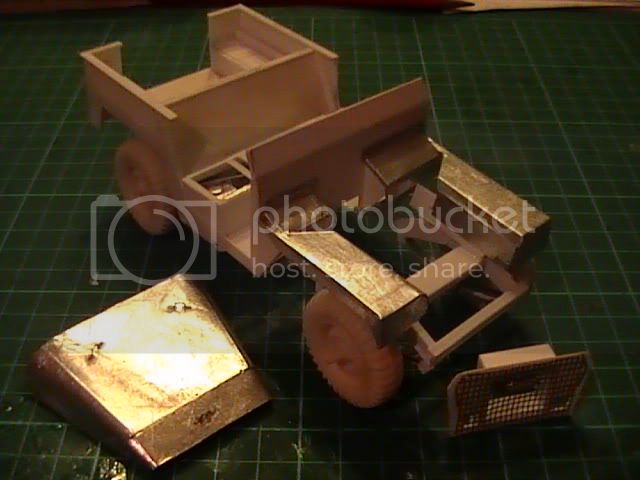
Enjoying my hols at the caravan in Lossiemouth with the kids and the inlaws. Determined to get a lot more time on the Landy.
Nige
also had to adjust the footwells as I realised I had made them too deep and they extended too far beyond the wheelarches. They now match the wheel arch
added the backing sheet to the front seats
also topped off the sides and rear cargo area with thin U channel
added the stiffeners to the backing sheet also
added some shims under the cargo area to try to get the correct ride height
made a start on lining the engine bay to accept the wheel arches, radiator and maybe a scratch engine, still to decide, unless someone has a spair sitting idle somewhere.
Enjoying my hols at the caravan in Lossiemouth with the kids and the inlaws. Determined to get a lot more time on the Landy.
Nige
okdoky
Member Since: April 30, 2007
entire network: 1,597 Posts
KitMaker Network: 673 Posts
Posted: Wednesday, April 06, 2011 - 11:22 AM UTC
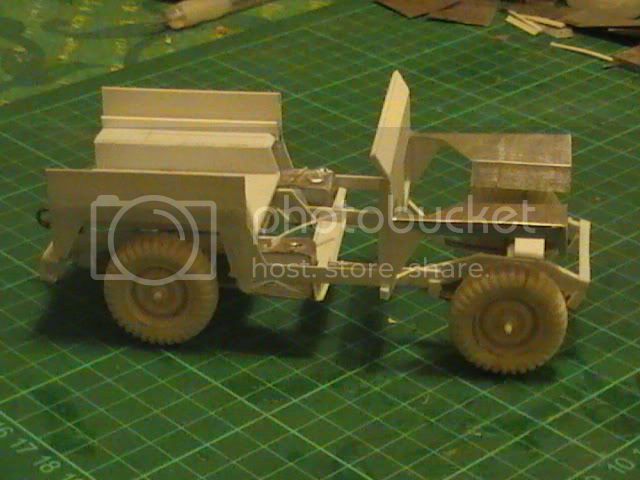
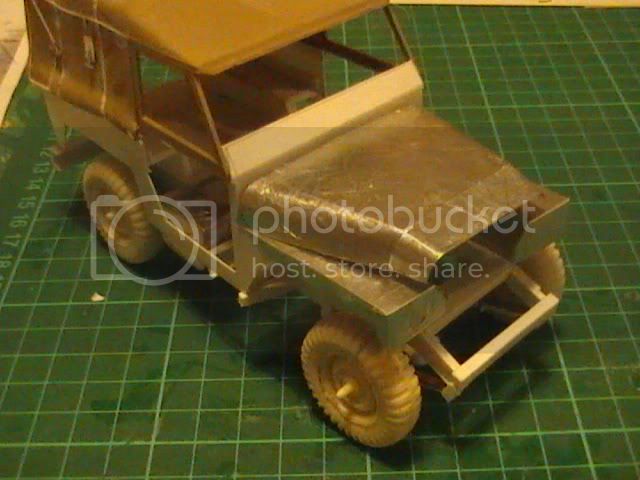
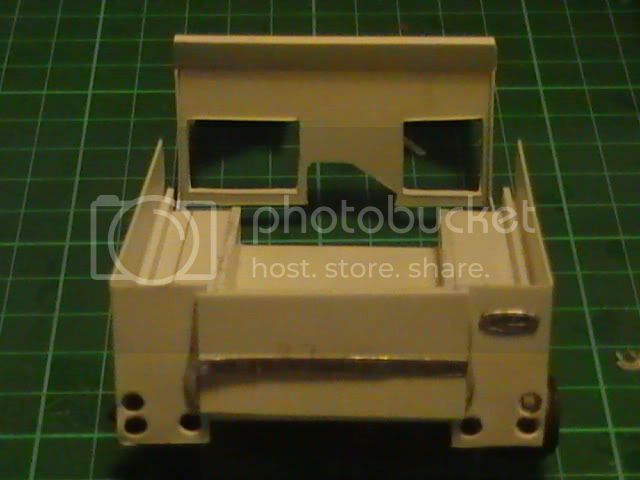
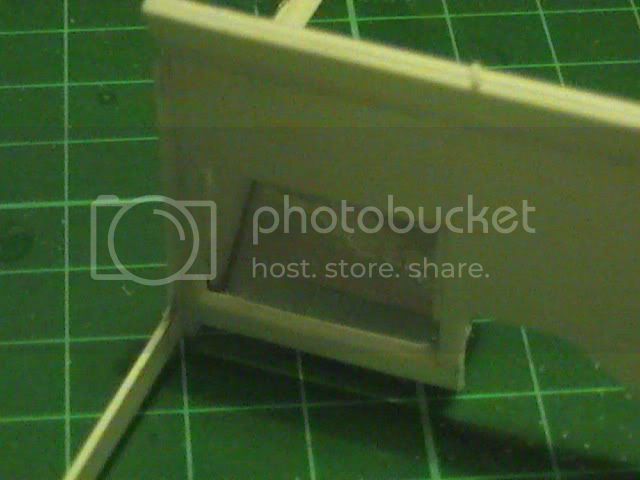
Managed to figure out what is going on with the front grill and bonnet. Needed a little snip off the top of the grill to allow the bonnet to sit right down and the tin foil arches needed a slot cut in each to allow the front light wells to sit in front of the grill. Also added the boxing for the dashboard dials.
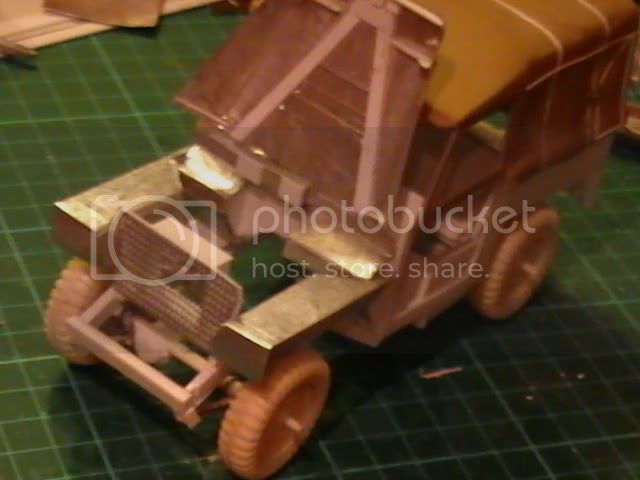
still needs a bit of trimming to get the bonnet to sit true left to right now
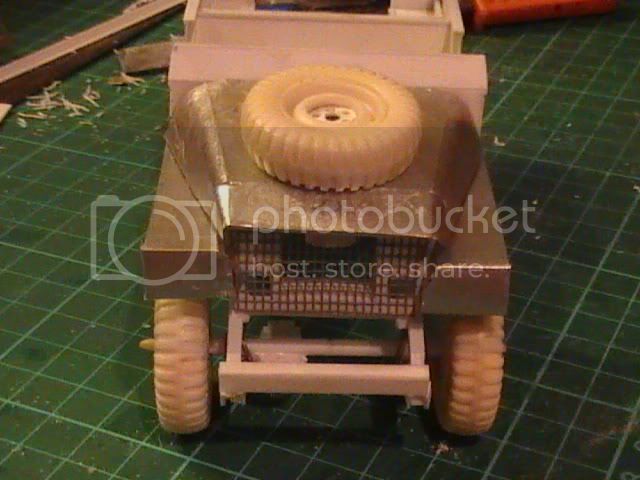
Nige
still needs a bit of trimming to get the bonnet to sit true left to right now
Nige
bigmal
Member Since: February 21, 2011
entire network: 211 Posts
KitMaker Network: 36 Posts
Posted: Thursday, April 07, 2011 - 05:41 AM UTC
Looking good Nige
Malcolm
Malcolm
okdoky
Member Since: April 30, 2007
entire network: 1,597 Posts
KitMaker Network: 673 Posts
Posted: Friday, April 08, 2011 - 06:38 AM UTC
Quoted Text
Looking good Nige
Malcolm
Thanks Malcolm
Had some peace from the kids and in-laws to get some work done today !!!!!
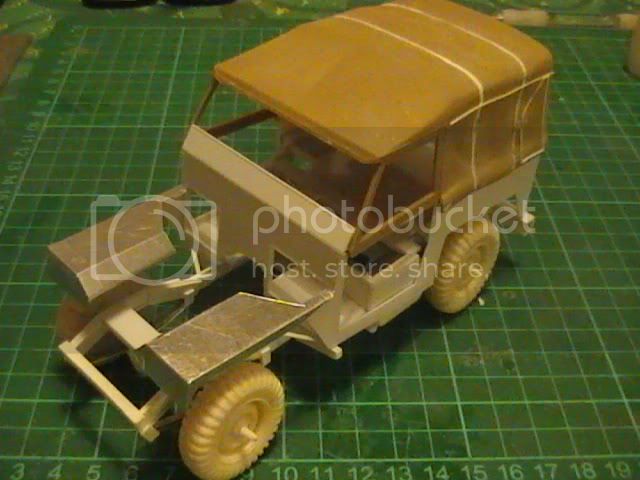
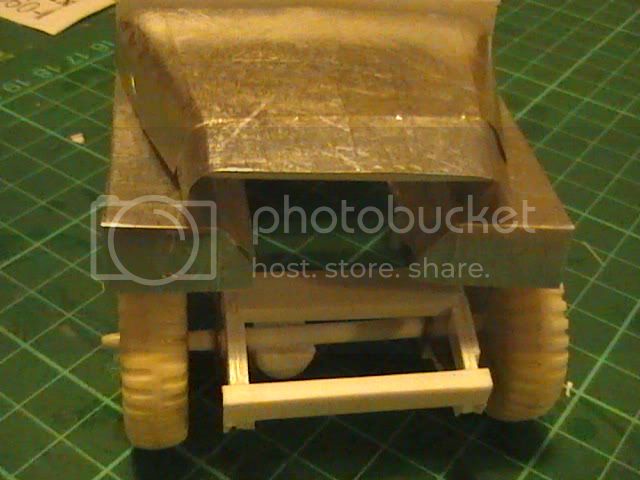
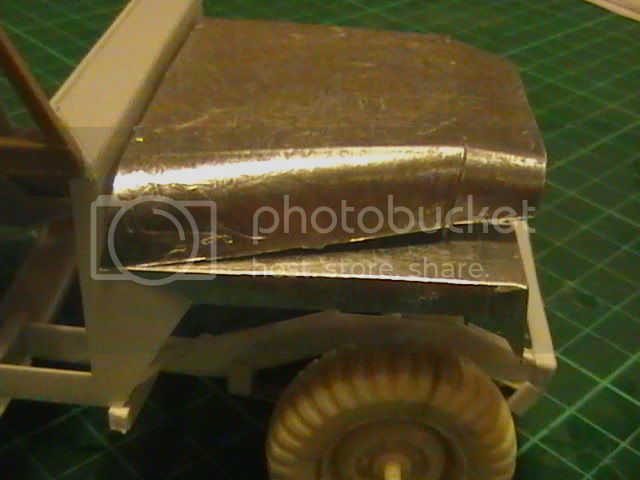
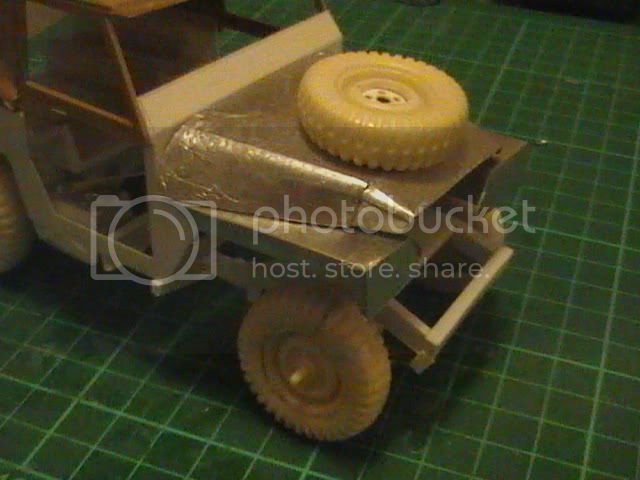
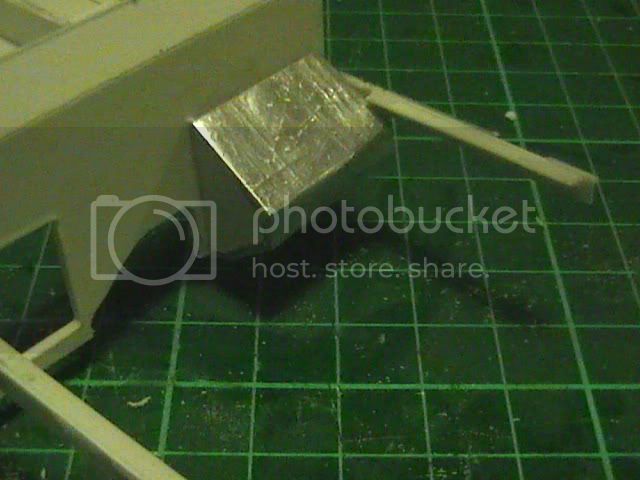
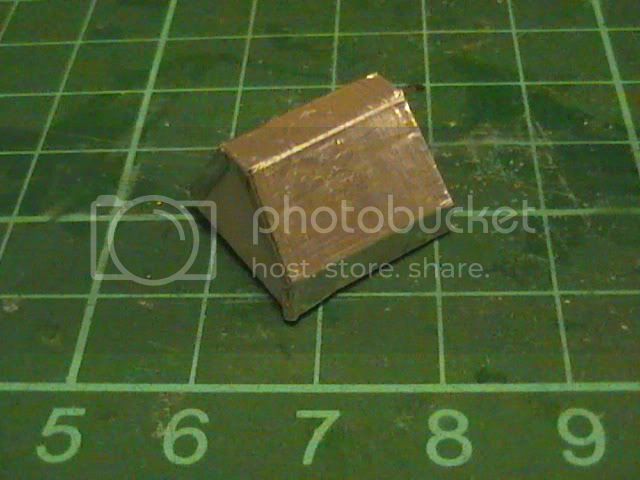
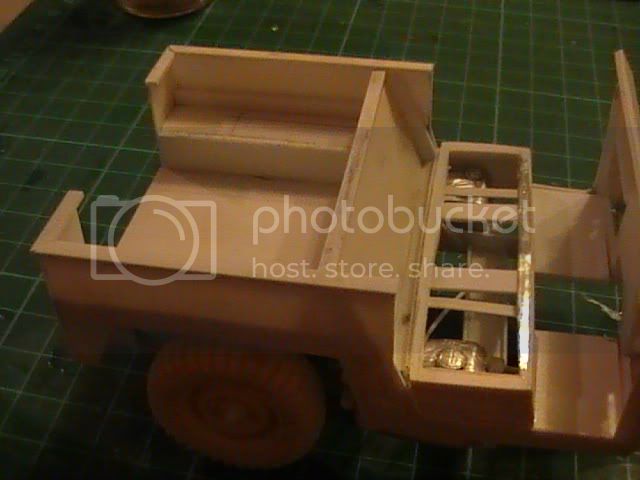
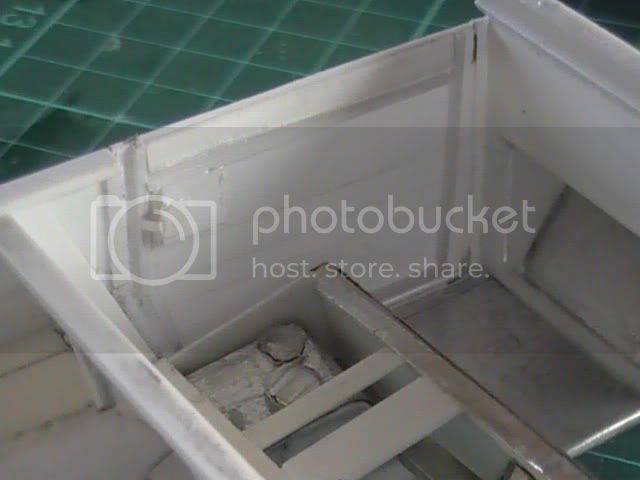
Under the bonnet tool box out of square hollow section and capped off with tin foil from chocolate powder tin.
Floor panels from tin foil on top of a plastic frame
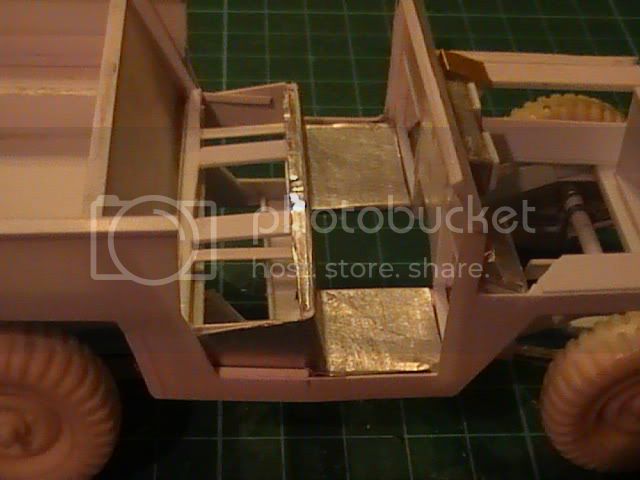
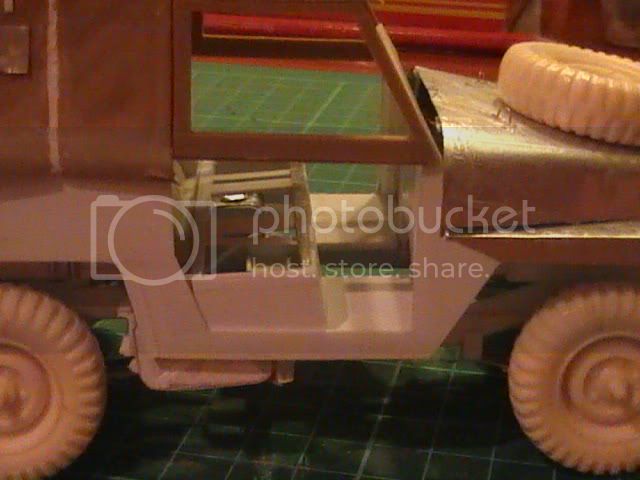
The doors cut out from the side panels were added to with door handle cut outs
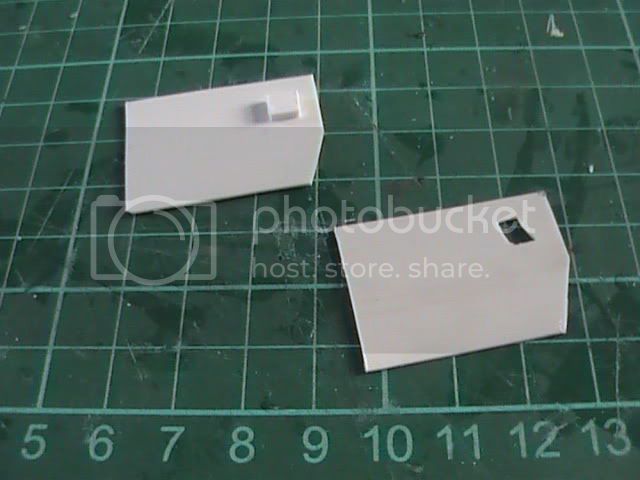
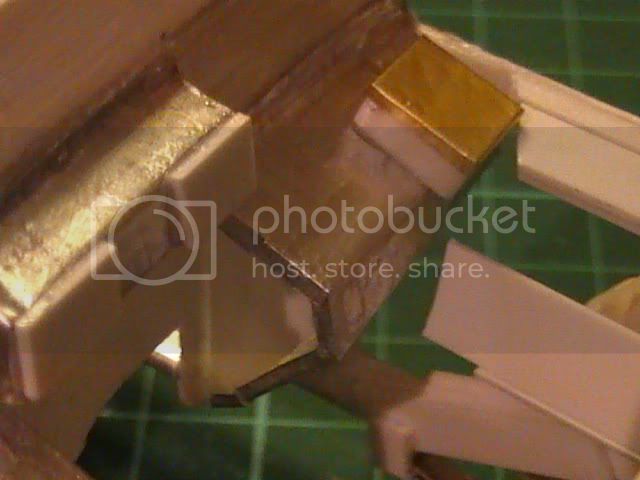
the door lock mechanism
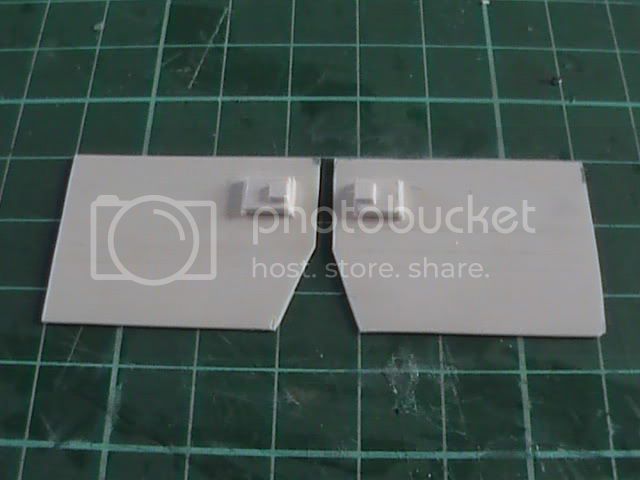
framing out (slightly inboard, but easier to make sure it fitted after forming up)
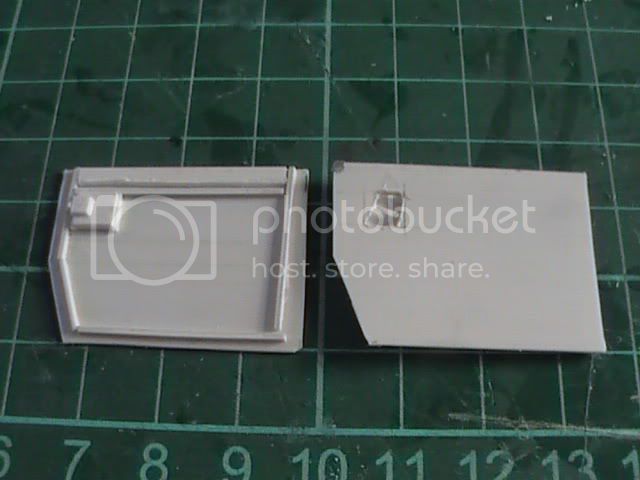
door handle in cut out
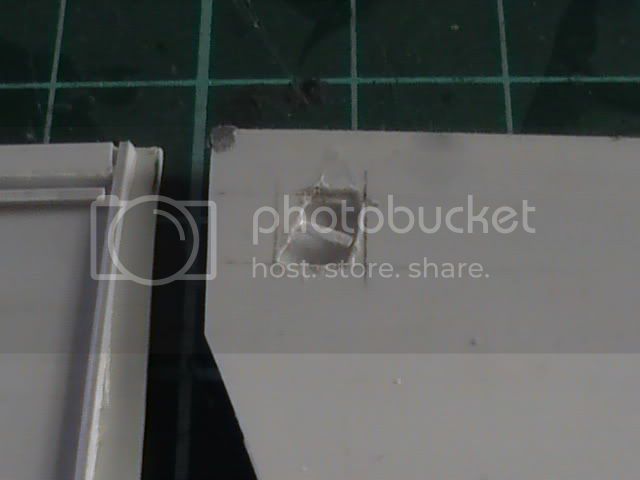
finished door lock

Nige
okdoky
Member Since: April 30, 2007
entire network: 1,597 Posts
KitMaker Network: 673 Posts
Posted: Friday, April 08, 2011 - 06:47 AM UTC

 |

WEB HOSTING BY


Copyright ©2021 KitMaker Network and Kitmaker Network, a subsidiary of Silver Star Enterprises
All Rights Reserved. Please read our Conditions of Use and Privacy Policy.
All Rights Reserved. Please read our Conditions of Use and Privacy Policy.