Modeling in General
General discussions about modeling topics.
Get the Job Done official t
Martinnnn
Visit this Community
Zuid-Holland, Netherlands
Member Since: April 26, 2004
entire network: 5,435 Posts
KitMaker Network: 454 Posts
Posted: Sunday, August 05, 2007 - 07:15 AM UTC
I'm guilty of having half finished kits that do deserve better.......so count me in!

My AFV Club M18 will be finished as an early T70 GMC at a tank graveyard at the Anzio beach 1944. For those who posses the Concord book "US Tank Battles in North Africa and Italy" check page 51 for my inspiration.

This is how it looks now, with already some work done on the suspension and wheels to make it look like the picture in the Concord book I'm reffering to:


Now looking for a suitable PE set and some reference material for the interior of the model which is actually kinda disappointing.

Martin
lampie
#029
Visit this Community
England - East Midlands, United Kingdom
Member Since: December 23, 2005
entire network: 6,249 Posts
KitMaker Network: 329 Posts
Posted: Monday, August 06, 2007 - 02:22 AM UTC
Slow and steady progress on my entry.
Not exactly flying along,,but seeing as its sat in its box for over 6 months Im not really bothered by the speed of the progress,,Im just happy that this campaign has given me the incentive to get it finished!

At least every part of the figure has some paint on it finally!
Nige
CaptainA
Visit this Community
Indiana, United States
Member Since: May 14, 2007
entire network: 3,117 Posts
KitMaker Network: 204 Posts
Posted: Monday, August 06, 2007 - 06:45 AM UTC

Quoted Text

Here is my entry. I really need some motivation to get this one done.

Everything is cut from the sprues due to having to bring it home in a suitcase where there was no room for the box or even the sprues.

Phew....


LOL. That looks like my spare parts box.
lampie
#029
Visit this Community
England - East Midlands, United Kingdom
Member Since: December 23, 2005
entire network: 6,249 Posts
KitMaker Network: 329 Posts
Posted: Tuesday, August 07, 2007 - 08:28 AM UTC
Almost done.
The face is finished.
For my first figure Im very happy with it.


Nige
spongya
Staff MemberAssociate Editor
MODELGEEK
Visit this Community
Budapest, Hungary
Member Since: February 01, 2005
entire network: 2,365 Posts
KitMaker Network: 474 Posts
Posted: Tuesday, August 07, 2007 - 09:00 AM UTC
It's very nice, not just for a first figure.
It's just hard to get used to these heads stuck on a pole... Especially when the different facial expressions don't match up to the gruesome end these poor fellows met.
lampie
#029
Visit this Community
England - East Midlands, United Kingdom
Member Since: December 23, 2005
entire network: 6,249 Posts
KitMaker Network: 329 Posts
Posted: Tuesday, August 07, 2007 - 09:27 AM UTC

Quoted Text

It's very nice, not just for a first figure.
It's just hard to get used to these heads stuck on a pole... Especially when the different facial expressions don't match up to the gruesome end these poor fellows met.


You dont want to see where the other bits are hanging!

Nige
lampie
#029
Visit this Community
England - East Midlands, United Kingdom
Member Since: December 23, 2005
entire network: 6,249 Posts
KitMaker Network: 329 Posts
Posted: Wednesday, August 08, 2007 - 12:04 AM UTC
Nearly finished.


Nige
Erik67
Visit this Community
Buskerud, Norway
Member Since: July 31, 2005
entire network: 1,871 Posts
KitMaker Network: 376 Posts
Posted: Thursday, August 09, 2007 - 04:58 AM UTC
Here is what I will enter, directly from "The wall of shame", My NM198. This is a Norwegian version of the M577, and the vehicle I have been commanding for the last four years. I guess I have some scratchbuilding left before I can call it finished...

Erik

slodder
Visit this Community
North Carolina, United States
Member Since: February 22, 2002
entire network: 11,718 Posts
KitMaker Network: 2,584 Posts
Posted: Thursday, August 09, 2007 - 05:01 AM UTC
Don't see a problem with signing up now at all. It's only to late after it over.

LOVE to see figures, ships, planes, tanks, trucks, cars, rail road - this is Great.

My 1st entry is a 12 pound field piece from the Civil War. Photos to come.
SGTJKJ
#041
Visit this Community
Kobenhavn, Denmark
Member Since: July 20, 2006
entire network: 10,069 Posts
KitMaker Network: 119 Posts
Posted: Monday, August 13, 2007 - 01:53 AM UTC

Quoted Text

It looks like you and I are working on the same subject Jesper. At least all of your parts are off of the sprue!! I haven't got that far yet.

HARV


That will be fun. What colour scheme and markings are you going to use for yours?
Apparently this is a kit of the type of katusha that did not make it into service during WWII. I am planning on an Egyptian vehicle or early Cold war vehicle. However, I have not decided yet.

Have you thought about how to finish yours?
HARV
#012
Visit this Community
Wyoming, United States
Member Since: November 07, 2003
entire network: 3,098 Posts
KitMaker Network: 899 Posts
Posted: Monday, August 13, 2007 - 05:11 AM UTC
I couldn't decide between a Russian or Polish version at first, but I decided to go ahead and build it as Russian. I hope to get started on it this week. If not, I will be working on it next week for sure. I still have to finish up the M8 armored car that I am working on for the "Under New Management" campaign. Hopefully it will be done by this weekend.

HARV
SGTJKJ
#041
Visit this Community
Kobenhavn, Denmark
Member Since: July 20, 2006
entire network: 10,069 Posts
KitMaker Network: 119 Posts
Posted: Monday, August 13, 2007 - 06:57 PM UTC
I did not know the Poles had these. What kind of camouflage and markings did they have? Have you come across some interesting camouflage schemes in your research?

I will probably only start on this one after a few weeks as I am building several kits at the same time for other campaigns already.
grayghost666
#021
Member Since: August 02, 2007
entire network: 2,458 Posts
KitMaker Network: 163 Posts
Posted: Tuesday, August 14, 2007 - 01:00 PM UTC
hello Matt,
does a p40n warhawk,with missing instr.and some parts count.i know i have to post pics before i am fully welcomed so we will try to post next couple of days.
thx
Bruce
almonkey
Visit this Community
England - East Midlands, United Kingdom
Member Since: March 23, 2003
entire network: 2,124 Posts
KitMaker Network: 369 Posts
Posted: Saturday, August 18, 2007 - 12:28 AM UTC
hi all! i got my rocket finished about a week and a half ago, but due to a big family wedding i'm only getting around to posting pics now. i'm glad this campaign happened because this little kit now has pride of place in my display cabinet, and has already become one of my favourites


and a sneak preview of my next entry, a pegasus junkers Cl1 limited run, injection/white metal kit. this may take a while.........
slodder
Visit this Community
North Carolina, United States
Member Since: February 22, 2002
entire network: 11,718 Posts
KitMaker Network: 2,584 Posts
Posted: Saturday, August 18, 2007 - 01:46 AM UTC
Adding those figures to the Rocket is a really nice touch.
grayghost666
#021
Member Since: August 02, 2007
entire network: 2,458 Posts
KitMaker Network: 163 Posts
Posted: Monday, August 20, 2007 - 06:46 PM UTC
hey all,
i got the pics for my project.i can post them in my photo gallery,but how do i post a pic in the reply's or the gallery area.i read thefaq's,but i have no idea what it means.httl or ur's or brackets or eieio 's.hopefuly some one can explain all this so can stop asking these questions .
thx
Bruce
slodder
Visit this Community
North Carolina, United States
Member Since: February 22, 2002
entire network: 11,718 Posts
KitMaker Network: 2,584 Posts
Posted: Monday, August 20, 2007 - 10:18 PM UTC
To get an image in the campaign gallery simply go to the Gallery area
Login if you need to (check the login/out link on the top right- if it says login then you need to, if it says logout, you're ok)
and navigate to CampaignsCurrent...The Support Team For 40K
Then click the upload image link at the top right.

To get an image into a reply in a thread you have two choices.
1. Upload the image to your gallery (or the campaign gallery). View the image, you'll see two tags at the bottom of it one says UBB - click the copy buttton to the right of it. Start a post and paste (right click paste) that in.

2. Upload your image to another photo site (photobucket for example). View the image, and get the URL of the image. This is based on the photo site so it may be different. Youre looking for http://somewhere/image name.jpg. Get that.
Start a post click the image button below the post box (img). Paste in the URL
grayghost666
#021
Member Since: August 02, 2007
entire network: 2,458 Posts
KitMaker Network: 163 Posts
Posted: Wednesday, August 29, 2007 - 12:40 PM UTC
hello Scott,
thanks for the reply and info.you put it into simple english for me.i looked at the faq's and also sent a messiger to jim about the same thing.if i may give a suggestion about the faq's.not all of us speak computer,so maybe the faq's might be rewrote as the "faq's for dummies" style.
again thx for all your help
Bruce
HARV
#012
Visit this Community
Wyoming, United States
Member Since: November 07, 2003
entire network: 3,098 Posts
KitMaker Network: 899 Posts
Posted: Saturday, September 01, 2007 - 02:19 PM UTC

Quoted Text

I did not know the Poles had these. What kind of camouflage and markings did they have? Have you come across some interesting camouflage schemes in your research?


Hi Jesper,

I haven't done any research other than what is printed on the instruction sheet.

For the Polish version it shows khaki as the overall color with just serial numbers and a license plate identifier.

The Russian version has dark gray-green as the overall color.

There isn't a camouflage paint scheme shown for the Russian or Polish version.

HARV
sgtreef
Visit this Community
Oklahoma, United States
Member Since: March 01, 2002
entire network: 6,043 Posts
KitMaker Network: 1,603 Posts
Posted: Monday, September 03, 2007 - 12:22 AM UTC
Where I stand as of now.


spongya
Staff MemberAssociate Editor
MODELGEEK
Visit this Community
Budapest, Hungary
Member Since: February 01, 2005
entire network: 2,365 Posts
KitMaker Network: 474 Posts
Posted: Monday, September 03, 2007 - 09:13 AM UTC
Jeff
Really impressive. Are you going to leave the top of the hull removable?
sgtreef
Visit this Community
Oklahoma, United States
Member Since: March 01, 2002
entire network: 6,043 Posts
KitMaker Network: 1,603 Posts
Posted: Monday, September 03, 2007 - 10:45 PM UTC

Quoted Text

Jeff
Really impressive. Are you going to leave the top of the hull removable?


No Andras and Thanks for the Comment.
slodder
Visit this Community
North Carolina, United States
Member Since: February 22, 2002
entire network: 11,718 Posts
KitMaker Network: 2,584 Posts
Posted: Tuesday, September 04, 2007 - 10:12 PM UTC
Good looking interior Jeff, gotta love the open top, forces you to focus on the interior details a whole lot more than just a few open hatches.
sgtreef
Visit this Community
Oklahoma, United States
Member Since: March 01, 2002
entire network: 6,043 Posts
KitMaker Network: 1,603 Posts
Posted: Tuesday, September 04, 2007 - 10:19 PM UTC
Thanks Scott Yes it does make you more aware of what can seen

Hope to have it done By Christmas or Early next Year.

Too many irons in the Fire right now.
MLD
Visit this Community
Vermont, United States
Member Since: July 21, 2002
entire network: 3,569 Posts
KitMaker Network: 684 Posts
Posted: Wednesday, September 05, 2007 - 03:04 PM UTC
Ok, after wrestling with the photo-gods for the last 30 min, only to find that kitmaker has a problem if I try to upload more than one pic at a time...

Pics of progress on the AFV Club 251D

But first.. a little background/introduction

Hi, I'm Mike and I have a 251 problem...


so it looks like I'm in the right place.

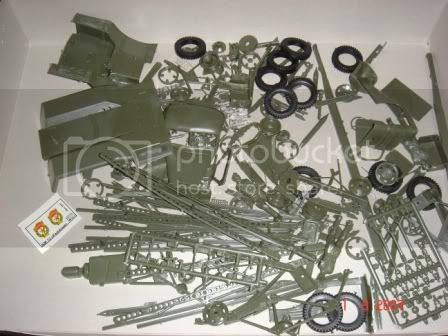
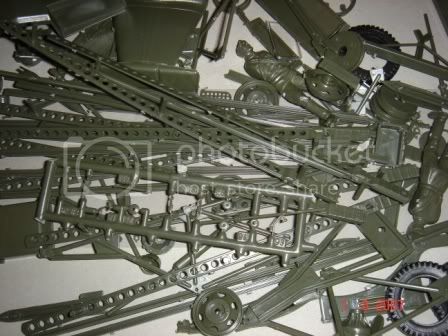
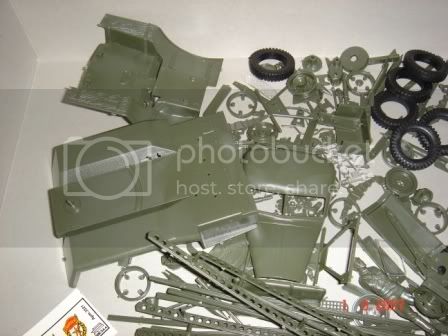
Many of those boxes look like these inside.
DML's 251D Falke

and AFV Club's -9


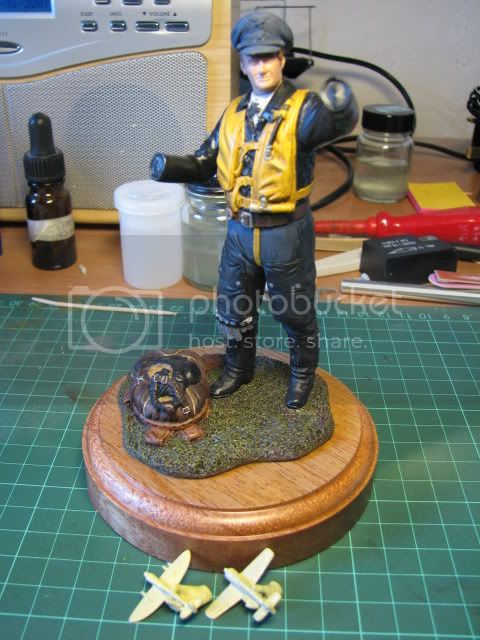
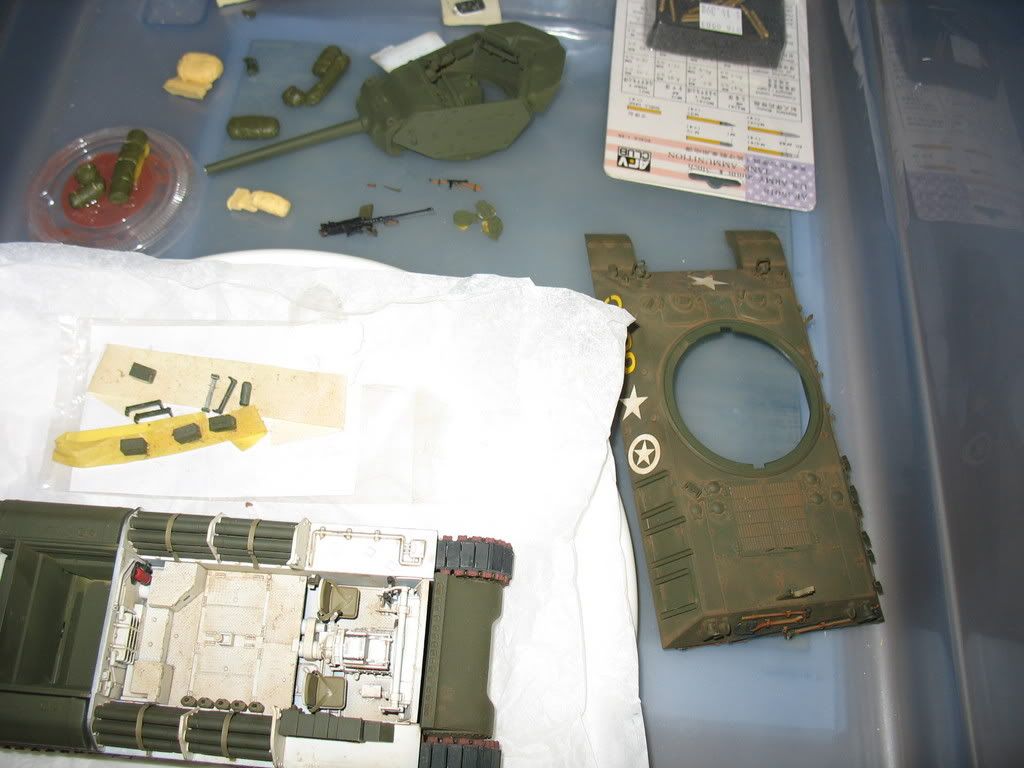
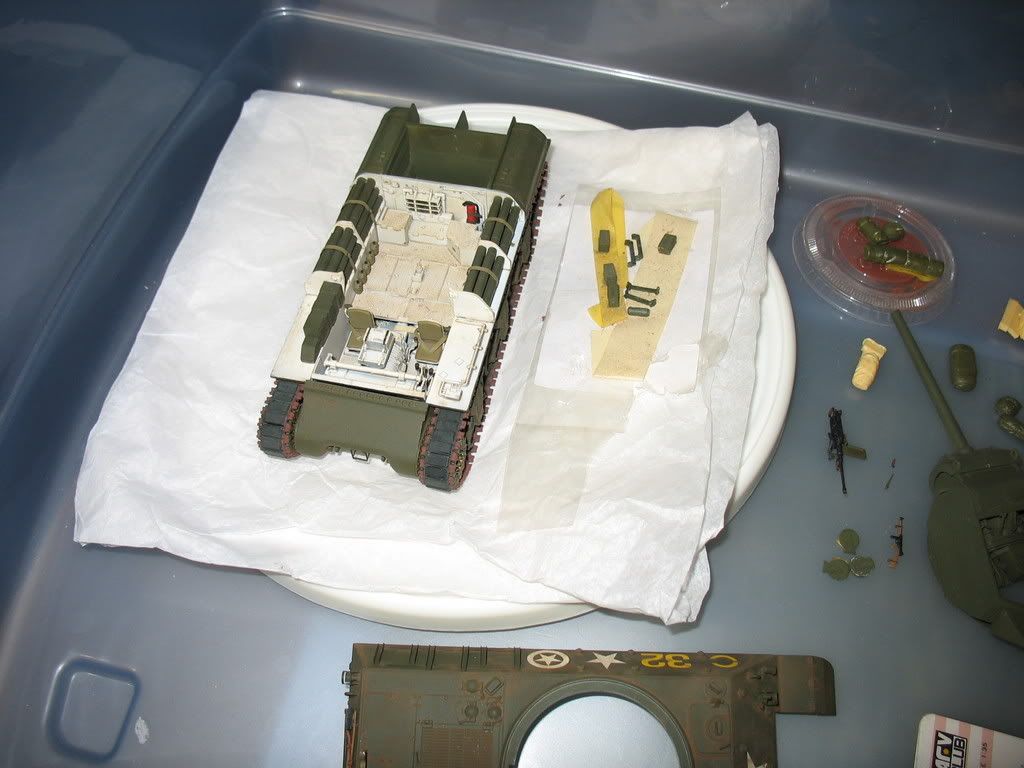
interior mostly built, painted, weathered, drybrushed usually with some aftermarket, added.

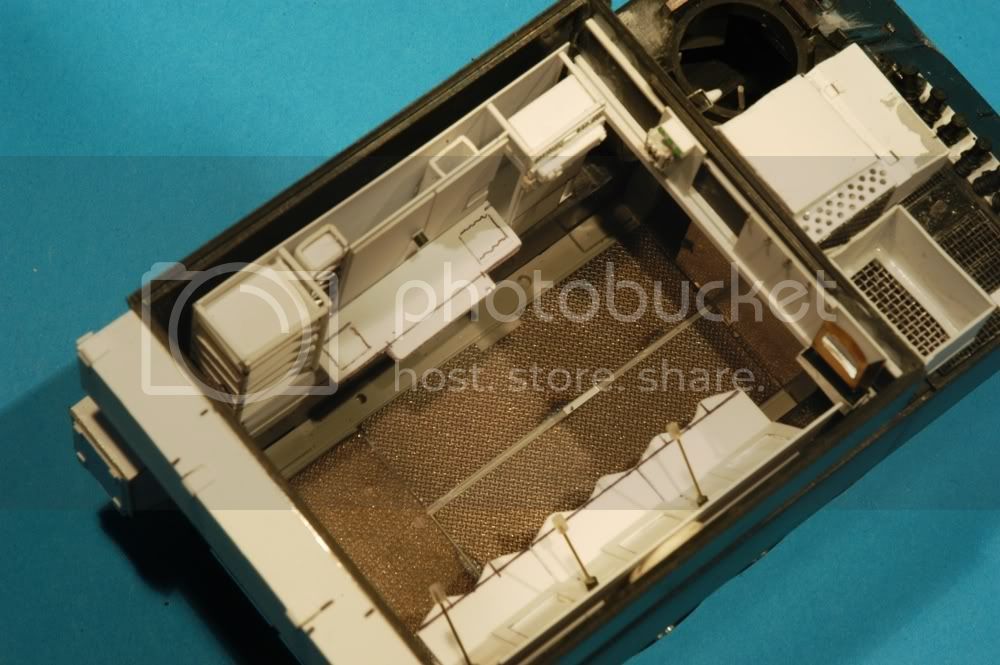
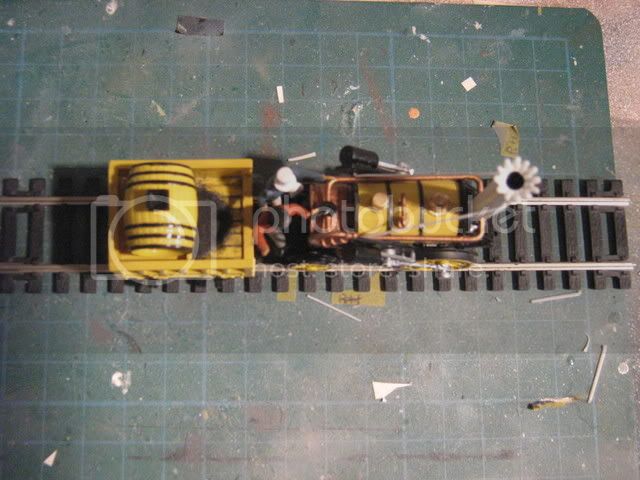
Like I'd posted to another thread , I've picked this thing up, after languishing like those others and blazed ahead in the last couple of days, we are now looking like this.


In the last 3 days, I've drybrushed the interior, added the upper hull, front and rear plates, and the interior bins. This is actually the first 251I've gotten so far as to actually add the upper hull to!

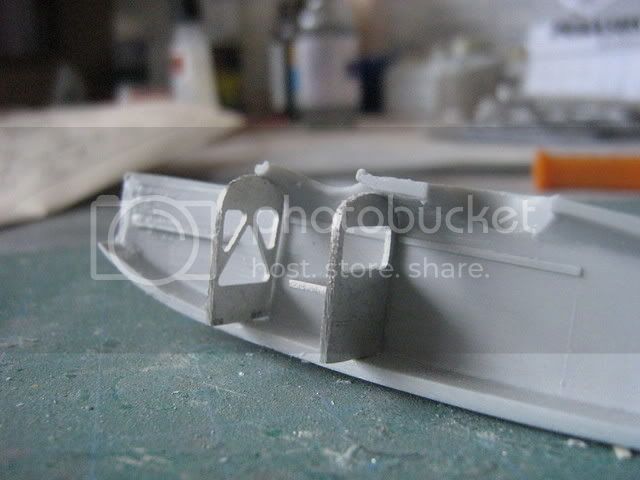
I've read a lot about building 251's but so far have not heard from anyone that the front seatbackrest is too long.
There is a locator notch in the front end of the rifle rack there on the right, and the left end is supposed to butt joint up against the rear bin.
But the padding section is too long and overlaps by 1.5 mm or so.
A lot of fiddling and cursing, double checking the directions, reference checking (WOW did DML get this area wrong in their kits..) and a little razor saw work, things stand as you see them now.