

Signup here:
https://archive.kitmaker.net/modules.php?op=modload&name=Campaigns&file=index&req=showcontent&id=815
Tools & Supplies
Discussions on the latest and greatest tools, glues, and gadgets.
Discussions on the latest and greatest tools, glues, and gadgets.
Hosted by Matt Leese
Build A Tool 4

matt

Member Since: February 28, 2002
entire network: 5,957 Posts
KitMaker Network: 2,626 Posts
Posted: Tuesday, April 21, 2015 - 06:01 PM UTC

2002hummer

#257

Member Since: October 11, 2011
entire network: 812 Posts
KitMaker Network: 105 Posts

Posted: Wednesday, April 22, 2015 - 04:36 AM UTC
I tried to enlist but it will not let. Just to let you know

ejhammer
Member Since: June 10, 2008
entire network: 230 Posts
KitMaker Network: 59 Posts

Posted: Wednesday, April 22, 2015 - 05:02 AM UTC
I'm in. Got a couple neat ideas going.
EJ
EJ
2002hummer
#257
Member Since: October 11, 2011
entire network: 812 Posts
KitMaker Network: 105 Posts
Posted: Wednesday, April 22, 2015 - 06:30 AM UTC
Count me in as well. Some ideas are coming.

Namabiiru
#399
Member Since: March 05, 2014
entire network: 2,888 Posts
KitMaker Network: 489 Posts

Posted: Wednesday, April 22, 2015 - 09:20 AM UTC
I'm in, in, in; but can't seem to find an ENLIST button. Also not seeing it listed on the CAMPAIGNS page.


Mar-74

Member Since: May 04, 2003
entire network: 679 Posts
KitMaker Network: 166 Posts

Posted: Wednesday, April 22, 2015 - 02:32 PM UTC
Im in but cant enlist, looks like the wifes blender survives a little longer!!
matt
Member Since: February 28, 2002
entire network: 5,957 Posts
KitMaker Network: 2,626 Posts
Posted: Wednesday, April 22, 2015 - 06:25 PM UTC
I have no clue... let me move the date up a little....
Mar-74
Member Since: May 04, 2003
entire network: 679 Posts
KitMaker Network: 166 Posts
Posted: Wednesday, April 22, 2015 - 07:07 PM UTC
I can see the date has changed, but still no joy for the sign up.
matt
Member Since: February 28, 2002
entire network: 5,957 Posts
KitMaker Network: 2,626 Posts
Posted: Wednesday, April 22, 2015 - 07:47 PM UTC
Got it... end date had to be changed to this year.....
Namabiiru
#399
Member Since: March 05, 2014
entire network: 2,888 Posts
KitMaker Network: 489 Posts
Posted: Thursday, April 23, 2015 - 02:59 AM UTC
Quoted Text
Got it... end date had to be changed to this year.....
Yes, I find that helps.

Enlisted!
Mar-74
Member Since: May 04, 2003
entire network: 679 Posts
KitMaker Network: 166 Posts
Posted: Thursday, April 23, 2015 - 04:46 AM UTC
Enlisted
2002hummer
#257
Member Since: October 11, 2011
entire network: 812 Posts
KitMaker Network: 105 Posts
Posted: Thursday, April 23, 2015 - 06:37 AM UTC
Enlisted
Mar-74
Member Since: May 04, 2003
entire network: 679 Posts
KitMaker Network: 166 Posts
Posted: Thursday, April 23, 2015 - 03:21 PM UTC
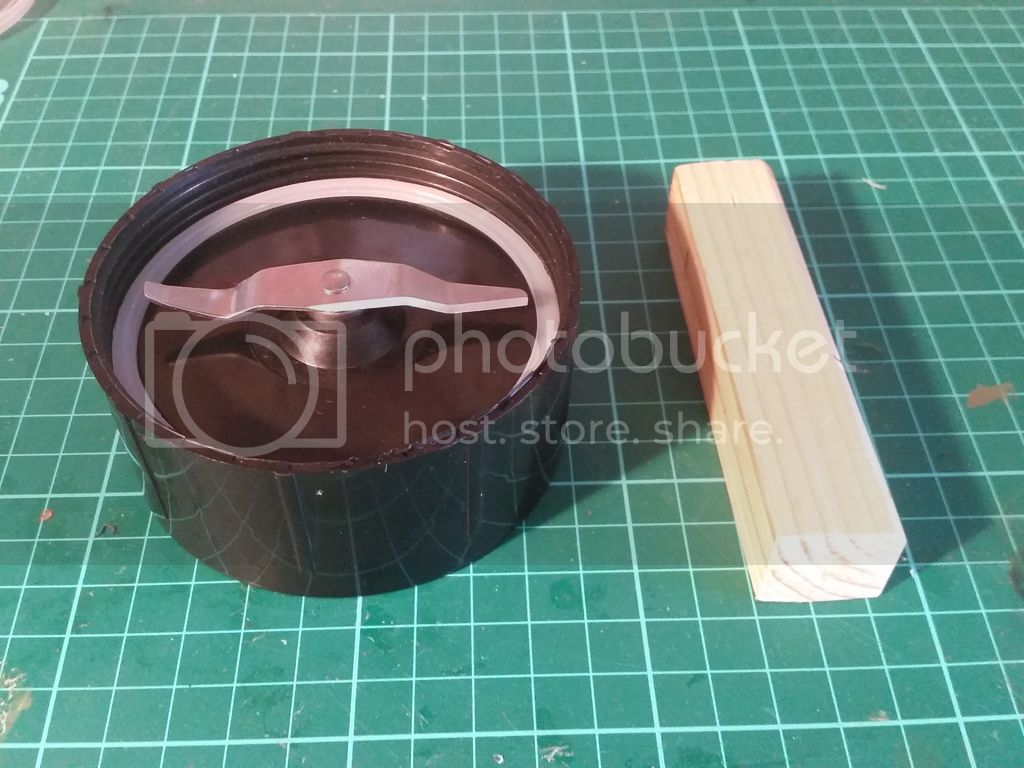
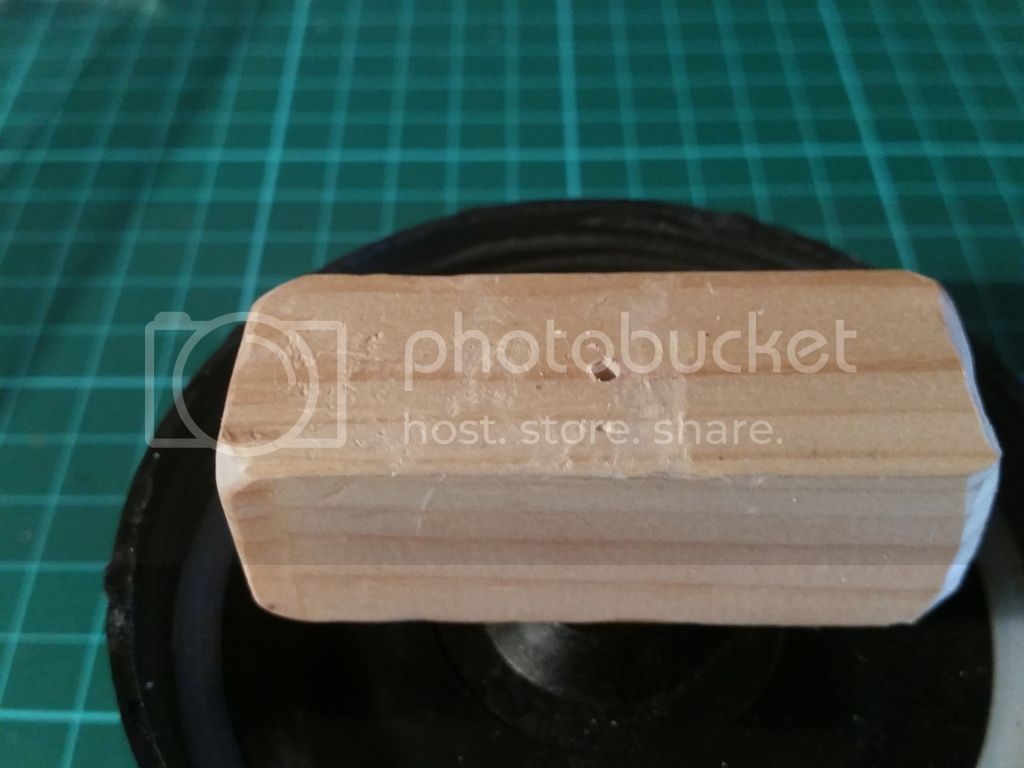
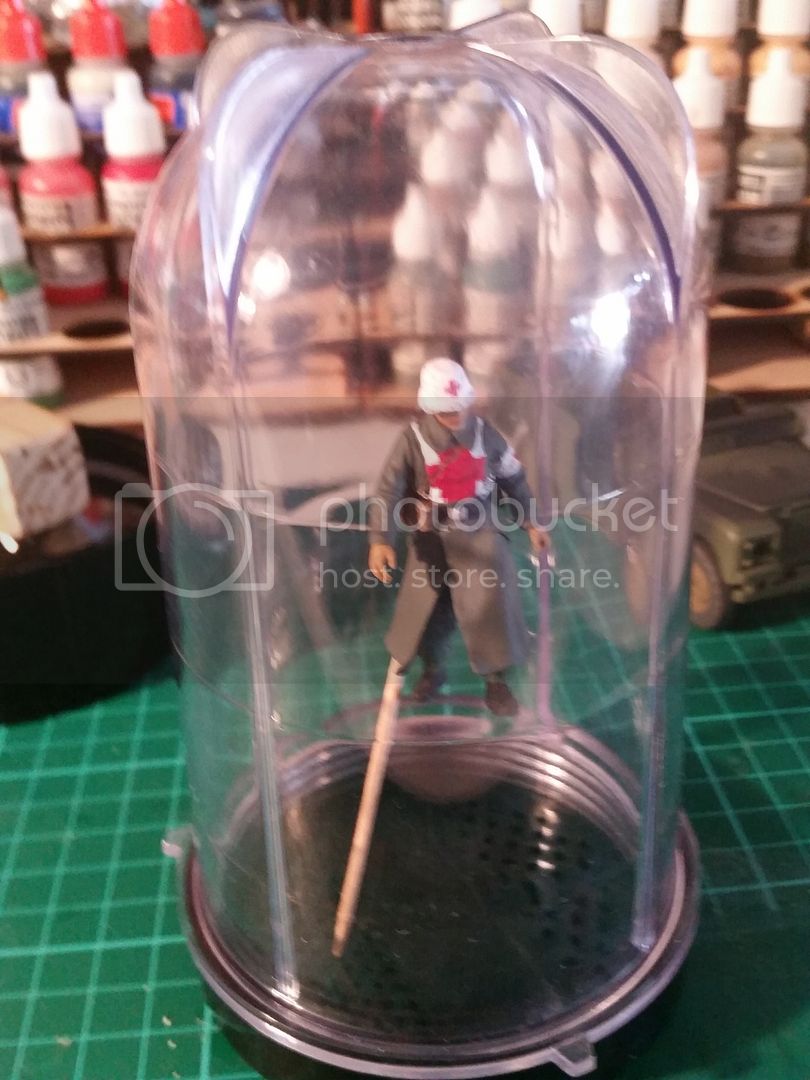
AS I had a free day today I got to work and completed my idea for a tool. Nothing special but it works and was based on a bullet style blender my girlfriend was throwing out.
Initially I was looking at the "cups" just to cover figures to prevent dust drying on them after painting, but then when I saw the rotating blade part I reckoned they might work as a figure stand which rotates during painting.
So I took the rotating blade and a small block of wood that was laying around.
Cut off the majority of the blade with a dremel and cut the wood to size to fit in the cup area with plenty of gap to allow rotation.

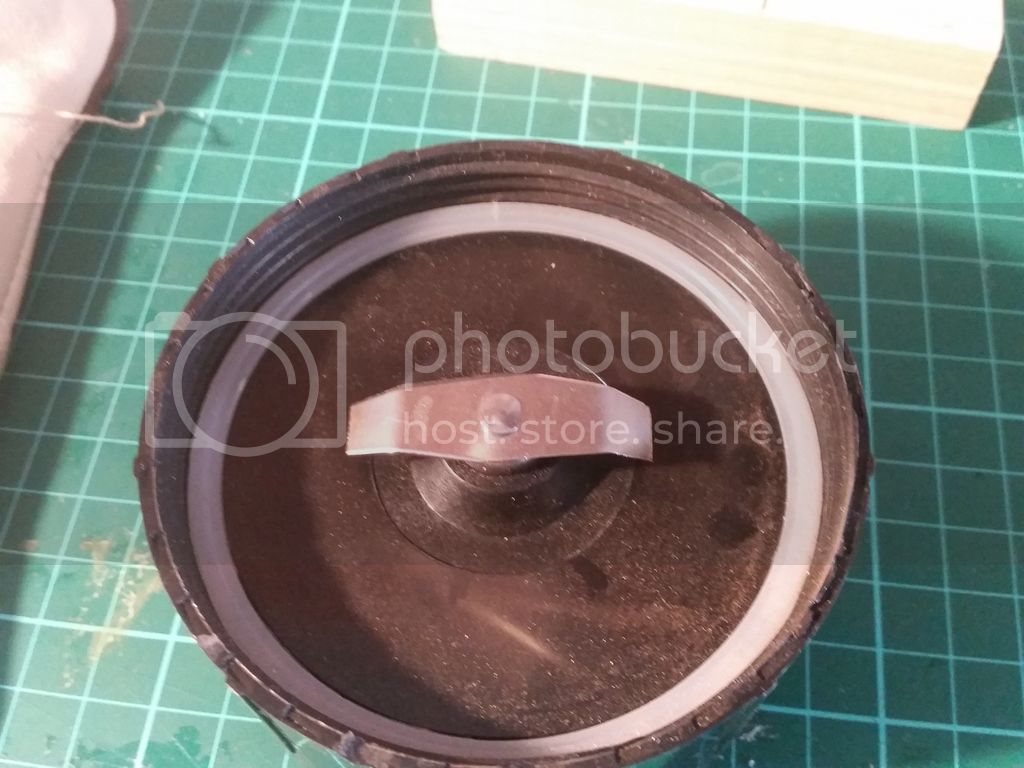
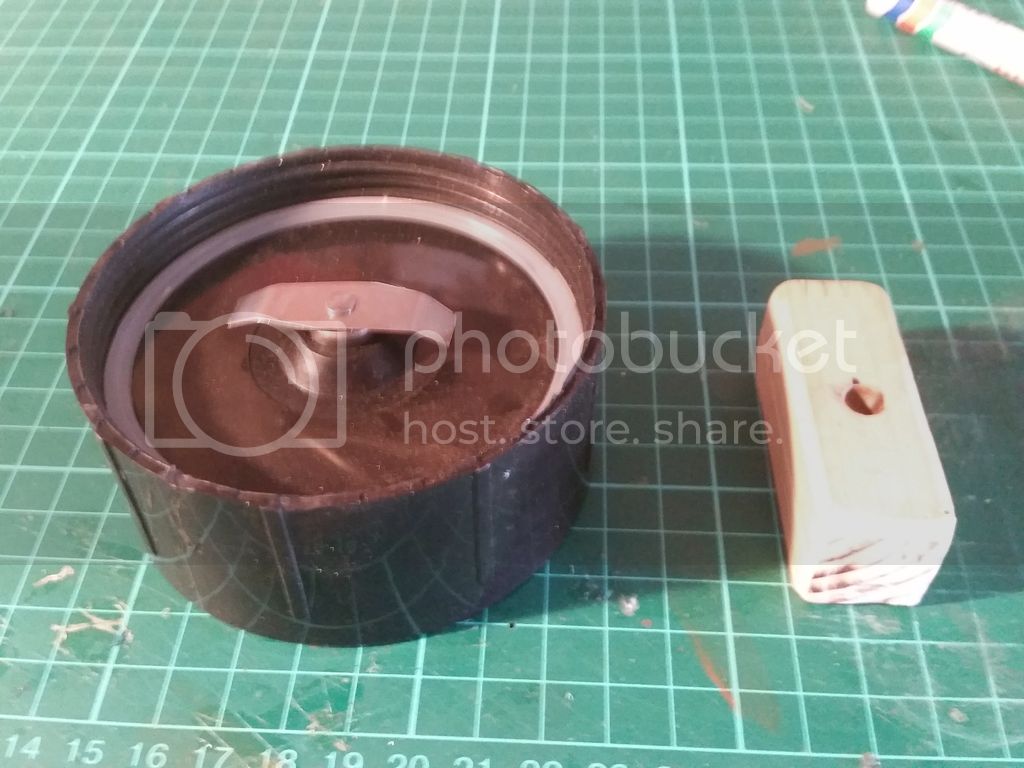
I also hollowed out a small area in the middle of the wood to allow the wood to sit flush on the blade as the was a raised nipple there.
Then it was a case of super glueing the wood to the blade and drilling a small hole in the wood to allow for a support for the figure, toothpick, wire etc.
Obviously more than one hole could be drilled and different dimensions to suit, but for now im happy with the one hole.
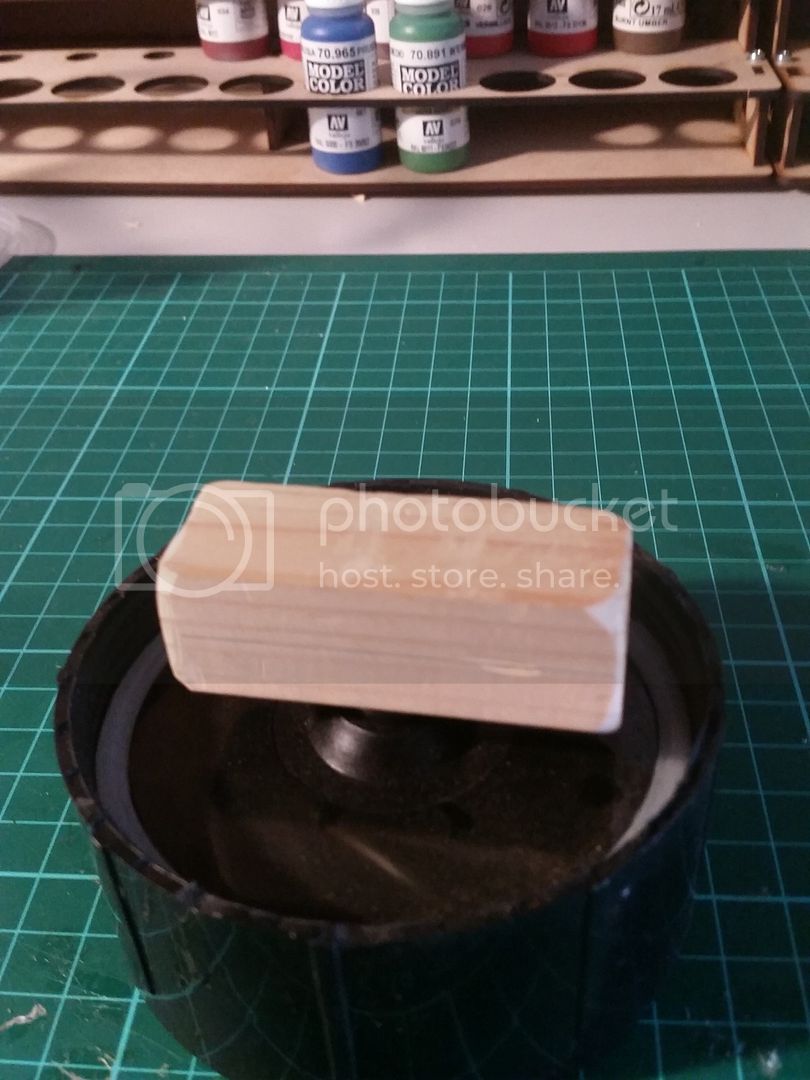
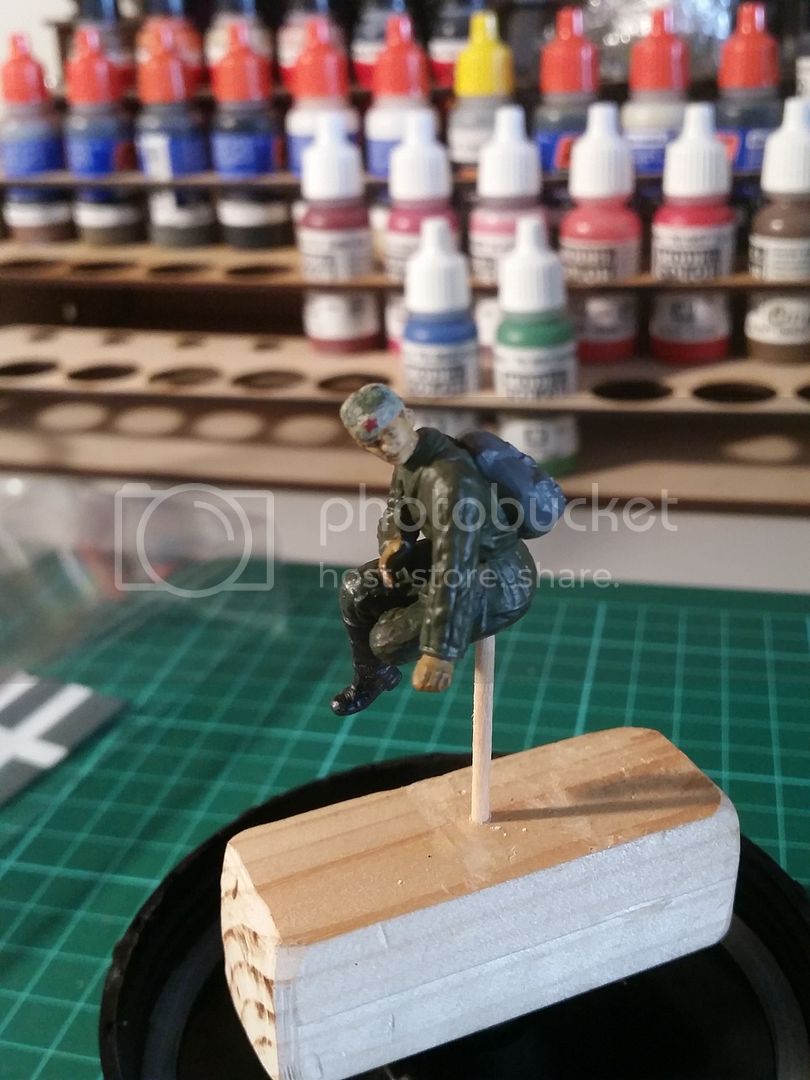
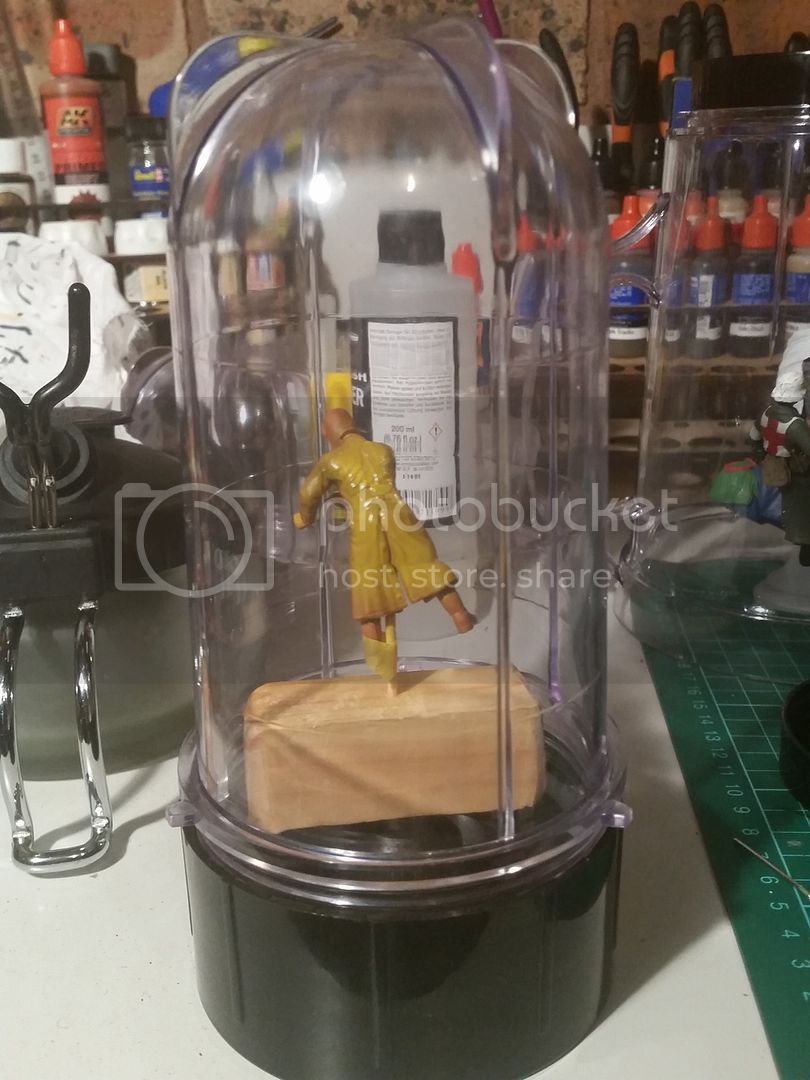
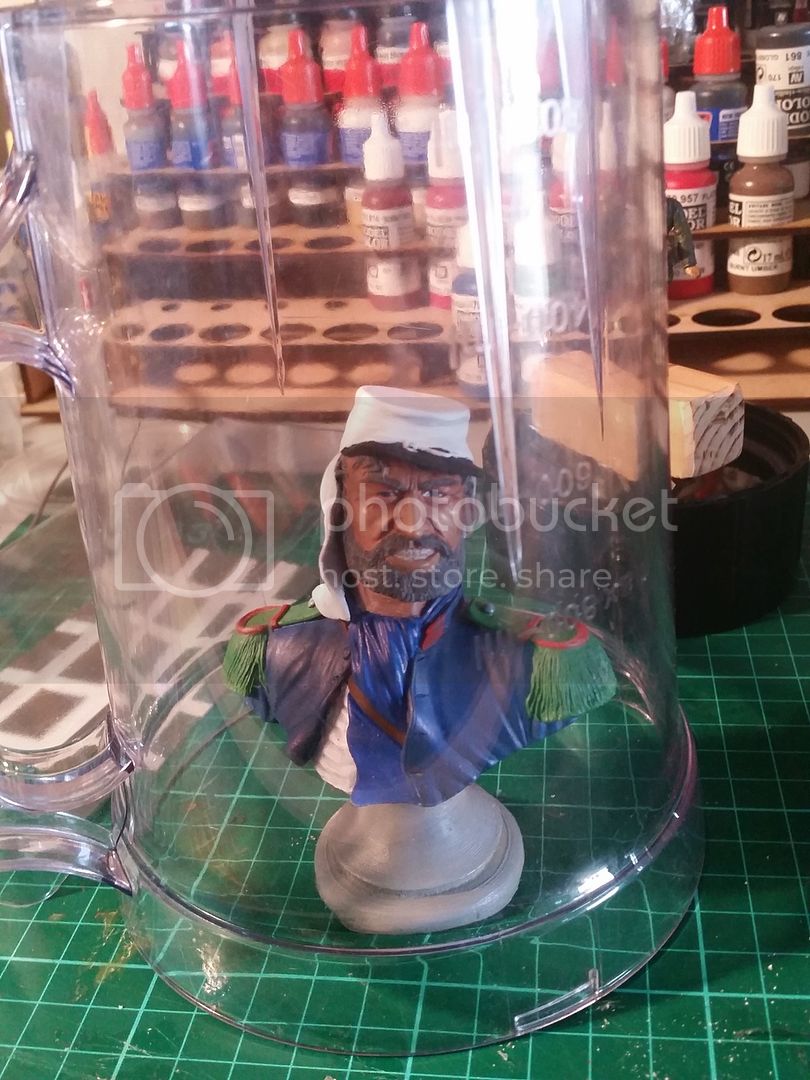
An added benefit with this sort of bullet blender is that the cups and jugs can be placed over model if you have spares or screwed directly onto the rotating base and avoid even further contact.
I wouldn't call myself handy but this was easy to make and took only about an hour from start to finish.
Got to love how modelling turns our brains into recycling mode!
Cheers,
Initially I was looking at the "cups" just to cover figures to prevent dust drying on them after painting, but then when I saw the rotating blade part I reckoned they might work as a figure stand which rotates during painting.
So I took the rotating blade and a small block of wood that was laying around.
Cut off the majority of the blade with a dremel and cut the wood to size to fit in the cup area with plenty of gap to allow rotation.


I also hollowed out a small area in the middle of the wood to allow the wood to sit flush on the blade as the was a raised nipple there.
Then it was a case of super glueing the wood to the blade and drilling a small hole in the wood to allow for a support for the figure, toothpick, wire etc.
Obviously more than one hole could be drilled and different dimensions to suit, but for now im happy with the one hole.


An added benefit with this sort of bullet blender is that the cups and jugs can be placed over model if you have spares or screwed directly onto the rotating base and avoid even further contact.


I wouldn't call myself handy but this was easy to make and took only about an hour from start to finish.
Got to love how modelling turns our brains into recycling mode!
Cheers,
matt
Member Since: February 28, 2002
entire network: 5,957 Posts
KitMaker Network: 2,626 Posts
Posted: Thursday, April 23, 2015 - 03:33 PM UTC
That's for sure...
I'll occasionally pick up old "free" printers, CD players, VCR's etc to gut for stuff to use. all sorts of Wire, gears and other stuff.
I'll occasionally pick up old "free" printers, CD players, VCR's etc to gut for stuff to use. all sorts of Wire, gears and other stuff.

majjanelson
Member Since: December 14, 2006
entire network: 1,355 Posts
KitMaker Network: 336 Posts
Posted: Monday, April 27, 2015 - 12:00 AM UTC
I've signed up.
I have a couple ideas I can post soon, hopefully.
I have a couple ideas I can post soon, hopefully.

hofpig

Member Since: March 04, 2007
entire network: 1,330 Posts
KitMaker Network: 56 Posts

Posted: Thursday, May 21, 2015 - 05:13 PM UTC
Just signed up. I have a static grass applicator ready to build off instruction on the internet. Got all the parts ready for assembly, only cost me about £4 in assorted bits!!!
Paul
Paul

Namabiiru
#399
Member Since: March 05, 2014
entire network: 2,888 Posts
KitMaker Network: 489 Posts
Posted: Sunday, July 05, 2015 - 01:00 PM UTC
Well, looks like an unforeseen move back to the US in the next month or so is going to curtail my tool-building activities for a while. However, it did precipitate a need to find a way to pack my models for shipping. Strictly speaking, this isn't a tool, but Matt can decide if it's credit-worthy. Hopefully, I can find a house and get the workshop set up in time to come up with a proper tool before time runs out on this campaign.
I started with a cheap Japanese Futon mattress, which I vivisected to remove the foam. This was then cut into thirds, which fit almost perfectly some plastic storage bins I picked up at the local DIY store. One piece goes in the bin as a base layer:

A second piece I went all hack and slash on:

And voila!

I could get nine slabs of foam from one mattress, which is enough to do four bins with a bit left over. It turns out four bins isn't quite enough so I'll need to get another mattress as well, which is fine since I've decided I want to throw another slab of foam over the top of each bin in case the movers go totally crazy.
Happy tool-building!
I started with a cheap Japanese Futon mattress, which I vivisected to remove the foam. This was then cut into thirds, which fit almost perfectly some plastic storage bins I picked up at the local DIY store. One piece goes in the bin as a base layer:
A second piece I went all hack and slash on:
And voila!
I could get nine slabs of foam from one mattress, which is enough to do four bins with a bit left over. It turns out four bins isn't quite enough so I'll need to get another mattress as well, which is fine since I've decided I want to throw another slab of foam over the top of each bin in case the movers go totally crazy.
Happy tool-building!
Namabiiru
#399
Member Since: March 05, 2014
entire network: 2,888 Posts
KitMaker Network: 489 Posts
Posted: Monday, July 27, 2015 - 05:13 PM UTC
It turns out my model moving paranoia knows no bounds. So not being satisfied that the movers still wouldn't crush my carefully padded plastic bins I decided to build a custom crate so they are nice and cozy for the voyage from Japan to the East coast of America:

May yet come up with an actual tool for this campaign after we get re-settled, but for now this is my entry.
May yet come up with an actual tool for this campaign after we get re-settled, but for now this is my entry.

MikeyBugs95
Member Since: May 27, 2013
entire network: 2,210 Posts
KitMaker Network: 345 Posts
Posted: Thursday, July 30, 2015 - 12:05 PM UTC
Just enlisted. I have 2 ideas. One of which is a straight track maker tool. I designed it on a CAD program already and I just have to make it. Planning on making it out of wood. Might improve it later on. The other tool is a sander of some sort made with the body of an electric shaver I cannibalized for parts. Although I'm unsure how I'll proceed with this one.

Armored76

Member Since: September 30, 2013
entire network: 1,615 Posts
KitMaker Network: 60 Posts
Posted: Wednesday, August 05, 2015 - 01:29 AM UTC
Wow! Really cool ideas everyone!
I just posted a short description of a DIY photography turntable on my blog so I thought I'll share it here as well. I hope this fits the topic.
I was always wondering how the scale model magazine photos are made so that they align up so nicely and have a "correct" viewing angle. After a short search I stumbled upon a very interesting and useful Youtube video showing you how to build a cheap photography turntable using just a cheap Ikea serving tablet and some office clips.
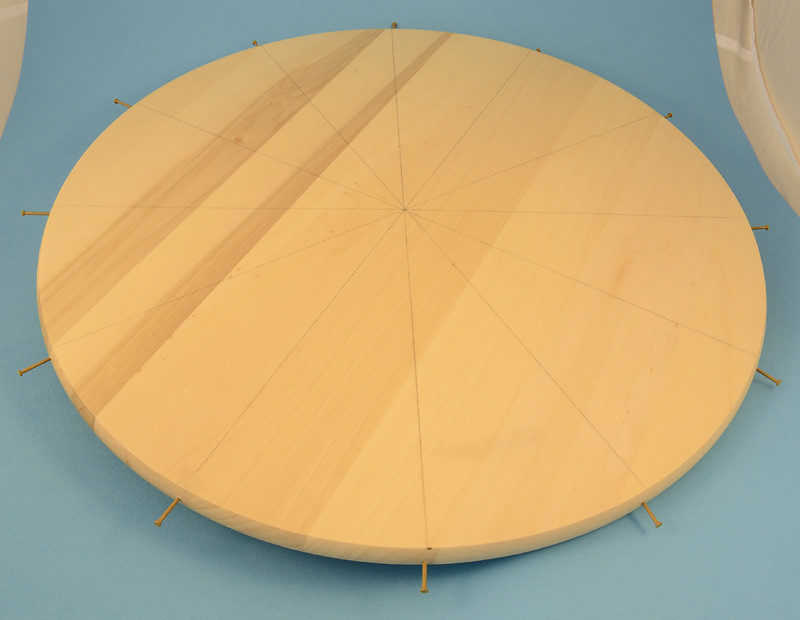
Based on that video, I decided to build my own photography turntable. I was going to use the above mentioned Ikea serving table, a few nails and a piece of white cardboard cut into a round shape, slightly larger that the table itself.
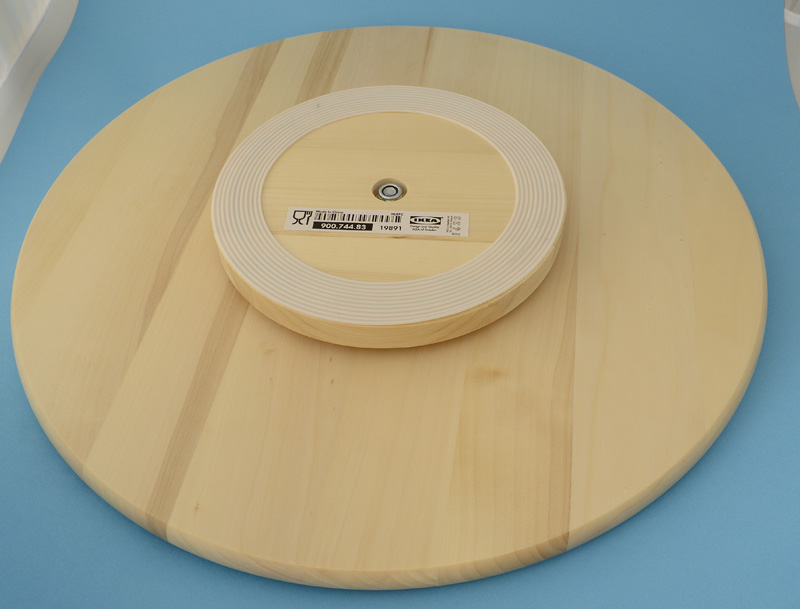

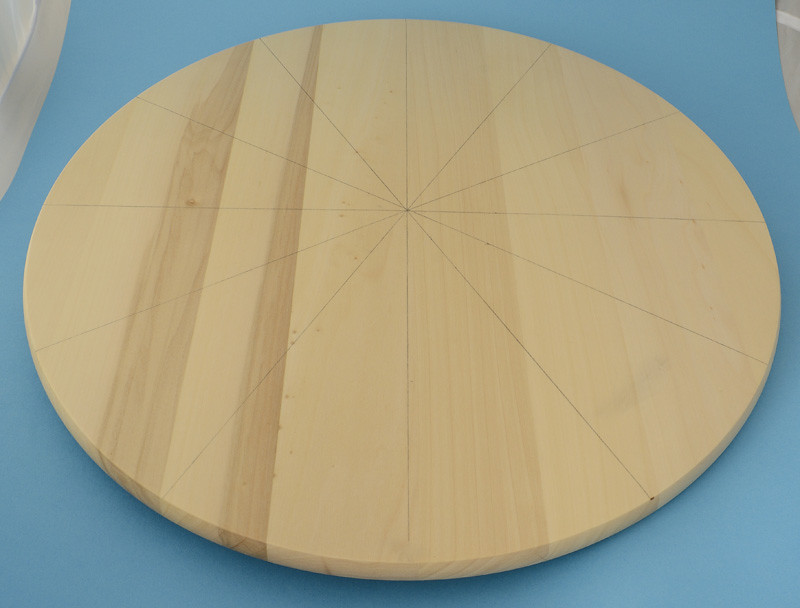
In a first step I divided the surface in equal slices using a pencil and ruler. The number of slices is not critical. The more you have the finer the positioning. I went with 12 slices in this case.
I continued by inserting small nails in the side of the rotating part, one on each marking. These will serve as positioning guides once the paper is laid over.
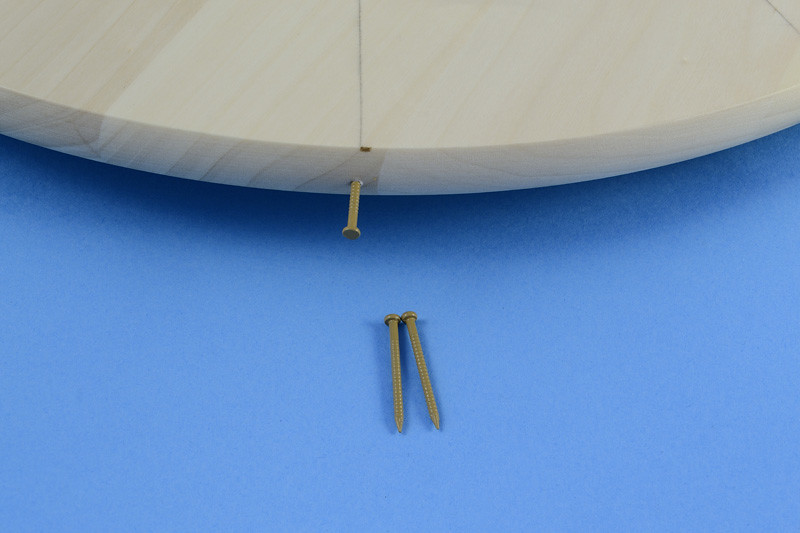
The end result looked like this:
Once this was done, I placed several pieces of double-sided tape to help fix the paper overlay to the wooden base.
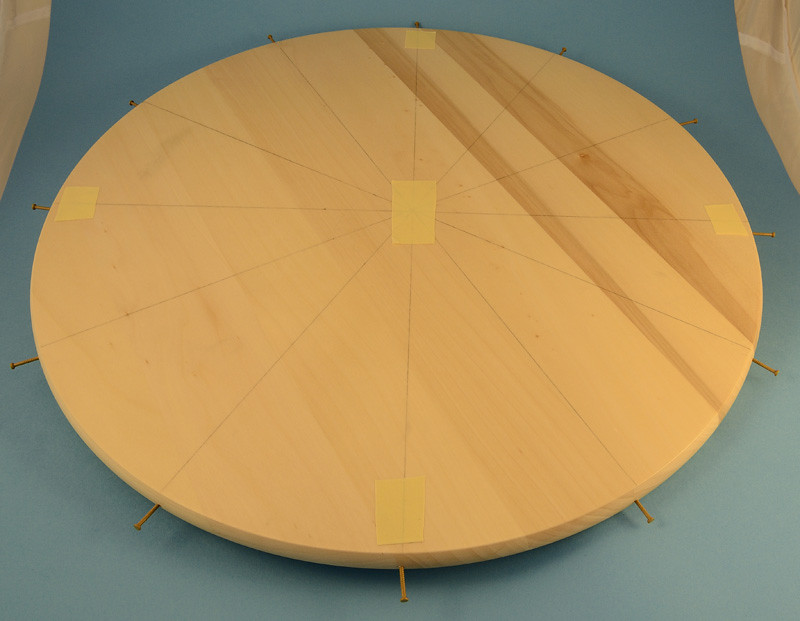
Last but not least, the cardboard cut to shape was laid over the based being fixed with the double-sided tape.
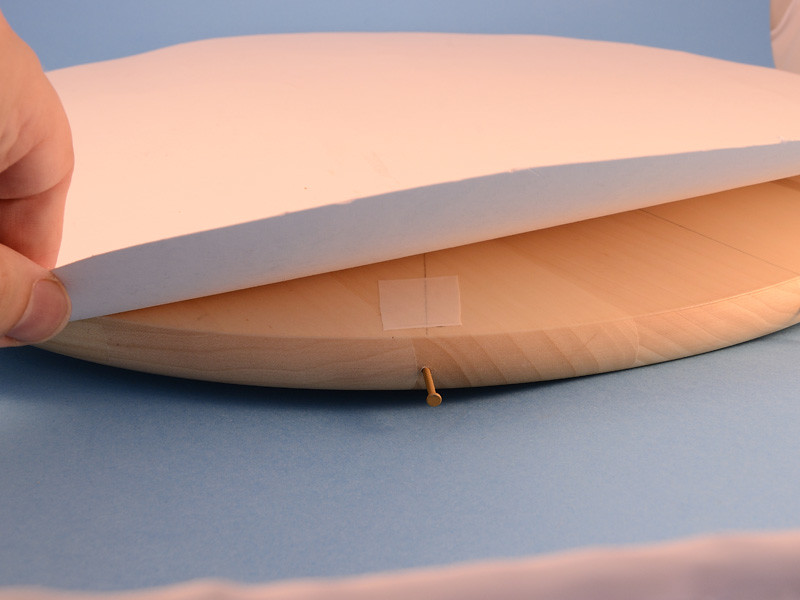
That's it! Let me know your thoughts!
Cheers,
Cristian
I just posted a short description of a DIY photography turntable on my blog so I thought I'll share it here as well. I hope this fits the topic.
I was always wondering how the scale model magazine photos are made so that they align up so nicely and have a "correct" viewing angle. After a short search I stumbled upon a very interesting and useful Youtube video showing you how to build a cheap photography turntable using just a cheap Ikea serving tablet and some office clips.
Based on that video, I decided to build my own photography turntable. I was going to use the above mentioned Ikea serving table, a few nails and a piece of white cardboard cut into a round shape, slightly larger that the table itself.
In a first step I divided the surface in equal slices using a pencil and ruler. The number of slices is not critical. The more you have the finer the positioning. I went with 12 slices in this case.
I continued by inserting small nails in the side of the rotating part, one on each marking. These will serve as positioning guides once the paper is laid over.
The end result looked like this:
Once this was done, I placed several pieces of double-sided tape to help fix the paper overlay to the wooden base.
Last but not least, the cardboard cut to shape was laid over the based being fixed with the double-sided tape.
That's it! Let me know your thoughts!
Cheers,
Cristian

justsendit
Member Since: February 24, 2014
entire network: 3,033 Posts
KitMaker Network: 361 Posts
Posted: Thursday, August 06, 2015 - 03:29 AM UTC
Hi Cristian,
Very useful idea! I jumped on this right away and found a similar version (16-Inch Lazy Suzan) at a local Bed, Bath & Beyond store no IKEA around here. Okay, I'm counting on this to magically improve my photography ... haha!
Thanks for sharing!
Cheers!
mike
Very useful idea! I jumped on this right away and found a similar version (16-Inch Lazy Suzan) at a local Bed, Bath & Beyond store no IKEA around here. Okay, I'm counting on this to magically improve my photography ... haha!
Thanks for sharing!
Cheers!
mike
Armored76
Member Since: September 30, 2013
entire network: 1,615 Posts
KitMaker Network: 60 Posts
Posted: Sunday, August 09, 2015 - 03:42 PM UTC
Glad you like it, Mike! One thing I would probably do differently now is NOT using the central piece of double-sided tape as this tends to raise the paper overlay in the center, causing any vehicle placed on it to "dangle" in the air. It is mostly visible with wheeled vehicles where only the wheel sitting on/above the piece of tape is touching the ground although all of them are perfectly aligned. The same applies for tracked vehicles as well but I find that less visible.
Show us some images when you're done!
Cheers,
Cristian
Show us some images when you're done!
Cheers,
Cristian
justsendit
Member Since: February 24, 2014
entire network: 3,033 Posts
KitMaker Network: 361 Posts
Posted: Monday, August 10, 2015 - 09:40 AM UTC
Electric Toothbrush Sander.
Guys, This is not my idea but one that deserves a second look. I cant begin to say how useful this sanding device is. One might think it would be a difficult tool to control but on the contrary, its use can be very delicate on tiny parts and in the occasional tight space more-so than my big clumsy hands! And just like the No. 11 X-Acto Blade, I find myself reaching for this tool often.
For the sander, just cut-off the bristles and CA glue on the sanding disk of your choice.


The GUM Crayola Battery-Powered Toothbrush can be found in local supermarkets or big-box stores for around $5.00 USD. At that price, I purchased a second one for parts cleaning. The two AAA batteries (included) are replaceable with the removal of a small Phillips screwdriver.
Disclaimer: After modification, DO NOT USE ON TEETH!
Cheers!
mike
Guys, This is not my idea but one that deserves a second look. I cant begin to say how useful this sanding device is. One might think it would be a difficult tool to control but on the contrary, its use can be very delicate on tiny parts and in the occasional tight space more-so than my big clumsy hands! And just like the No. 11 X-Acto Blade, I find myself reaching for this tool often.
For the sander, just cut-off the bristles and CA glue on the sanding disk of your choice.
The GUM Crayola Battery-Powered Toothbrush can be found in local supermarkets or big-box stores for around $5.00 USD. At that price, I purchased a second one for parts cleaning. The two AAA batteries (included) are replaceable with the removal of a small Phillips screwdriver.
Disclaimer: After modification, DO NOT USE ON TEETH!
Cheers!
mike
Namabiiru
#399
Member Since: March 05, 2014
entire network: 2,888 Posts
KitMaker Network: 489 Posts
Posted: Monday, August 10, 2015 - 05:42 PM UTC
Saw a feature on making those and have been wanting to give it a try--just watching for a cheap second-hand electric toothbrush

sneakypete
Member Since: June 10, 2006
entire network: 149 Posts
KitMaker Network: 20 Posts
Posted: Saturday, August 15, 2015 - 12:40 PM UTC
Mark,
Great idea, the thought of pouring hours into a model and then movers destroy it makes me hesitant about finishing them up. I like your idea I will have to get myself organized for my move next year.
Dan
Great idea, the thought of pouring hours into a model and then movers destroy it makes me hesitant about finishing them up. I like your idea I will have to get myself organized for my move next year.
Dan
 |

WEB HOSTING BY


Copyright ©2021 KitMaker Network and Kitmaker Network, a subsidiary of Silver Star Enterprises
All Rights Reserved. Please read our Conditions of Use and Privacy Policy.
All Rights Reserved. Please read our Conditions of Use and Privacy Policy.