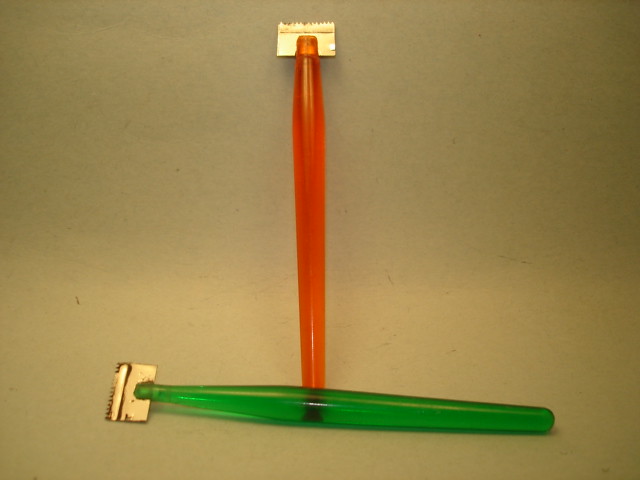
Tools & Supplies
Discussions on the latest and greatest tools, glues, and gadgets.
Hosted by Matt Leese
Build A Tool 4
Armored76
Visit this Community
Bayern, Germany
Member Since: September 30, 2013
entire network: 1,615 Posts
KitMaker Network: 60 Posts
Posted: Saturday, August 15, 2015 - 02:37 PM UTC

Quoted Text

just watching for a cheap second-hand electric toothbrush


I wouldn't expect an all that large market for second-hand toothbrushes But you never know!

I have two old ones in the basement waiting for me to bring then to the recycling point so I might save 'em and give them a second life.

Cheers,
Cristian
varanusk
Staff MemberManaging Editor
ARMORAMA
Visit this Community
Santa Cruz de Tenerife, Spain / España
Member Since: July 04, 2013
entire network: 1,288 Posts
KitMaker Network: 337 Posts
Posted: Monday, October 05, 2015 - 04:08 AM UTC
Well this is so simple I can hardly call it "tool"... but it is doing a good job for me.

My last two models have been prone to peeling off paint so I had to avoid touching them as much as possible during the weathering stages.
As I store them on a plastic box, putting them in & out meant I had to handle them somehow.

So I have bent a wire hanger, that can be slipped under the tank to move it. Kind "fishing" it!

As the part that goes under the belly is as wide as possible, it will not fall on its side when elevated.


Hope someone finds it useful also.
Armored76
Visit this Community
Bayern, Germany
Member Since: September 30, 2013
entire network: 1,615 Posts
KitMaker Network: 60 Posts
Posted: Monday, October 05, 2015 - 10:35 AM UTC
A simple but great idea! Thanks for sharing, Carlos.
justsendit
Visit this Community
Colorado, United States
Member Since: February 24, 2014
entire network: 3,033 Posts
KitMaker Network: 361 Posts
Posted: Monday, October 05, 2015 - 08:22 PM UTC
Helpful tips. All this talk about “moving models” makes my head hurt, since I’m currently in the process of relocating my operations ... ugh!

—mike
All_You_Can_Kit
Visit this Community
Jakarta Raya, Indonesia
Member Since: August 22, 2012
entire network: 599 Posts
KitMaker Network: 38 Posts
Posted: Saturday, October 10, 2015 - 12:54 PM UTC
Hello fellas, just share freehand ideas... Would you please allow to me to propose a ribbon for this campaign as I already post in thread "Ribbons Needed", just like this:


Feel free to agree or disagree, man, No problem at all... Just a simple sharing


Cheers


Garry
Armored76
Visit this Community
Bayern, Germany
Member Since: September 30, 2013
entire network: 1,615 Posts
KitMaker Network: 60 Posts
Posted: Saturday, October 10, 2015 - 01:31 PM UTC
Thanks for taking the time to put these together, Garry!

I like the first one a lot but I'm not sure what the second one is supposed to show due to its size.

If you would allow for a few comments... How about swapping the hammer in the first one to have it's head on the right? I guess this has something to do with the left-to-right reading direction. Also, have you experimented with different border? They are great as they are but other options might pop up.

As I said, I personally like what you did! Let's see what the campaign owner says

Cheers,
Cristian
All_You_Can_Kit
Visit this Community
Jakarta Raya, Indonesia
Member Since: August 22, 2012
entire network: 599 Posts
KitMaker Network: 38 Posts
Posted: Saturday, October 10, 2015 - 04:49 PM UTC

Quoted Text

Thanks for taking the time to put these together, Garry!

I like the first one a lot but I'm not sure what the second one is supposed to show due to its size.

If you would allow for a few comments... How about swapping the hammer in the first one to have it's head on the right? I guess this has something to do with the left-to-right reading direction. Also, have you experimented with different border? They are great as they are but other options might pop up.

As I said, I personally like what you did! Let's see what the campaign owner says

Cheers,
Cristian


No, no problem at all my friend... Please feel free to put a lot of comments about my design. For the first design, I will try your suggestion and about different border color, I use blue since that's one of my favorite color.. Sounds too selfish ya? .. I will try another color, any suggestion Cristian?

About the second design, I want to show that the word "Tool" consisting of "T" that represented by hammer picture in a vertical position and the remaining letters "ool" was created by using WordArt facility in MS-Office.


Best regards from Indonesia


Garry
Armored76
Visit this Community
Bayern, Germany
Member Since: September 30, 2013
entire network: 1,615 Posts
KitMaker Network: 60 Posts
Posted: Saturday, October 10, 2015 - 09:14 PM UTC
Now I can see the word "Tool". Thanks!

Blue is actually a great color for many designs. I was thinking a warn brown tone might work, too. Not sure myself...
TimReynaga
Staff MemberAssociate Editor
MODEL SHIPWRIGHTS
Visit this Community
California, United States
Member Since: May 03, 2006
entire network: 2,500 Posts
KitMaker Network: 19 Posts
Posted: Wednesday, October 21, 2015 - 08:39 AM UTC
I found a simple, cheap battery powered “milk frother”
 photo milk frother_zpsrhywtzym.jpg

...works great as a model paint stirrer! I just cut off that weird frother tip and the tool was good to go:
 photo Milk frother paint mixer_zpscbrwwinh.jpg
Almost embarassingly simple, but it works great!


by the way, Gary - I love your "Tool" campaign ribbon. The simple hammer version works best as a tiny ribbon, I think. I like the blue, too.
varanusk
Staff MemberManaging Editor
ARMORAMA
Visit this Community
Santa Cruz de Tenerife, Spain / España
Member Since: July 04, 2013
entire network: 1,288 Posts
KitMaker Network: 337 Posts
Posted: Wednesday, October 21, 2015 - 01:43 PM UTC
Hi,
Ribbon looks good but I agree with the hammer head on the upper right corner :-)
krow113
Visit this Community
British Columbia, Canada
Member Since: March 16, 2010
entire network: 473 Posts
KitMaker Network: 58 Posts
Posted: Friday, October 23, 2015 - 02:55 AM UTC
I did put this in BAT 3 but missed the boat. I have registered this time so I hope it qualifies.

WW1 modelers and dioramist's will recognize the need for a tool to make the ever present corrugated iron sheets we see in many photo's of WW 1 action.
Here I take a number of household pizza slicing utensils and remove the circular blades. Also in the pic is the guardrail from a Tamiya pit crew 1/24 kit.

Using fender washers as spacers , diff thickness' can be achieved for the scale required:

The guard rail is used here for 54mm scale:

Some pressure is required:

As you can see a piece of corrugated material can be produced quite easily.
By using angle brass ,attached to a base and varying the spacers in the tool , different scale corrugated sheet can be produced.

Namabiiru
Staff MemberAssociate Editor
MODEL SHIPWRIGHTS
#399
Visit this Community
Rhode Island, United States
Member Since: March 05, 2014
entire network: 2,888 Posts
KitMaker Network: 489 Posts
Posted: Sunday, October 25, 2015 - 11:45 PM UTC
Do we have a gallery for this campaign? Want to make sure I'm not overlooking something.

matt
Staff MemberCampaigns Administrator
Visit this Community
New York, United States
Member Since: February 28, 2002
entire network: 5,957 Posts
KitMaker Network: 2,626 Posts
Posted: Monday, October 26, 2015 - 05:49 PM UTC
You'll have to forgive me, as the Gallery isn't my cup of tea per sae. I can;t remember how to create new albums. Considering it's been a source of issues in the past, Our own hosting is prolly the best option.
Namabiiru
Staff MemberAssociate Editor
MODEL SHIPWRIGHTS
#399
Visit this Community
Rhode Island, United States
Member Since: March 05, 2014
entire network: 2,888 Posts
KitMaker Network: 489 Posts
Posted: Tuesday, November 17, 2015 - 07:35 AM UTC
No worries. just want to make sure I'm not missing anything.

Anyway, rather than work on my LAV for the Japanese Military campaign, I spent the weekend whipping this out:


I know shelves aren't technically a tool, but as I recall the door was pretty wide open for this campaign.

It's a tight fit, but I managed to get everything on there. Not sure what I'm going to do when my next build is complete...might have to burn a few books to make space.

Removed by original poster on 11/21/15 - 00:59:23 (GMT).
HARV
#012
Visit this Community
Wyoming, United States
Member Since: November 07, 2003
entire network: 3,098 Posts
KitMaker Network: 899 Posts
Posted: Friday, November 20, 2015 - 06:02 AM UTC
Nothing too fancy but here are a few more of my homemade tools.

I made these Zimmerit tools by taking the cutting edge off of a tape dispenser, cutting it down into smaller sizes and straightening the pieces. I then cut a notch in the end of a paint brush handle and used epoxy to hold the blade in place.


I made these panel scribing tools by taking #2 Wilkee scribing needles and placing them in the end of paint brush handles and I used epoxy to hold the needle in place.


Both very simple to make and they work well. I might come up with a couple more entries before the campaign ends.

Thank you,
Randy
matt
Staff MemberCampaigns Administrator
Visit this Community
New York, United States
Member Since: February 28, 2002
entire network: 5,957 Posts
KitMaker Network: 2,626 Posts
Posted: Friday, November 20, 2015 - 05:44 PM UTC
Down to a little over a month. All I've managed to do, is add some threaded inserts into my bench to bolt down my Lathe when I'm using it. (pics will follow) Time has not been kind to me this year.
Namabiiru
Staff MemberAssociate Editor
MODEL SHIPWRIGHTS
#399
Visit this Community
Rhode Island, United States
Member Since: March 05, 2014
entire network: 2,888 Posts
KitMaker Network: 489 Posts
Posted: Saturday, November 21, 2015 - 10:51 PM UTC
Randy and I seem to be working along parallel lines. I needed a way to make a pilot hole to keep my micro drill bits from wandering from the spot where I want the hole to be. I took an old airbrush needle, drilled a hole in the end of a piece of dowel, and jammed the needle through. Now I can finally drill holes exactly where I want them.


majjanelson
Visit this Community
South Carolina, United States
Member Since: December 14, 2006
entire network: 1,355 Posts
KitMaker Network: 336 Posts
Posted: Saturday, November 21, 2015 - 11:10 PM UTC
I’ve found a couple items that I think will work for making grab handles and wire rails for models. I apologize for the poor quality pictures, but hopefully they are clear enough to allow you to see what I'm trying to explain.

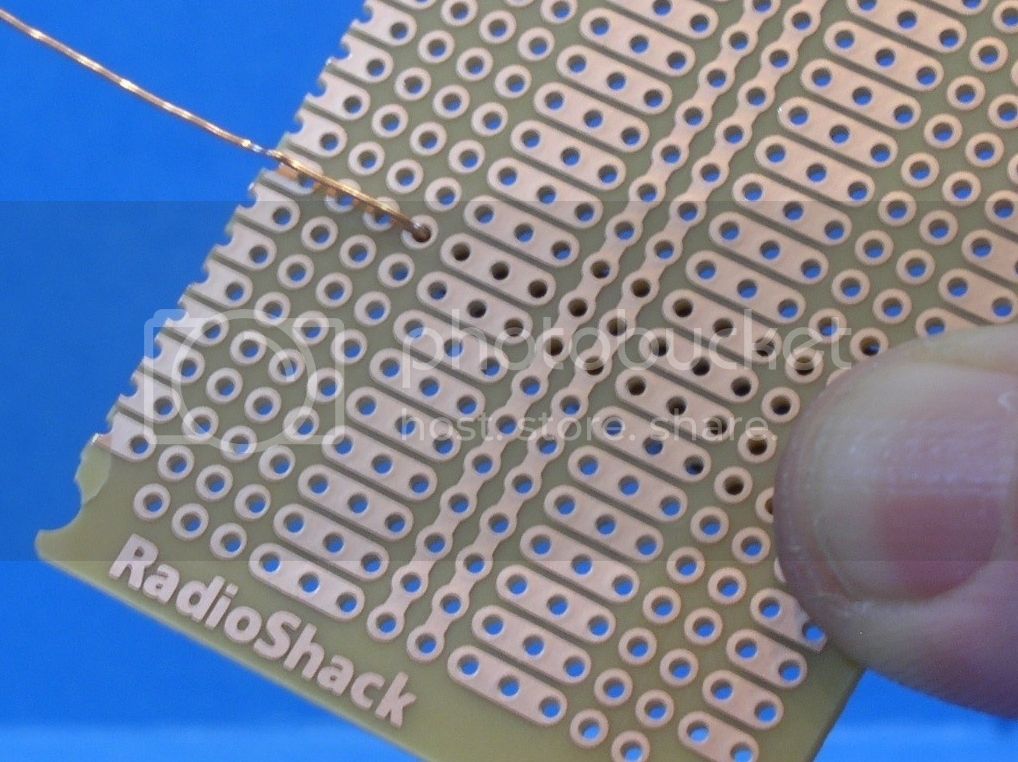
Printed Circuit Board


I found the first one at Radio Shack for about $3. The Shack had other sizes and even some round boards, but this one has holes spaced the closest together.

The Circuit Board is approximately 1-13/16” x 2-27/32” and is about 1/16” thick. It has 417 through holes that are 0.020” diameter, and evenly spaced apart at 0.100” vertically and horizontally.

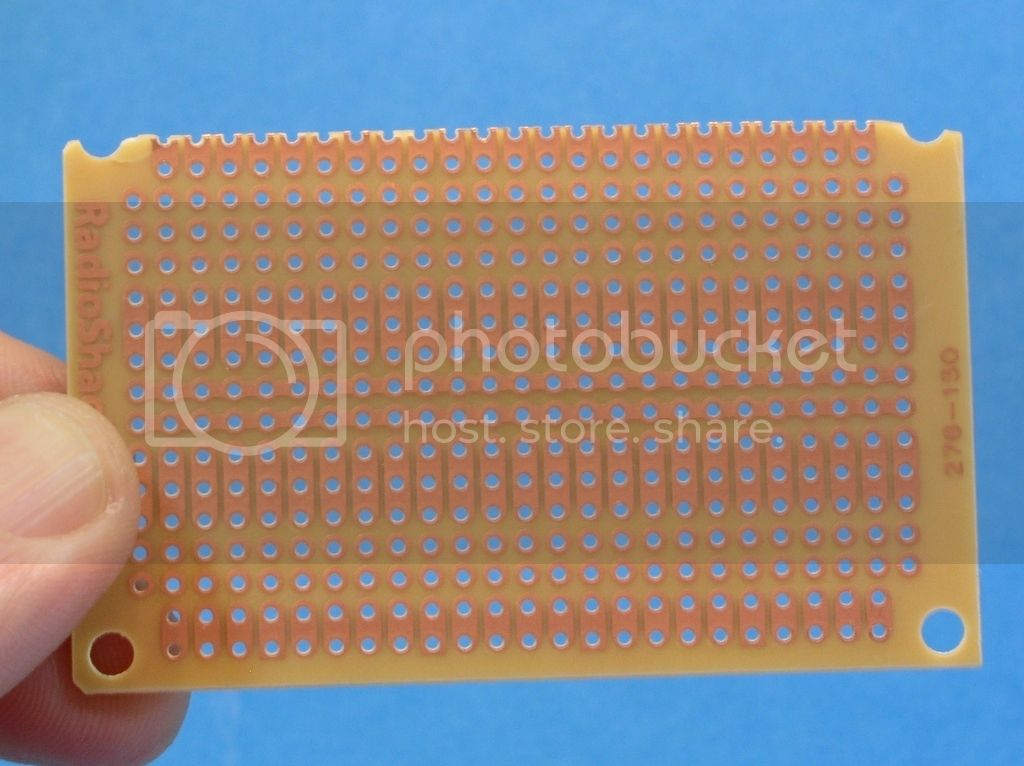
I sanded/filed one of the long side edges until the edge runs through the center of the outside set of holes. Note – sand/file towards the face of the board with the copper printing, otherwise they probably will be pulled away from the board. The sanded edge created “notches” that should make it easier to make the second bend in the wire.

I’ll measure which hole to a “notch” is close enough to the size I need. The appropriate hole and notch may be horizontal on the same row, or may be diagonally on different rows. Also, the hole and the notch could be marked with a colored marker.

For bending a grab handle, I insert one end of the wire into a hole and hold the end with a pair of pliers flat against the underside. This is more secure than trying to do so with just my fingers.

Next I bent the wire across the board, pulling it tight to make the first 90 degree bend.

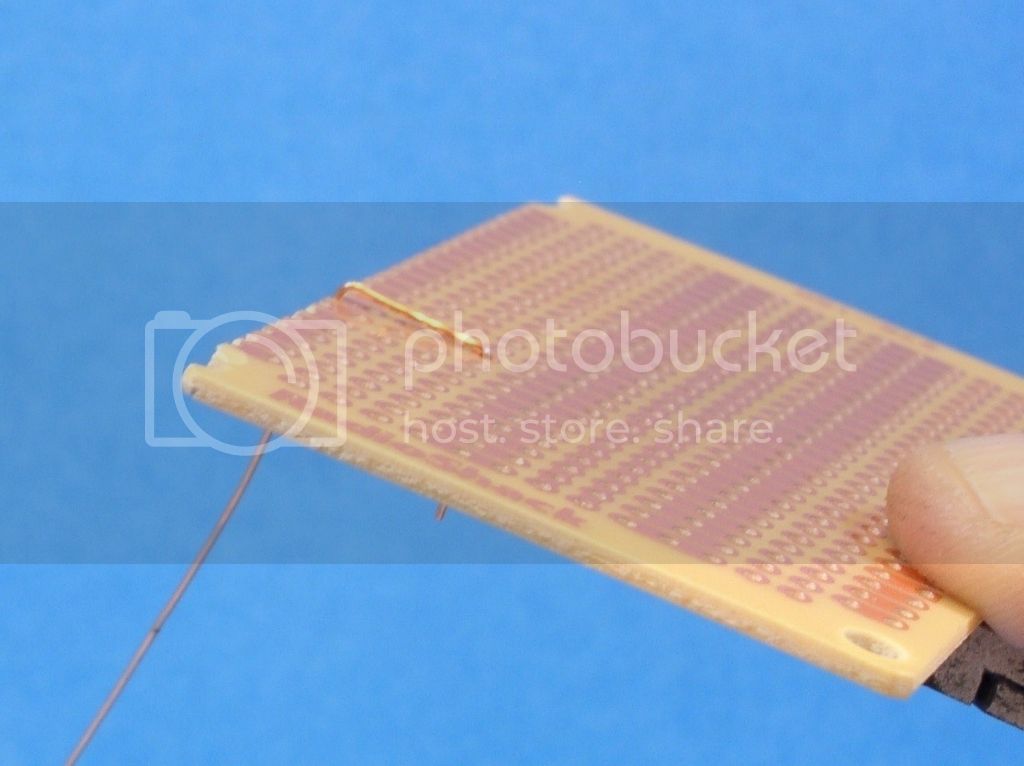
I bent the wire into an edge notch to make the second 90 degree bend, pulling it tight to make a tight bend.

I removed the bent wire…

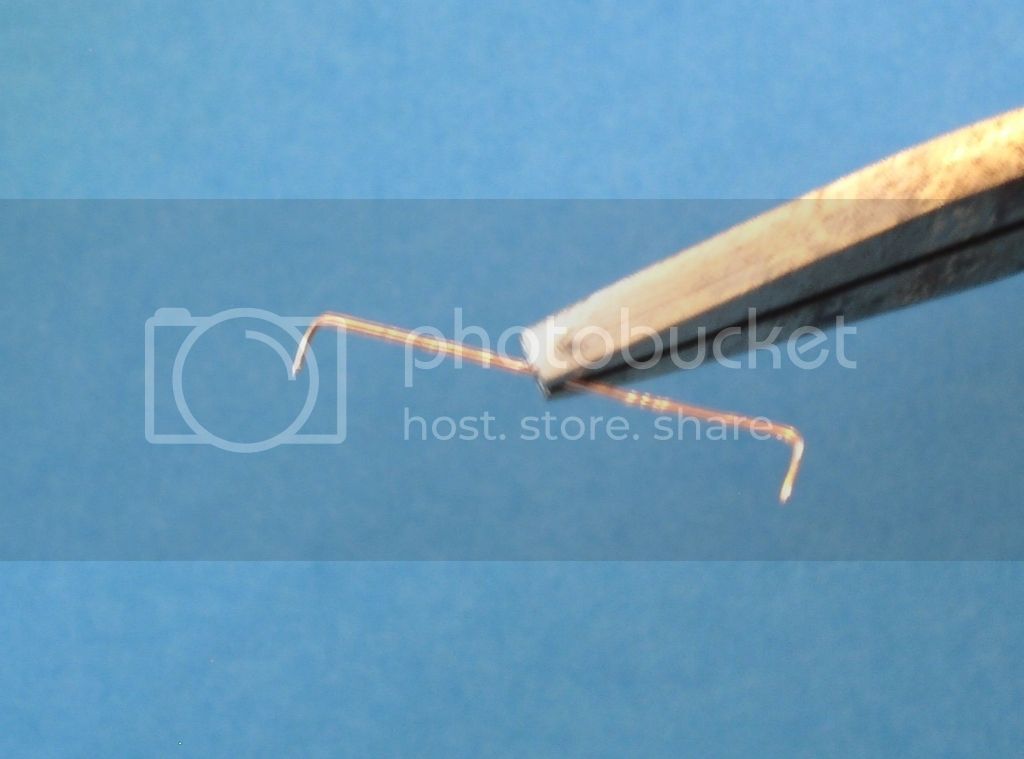
… and snip off the excess ends to make the grab handle.
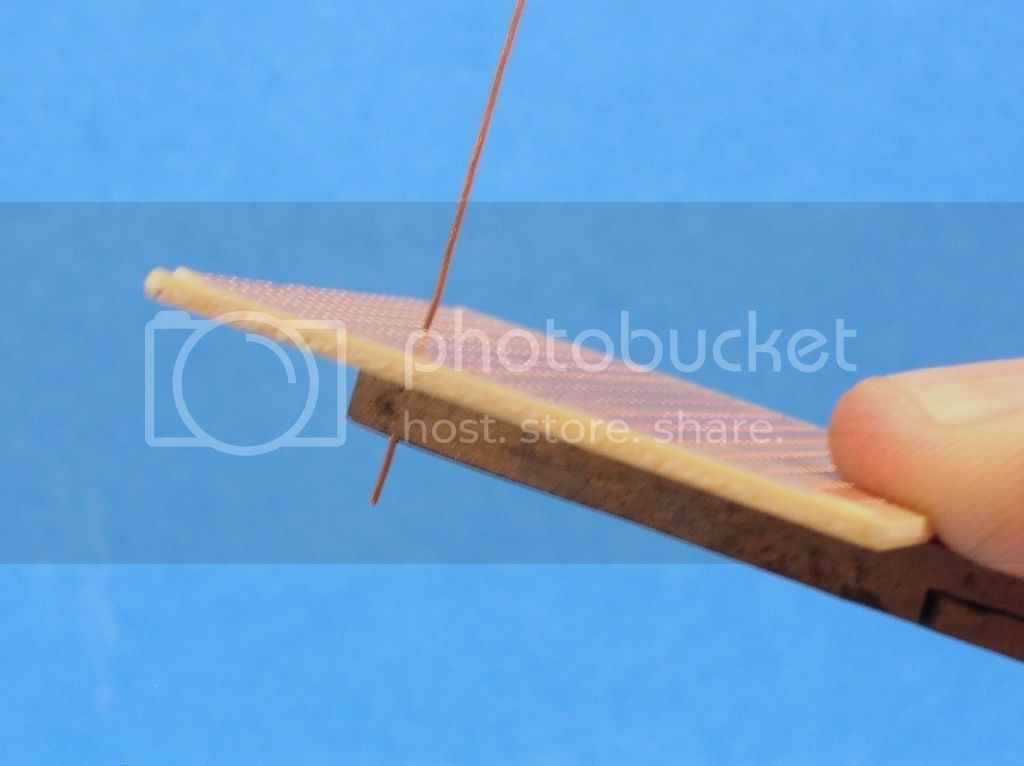
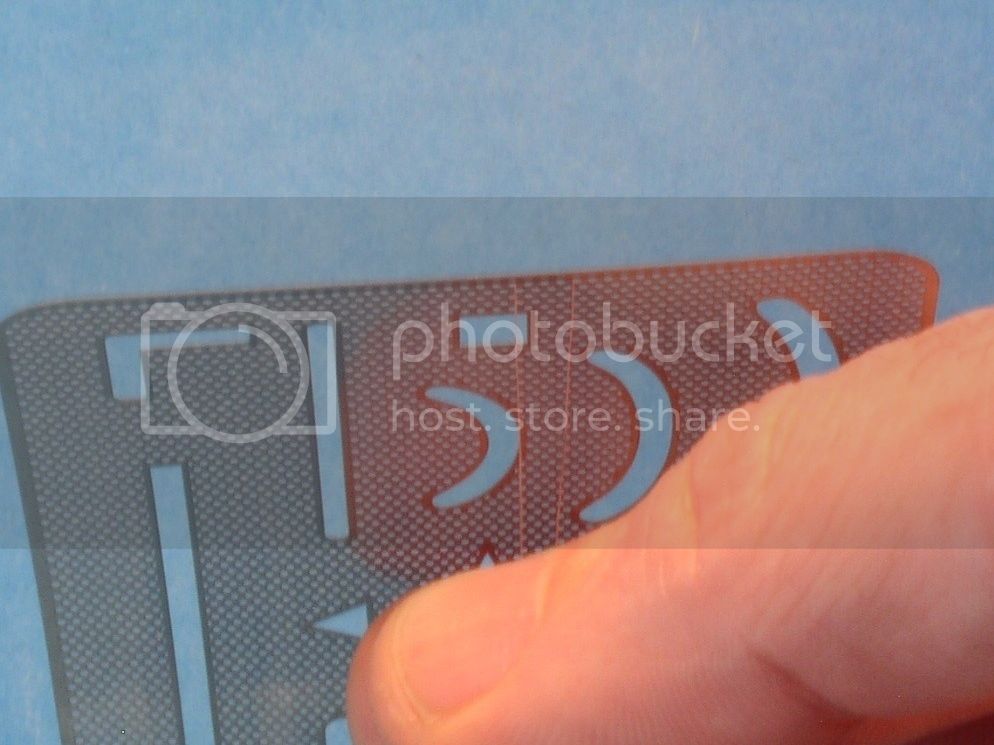
Mesh Erasing Shield


The second item I found in the drafting supplies in Hobby Lobby. I’ve been using Stainless Steel Erasing Shields for drafting and drawing since the late seventies, but they are all of a standard pattern that I’ve used also as scribing templates for models. This is the first one I’ve found that’s different.

The shield is 2.36” x 2.705” and 0.007” thick. The mesh holes are approximately 0.0225” diameter (or a #74 dill bit), and they are appear to be 0,030” apart but in a hexagon pattern. And there’s a kah-zillion of them, so I didn’t bother counting them all.
Since the shield is so thin, I think it’s best for thin wire.

I inserted both ends of a length of thin wire in two holes that are spaced apart the distance I need.

Next, I pulled BOTH ends of the wire tight to form the 90 degree bends of the grab handle.

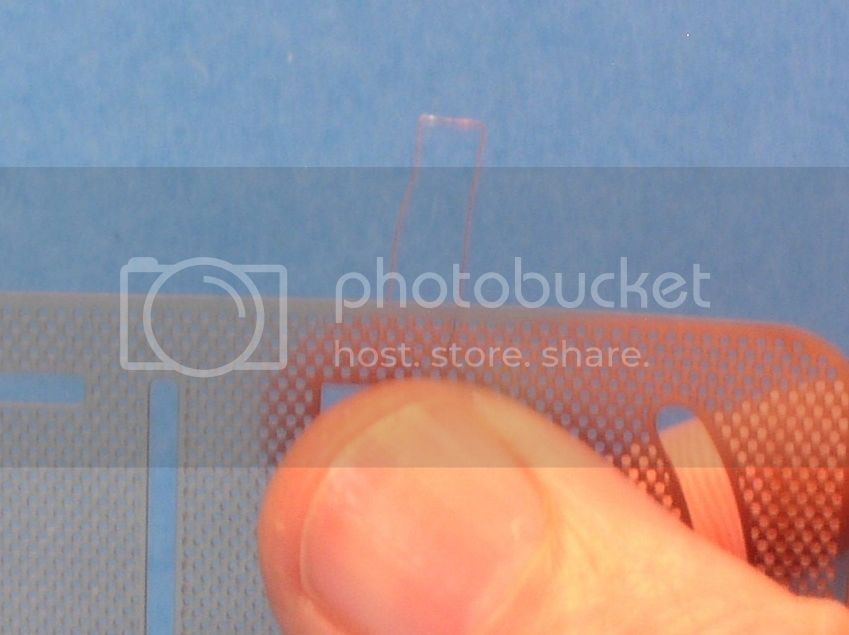
I removed the formed wire…

… and snip the excess ends to make the grab handle.

To help with making multiples of the same size grab handle, you could also use a piece of masking tape over the grid of holes and only punch the holes through you need to make that size. Once you've made all of the copies you need of that size, replace the tape and punch holes for the next size.

Yes, you can make grab handles with just a pair of needle point pliers, but hopefully these two items will give you options for other sizes/lengths.

IHTH
Namabiiru
Staff MemberAssociate Editor
MODEL SHIPWRIGHTS
#399
Visit this Community
Rhode Island, United States
Member Since: March 05, 2014
entire network: 2,888 Posts
KitMaker Network: 489 Posts
Posted: Sunday, November 22, 2015 - 12:16 AM UTC
OMG, Jeff! That's brilliant! Why did I never think of that?

majjanelson
Visit this Community
South Carolina, United States
Member Since: December 14, 2006
entire network: 1,355 Posts
KitMaker Network: 336 Posts
Posted: Sunday, November 22, 2015 - 12:59 AM UTC
Thank you, Mark.

I'm going to check a used circuit board from a PC to see of the holes are smaller. I believe smaller holes would work better for smaller wire grab handles.
roteck
Visit this Community
Quebec, Canada
Member Since: January 12, 2004
entire network: 274 Posts
KitMaker Network: 6 Posts
Posted: Saturday, November 28, 2015 - 12:23 AM UTC
There are some very neat ideas in here! Good job all!

Being mostly an armor modeler, I make tanks. Tanks have tracks and they need to be painted! I've always hated painting them! Why? Because you need to handle them... I was thinking about how to resolve the problem the other day...

The problem...


The solution!


Using 10 #8 bolts 1 1/4" (I used what I had on hand), 20 washers and 10 nuts, I drilled holes through a particle board (any board will do) and passed the screws through. I did put a washer at the base of the screws to make the assembly sturdier.

The advantage is that you I can now paint both sides at the same time and I'm minimizing handling as well!

I hope that someone else find this useful!

Cheers,

Christian
justsendit
Visit this Community
Colorado, United States
Member Since: February 24, 2014
entire network: 3,033 Posts
KitMaker Network: 361 Posts
Posted: Saturday, November 28, 2015 - 12:27 AM UTC
I like it! ... Brilliant idea!

—mike
Namabiiru
Staff MemberAssociate Editor
MODEL SHIPWRIGHTS
#399
Visit this Community
Rhode Island, United States
Member Since: March 05, 2014
entire network: 2,888 Posts
KitMaker Network: 489 Posts
Posted: Monday, November 30, 2015 - 08:25 PM UTC
That is a very cool idea.

ejhammer
Visit this Community
Michigan, United States
Member Since: June 10, 2008
entire network: 230 Posts
KitMaker Network: 59 Posts
Posted: Monday, November 30, 2015 - 09:15 PM UTC
Here's mine.
Those little bottles of Model Master paint. No matter how I clean the jar lid and cap, they always get stuck. When opening after the first time, the plastic film seperates from the paper. The film then needs to be pealed off the jar and kinda stuck back in the lid. By that time I've got paint all over. This is my solution.

I took a scrap of 1 inch metal thinwall electrical conduit, ground the outside edge to a bevel, cleaned up the inside with a small file, making a sharp edged punch. I use old plastic milk jugs, the smooth flat parts of them, to punch out disks of plastic. Using a chunk of 4 X 4 wood, punch them out on the end grain. Can make a bunch of these in just a few minits. They fit perfectly in the little bottle caps of the MM 1/2 oz bottles. The lids then wipe out easily, and no longer separate making a mess.


EJ