ACUTR 2 . crane on HMMWV platform
Myanmar
Member Since: March 05, 2004
entire network: 4,011 Posts
KitMaker Network: 879 Posts
Posted: Saturday, March 06, 2010 - 10:36 AM UTC
This is my project for the
ACUTR Again-Salute to Steve snr. campaign

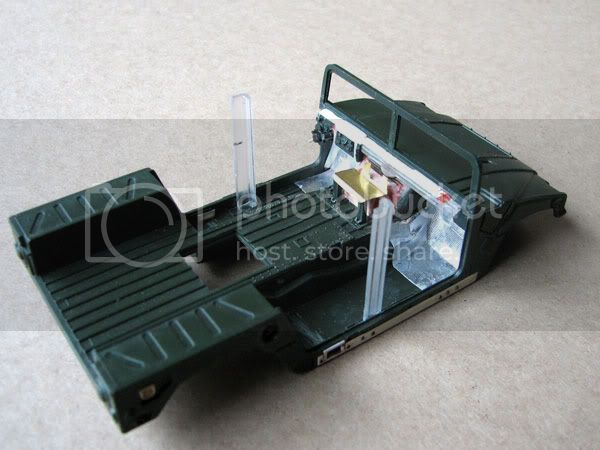
I'll start with the kit in the picture and build from there

i watched a scale plastic figure crawl along the edge . . . of an exacto blade . . . that's my dream , it's my nightmare . . . . . . . crawling , slithering . . . . . along the edge . . . . . . of an exacto . . . . . blade . . . . and surviving
Myanmar
Member Since: March 05, 2004
entire network: 4,011 Posts
KitMaker Network: 879 Posts
Posted: Sunday, March 07, 2010 - 11:53 AM UTC
some progress today
roof marked and will be cut here
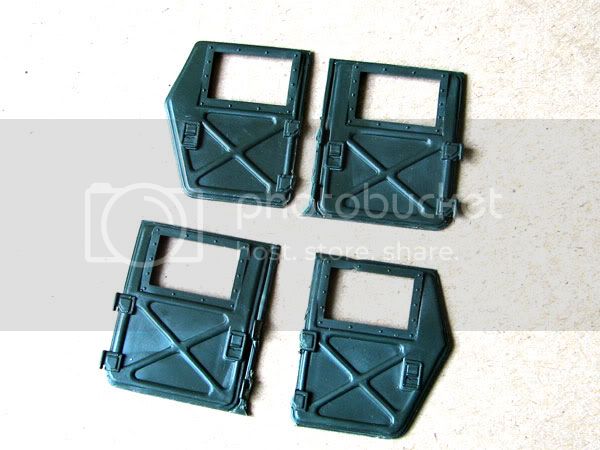
doors cut apart
and a couple mock ups with tack clay
i watched a scale plastic figure crawl along the edge . . . of an exacto blade . . . that's my dream , it's my nightmare . . . . . . . crawling , slithering . . . . . along the edge . . . . . . of an exacto . . . . . blade . . . . and surviving
Florida, United States
Member Since: May 16, 2002
entire network: 17,694 Posts
KitMaker Network: 1,968 Posts
Posted: Monday, March 08, 2010 - 03:17 AM UTC
Good start, but I will warn you, the old Esci HMMWV is really bad. It is out of proportion, the hood is short, details are soft, the tires are horrible, etc., etc., .... It does have the short roof section in the kit though, on the sprue with the doors. So I am a little confused as to why you cut the full roof down and now have to deal with filling the MG mount hole. I would recommend you start with a Tamiya HMMWV to have a much better looking model in the end. It looks like an interesting project. Keep us posted.
Field Artillery --- The KING of BATTLE!!!
"People sleep peaceably in their beds at night only because rough men stand ready to do violence on their behalf." -- George Orwell
Showcase
Myanmar
Member Since: March 05, 2004
entire network: 4,011 Posts
KitMaker Network: 879 Posts
Posted: Monday, March 08, 2010 - 03:40 AM UTC
True on all descriptive details of this kit. This is the only HMMWV kit I have have in the stash. I didn't see the roof section that you're talking about, I'll check for it again.
and speaking of the tires, anyone know where I can get the style that is on the prototype in 1/35?
Thanks for looking in, I will post progress here
i watched a scale plastic figure crawl along the edge . . . of an exacto blade . . . that's my dream , it's my nightmare . . . . . . . crawling , slithering . . . . . along the edge . . . . . . of an exacto . . . . . blade . . . . and surviving
Myanmar
Member Since: March 05, 2004
entire network: 4,011 Posts
KitMaker Network: 879 Posts
Posted: Monday, March 08, 2010 - 02:10 PM UTC
Yes, you are right, it's part B-27. Too short for this variant
Thanks for the heads up though
i watched a scale plastic figure crawl along the edge . . . of an exacto blade . . . that's my dream , it's my nightmare . . . . . . . crawling , slithering . . . . . along the edge . . . . . . of an exacto . . . . . blade . . . . and surviving
Myanmar
Member Since: March 05, 2004
entire network: 4,011 Posts
KitMaker Network: 879 Posts
Posted: Sunday, March 14, 2010 - 02:11 PM UTC
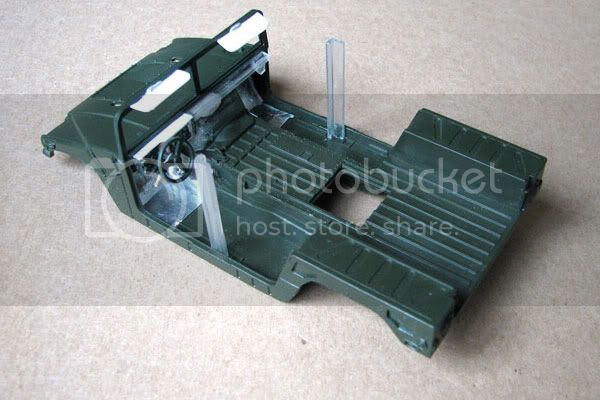
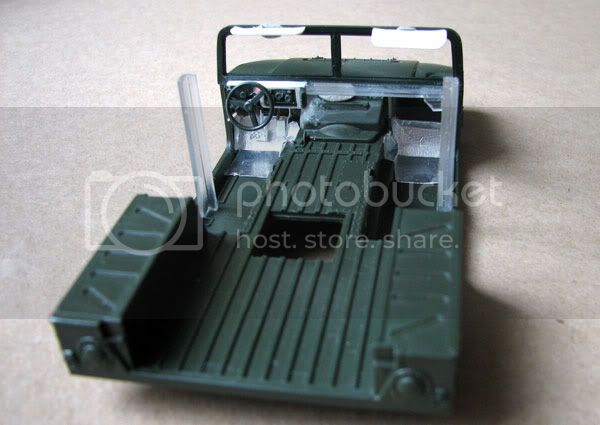
I didn't get as far as I'd planned this weekend
a little progress
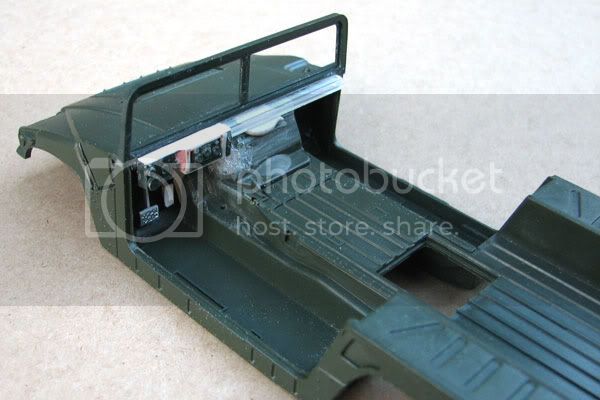
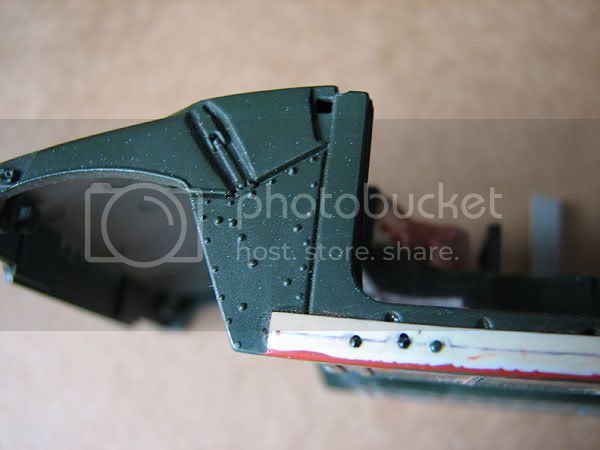
reworked the dash cluster, foot pedals and general frontal cab stuff
drilled a hole and added some sort of additional rear filler cap that is on the prototype
also cut a piece of plastic to fill the roof hole, putty curing now
i watched a scale plastic figure crawl along the edge . . . of an exacto blade . . . that's my dream , it's my nightmare . . . . . . . crawling , slithering . . . . . along the edge . . . . . . of an exacto . . . . . blade . . . . and surviving
Myanmar
Member Since: March 05, 2004
entire network: 4,011 Posts
KitMaker Network: 879 Posts
Posted: Sunday, March 21, 2010 - 03:48 PM UTC
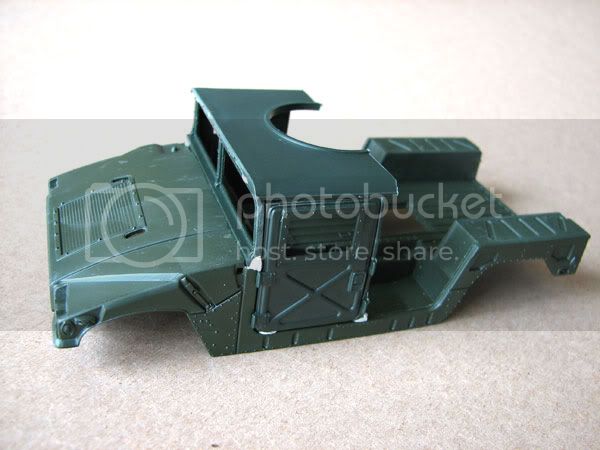
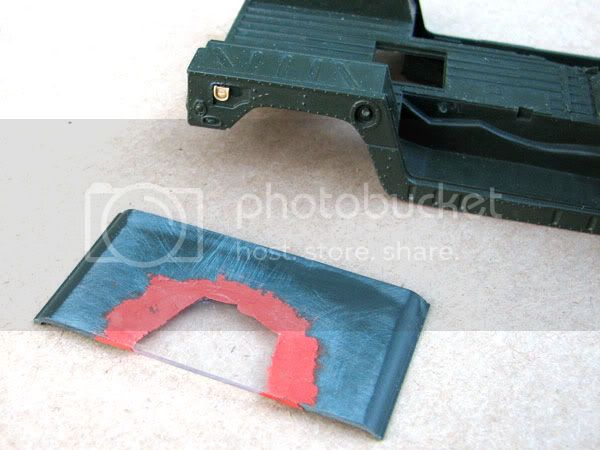
rework of this ESCI kit of the front area of the cab is done
audio CD case material is great for scratch building
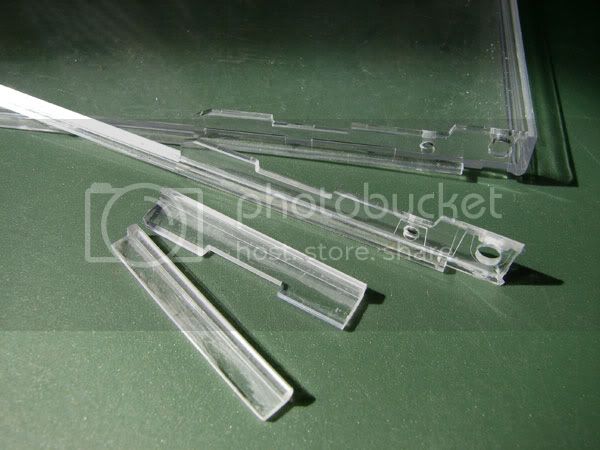
material source, then cut, and cut, then modify to application
i watched a scale plastic figure crawl along the edge . . . of an exacto blade . . . that's my dream , it's my nightmare . . . . . . . crawling , slithering . . . . . along the edge . . . . . . of an exacto . . . . . blade . . . . and surviving
Scotland, United Kingdom
Member Since: April 30, 2007
entire network: 1,597 Posts
KitMaker Network: 673 Posts
Posted: Monday, March 22, 2010 - 12:24 AM UTC
Hi there Ko
I like the recycling of materials ,,,,,,,,,,,,,,,,, gets my green vote !!!!!! Am watching this build.
Nige
"Procrastination is the art of keeping up with yesterday."
Don Marquis
Procrastination isn't the problem, it's the solution. So procrastinate now, don't put it off.
Ellen DeGeneres
Myanmar
Member Since: March 05, 2004
entire network: 4,011 Posts
KitMaker Network: 879 Posts
Posted: Sunday, April 04, 2010 - 03:55 PM UTC
Thanks Nige!
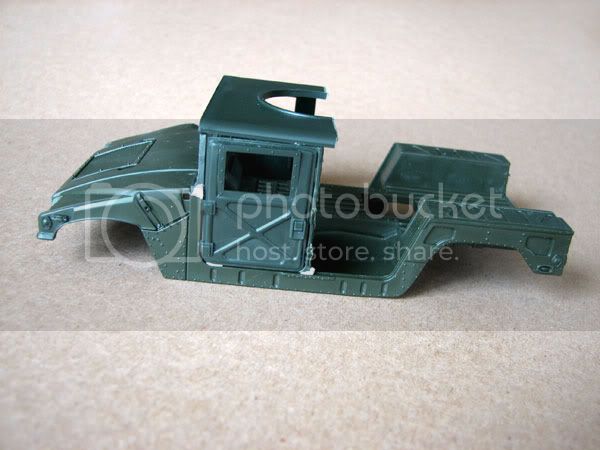
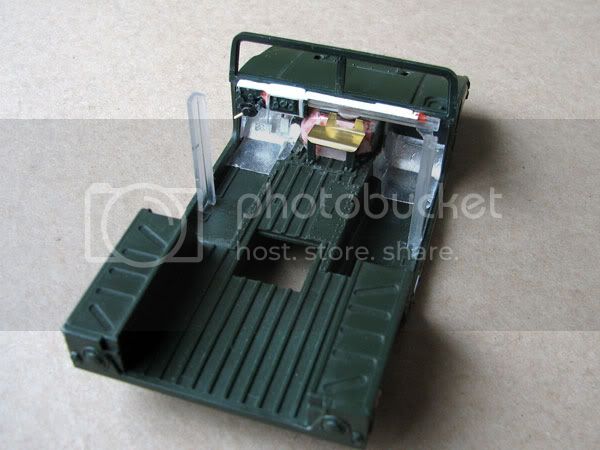
got more done this weekend. Gino was very accurate in his description of the quality of this kit. Requires a lot of re-work.
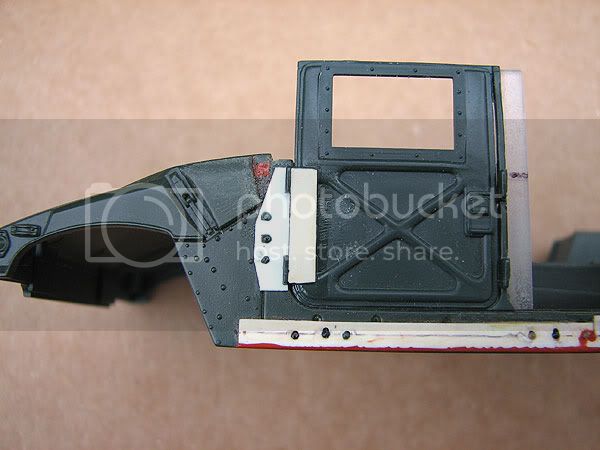
New built up 'dog house' up front from styrene
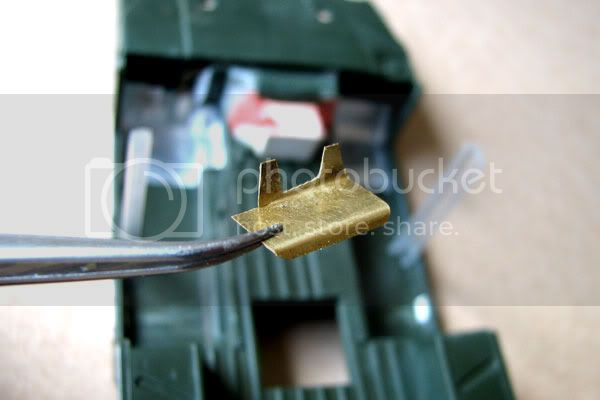
made a radio shelf from brass sheet, cut and bend to shape
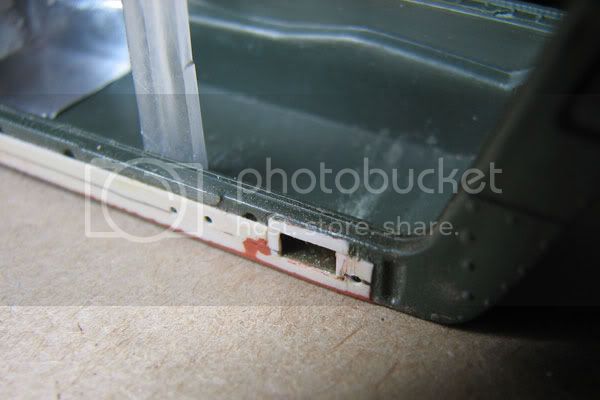
Made a foot step on both sides by drilling a hole then filing a rectangle to shape
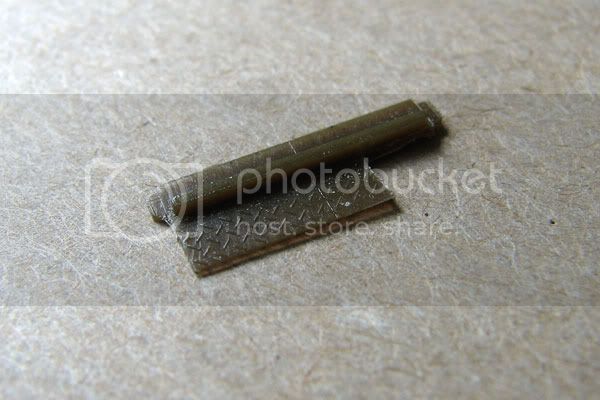
This is a part from the parts box that was used for diamond plate that was cut to size and inserted into place.
Bolts were made by the epoxy putty 'diecast' method with melted sprue that dot along side the new styrene running boards
i watched a scale plastic figure crawl along the edge . . . of an exacto blade . . . that's my dream , it's my nightmare . . . . . . . crawling , slithering . . . . . along the edge . . . . . . of an exacto . . . . . blade . . . . and surviving
Myanmar
Member Since: March 05, 2004
entire network: 4,011 Posts
KitMaker Network: 879 Posts
Posted: Saturday, April 17, 2010 - 12:28 PM UTC
i watched a scale plastic figure crawl along the edge . . . of an exacto blade . . . that's my dream , it's my nightmare . . . . . . . crawling , slithering . . . . . along the edge . . . . . . of an exacto . . . . . blade . . . . and surviving
North Carolina, United States
Member Since: November 28, 2005
entire network: 2,216 Posts
KitMaker Network: 399 Posts
Posted: Saturday, April 17, 2010 - 12:43 PM UTC
Looking really tight man.
I hate to jump too far ahead of you on this build, but while looking at your reference pic I was thinking about those hydrolic cylinders. I remember when I was scratching my 50 cal for my entry I used two seperate pieces of evergreen rod........a solid piece slightly smaller inside of a hollow piece. If you want to make your crane poseable this would work for the cylinders as it would allow them to adjust in and out. All of the actual mounting points where the stick-boom-jig move could be made with the same rod with a plate on the ends. Just a thought.

Hermon

"Those who would give up Essential Liberty
to purchase a little Temporary Safety,
deserve neither Liberty nor Safety."
Benjamin Franklin
Myanmar
Member Since: March 05, 2004
entire network: 4,011 Posts
KitMaker Network: 879 Posts
Posted: Sunday, April 18, 2010 - 12:06 PM UTC
Good ideas, Mr. VonCuda. That's sort of what I was thinking about. I have some brass and plastic square and rectangular stock I'll work with as well. I'll have to factor in weight vs operability vs accuracy, to determine what will work. Cool, thanks for checking in
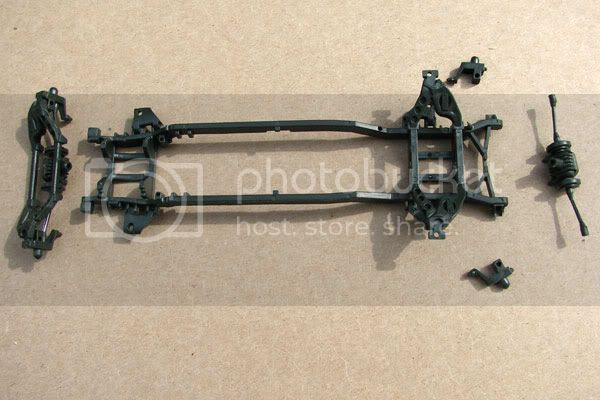
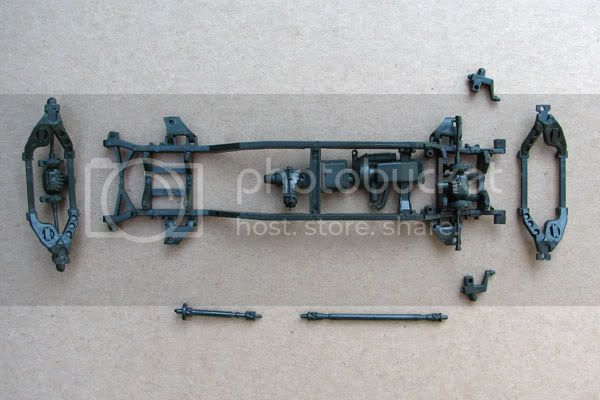
I figured out the chassis suspension issue this morning and did a switch-a-roo today. Front on the rear and rear on the front. Some slight mods were required but is working so far
i watched a scale plastic figure crawl along the edge . . . of an exacto blade . . . that's my dream , it's my nightmare . . . . . . . crawling , slithering . . . . . along the edge . . . . . . of an exacto . . . . . blade . . . . and surviving
AussieReg
 Associate Editor
#007
Victoria, Australia
Member Since: June 09, 2009
entire network: 8,156 Posts
KitMaker Network: 593 Posts
Posted: Sunday, April 18, 2010 - 12:13 PM UTC
Looking great KSO, I'm enjoying this thread and getting lots of clues for my EOD Campaign builds !!
Cheers, D
ON the bench
Revell 1/24 '53 Corvette (building as '54)
Revell 1/24 BMW 507 Coupe and Cabrio
Italeri 1/48 Me262 B-1a/U1 Nightfighter
Monogram 1/24 '57 Chevy Nomad
Dragon 1/350 USS Frank Knox DD-742
North Carolina, United States
Member Since: November 28, 2005
entire network: 2,216 Posts
KitMaker Network: 399 Posts
Posted: Sunday, April 18, 2010 - 01:41 PM UTC
Mr. VonCuda?
Dude, come on. We're practically brothers......from different mothers of course.

Hermon
"Those who would give up Essential Liberty
to purchase a little Temporary Safety,
deserve neither Liberty nor Safety."
Benjamin Franklin
Myanmar
Member Since: March 05, 2004
entire network: 4,011 Posts
KitMaker Network: 879 Posts
Posted: Monday, April 19, 2010 - 08:12 AM UTC
Haha, true that. Thanks for checking in fellas
i watched a scale plastic figure crawl along the edge . . . of an exacto blade . . . that's my dream , it's my nightmare . . . . . . . crawling , slithering . . . . . along the edge . . . . . . of an exacto . . . . . blade . . . . and surviving
Florida, United States
Member Since: January 14, 2009
entire network: 2,798 Posts
KitMaker Network: 286 Posts
Posted: Monday, April 19, 2010 - 01:51 PM UTC
Cuda has a brother were in trouble

Good work so far Ko.
Build On,
Justin

"From time to time, the tree of liberty must be watered with the blood of
tyrants and patriots."
- Thomas Jefferson
IPMS#47611
Myanmar
Member Since: March 05, 2004
entire network: 4,011 Posts
KitMaker Network: 879 Posts
Posted: Tuesday, April 27, 2010 - 03:11 PM UTC
Thanks, Justin
Ok, I'll be jumping around this build. Today I worked on the door hinge area and is not complete yet.
This is where it's at right now
A third hinge in the middle will be built on each side
i watched a scale plastic figure crawl along the edge . . . of an exacto blade . . . that's my dream , it's my nightmare . . . . . . . crawling , slithering . . . . . along the edge . . . . . . of an exacto . . . . . blade . . . . and surviving
Dalarnas, Sweden
Member Since: May 08, 2002
entire network: 2,264 Posts
KitMaker Network: 254 Posts
Posted: Tuesday, April 27, 2010 - 10:54 PM UTC
Awesome choice and darn fine start. Cannot wait to see it when it is done.
Charles
What we perceive to be may not be what we believe to be.
---------------------------------------------------------------------------
Myanmar
Member Since: March 05, 2004
entire network: 4,011 Posts
KitMaker Network: 879 Posts
Posted: Wednesday, April 28, 2010 - 05:04 PM UTC
Thank you Charles. A slow build, I know
i watched a scale plastic figure crawl along the edge . . . of an exacto blade . . . that's my dream , it's my nightmare . . . . . . . crawling , slithering . . . . . along the edge . . . . . . of an exacto . . . . . blade . . . . and surviving
Myanmar
Member Since: March 05, 2004
entire network: 4,011 Posts
KitMaker Network: 879 Posts
Posted: Sunday, May 09, 2010 - 02:31 PM UTC
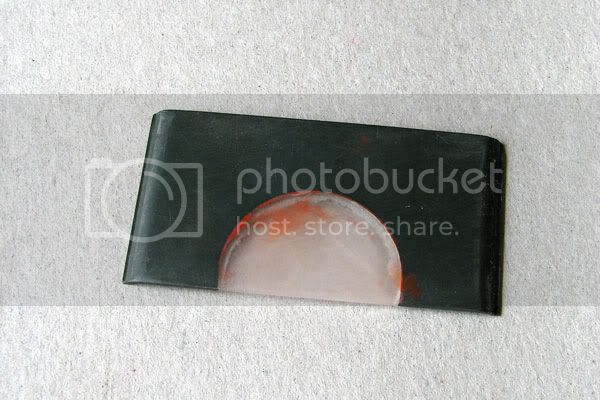
The door hinges on both sides are finished. They look a little crusty in this close up photo so maybe some light sanding clean up
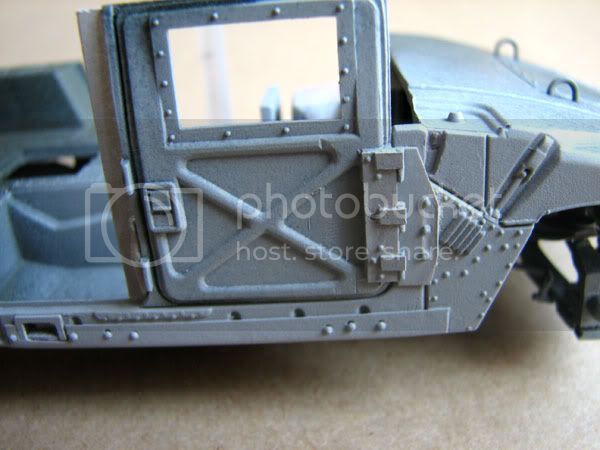
next I'm moving onto scratch building the front and rear bumpers
i watched a scale plastic figure crawl along the edge . . . of an exacto blade . . . that's my dream , it's my nightmare . . . . . . . crawling , slithering . . . . . along the edge . . . . . . of an exacto . . . . . blade . . . . and surviving
Florida, United States
Member Since: January 14, 2009
entire network: 2,798 Posts
KitMaker Network: 286 Posts
Posted: Sunday, May 09, 2010 - 02:37 PM UTC
Good job on the hinges KO just wanted to let you know im still watching and wow its coming out great
Build On,
Justin
"From time to time, the tree of liberty must be watered with the blood of
tyrants and patriots."
- Thomas Jefferson
IPMS#47611
Myanmar
Member Since: March 05, 2004
entire network: 4,011 Posts
KitMaker Network: 879 Posts
Posted: Tuesday, May 11, 2010 - 03:46 PM UTC
Thanks Justin
i watched a scale plastic figure crawl along the edge . . . of an exacto blade . . . that's my dream , it's my nightmare . . . . . . . crawling , slithering . . . . . along the edge . . . . . . of an exacto . . . . . blade . . . . and surviving
New York, United States
Member Since: January 29, 2004
entire network: 3,836 Posts
KitMaker Network: 1,121 Posts
Posted: Tuesday, May 11, 2010 - 04:22 PM UTC
Hey K great project you got going on. I really enjoy how you think outside the box and the materials youre using. This was one of the engineer vehicles I had planned in the future. Im looking forward to your next posting.
Happy Modeling,
Joe
It feels like bible camp
Only Im not crying pretending Im somewhere else.
Happy Modeling
Joe
Myanmar
Member Since: March 05, 2004
entire network: 4,011 Posts
KitMaker Network: 879 Posts
Posted: Tuesday, May 11, 2010 - 05:24 PM UTC
cool, thanks for checking in on this
i watched a scale plastic figure crawl along the edge . . . of an exacto blade . . . that's my dream , it's my nightmare . . . . . . . crawling , slithering . . . . . along the edge . . . . . . of an exacto . . . . . blade . . . . and surviving
North Carolina, United States
Member Since: November 28, 2005
entire network: 2,216 Posts
KitMaker Network: 399 Posts
Posted: Thursday, May 13, 2010 - 01:12 AM UTC
Looking good man. Are you making those rivets (at the bottom of the rocker panels) or are they kit?
As for the whole cleaning up the doors thing, sort of looks like scaley rust trying to peak out from under the paint. Might look pretty cool and realistic in the end.
Hermon
"Those who would give up Essential Liberty
to purchase a little Temporary Safety,
deserve neither Liberty nor Safety."
Benjamin Franklin