ACUTR 2 . crane on HMMWV platform
Myanmar
Member Since: March 05, 2004
entire network: 4,011 Posts
KitMaker Network: 879 Posts
Posted: Thursday, May 13, 2010 - 03:13 PM UTC
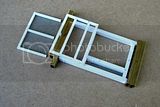
interesting perspective on the rust, but the 1/1 isn't all beat up yet.
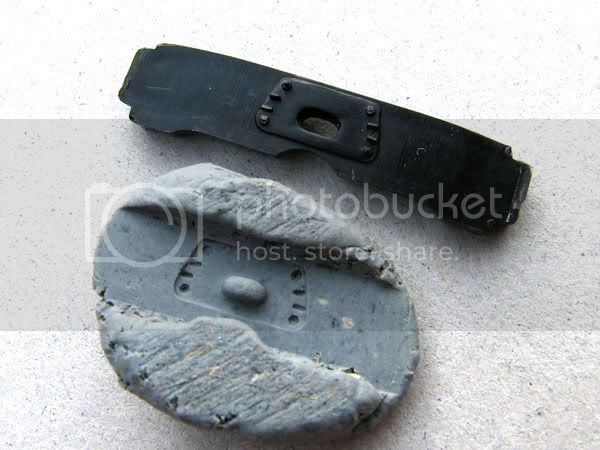
The rivets are made. It is suppose to look like slotted holes under the bolts for adjustment during installation. And they are all out of alignment on the 1/1 as well

i watched a scale plastic figure crawl along the edge . . . of an exacto blade . . . that's my dream , it's my nightmare . . . . . . . crawling , slithering . . . . . along the edge . . . . . . of an exacto . . . . . blade . . . . and surviving
Myanmar
Member Since: March 05, 2004
entire network: 4,011 Posts
KitMaker Network: 879 Posts
Posted: Saturday, June 12, 2010 - 01:54 PM UTC
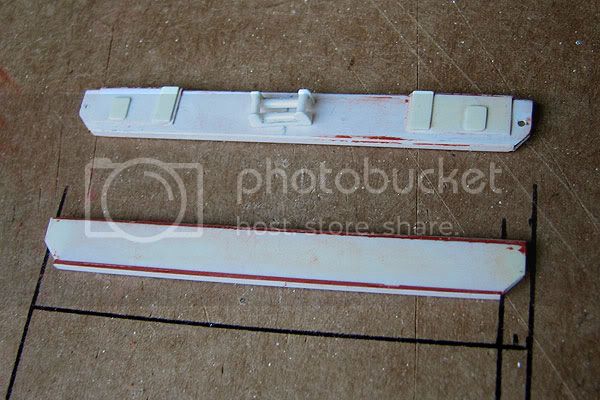
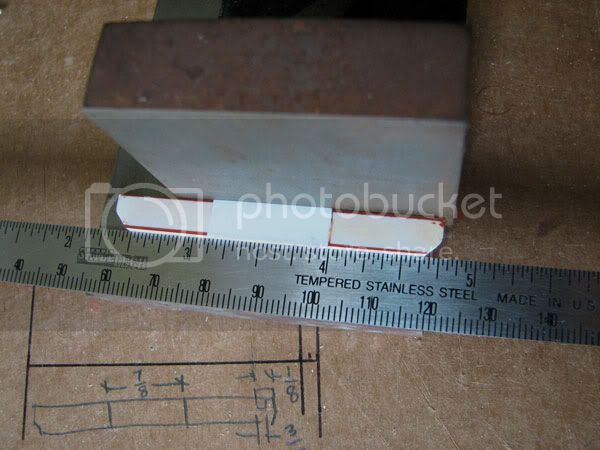
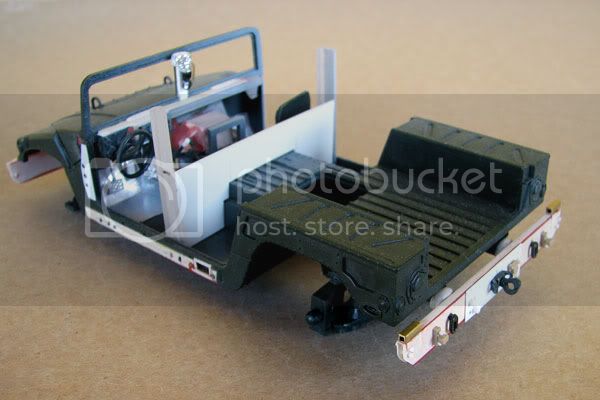
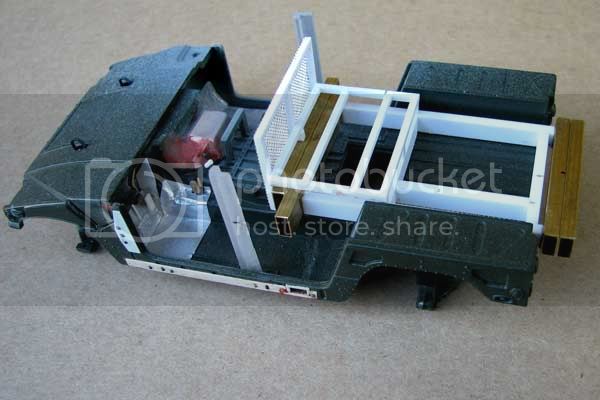
The interior is done. Foot pedals in the kit part were molded into the floor. I didn't like the look so I scratch built new ones.
The gas pedal grip texture was simply scribed in with a knife.
The brake pedal had foil textured first then glued on.
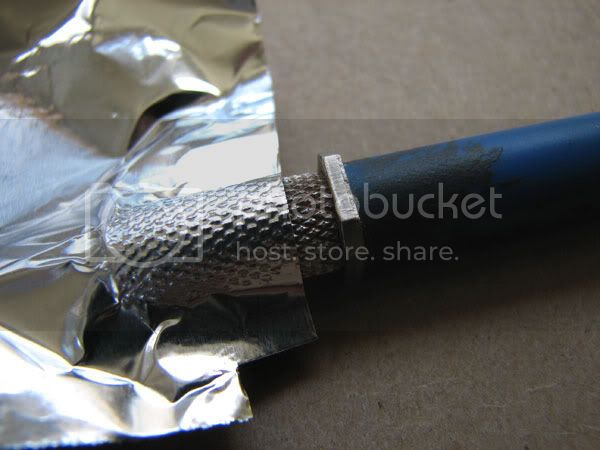
Foil was burnished onto the knurl of a hobby knife
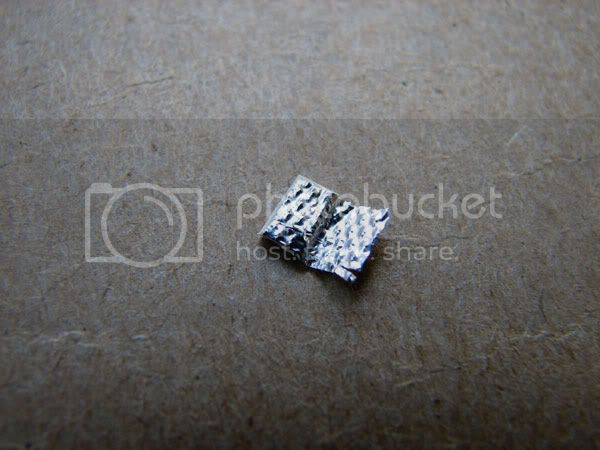
The piece of foil was then cut out and glued to the styrene pedal
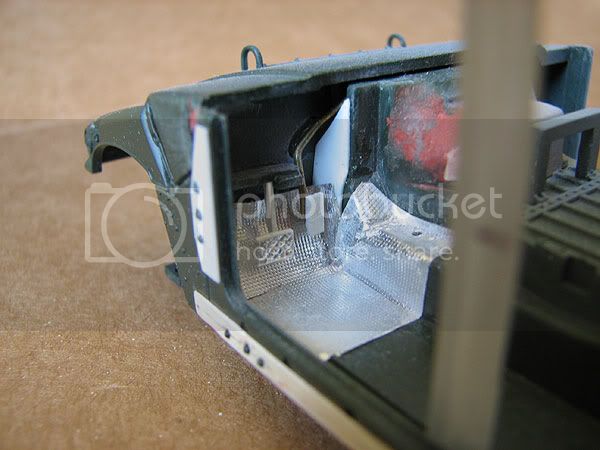
This might be out of scale but once installed and painted, it will be ok under the dash and steering column
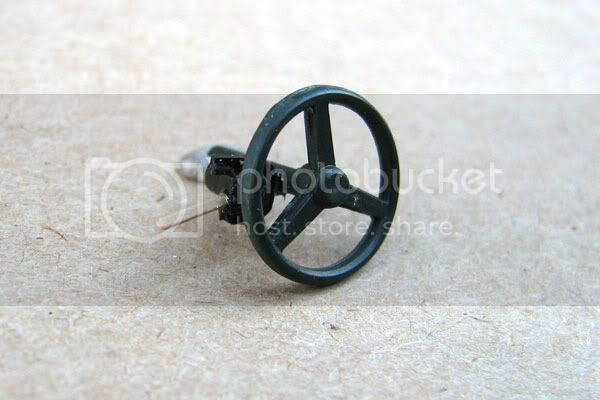
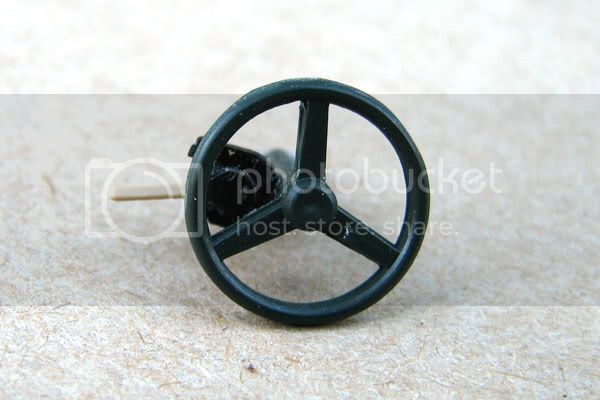
The steering wheel was built with scrap parts from an electronics unit
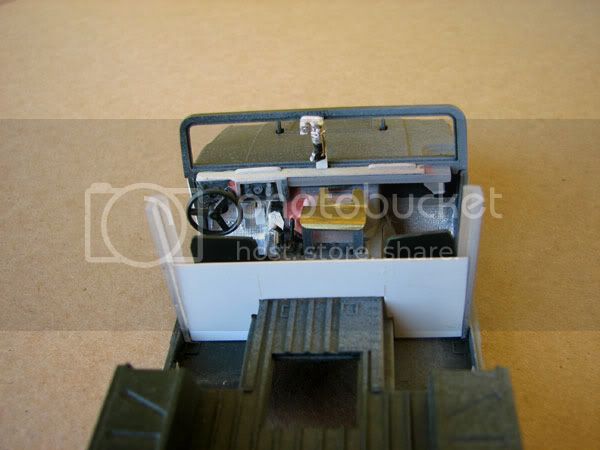
The wiper motor was also scratch built with scrap parts that were cut up and glued together
i watched a scale plastic figure crawl along the edge . . . of an exacto blade . . . that's my dream , it's my nightmare . . . . . . . crawling , slithering . . . . . along the edge . . . . . . of an exacto . . . . . blade . . . . and surviving
Florida, United States
Member Since: January 14, 2009
entire network: 2,798 Posts
KitMaker Network: 286 Posts
Posted: Saturday, June 12, 2010 - 04:19 PM UTC
Wow sorry but I'm stealing the diamond plate idea good work man

"From time to time, the tree of liberty must be watered with the blood of
tyrants and patriots."
- Thomas Jefferson
IPMS#47611
Myanmar
Member Since: March 05, 2004
entire network: 4,011 Posts
KitMaker Network: 879 Posts
Posted: Sunday, June 13, 2010 - 11:34 AM UTC
i watched a scale plastic figure crawl along the edge . . . of an exacto blade . . . that's my dream , it's my nightmare . . . . . . . crawling , slithering . . . . . along the edge . . . . . . of an exacto . . . . . blade . . . . and surviving
Florida, United States
Member Since: January 14, 2009
entire network: 2,798 Posts
KitMaker Network: 286 Posts
Posted: Sunday, June 13, 2010 - 12:31 PM UTC
"From time to time, the tree of liberty must be watered with the blood of
tyrants and patriots."
- Thomas Jefferson
IPMS#47611
North Carolina, United States
Member Since: November 28, 2005
entire network: 2,216 Posts
KitMaker Network: 399 Posts
Posted: Thursday, June 17, 2010 - 07:59 AM UTC
Mad skills man.

Watching your build progress makes me wanna speed up time for the EoD campaign.
Anyhoo.......
Here's a little sumptin' sumptin' you may want to try for bolt heads in the future. I figured this out while trying to make lugs for my scratch built tires and wheels.
You can buy a pack of allen wrenches anywhere for a few bucks. Pick out the appropriate size allen head to fit your project, push it into some self hardening clay to the right depth, and fill the indention with silicone. You can make a zillion bolt heads for next to nothing like this and even make a few different size bolt heads to add depth and realism to a project.
Hermon

"Those who would give up Essential Liberty
to purchase a little Temporary Safety,
deserve neither Liberty nor Safety."
Benjamin Franklin
Myanmar
Member Since: March 05, 2004
entire network: 4,011 Posts
KitMaker Network: 879 Posts
Posted: Thursday, June 17, 2010 - 01:39 PM UTC
Thanks Bro. Do you mean something like this?

thanks for the heads up, but how do you paint and glue the
silicone bolt heads on the model?

i watched a scale plastic figure crawl along the edge . . . of an exacto blade . . . that's my dream , it's my nightmare . . . . . . . crawling , slithering . . . . . along the edge . . . . . . of an exacto . . . . . blade . . . . and surviving
North Carolina, United States
Member Since: November 28, 2005
entire network: 2,216 Posts
KitMaker Network: 399 Posts
Posted: Friday, June 18, 2010 - 01:10 PM UTC
Yeah, that totally makes NO sense. I didn't use silicone. It was actually the clear acrylic 2 part stuff used to make waterfalls and ponds and stuff. Can't remember the exact name of it but all the craft stores will have a version of it. Also, I DID use a silicone based spray gun oil in the indentions as a release agent.
Hermon
"Those who would give up Essential Liberty
to purchase a little Temporary Safety,
deserve neither Liberty nor Safety."
Benjamin Franklin
Myanmar
Member Since: March 05, 2004
entire network: 4,011 Posts
KitMaker Network: 879 Posts
Posted: Saturday, June 19, 2010 - 05:03 AM UTC
Ok, that makes sense. cool
I ordered some hex rod and they arrived yesterday. I'll finish the bumpers up this weekend and move onto the support out riggers
i watched a scale plastic figure crawl along the edge . . . of an exacto blade . . . that's my dream , it's my nightmare . . . . . . . crawling , slithering . . . . . along the edge . . . . . . of an exacto . . . . . blade . . . . and surviving
Virginia, United States
Member Since: May 07, 2003
entire network: 1,174 Posts
KitMaker Network: 161 Posts
Posted: Saturday, July 03, 2010 - 10:07 AM UTC
"HAAA YOU THINK THIS CAR IS BAD,,MY OTHER ONE ONLY HAS TWO WHEELS'
In War...., Everybody Loses something!!
WHEN DOES A HOBBY Become A SICKNESS
Myanmar
Member Since: March 05, 2004
entire network: 4,011 Posts
KitMaker Network: 879 Posts
Posted: Monday, July 05, 2010 - 12:03 PM UTC
Thanks for looking in and replying.
yeah, this kit is dated for sure. I guess most of the focus will be on the boom arm area anyway
i watched a scale plastic figure crawl along the edge . . . of an exacto blade . . . that's my dream , it's my nightmare . . . . . . . crawling , slithering . . . . . along the edge . . . . . . of an exacto . . . . . blade . . . . and surviving
Myanmar
Member Since: March 05, 2004
entire network: 4,011 Posts
KitMaker Network: 879 Posts
Posted: Sunday, August 15, 2010 - 03:02 PM UTC
i watched a scale plastic figure crawl along the edge . . . of an exacto blade . . . that's my dream , it's my nightmare . . . . . . . crawling , slithering . . . . . along the edge . . . . . . of an exacto . . . . . blade . . . . and surviving
Scotland, United Kingdom
Member Since: April 30, 2007
entire network: 1,597 Posts
KitMaker Network: 673 Posts
Posted: Monday, August 16, 2010 - 01:39 AM UTC
Hi Ko
Nice to see a real mix of materials coming together. Loving the detailing.
Nige
"Procrastination is the art of keeping up with yesterday."
Don Marquis
Procrastination isn't the problem, it's the solution. So procrastinate now, don't put it off.
Ellen DeGeneres
Myanmar
Member Since: March 05, 2004
entire network: 4,011 Posts
KitMaker Network: 879 Posts
Posted: Wednesday, August 18, 2010 - 12:33 PM UTC
Thanks Nige.
The whole rear frame stabilizer subassembly should be complete by tonight or tomorrow
i watched a scale plastic figure crawl along the edge . . . of an exacto blade . . . that's my dream , it's my nightmare . . . . . . . crawling , slithering . . . . . along the edge . . . . . . of an exacto . . . . . blade . . . . and surviving
North Carolina, United States
Member Since: November 28, 2005
entire network: 2,216 Posts
KitMaker Network: 399 Posts
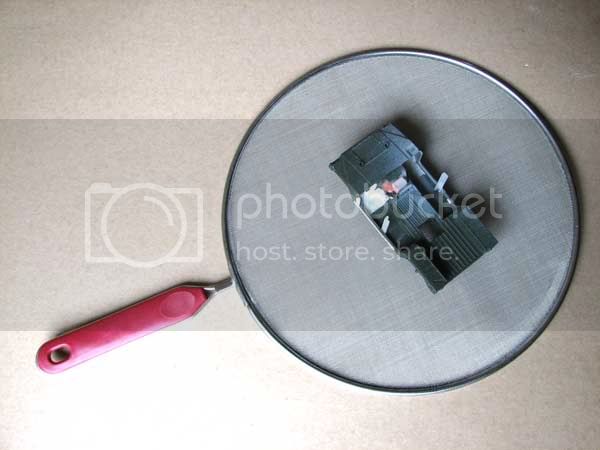
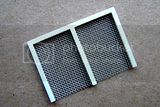
Posted: Wednesday, August 18, 2010 - 01:34 PM UTC
I'm diggin' the screen man. Great idea, only now the fried chicken will be really greasy.


I don't think you need to worry about the deadline. Murphy has been AWOL for a few months now.
Hermon
"Those who would give up Essential Liberty
to purchase a little Temporary Safety,
deserve neither Liberty nor Safety."
Benjamin Franklin
Myanmar
Member Since: March 05, 2004
entire network: 4,011 Posts
KitMaker Network: 879 Posts
Posted: Wednesday, August 18, 2010 - 03:47 PM UTC
haha, yeah I bought two, so one is in the kitchen
AWOL? dang, I hope awol means toes in the sand somewhere with a drink in one hand, an exacto blade in one, and the current issue of MCM in the other... as opposed to the other three awol locations we all can sometimes find our selves in. One of which has bars and really bad room mates . . .
i watched a scale plastic figure crawl along the edge . . . of an exacto blade . . . that's my dream , it's my nightmare . . . . . . . crawling , slithering . . . . . along the edge . . . . . . of an exacto . . . . . blade . . . . and surviving
Myanmar
Member Since: March 05, 2004
entire network: 4,011 Posts
KitMaker Network: 879 Posts
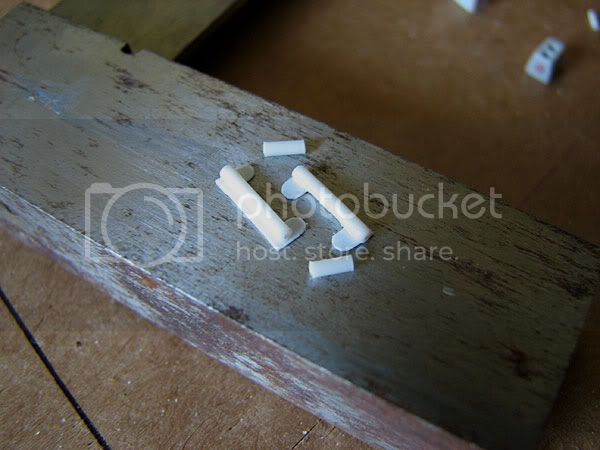
Posted: Saturday, August 21, 2010 - 01:57 PM UTC


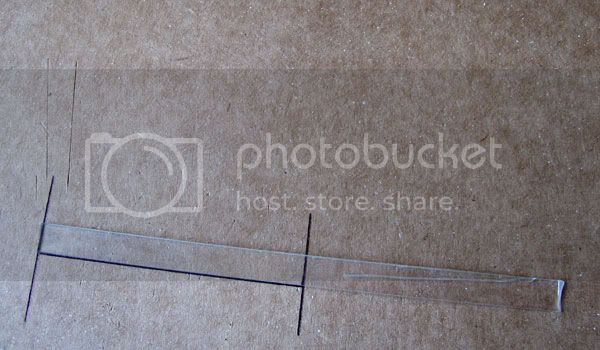
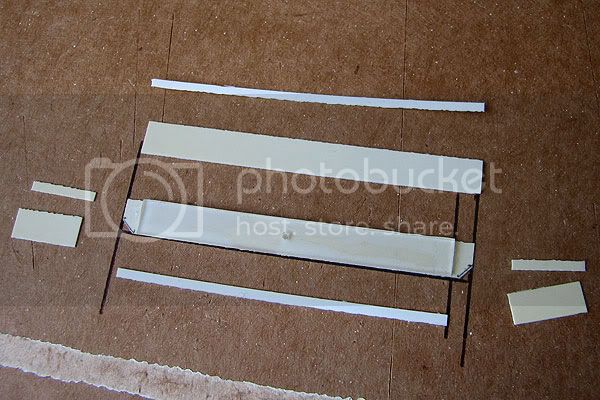
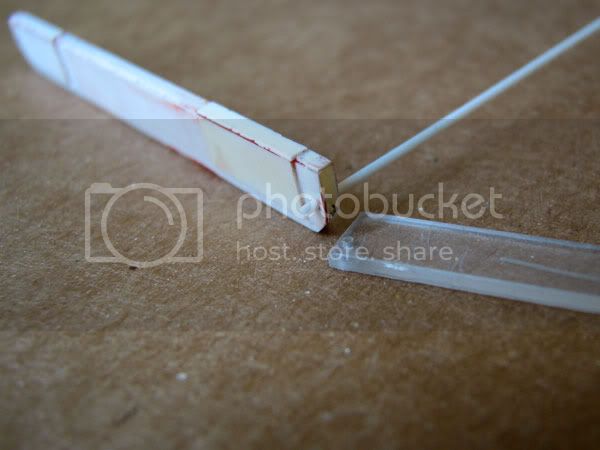
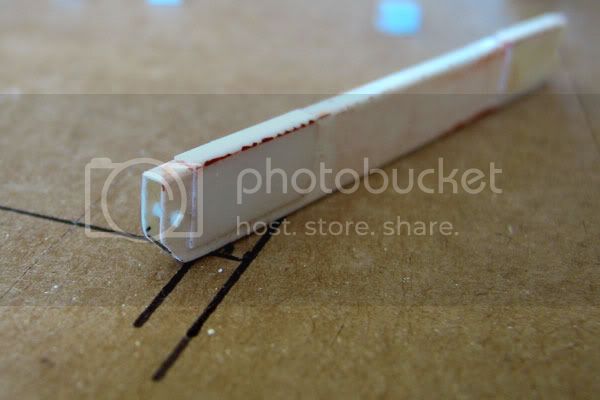
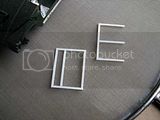
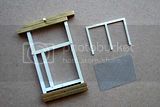
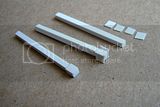
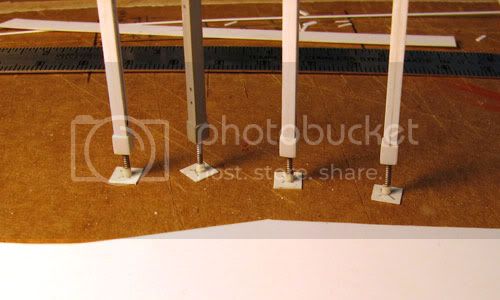
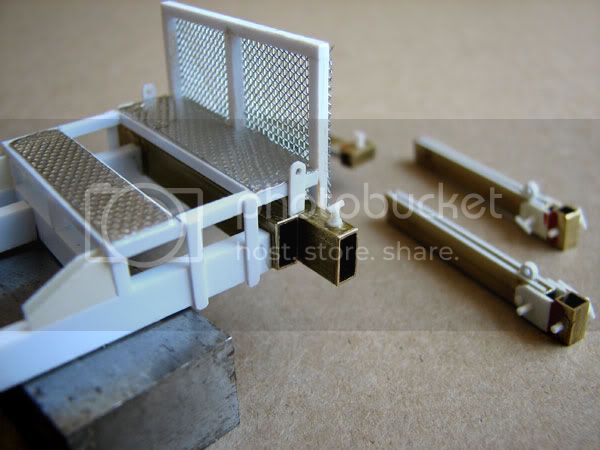
I finished the poles today and out riggers today. They were built then drilled like this
The whole subassembly is dry fit set into the HMMWV and it looks like weird, super sturdy bed frame. Only fine details such as the position set pins will complete this part of the model which I'll get to tonight

thanks for looking ....
i watched a scale plastic figure crawl along the edge . . . of an exacto blade . . . that's my dream , it's my nightmare . . . . . . . crawling , slithering . . . . . along the edge . . . . . . of an exacto . . . . . blade . . . . and surviving
North Carolina, United States
Member Since: November 28, 2005
entire network: 2,216 Posts
KitMaker Network: 399 Posts
Posted: Saturday, August 21, 2010 - 02:59 PM UTC
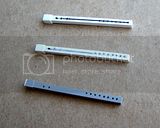
KSO, Dunno if the original has this or not, but some baby moon upside down hubcaps would be pretty cool for the pads under the leveling legs. Just an idea. Nice detail on the legs and (brass?) holders.
Hermon
"Those who would give up Essential Liberty
to purchase a little Temporary Safety,
deserve neither Liberty nor Safety."
Benjamin Franklin
Myanmar
Member Since: March 05, 2004
entire network: 4,011 Posts
KitMaker Network: 879 Posts
Posted: Saturday, August 21, 2010 - 05:21 PM UTC
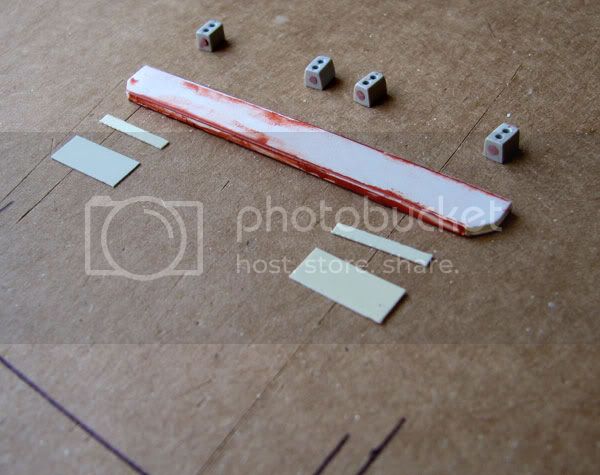
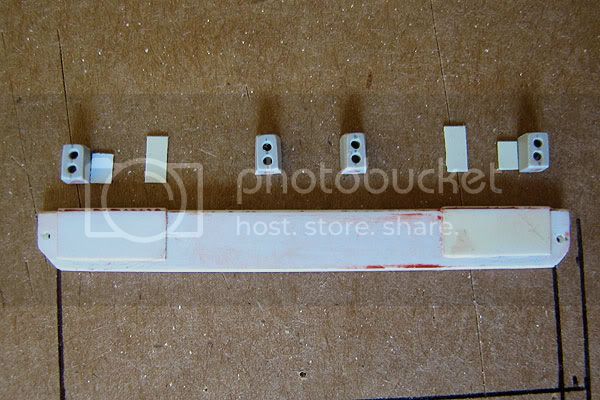
That's actually a great idea
There are flat plates secured with threaded bar for adjustments on the prototype. I'll make these tonight
i watched a scale plastic figure crawl along the edge . . . of an exacto blade . . . that's my dream , it's my nightmare . . . . . . . crawling , slithering . . . . . along the edge . . . . . . of an exacto . . . . . blade . . . . and surviving
Myanmar
Member Since: March 05, 2004
entire network: 4,011 Posts
KitMaker Network: 879 Posts
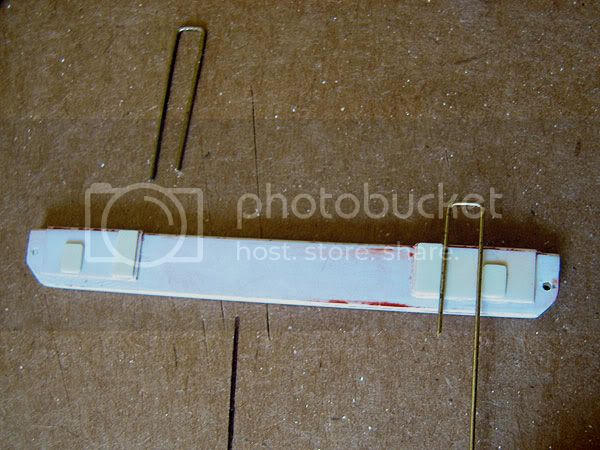
Posted: Sunday, August 22, 2010 - 11:41 AM UTC
These
i watched a scale plastic figure crawl along the edge . . . of an exacto blade . . . that's my dream , it's my nightmare . . . . . . . crawling , slithering . . . . . along the edge . . . . . . of an exacto . . . . . blade . . . . and surviving
North Carolina, United States
Member Since: November 28, 2005
entire network: 2,216 Posts
KitMaker Network: 399 Posts
Posted: Sunday, August 22, 2010 - 11:47 AM UTC
Works for me man. Is that actual functioning threaded rod or did you just make it look that way?
Hermon
"Those who would give up Essential Liberty
to purchase a little Temporary Safety,
deserve neither Liberty nor Safety."
Benjamin Franklin
Myanmar
Member Since: March 05, 2004
entire network: 4,011 Posts
KitMaker Network: 879 Posts
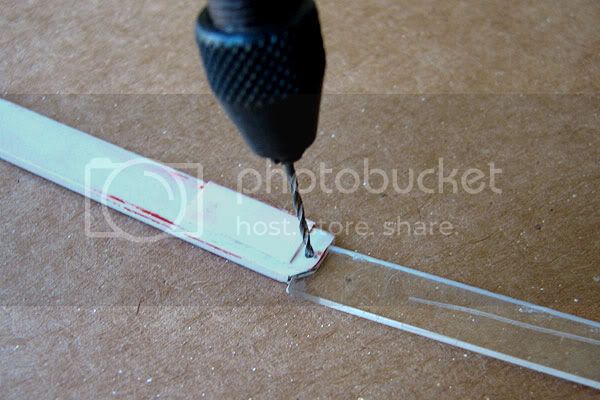
Posted: Sunday, August 22, 2010 - 12:01 PM UTC
those are guitar string glued into drilled holes under the leg poles
i watched a scale plastic figure crawl along the edge . . . of an exacto blade . . . that's my dream , it's my nightmare . . . . . . . crawling , slithering . . . . . along the edge . . . . . . of an exacto . . . . . blade . . . . and surviving
North Carolina, United States
Member Since: November 28, 2005
entire network: 2,216 Posts
KitMaker Network: 399 Posts
Posted: Sunday, August 22, 2010 - 12:35 PM UTC
Damn bro, I'd seriously like to live next door to you. Freakin' awsome ideas floating around in that brain basket of yours. Really nice.
Hermon
"Those who would give up Essential Liberty
to purchase a little Temporary Safety,
deserve neither Liberty nor Safety."
Benjamin Franklin
Myanmar
Member Since: March 05, 2004
entire network: 4,011 Posts
KitMaker Network: 879 Posts
Posted: Sunday, August 22, 2010 - 12:50 PM UTC
Haha, thanks bro, but I got that idea from someone else
now the next time my brother picks up his guitar ... well ... uh .
he'll say,

and then I'll say
i watched a scale plastic figure crawl along the edge . . . of an exacto blade . . . that's my dream , it's my nightmare . . . . . . . crawling , slithering . . . . . along the edge . . . . . . of an exacto . . . . . blade . . . . and surviving
Myanmar
Member Since: March 05, 2004
entire network: 4,011 Posts
KitMaker Network: 879 Posts
Posted: Tuesday, August 24, 2010 - 05:35 AM UTC
details on this subassembly area is done
now onto the hydraulic arm
i watched a scale plastic figure crawl along the edge . . . of an exacto blade . . . that's my dream , it's my nightmare . . . . . . . crawling , slithering . . . . . along the edge . . . . . . of an exacto . . . . . blade . . . . and surviving