

1⁄35Digital Photography Tips
|
|
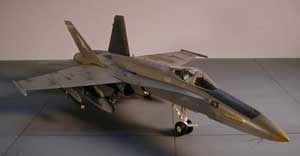
To setup the photo shoot, I placed the foam board on the kitchen table and placed the white cardboard behind it leaning up against the wall. With the base and background in place I setup the lights next. I strategically placed two chairs so that when the light clamps were attached they lite up the model from two angles. The lights have two swivels on them so you can rotate them around two axes and get them into almost any position you need. Using this setup, I took my first set of pictures for the article. The biggest thing to remember is to really pay attention to what's in the background of the picture. Even though you have the cardboard background, you'll find yourself shooting at an angle that will get some unwanted items in the pictures such as the refrigerator, stove, etc. If you catch this before taking the picture, just rearrange the model on the base so you can get the same picture without the unwanted items and minimizing shadows from the lamps.
|
|
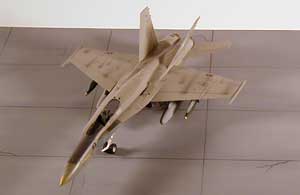
While looking through the first set of pics and looking at other model pictures
on the Internet, I decided to try and paint a tarmac on one side of the foam
board to simulate a military landing strip. I started by asking around for
dimensions of the concrete slabs used on actual tarmacs so I could get the slabs
in the correct scale for the Hornet (which was 1/48). I got some answers and
decided to go with a 24'x16' slab which scaled down to 6"x4" for the foam board.
This actually worked out well because that made a tarmac on my foam board that
was exactly five slabs by five slabs. What luck! To finish the tarmac I painted
the entire board a dark gray to simulate the concrete and then took a black
permanent market to draw lines to represent the rubber sealant between each
block. In random areas I used the market to draw cracks in the slabs that had
been repaired. To finish the tarmac I airbrushed a lighter shade of gray into
the centers of each slab to simulate effects of wear and tear and sun fading.
Over all the tarmac turned out ok but could be better. The gray I used to start
with is a little dark in my opinion and the permanent marker is too neat and
sharp for the separation between the slabs. A few sprouts of grass growing
between the cracks here and there would be a nice touch too I think. Perhaps
I'll mess around with it some more and try to get it more realistic for the next
project. For now, though, it works.
About the Author


FROM: FLORIDA, UNITED STATES
My interest in modeling started while watching my dad work late night's on old Star Trek and WWII plane models. I modeled planes for about 3 or 4 years before joining the Navy in 1990 and then took a 12-year break from the hobby before starting back-up again last fall. Man has it changed since I'v...
Comments


All Rights Reserved. Please read our Conditions of Use and Privacy Policy.