_GOTOBOTTOM
Scratchbuilders!
Built a model or part from your own materials lately?
Hosted by Mike Kirchoff
Blomberg-B power trucks (Rail)
Cuhail
Visit this Community
Illinois, United States
Member Since: February 10, 2004
entire network: 2,058 Posts
KitMaker Network: 787 Posts
Posted: Thursday, January 22, 2009 - 02:06 PM UTC
Well, after scouring the internet and about 40 issues of Model Railroader Magazine looking for good refs, I started the power trucks for the [CENSORED] Project. Here's what I'm building.


Using an N-Scale GP 20, I took 1/160 measurements and roughed out a plan on paper using a 1/35 ruler. Then, using .125 X .250 and .125 X .080 strip stock, I roughed out the general shape of the main steel components of the truck.


I cut apart the modern freight truck I'm using for the wheels and journals and using the cut-off journals, glued the truck frames to accept them.


Once I had the right general shape, I took the two sides and taped them together and started cutting and shaping by chucking a Dremel drum sander into my drill press and raising the table up.


So, here we have the final shape of the two sides and the journal/races dryfitted in. I still need to make final measurements to make sure the axles are the right distance from the top of the truck frame.


More tomorrow, any comments, or, praytell, criticisms welcome.

Cuhail
KoSprueOne
Visit this Community
Myanmar
Member Since: March 05, 2004
entire network: 4,011 Posts
KitMaker Network: 879 Posts
Posted: Thursday, January 22, 2009 - 02:52 PM UTC
Very well documented step-by-step photos and text.
This is a 1/35 scale project?
I clicked the SUBSCRIBE on this one!


Cuhail
Visit this Community
Illinois, United States
Member Since: February 10, 2004
entire network: 2,058 Posts
KitMaker Network: 787 Posts
Posted: Thursday, January 22, 2009 - 03:18 PM UTC

Yeah, kinda. The whole project is running between 1/35 and 1/29 with some 1/32 in there as well.
The engine that will be powering this truck is here too at my Scratchbuilt V-10 Prime Mover Diesel thread.

I'm really hoping these trucks work right. This is the first try at this.

Cuhail
Cuhail
Visit this Community
Illinois, United States
Member Since: February 10, 2004
entire network: 2,058 Posts
KitMaker Network: 787 Posts
Posted: Friday, January 23, 2009 - 02:19 PM UTC

Well, real life did not allow me to get down to the workshop today. I wanted to really bad, but, didn't make it. That's okay, tomorrows Saturday and I'll definately put some time in. Tomorrows portion will be a bit more delicate anyway. Let's take a look. The pink highlights the brake assembly I'm going to making.


NO questions or comments?
Cuhail
VonCuda
Visit this Community
North Carolina, United States
Member Since: November 28, 2005
entire network: 2,216 Posts
KitMaker Network: 399 Posts
Posted: Friday, January 23, 2009 - 03:20 PM UTC

Quoted Text

NO questions or comments?
Cuhail


Yeah, I have a bunch of questions but I don't know where to start. Are you doing this because the power trucks are not readily available or because you just wanted to do the whole project from scratch? I ask because the power trucks and platform are what I need and what I've been looking for for my T2K project. So far I can't find anything in 1/35 scale without buying a $5,000 (well, maybe not quite that much) engine.
Other than that, I'm just watchin' and learnin'.

Hermon
Cuhail
Visit this Community
Illinois, United States
Member Since: February 10, 2004
entire network: 2,058 Posts
KitMaker Network: 787 Posts
Posted: Friday, January 23, 2009 - 03:50 PM UTC

Hermon, those are some good questions.
First of all, I haven't come across any 1/35 modern GP, SD, SW, etc trucks anywhere. I have, however, found 1/29 sideframes and full motor trucks out there. I almost bought one here- GP38-2 Locomotive Parts List (#21), but, I just didn't want to pay $30 some-odd dollars for something I thought I could scratchbuild myself. It's all just a matter of getting the general shape crafted with stripstock and cutting and sanding away what doesn't belong, then, putting all the parts you carved together. Patience and practice make almost anything possible. This included.
Now, granted, over time I have gotten better at looking at a thing and breaking it down to what I have to do to craft it, but, just sitting down to do it and ignoring the apprehension and lack of self-confidence is the hardest part, for me anyway. I find once I sit down and start, it comes out pretty good and I find I had nothing to be nervous about. The glee of knowing you made it outta just some plastic strips and glue is pretty cool too.

Cuhail
samkidd
Visit this Community
Alaska, United States
Member Since: January 06, 2006
entire network: 530 Posts
KitMaker Network: 60 Posts
Posted: Saturday, January 24, 2009 - 11:55 AM UTC

Absolutely! Often times the apprehension of creating a part is the worst part of the entire process for me. I find that once I sit my butt down and actually tackle it that more often than not I'm pleased with the results. You look back and wonder why you put off building it for so long. And there is a great deal of satisfaction in looking at something you've made after it's been painted or cast and remembering that it started out as a large pile of styrene bits and pieces of whatever.
By the way, really cool results so far, I'll be watching this construction with interest. (My love of trains is what eventually lead me to creating LSA).

Jim
Large Scale Armory
VonCuda
Visit this Community
North Carolina, United States
Member Since: November 28, 2005
entire network: 2,216 Posts
KitMaker Network: 399 Posts
Posted: Saturday, January 24, 2009 - 03:55 PM UTC
Murphy, don't get mad cause I'm not trying to hijack your thread but I gotta run something by ya. My T2K rail idea is crazy and that's why I'm asking RR related questions. Here's what I wanna do.
1. scratch build diesel engine. (cat, cummins, detroit,etc.)
2. engine and tranny will be connected to an automobile rear end
3. rear end will have sprockets welded to the break drums
4. sprockets will drive a chain wich will be connected to more sprockets to train trucks.

This is kind like the setup on an old chain drive Mack truck.
Does this sound even remotely do-able?

Again, sorry to do this on your thread.
Hermon
Cuhail
Visit this Community
Illinois, United States
Member Since: February 10, 2004
entire network: 2,058 Posts
KitMaker Network: 787 Posts
Posted: Saturday, January 24, 2009 - 04:16 PM UTC
Thank you Jim, you captured the feelings well. I'm glad you took some time and looked in on this build. Scratchbuilding isn't hard, per say, just a process that needs focus and practiced skill.

Hermon. It's do-able, of course, but, the chain drive will be a tough scratch. The power transfer with the car transmission is hard to picture in reality, but, if you have it in your head, do it. If it doesn't look right, pop it all off and do it a bit different. I pondered that drivetrain for about a tenth of a second...then I went traditional.

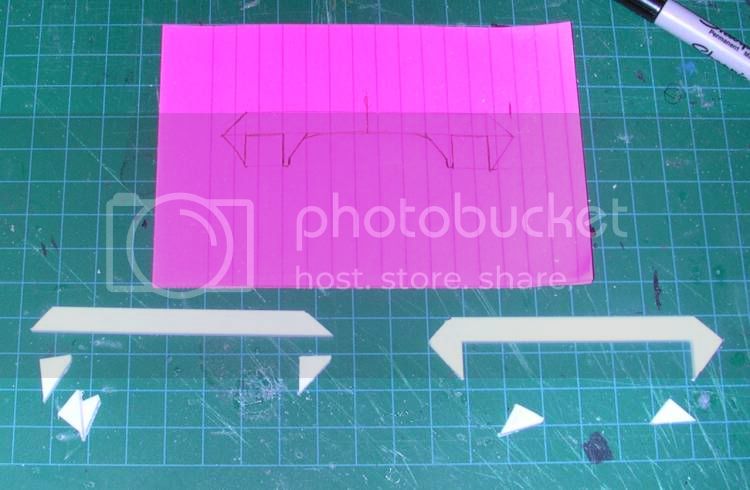
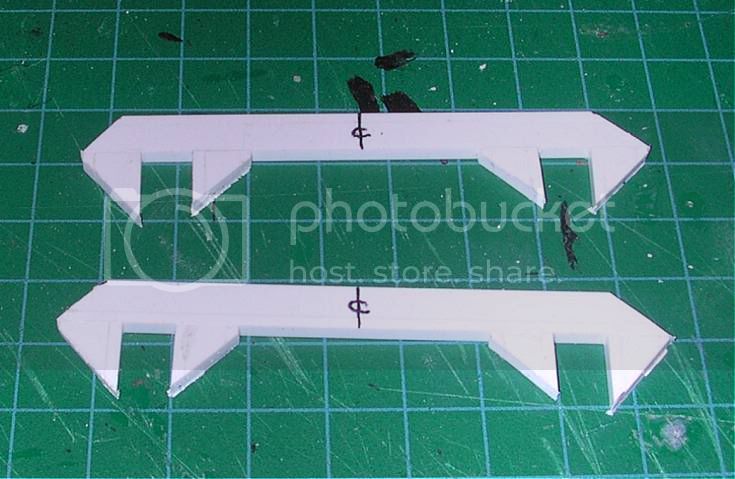
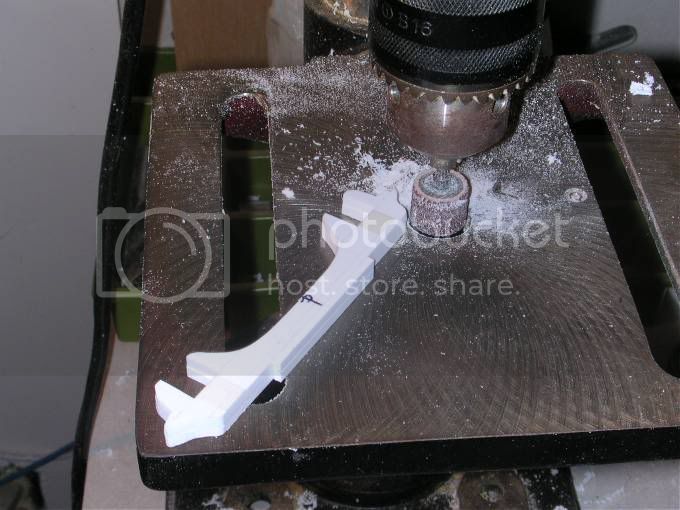
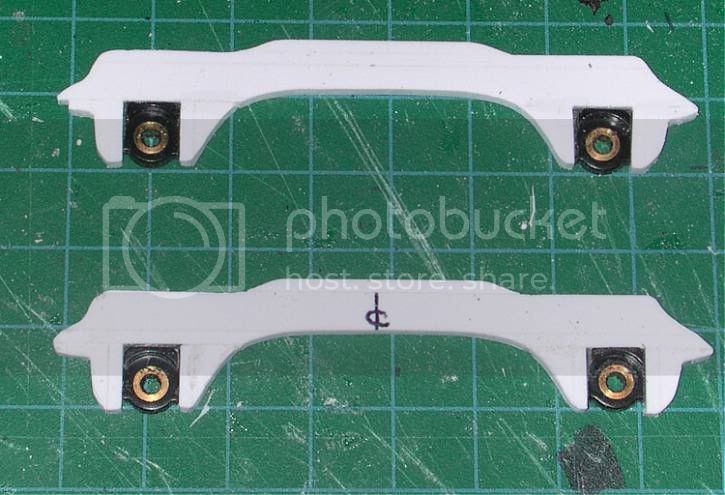
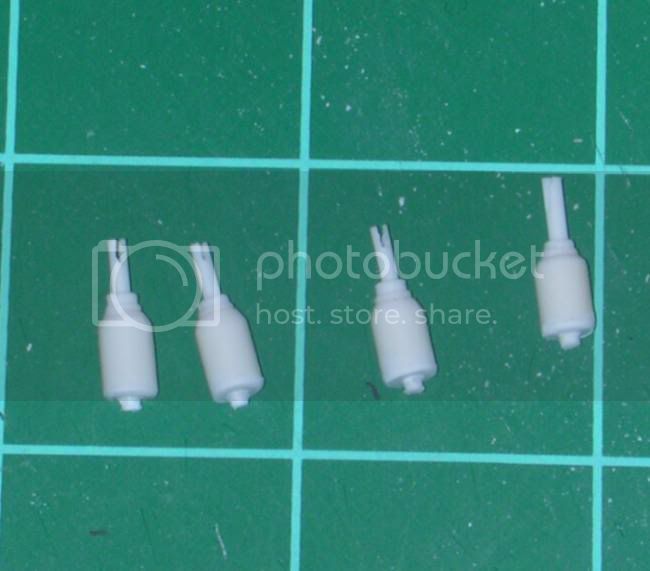
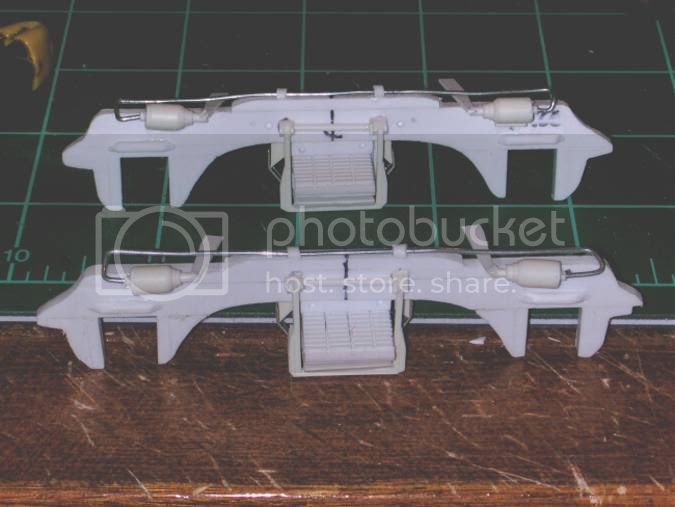
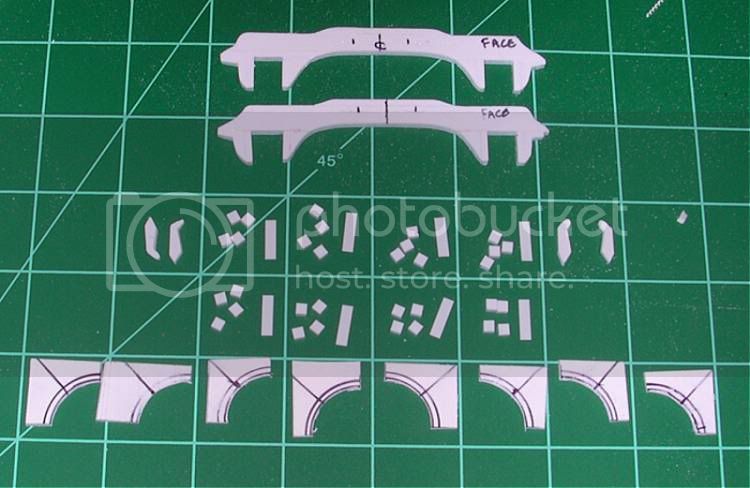
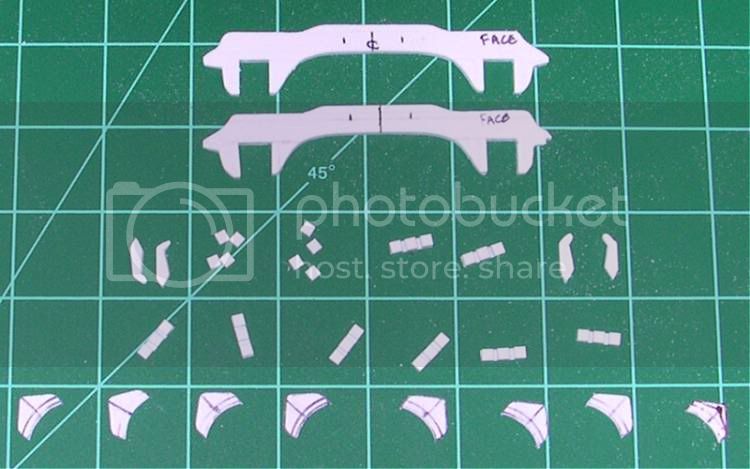
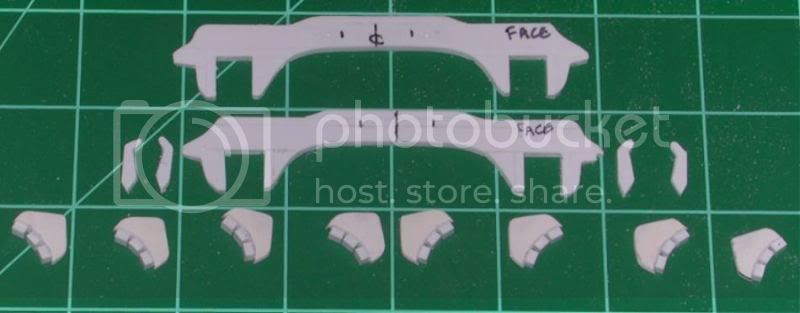
Now, as far as progress goes, I started on the brake parts today. I did the outside brake arms that hold the brakepad assembly and moves it to the wheel surface. I used strip stock and made a pattern piece. The pattern piece, when finished, was used to trace three more brake arms. I would hold the pattern to the stripstock and trace around it, filling in all that white surface around the pattern, then, I'd cut and sand away all that was marked.

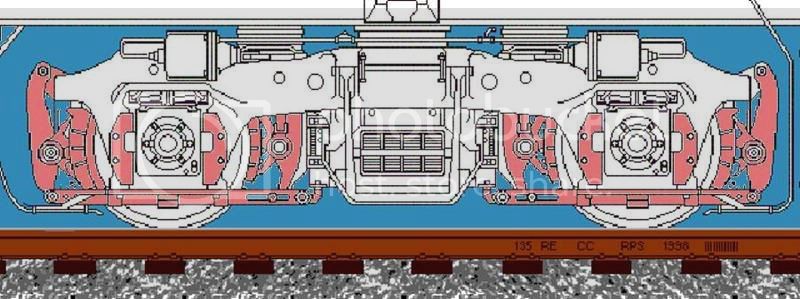
This part is GREEN in the picture


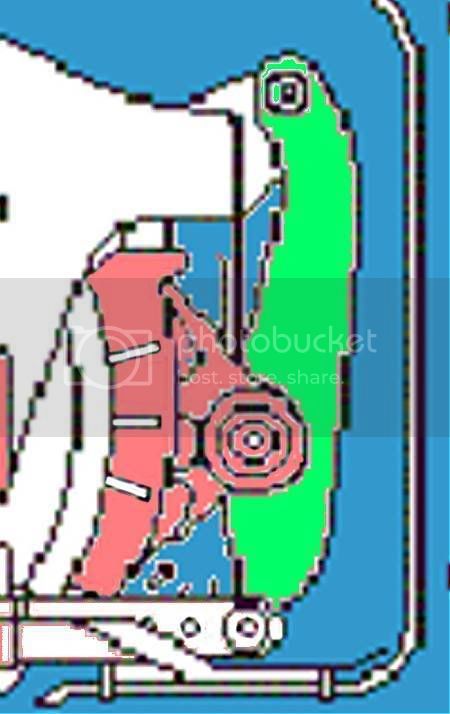
I only did the ouside brake arms because I just can't find a reference that shows the shape of the inside one any better than the drawing in my previous post.

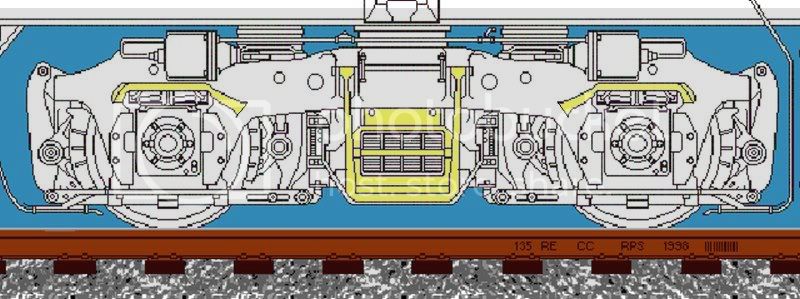
Next, I started the brakepad assembly (Marked pink in the above drawing.)
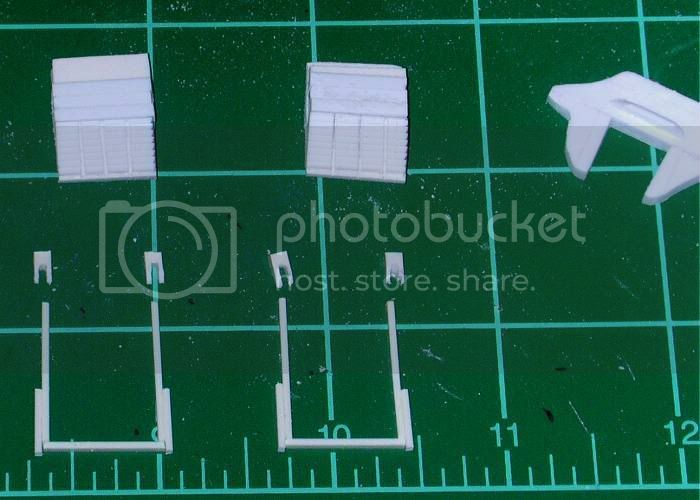
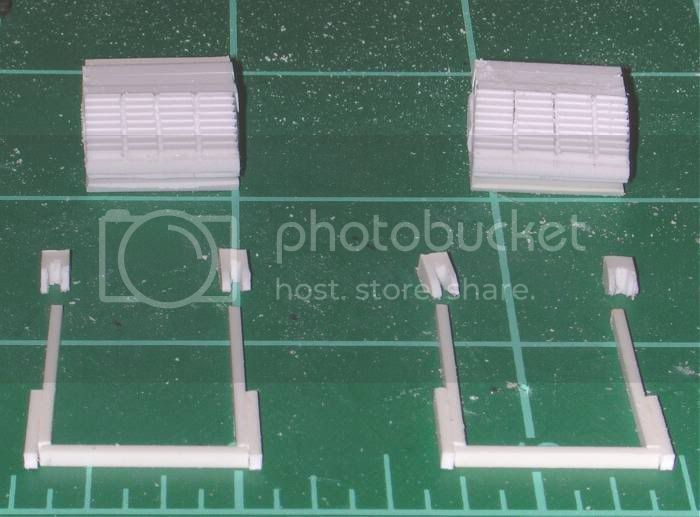
Using a circle template in the diameter of the wheel face, I marked and cut a hole in a piece of .050 plastic sheet. I made another circle (in ink) around the cut and quartered it. I made two of these, giving me 8 brake assemblies. I also cut 8 strips of .080 X .010 and 24 squares .080 X .080 X .060 for the pads.

Here's all the parts, unassembled.


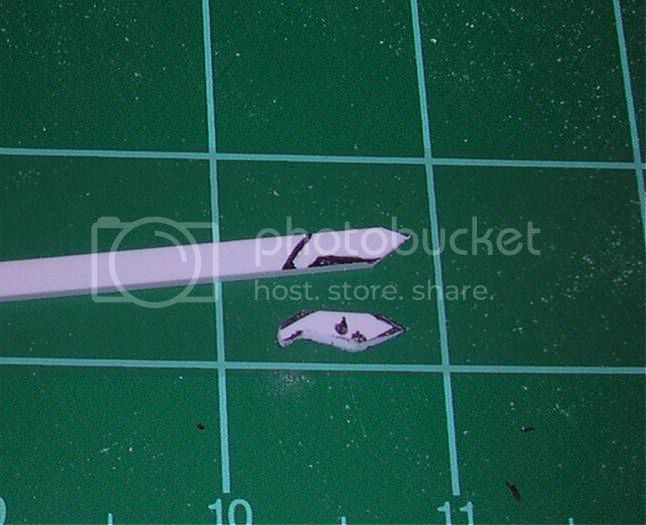
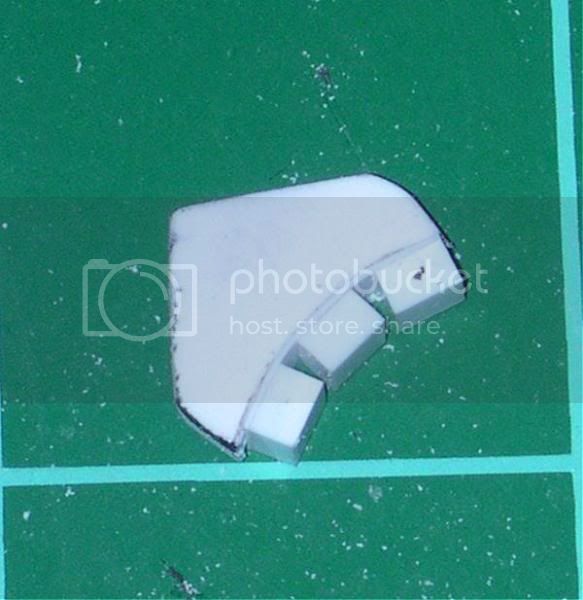
With the pads assembled and pad holders trimmed up.


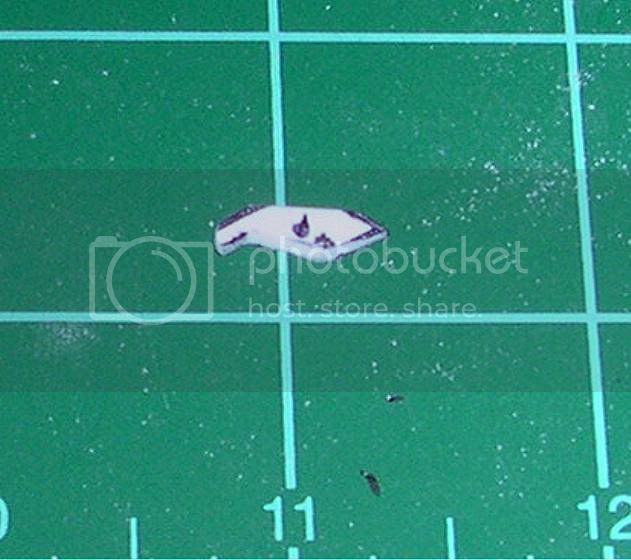
The brakepads assembled.


And a closeup of the pad assembly


That's where I am.

More tomorrow maybe. My flying wonderdog, Sallie Derra, pulled a muscle in her hind end and is in a bunch of uncomfortableness. I have two friends who work for vets that assure me she'll be fine, just very sore, but, man. My dog is in pain and I can't really help her except for a childrens chewable asprin every 8 hours and icing it off and on. I'm beside myself with worry.

Talk soon,
Cuhail
slodder
Visit this Community
North Carolina, United States
Member Since: February 22, 2002
entire network: 11,718 Posts
KitMaker Network: 2,584 Posts
Posted: Sunday, January 25, 2009 - 01:10 AM UTC
Sorry to hear about Sallie Derra, never any fun when they are hurt. It's hard to deal with.

The models coming along pretty well though.
old-dragon
Visit this Community
Illinois, United States
Member Since: August 30, 2005
entire network: 3,289 Posts
KitMaker Network: 592 Posts
Posted: Sunday, January 25, 2009 - 02:30 AM UTC
Hey, I tought we didn't start till feb 1st{hahaha}....nice work! Are we headed for a full GP-38 or something?{or are ya just warming up for a DD-40?}
Why the bushed inserts on the truck sides....carpet drives?! If so, you can also use brass tubing inserts with a flared end{flare towards the wheel}. Make a strong bolster because you'll need an anchor point for the drive.....paper clips make great contact wipers on the back of the wheels...one per side, per truck.{or battery power....}


...hermon, check your Pm's! ...that'll give your questions an answer....

...murphy, I have a nice diesel trains book that has multi views{the both the very old model railroader cyclopedias, vol 1&2...steam and diesel} If ya need help in that department{pics}, just holler...
Cuhail
Visit this Community
Illinois, United States
Member Since: February 10, 2004
entire network: 2,058 Posts
KitMaker Network: 787 Posts
Posted: Sunday, January 25, 2009 - 03:20 PM UTC
Bob! THAT'S IT!!! THAT'S the scanned picture I need! The above view!!! Thank you! Thank you! Thank you! Thank you Thank you! Thank you!!

Gotta screen cap that baby!

This will be a part of my ACUTR build, not the S,L&L build. I have a couple of things I'm doing for S,L&L.

Sallie is doing okay today. Very stiff and walking very purposefully, but, I think she'll be okay until we go see the vet tomorrow. Thanks for the concern all. I appreciate it. She's my buddy.

Cuhail
old-dragon
Visit this Community
Illinois, United States
Member Since: August 30, 2005
entire network: 3,289 Posts
KitMaker Network: 592 Posts
Posted: Monday, January 26, 2009 - 02:31 PM UTC

Quoted Text

Bob! THAT'S IT!!! THAT'S the scanned picture I need! The above view!!! Thank you! Thank you! Thank you! Thank you Thank you! Thank you!!

Gotta screen cap that baby!

This will be a part of my ACUTR build, not the S,L&L build. I have a couple of things I'm doing for S,L&L.

Sallie is doing okay today. Very stiff and walking very purposefully, but, I think she'll be okay until we go see the vet tomorrow. Thanks for the concern all. I appreciate it. She's my buddy.

Cuhail


A)- Your welcome{times 6 or so}...hope the email went thru today...and I sent a bill in the mail{what was your address again?!}
B)- I don't care if it's for S/L/L or not...I was just givin ya flak.
C)- I feel for you{but mostly for the dog}.
Cuhail
Visit this Community
Illinois, United States
Member Since: February 10, 2004
entire network: 2,058 Posts
KitMaker Network: 787 Posts
Posted: Monday, January 26, 2009 - 03:00 PM UTC
Sallie's going to be fine, folks. She went to the vet and he said she pulled a muscle, no biggie, no torn ACL. He did however assess her cyst on her other leg, gave her her vaccinations and scheduled a surgury date to remove the cyst.
She's golden.

As for the build progress, I made some time and did the suspension system (In yellow)


I didn't take pix of the process and as soon as the camera battery charges ( ) I'll take some pix of the finished parts.

[EDIT] Pictures...


[/EDIT... ]


So, that's where I am at,

Cuhail
old-dragon
Visit this Community
Illinois, United States
Member Since: August 30, 2005
entire network: 3,289 Posts
KitMaker Network: 592 Posts
Posted: Monday, January 26, 2009 - 04:29 PM UTC
Lookin' good!
I just finally looked at your reference site for the $32 part...even though that was the whole truck, the width would've been wrong for 1/35...trust me on that{unless your making your own rail section to sit it on}. Your on the right path with what your doing; hope you don't get derailed.


Cuhail
Visit this Community
Illinois, United States
Member Since: February 10, 2004
entire network: 2,058 Posts
KitMaker Network: 787 Posts
Posted: Monday, January 26, 2009 - 06:20 PM UTC

Nah, the front truck is a 1/29 Aristo-Craft bettendorf. The wheels for the rear power truck are the wheels from the other bettendorf truck I dismantled for the wheels and axle journals.
As such, I'm using , I think, LGB track.

So this monster is all over the "scale" board anyways. 1/29, 1/35, 1/32.
It's a boxcar full of fun to build!

Cuhail
Cuhail
Visit this Community
Illinois, United States
Member Since: February 10, 2004
entire network: 2,058 Posts
KitMaker Network: 787 Posts
Posted: Tuesday, January 27, 2009 - 11:10 AM UTC

So, I worked a little more today. No actual in-progress pics again, but, wrap-up-for-the-day pictures.

The air canisters.


... and on the trucks with lines installed.


The 'puter I'm on is slow, so, I check back later.

Later!
Cuhail
samkidd
Visit this Community
Alaska, United States
Member Since: January 06, 2006
entire network: 530 Posts
KitMaker Network: 60 Posts
Posted: Tuesday, January 27, 2009 - 02:35 PM UTC


Hi Murphy,

Man, this is really starting to look great! Keep up the great work and the photos. It's great seeing this thing come together so well---it takes my mind off my own floundering projects. Seriously though, it's looking great man!

Jim
Large Scale Armory
Cuhail
Visit this Community
Illinois, United States
Member Since: February 10, 2004
entire network: 2,058 Posts
KitMaker Network: 787 Posts
Posted: Tuesday, January 27, 2009 - 05:30 PM UTC

Thanks James!
I'll tell ya what, everytime I produce another part and it looks right, I shake my head and wonder how I really do it. I completely lose myself in the building of the part, that, when I attach it, it's like someone else did it. It sounds horrible, but, I greatly admire my own skill, but, from a very detatched way. It's like I have a front row seat, watching another scratchbuilder make the same thing as in the pictures he studies....but it's me.

I truely believe that if I can do this kind of stuff, anybody can.

Cuhail
Cuhail
Visit this Community
Illinois, United States
Member Since: February 10, 2004
entire network: 2,058 Posts
KitMaker Network: 787 Posts
Posted: Wednesday, January 28, 2009 - 03:02 PM UTC

What, did I come off as conceited there? I didn't mean to.


Just kidding I didn't work on her today...because it was camera buying day. Tomorrow, though. Progress with good pictures!

Cuhail
samkidd
Visit this Community
Alaska, United States
Member Since: January 06, 2006
entire network: 530 Posts
KitMaker Network: 60 Posts
Posted: Wednesday, January 28, 2009 - 11:25 PM UTC


Nah. Anyone who's ever read any of the posts on this thread can tell you're not conceited. Anyone actually involved in scratchbuilding anything may be suffering from serious mental illness---but certainly not conceit.
Okay, maybe LIKELY serious mental illness.......

Jim
Large Scale Armory
Cuhail
Visit this Community
Illinois, United States
Member Since: February 10, 2004
entire network: 2,058 Posts
KitMaker Network: 787 Posts
Posted: Thursday, January 29, 2009 - 04:38 AM UTC

Thanks Jim. I'm not crazy, I'm just drawn that way.

So, I'm finangling a deal to get some 1/35 wheels. I have a set of 1/29 Aristo-craft wheels, but, now that most of the sideframes are built, I set them on the wheels I have and found they are VERY noticably out of scale AND too big to attach the end bars holding the brake arms. This is a problem.
Not a big problem, but, a time consuming one. I'm working with a couple other KitMaker modelers to get some 1/35 German Railcar wheels cast, then, when I get my set, I'll have to chuck them into the drill press and alter them to make them modern.
So, until then, this is kinda shelved.
I think it's back to the engine room for a bit. Keep an eye out.

Cuhail
VonCuda
Visit this Community
North Carolina, United States
Member Since: November 28, 2005
entire network: 2,216 Posts
KitMaker Network: 399 Posts
Posted: Thursday, January 29, 2009 - 12:29 PM UTC

Quoted Text

everytime I produce another part and it looks right, I shake my head and wonder how I really do it.


We're not worthy......We're not worthy......We're not worthy.........

OK, seriously though. Considering what you've already scratch built, why wouldn't you just go ahead and make your own wheels to match the scale? Did I miss something here or is there just no "good" way to make a realistic wheel with styrene. Just curious.

Hermon
Cuhail
Visit this Community
Illinois, United States
Member Since: February 10, 2004
entire network: 2,058 Posts
KitMaker Network: 787 Posts
Posted: Thursday, January 29, 2009 - 12:53 PM UTC

Why wouldn't I???

Did you miss something?

Are you serious???


Because "round" is a pain in the ass!

Round really is a PITA. Scratching it out would require multiple rings, discs and then prayer all four come out the same size. Casting parts in resin is a quick and handy alternative.
It's okay, the resolution is presenting itself as we speak and are still not any kit parts. In fact, I'll have to do some flange work on each one so they look American Modern and not WWII German.
It's just a delay, Hermon, not a shelving or scrapping. Patience is an aquired talent. I have other scratchbuilding to do, not to mention the S, L&L campaign in a couple of days.

'S all good!
Cuhail
old-dragon
Visit this Community
Illinois, United States
Member Since: August 30, 2005
entire network: 3,289 Posts
KitMaker Network: 592 Posts
Posted: Saturday, January 31, 2009 - 08:50 AM UTC

Quoted Text

Because "round" is a pain in the ass!

Cuhail


...rookies....grab one of those green drafting circle templates and a scribe, find a slightly larger hole than needed and scribe out a circle out of your flat stock...then do an inner cut out if your doing a ring. Actuall, any ring should be cut out inner 1st, then outer from the sheet stock. A wheel can be layered from the back to the front{outside} in 3 to 4 layers{rings with the backing ring being solid}. I've tried the compass thing and it just scoots out of line...try the circle template thing...you'll like it.
An other resource is to use the dremel cutting disc shaft and by drilling a small hole in some stock, you can sand a circle-
 _GOTOTOP