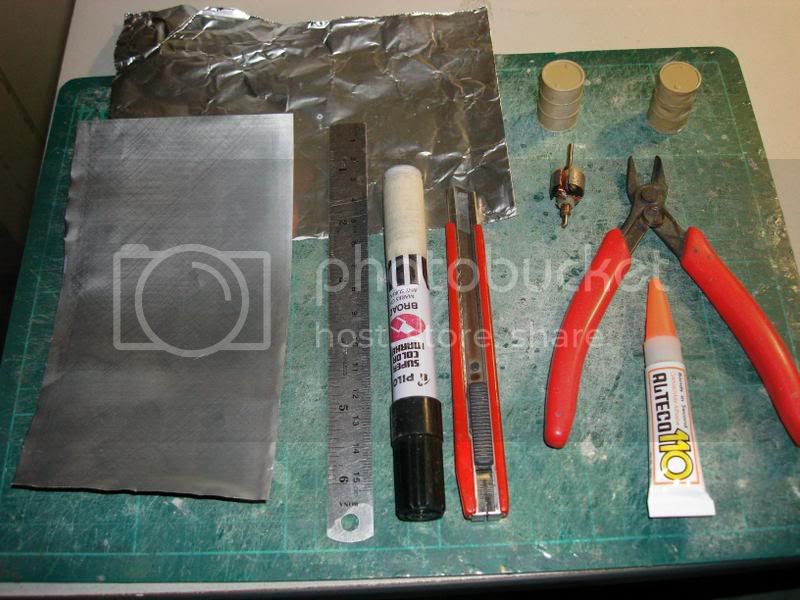
_GOTOBOTTOM
Scratchbuilders!: General
For general topics on scratchbuilding.
Hosted by Mike Kirchoff
1:35th scale open fuel drums
Jaguar
Visit this Community
Visayas, Philippines
Member Since: November 12, 2005
entire network: 38 Posts
KitMaker Network: 9 Posts
Posted: Thursday, March 15, 2007 - 05:08 AM UTC
-Materials:
soda can tin
fine copper wire
aluminum foil
marker(preferably Pentel Pen)


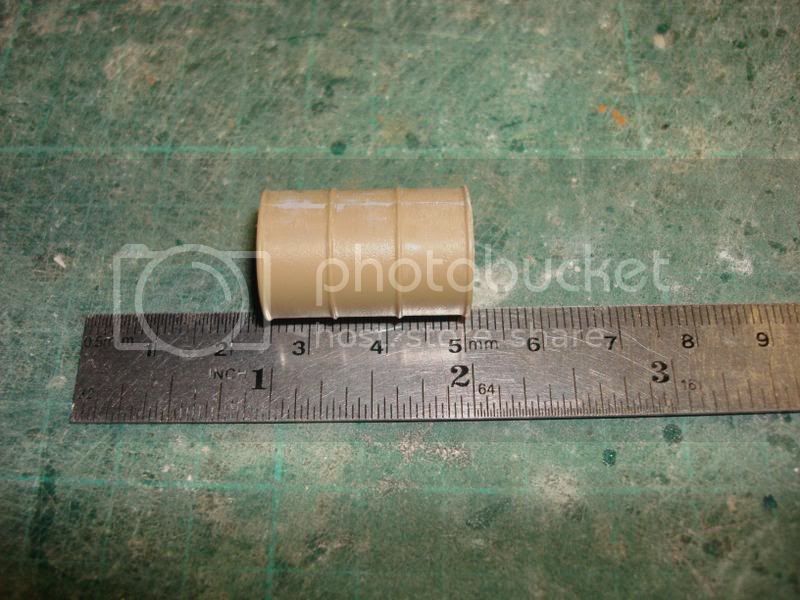
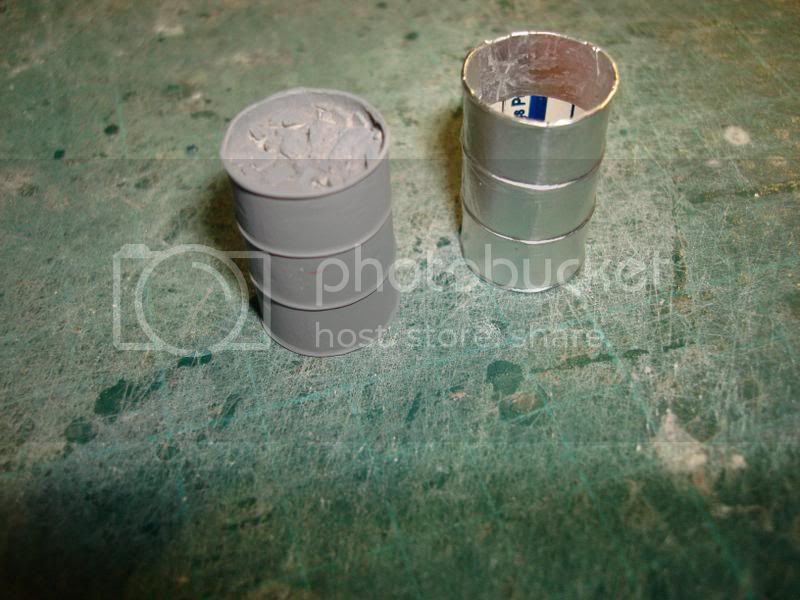
-For reference I used an Academy 1:35th scale fuel drum the height of which is about 2.5cm or 1 inch.


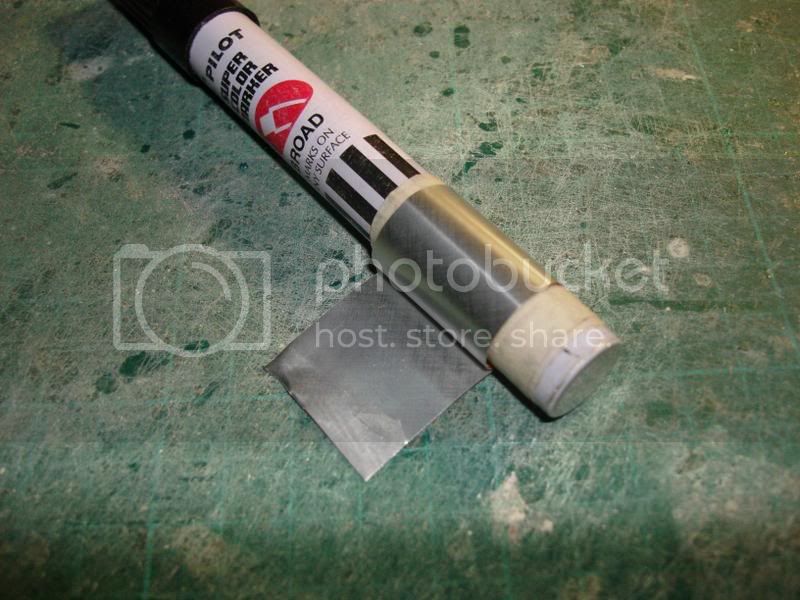
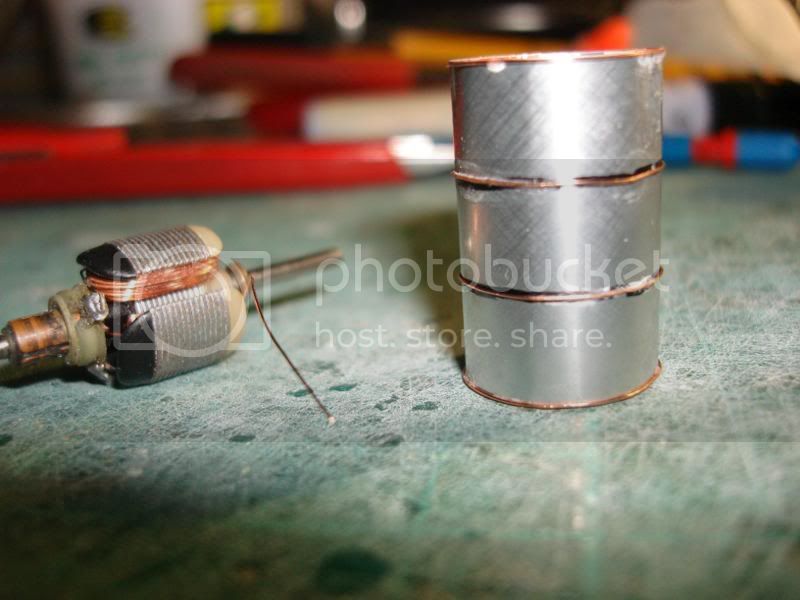
-Cut a 1 x 3 inch strip of tin and wrap it around the end of the marker (as you can see I wrapped some masking tape around the marker to increase its diameter a little). Glue the ends and trim the excess.


-Divide the tube into three (3) and mark with a pencil or marker.


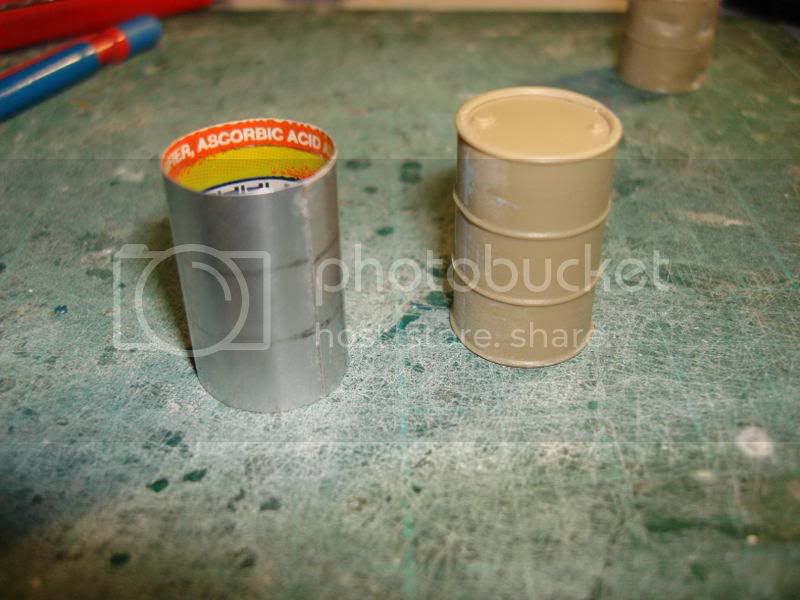
-Glue copper wire around the rims and marked areas.


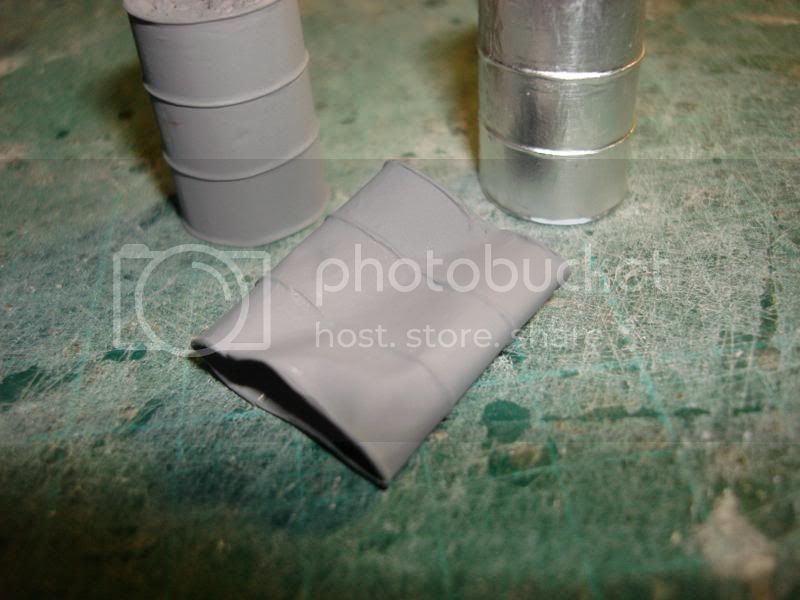
-Cut a strip of foil about 1.5 x 3 inches. Glue the end of the foil to the tube and slowly wrap it around.


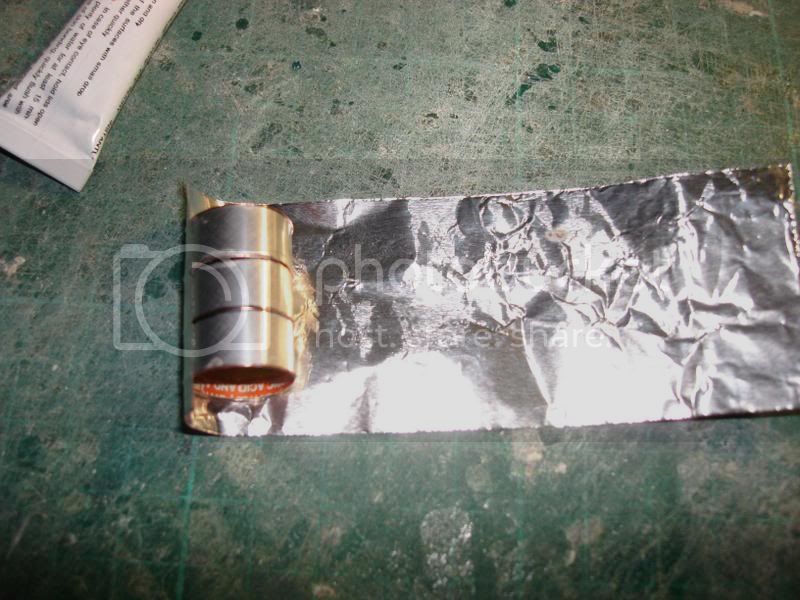
-Rub the foil smooth with your finger or fingernail to pick up the “rib” details as you wrap it around. Glue the ends and remove the excess.


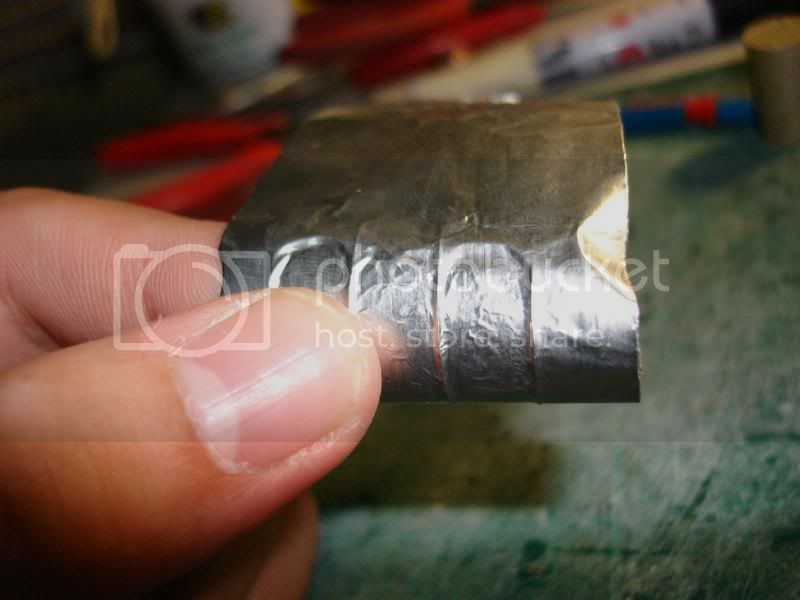
-Fold the remaining foil at the ends toward the inside.


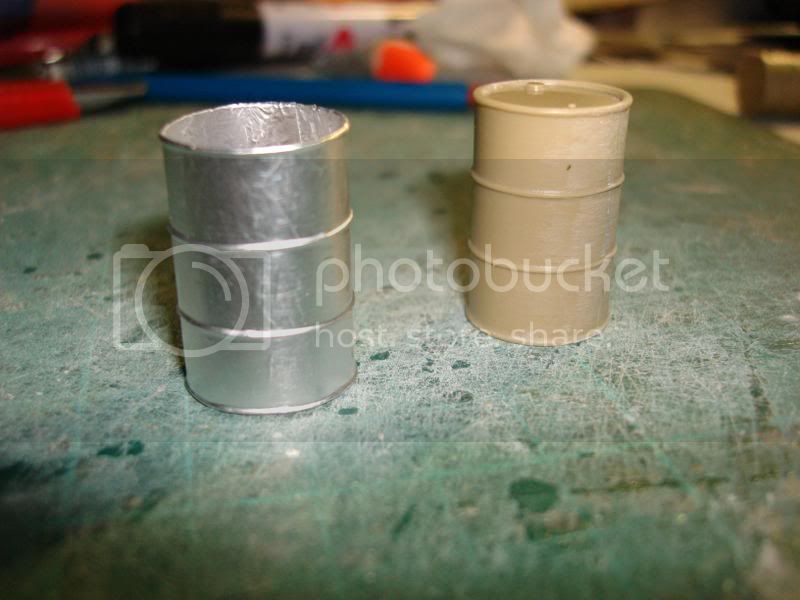
-The barrels can be left empty or filled with debris or some form of liquid.


-For a damaged or crushed barrel, it's easier to deform the tube before adding the copper wire and foil.


-Dents can be added by using your fingernails or hitting it with a blunt object.
-For bullet holes use a pin or the sharp end of a compass.

Comments and suggestions are very welcome.
drumthumper
Visit this Community
Kansas, United States
Member Since: December 22, 2004
entire network: 392 Posts
KitMaker Network: 159 Posts
Posted: Thursday, March 15, 2007 - 05:32 AM UTC
Mark,
Awesome how-to, dude! Thanks for sharing. I love these techniques that render outstanding results using materials easily found around the home. Great job!!

Mike
KoSprueOne
Visit this Community
Myanmar
Member Since: March 05, 2004
entire network: 4,011 Posts
KitMaker Network: 879 Posts
Posted: Thursday, March 15, 2007 - 05:35 AM UTC
Maraming Salamat ! *

^ ditto, man ^

Excellent presentation and technique. I'm actually going to try this.


*thanks very much !
FAUST
#130
Visit this Community
Noord-Holland, Netherlands
Member Since: June 07, 2002
entire network: 8,797 Posts
KitMaker Network: 1,186 Posts
Posted: Thursday, March 15, 2007 - 05:51 AM UTC
Ola Mark

Brilliant how to you put down here. I have a question... how do you hide the seam on the back where the two sides of both foils meet? Do you use putty to hide it? Or do you just cut it sharply so the sides meet each other?

This is very usefull. I need to make some barrels of Lozantin for an upcoming vehicle idea. and those barrels are bare metal.. this technique is just perfect. Even the idea of wrapping standard barrels in aluminum foil to create a metal finish you almost cannot paint is something I only start to think of when I saw this tutorial

BTW I have send you a PM

With friendly greetz

Robert Blokker
Cuhail
Visit this Community
Illinois, United States
Member Since: February 10, 2004
entire network: 2,058 Posts
KitMaker Network: 787 Posts
Posted: Thursday, March 15, 2007 - 05:54 AM UTC
That's brilliantly simple! Great how-to Mark!


Cuhail
Jaguar
Visit this Community
Visayas, Philippines
Member Since: November 12, 2005
entire network: 38 Posts
KitMaker Network: 9 Posts
Posted: Thursday, March 15, 2007 - 06:22 AM UTC
drumthumper, cuhail: Thanks. I'm glad you find this useful.

KoSprueOne: Excellent Filipino you have there. Glad you like it.

Faust: Unfortunately, the seams at the back are hard to hide. I'm still working on that. I'll try your suggestion as well. As of now the best way to hide it is to place a bunch of the barrels with the seam side inward, or have them against a wall in a dio.

I haven't looked at my inbox but I'll reply ASAP.
matt
Staff MemberCampaigns Administrator
Visit this Community
New York, United States
Member Since: February 28, 2002
entire network: 5,957 Posts
KitMaker Network: 2,626 Posts
Posted: Thursday, March 15, 2007 - 10:36 PM UTC
QUICK & EASY..... I Like!!!!!!!!!
RedLeg
Visit this Community
England - South East, United Kingdom
Member Since: April 30, 2005
entire network: 746 Posts
KitMaker Network: 0 Posts
Posted: Thursday, March 15, 2007 - 11:04 PM UTC
Superb How to, Thanks for sharing


redleg
HeavyArty
Visit this Community
Florida, United States
Member Since: May 16, 2002
entire network: 17,694 Posts
KitMaker Network: 1,968 Posts
Posted: Thursday, March 15, 2007 - 11:24 PM UTC
Great idea and excellent description. You should submit it as a Diorama Feature so it will be around for posterity and can be accessed at any time. This post will be buried under a bunch of others in a few days.
Sandy
Visit this Community
England - East Anglia, United Kingdom
Member Since: June 24, 2002
entire network: 628 Posts
KitMaker Network: 212 Posts
Posted: Friday, March 16, 2007 - 12:32 AM UTC
Hi I have been demmoing this tec for over 7 years in the UK at model shows , nothing new under the sun cheers ian
grimreaper
Visit this Community
Kansas, United States
Member Since: April 11, 2005
entire network: 417 Posts
KitMaker Network: 0 Posts
Posted: Friday, March 16, 2007 - 01:20 AM UTC
Outstanding HOW TO.
So simple and yet absolutely realistic.
Would never have thought to do the second coating the way you did with the foil.
You're a genius!!!!!!
Well done.
animal
Visit this Community
Member Since: December 15, 2002
entire network: 4,503 Posts
KitMaker Network: 1,163 Posts
Posted: Friday, March 16, 2007 - 01:43 AM UTC
Fantastic how to. Thanks for sharing this one. I am saving this one for future refs.
Mars_Volta
Visit this Community
Quebec, Canada
Member Since: March 28, 2005
entire network: 145 Posts
KitMaker Network: 0 Posts
Posted: Friday, March 16, 2007 - 05:50 AM UTC
Very sharp job. Congrats!
Jaguar
Visit this Community
Visayas, Philippines
Member Since: November 12, 2005
entire network: 38 Posts
KitMaker Network: 9 Posts
Posted: Friday, March 16, 2007 - 03:41 PM UTC
Thanks all.

Sandy: Wow! Have you really done this technique already? Great minds do think alike. hehe. :-)
USMarine
Visit this Community
Christchurch, New Zealand
Member Since: September 17, 2005
entire network: 475 Posts
KitMaker Network: 0 Posts
Posted: Friday, March 16, 2007 - 05:04 PM UTC
what diamater is the barrel/drum

cheers
matt
Jaguar
Visit this Community
Visayas, Philippines
Member Since: November 12, 2005
entire network: 38 Posts
KitMaker Network: 9 Posts
Posted: Friday, March 16, 2007 - 05:12 PM UTC
matt: the diameter is about 1.5 centimeters.
exer
Visit this Community
Dublin, Ireland
Member Since: November 27, 2004
entire network: 6,048 Posts
KitMaker Network: 845 Posts
Posted: Friday, March 16, 2007 - 05:13 PM UTC
Good work. Thanks for a very useful step by step guide.
Grumpyoldman
Staff MemberConsigliere
KITMAKER NETWORK
Visit this Community
Florida, United States
Member Since: October 17, 2003
entire network: 15,338 Posts
KitMaker Network: 5,072 Posts
Posted: Friday, March 16, 2007 - 07:10 PM UTC
That's what I like, nice simple step by steps that show good results.

Mike you should write this up, and submit it to the support center, so it doesn't get lost.
Plasticbattle
#003
Visit this Community
Donegal, Ireland
Member Since: May 14, 2002
entire network: 9,763 Posts
KitMaker Network: 1,351 Posts
Posted: Friday, March 16, 2007 - 08:46 PM UTC
Hi Mark. Excellent tip .. with excellent SBS pictures. Cant get any better! A very timely post as well .. I need some crushed barrells for my current base. Cheers.
roudeleiw
Visit this Community
Luxembourg
Member Since: January 19, 2004
entire network: 2,406 Posts
KitMaker Network: 78 Posts
Posted: Saturday, March 17, 2007 - 03:38 AM UTC
How simple, why didn't i have this idea before :-)

Thanks for showing this, it's really great!

Cheers
Claude
rotATOR
Visit this Community
California, United States
Member Since: November 16, 2006
entire network: 223 Posts
KitMaker Network: 53 Posts
Posted: Wednesday, March 28, 2007 - 06:22 AM UTC
troubble27
Visit this Community
New Jersey, United States
Member Since: October 10, 2003
entire network: 783 Posts
KitMaker Network: 0 Posts
Posted: Wednesday, March 28, 2007 - 07:26 AM UTC
Dude, thats smooth! You got great imagination and how to skills. You can almost picture a tank driving over one of the dented cans. I can see where this would be more useful then buying the kit!

Gary
Removed by original poster on 04/12/07 - 12:45:39 (GMT).
 _GOTOTOP