_GOTOBOTTOM
Modeling Questions?
Ask your modeling related questions here.
N1K1 Kyufo "Rex"
Holdfast
Staff MemberPresident
IPMS-UK KITMAKER BRANCH
#056
Visit this Community
England - South West, United Kingdom
Member Since: September 30, 2002
entire network: 8,581 Posts
KitMaker Network: 963 Posts
Posted: Sunday, February 18, 2007 - 12:57 AM UTC
This is Tamiya's 1/48 Kawinishi N1K1 Kyofu Type 11 "Rex" which I am building for my latest article on pre-shading, part 16.

This is a new idea and, as you will see the metalic parts hve been given a coat of "aluminium" (Halfords Nissan Silver) and the fabric parts have been painted with Japanese dope ( or by a dope?).


You will notice that the rear upper deck has been filled and sanded. It has been re-sprayed and the antenna has been fitted. It has also had it's underside colour added and is drying in the spray booth.
Mal
yoghurt
Visit this Community
England - South East, United Kingdom
Member Since: November 21, 2005
entire network: 76 Posts
KitMaker Network: 0 Posts
Posted: Saturday, February 24, 2007 - 12:02 AM UTC
Hi Mal,
It's looking good so far.
Is the silver going to be the pre-spray?
Courtney
Holdfast
Staff MemberPresident
IPMS-UK KITMAKER BRANCH
#056
Visit this Community
England - South West, United Kingdom
Member Since: September 30, 2002
entire network: 8,581 Posts
KitMaker Network: 963 Posts
Posted: Saturday, February 24, 2007 - 01:03 AM UTC
Hi Courtney
The silver will act as the primer coat, and the alluminium panels of the aircraft. I will pre-shade using the top surface camo colour, which is a dark green. If I do it right it will work (I have been practicing ) I will also paint on the markings. The idea is to be able to weather back through the layers of paint. So under the markings, in places, you will see the camo colour, and, in more serverly weathered areas, the underlying metal skin of the aircraft. This is why I can't use black for the pre-shading, it would show, when the colours are removed.
Mal
lampie
#029
Visit this Community
England - East Midlands, United Kingdom
Member Since: December 23, 2005
entire network: 6,249 Posts
KitMaker Network: 329 Posts
Posted: Saturday, February 24, 2007 - 02:23 AM UTC
NIce idea Mal.
I remember seeing a 1:24 Airfix Hurricane a few months ago being done this way.
Going to be really interesting to see how this works out.
Im considering doing the same method on a Spit but using the light green primer colour over the silver.I found a great book about retro restoring a Corsair and it gave me the idea.
Nige
Holdfast
Staff MemberPresident
IPMS-UK KITMAKER BRANCH
#056
Visit this Community
England - South West, United Kingdom
Member Since: September 30, 2002
entire network: 8,581 Posts
KitMaker Network: 963 Posts
Posted: Sunday, February 25, 2007 - 02:03 AM UTC
Yes Nige, I'm trying this out before going the "proper" primer colour route. My ultimate idea is to start with the metalic colour, to give the model it's naked state, fabric coverings will be doped. Next paint the original primer colour, then the camo coats, then markings etc. This will allow the paint to be weatherd back through the layers. The real problem with doing this is that you can't use the normal method of pre-shading. As you removed paint, through the layers you would see the black pre-shading. This would not be very realistic. I have had some success in using the actual camo colour itself for the pre-shading effect but, at the moment, this relies on a primer coat of white to achieve the contrast. I have been experimenting, on the P-51B (see elsewhere) and I think that it might be possible to achiev pre-shading over a "normal" primer colour. Of corse to achieve pre-shading on this "rex" will be simpler, as the base coat will be silver. It is representing a late war machine which will be heavily weathered, ie no primer.
I have been making a piano stool for my mums birthday, so I haven't been able to get into the spray booth this week end. I want to paint this during the day as I want to do it in stages and photograph it, so it will have to wait until next week end, maybe
Mal
almonkey
Visit this Community
England - East Midlands, United Kingdom
Member Since: March 23, 2003
entire network: 2,124 Posts
KitMaker Network: 369 Posts
Posted: Tuesday, February 27, 2007 - 12:05 AM UTC
hi mal! this may be teaching grandma to suck eggs! but have you thought of using maskol in between each coat, so that you can easily rub through later coats of paint without risking scratching right through to plastic?
Holdfast
Staff MemberPresident
IPMS-UK KITMAKER BRANCH
#056
Visit this Community
England - South West, United Kingdom
Member Since: September 30, 2002
entire network: 8,581 Posts
KitMaker Network: 963 Posts
Posted: Tuesday, February 27, 2007 - 01:49 AM UTC
:-) I have watched and read about all the different methods of weathering Japanese, and other "heavily weathered" aircraft and none of them do anything for me. Anything like Maskol, white glue, salt or anything that forms a barrier is too random. Forgive me, if there's anyone out there who has done this, but pulling paint off with sellotape also looks wrong to me. If you remember my Hs 129, with winter whitewash (?) then, the way the whitewash was removed, in places, that is the type of method I intend to employ, (the Hs 129 was a practice for the method I have in my mind, and it worked). The effect that i'm after is "random" but I want to have control over it. Plus, for the effect that I am trying to create, the paint will need to be removed gradually.

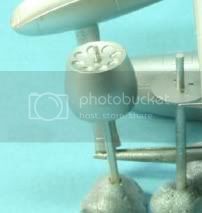
You are correct that I might "weather" through to the plastic so I will be applying a coat of Klear over the silver "metal skin". I thougfht about this after doing the undersurface colour but it wont matter as this model will be in a vignette which is in the advance planning stage

Mal
Holdfast
Staff MemberPresident
IPMS-UK KITMAKER BRANCH
#056
Visit this Community
England - South West, United Kingdom
Member Since: September 30, 2002
entire network: 8,581 Posts
KitMaker Network: 963 Posts
Posted: Tuesday, March 13, 2007 - 02:40 AM UTC
Having said what I said about white glue etc, guess what I did yep used white glue as a barrier. However I applied it with a cocktail stick, in areas that I want to be able to remove the paint. This was not random but I applied a little thought as to where I wanted to remove the paint. I realised that by doing this it would allow me to use thinners but the hard work will have been done, the thinners will just enhance the effect, I hope.

This is what it looked like after the second session in the spray booth. In the first session I used the green uppersurface colour for the pre-shading and applied paint to the individual panels. Here I have applied more paint to the panel lines, as they were a little weak, with colour, then added more paint to the panels themselves and finally started to blend it all together with very light coats over everything. I continued this process this evening and I think it's about there. I now have to re-apply the undersurface colour in a few places. I used no masking on the undersurface colour, as I didn't want dead sharp edges to the wings and tail.


Mal
Holdfast
Staff MemberPresident
IPMS-UK KITMAKER BRANCH
#056
Visit this Community
England - South West, United Kingdom
Member Since: September 30, 2002
entire network: 8,581 Posts
KitMaker Network: 963 Posts
Posted: Wednesday, May 02, 2007 - 01:14 AM UTC
I have finally been able to get some more work done on this. I made masks and painted on the main markings. They are not perfect but I am quite pleased with the results. Before applying paint I add a little more PVA glue, in a few selected places. You can see where the masking has pulled up the the PVA, where it overlapped the edges, when it was removed. You can also see where I have removed the PVA, in a couple of places, which of course removed the paint. This is what it is ment to do, I should have left it alone, but I wanted to see if it had worked. The final effect should be that in some places the paint is "weatherd down to the bare skin, in other places (were the Hinomaru and other markings are) the camo paint is showing through. There are a couple of small decals to apply. I need to give the uppersurfaces a toning down (which is why I should have left the PVA alone), then I will remove all the PVA glue, revealing the battered paint work. A couple of coats of Klear will then be hand brushed on before a wash is applied. The wash will tone down the bare metal areas and pull the whole thing together. A matt coat will finish it off. I then have to think about the Diorama


Mal
Holdfast
Staff MemberPresident
IPMS-UK KITMAKER BRANCH
#056
Visit this Community
England - South West, United Kingdom
Member Since: September 30, 2002
entire network: 8,581 Posts
KitMaker Network: 963 Posts
Posted: Saturday, September 22, 2007 - 07:14 PM UTC
I finally managed a little more with this (the SP is still on going) I sprayed on heavely diluted medium sea grey, randomly but only on the top areas, such as the upper wings and upper fuselage. It is built up gradually and heavier in places.
I then proceeded to remove the PVA glue, which, as you can see, reveals the silver paint applied as the under coat. Where it was used under the markings it reveals the underlying camo paint. The effect though is not quite what I was after as the white glue masking has left rounded portions to the peeling paint. To remady this I have started scraping away further paint, adjacent to where the PVA masking was. The scraped off areas, when done properly, look better than the PVA masked areas. I haven't finished removing the PVA masking, or scraping away paint but a combination of the 2 methods seems, at the moment, the way to go.


Mal
almonkey
Visit this Community
England - East Midlands, United Kingdom
Member Since: March 23, 2003
entire network: 2,124 Posts
KitMaker Network: 369 Posts
Posted: Saturday, September 22, 2007 - 08:02 PM UTC
thats certainly beginning to look beat up now! one thing though, going back to your aluminium pics one thing puzzled me-

whats this part for?
Holdfast
Staff MemberPresident
IPMS-UK KITMAKER BRANCH
#056
Visit this Community
England - South West, United Kingdom
Member Since: September 30, 2002
entire network: 8,581 Posts
KitMaker Network: 963 Posts
Posted: Saturday, September 22, 2007 - 08:49 PM UTC

Quoted Text

whats this part for?


It's part of the propeller spinner.

Mal
 _GOTOTOP