_GOTOBOTTOM
Scratchbuilders!: Armor/AFV
This is a group for armor scratchbuilding questions, topics and projects.
Hosted by Mike Kirchoff
Building a ferret scout car
druid_99
Visit this Community
Kuala Lumpur, Malaysia
Member Since: May 03, 2006
entire network: 47 Posts
KitMaker Network: 0 Posts
Posted: Tuesday, February 13, 2007 - 08:10 AM UTC
Hi all,

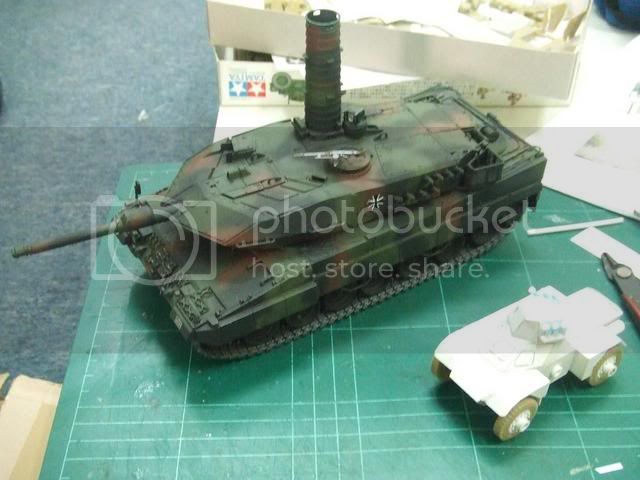
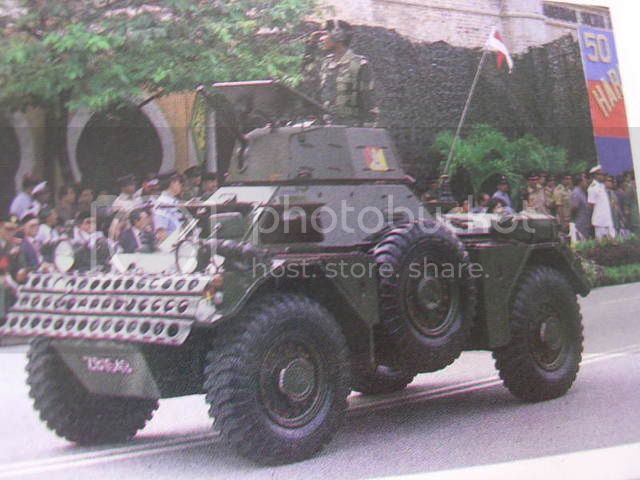
This is my first post (I think) which actually shows that I'm building something :-) . I am building a ferret scout car which is used by the Malaysian Armed Forces for the 50th Malaysian Independance Day group build which is organized in another forum.

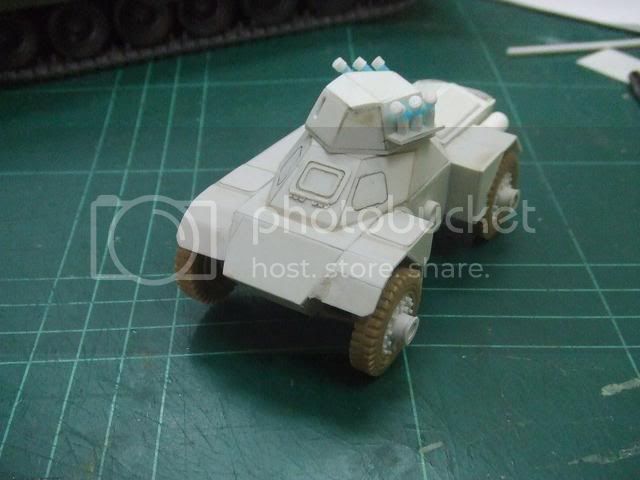
This is what I'm going to build...


The first step is getting a 1/35th Tamiya Daimler scout car but still a lot needs to be done in order to turn it into a ferret scout car. When the kit arrives from HLJ, upon checking there is a lot that needs to be done.

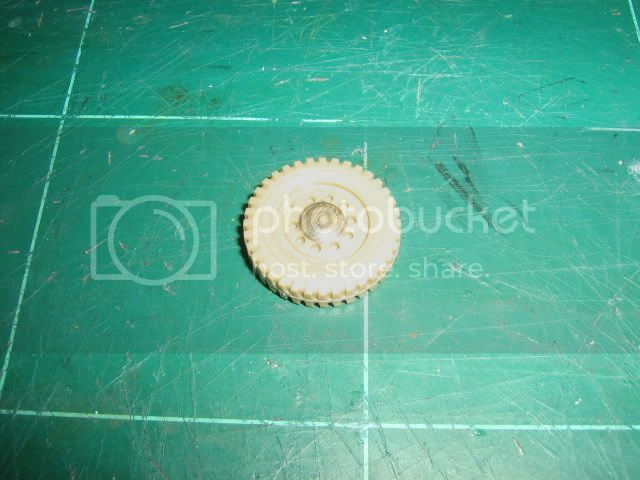
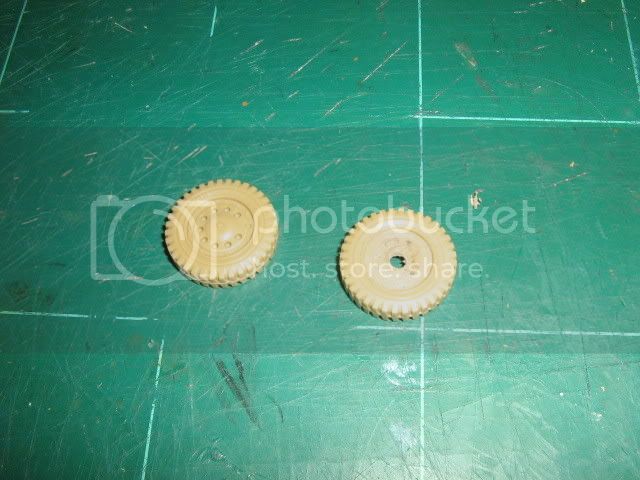
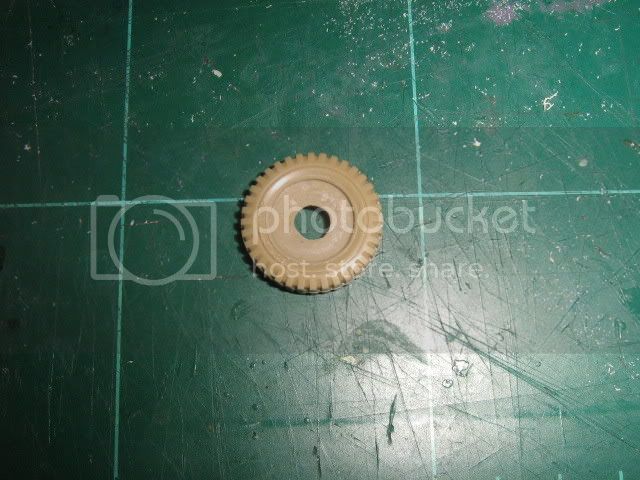
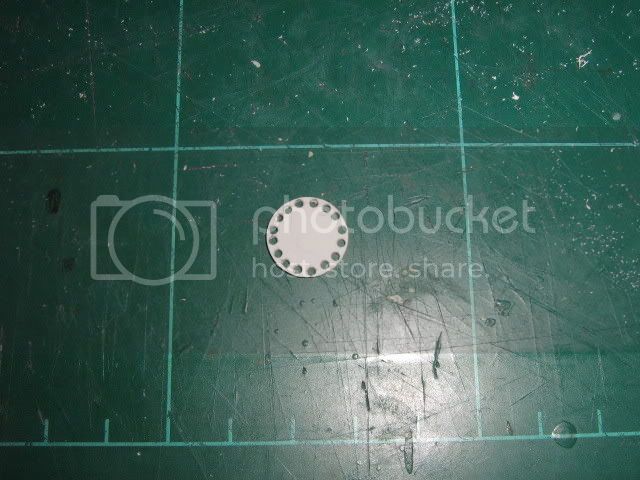
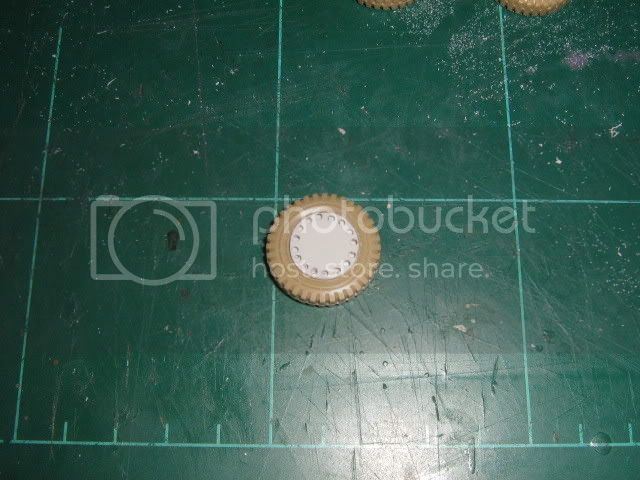
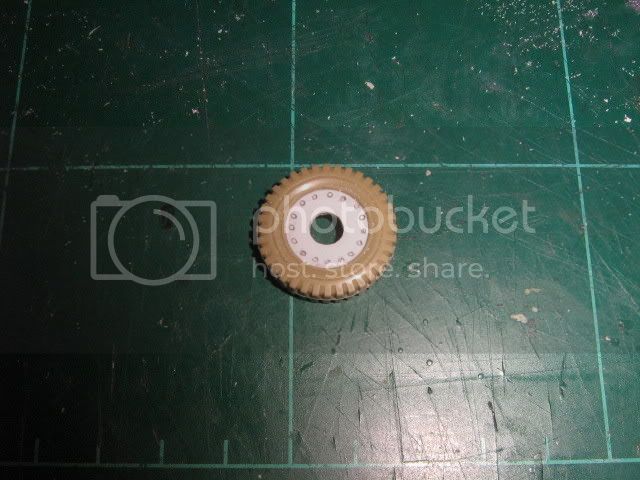
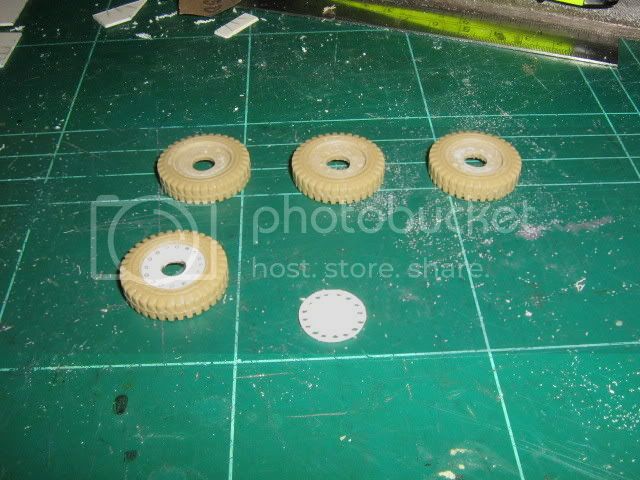
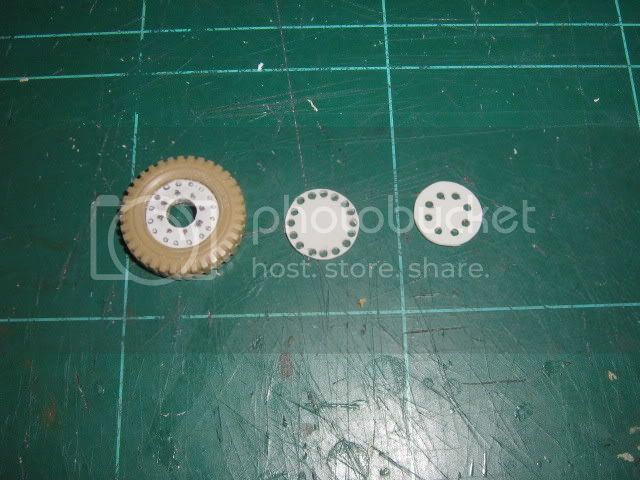
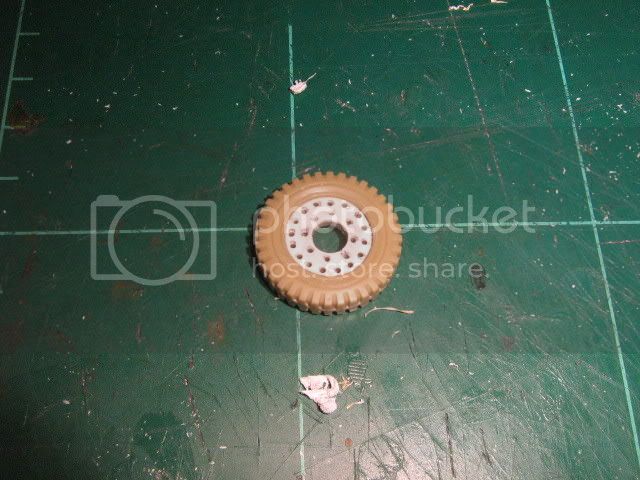
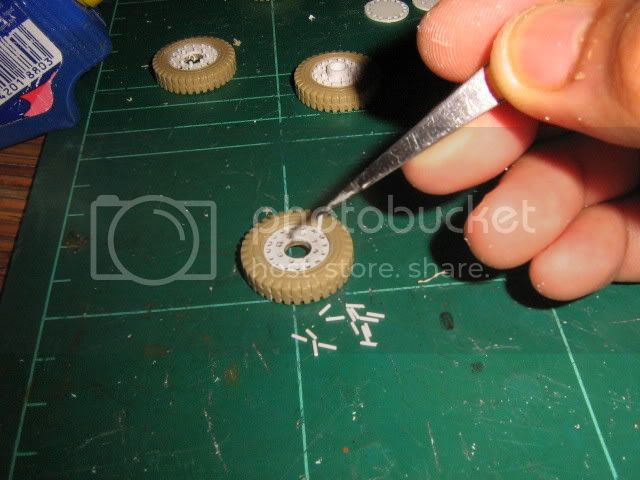
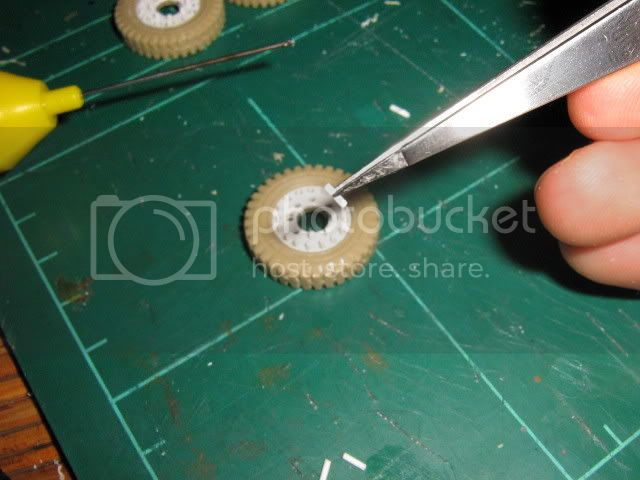
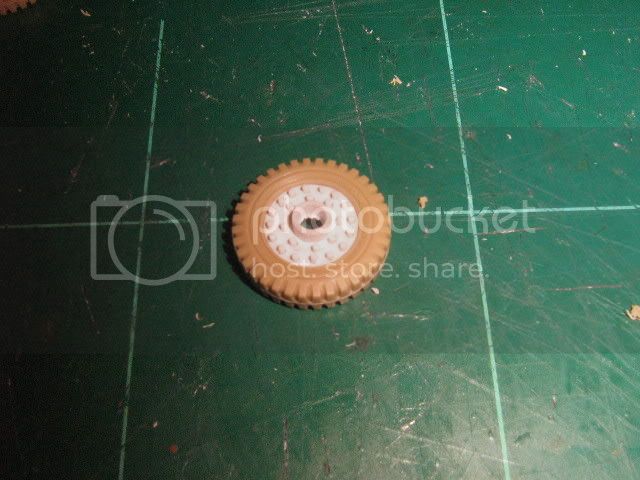
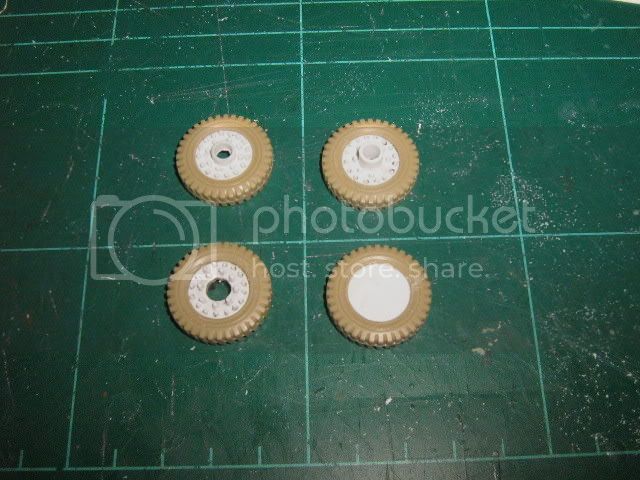
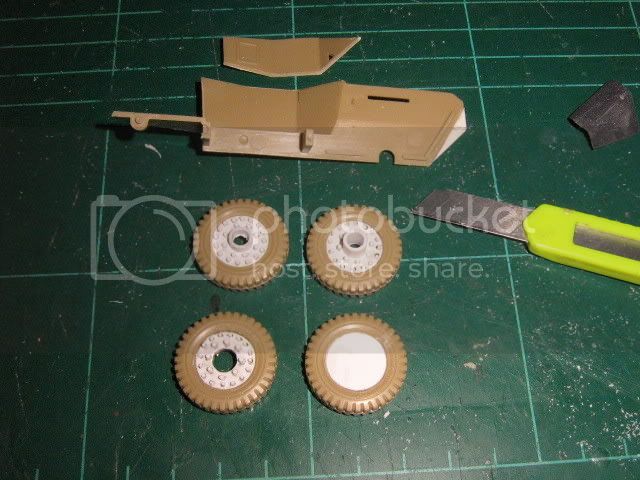
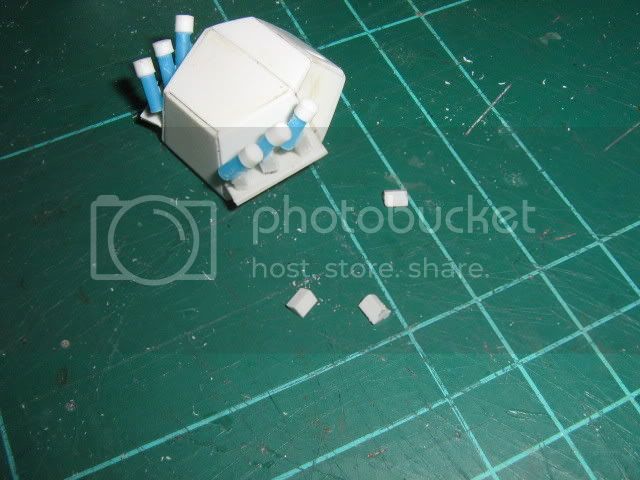
1) Tyres - eventhough the tyres are the right size, the rims are a bit different. The Ferret have, instead of holes on the Daimlers, are eight nuts on the inner side of the rim and the wheel hub will need to be added as well. This will be tackled first as I will need to make a cast copy out of the modified ones because the Daimler only has four wheels while the Ferret has a spare wheel on the side. I will modify all the wheels and cast a few copies of the wheel as back up.

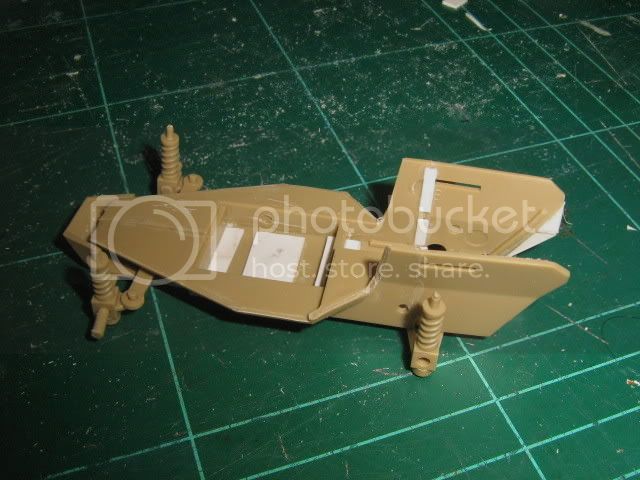
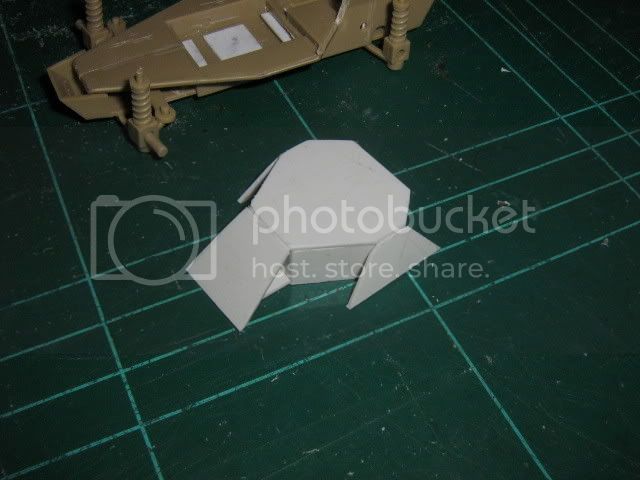
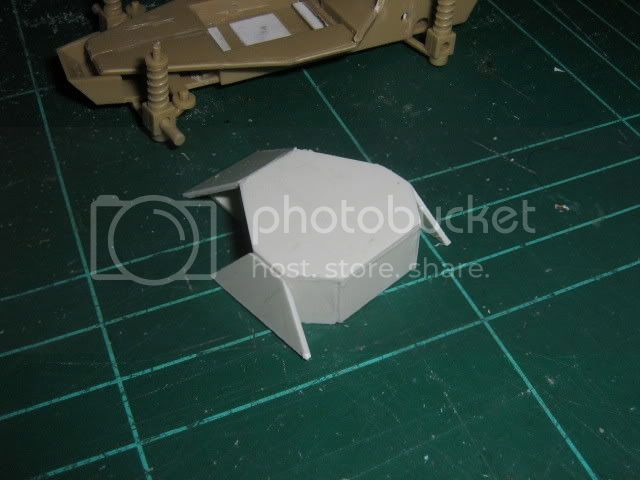
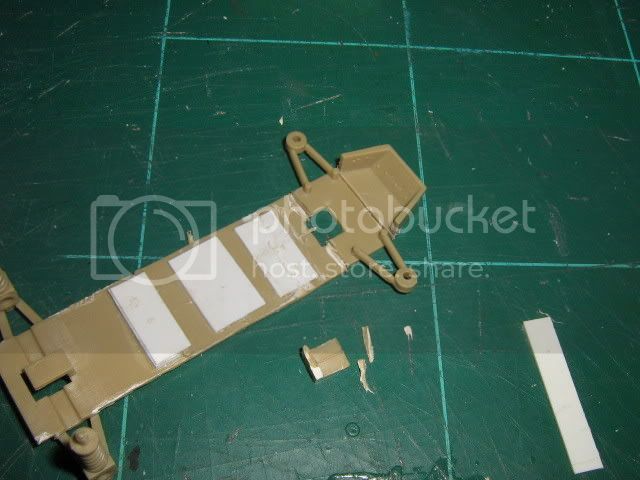
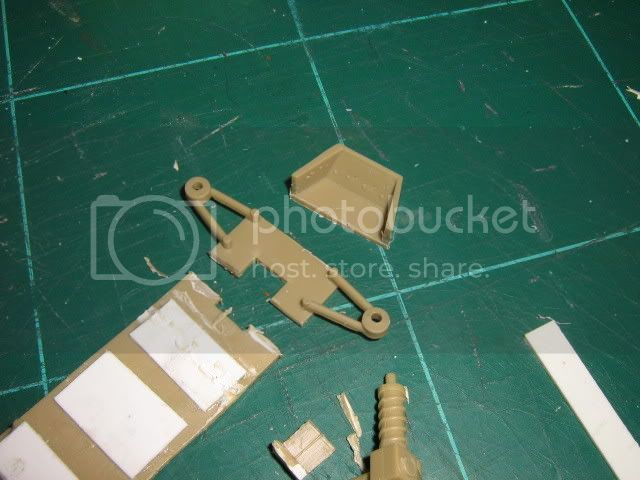
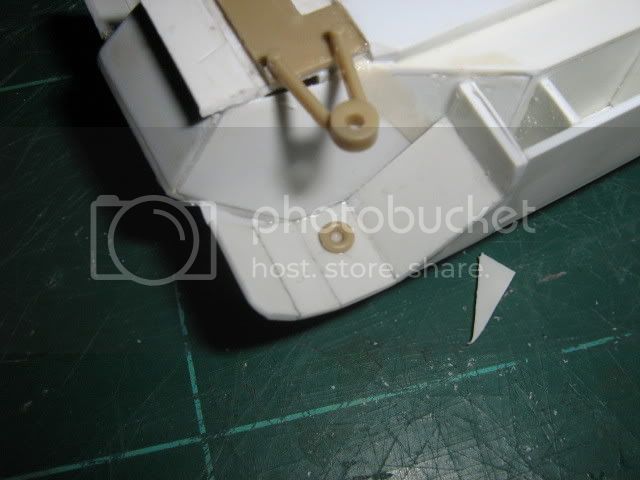
2) Wheelarch - The rear wheelarch does not need any modification done but the front will need to be rebuild. Luckily the wheelarch comes in separate parts thus making it easier for me to rebuild it.

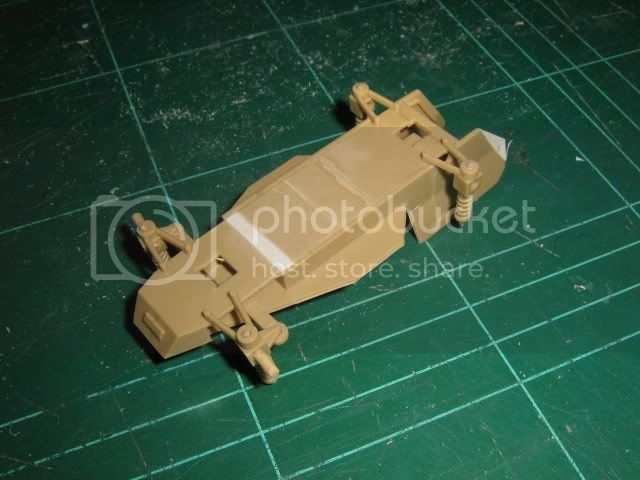
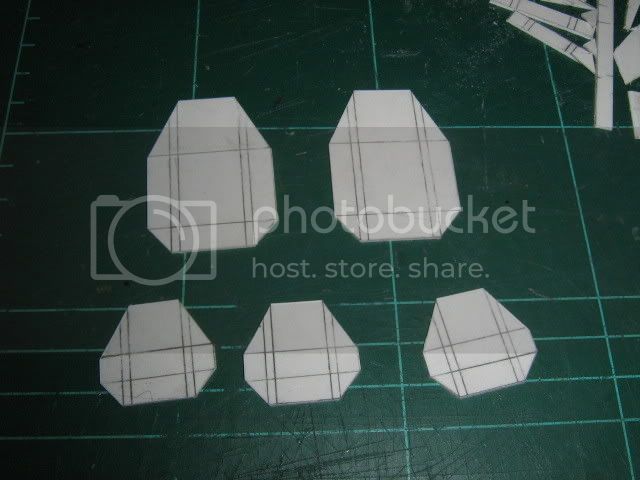
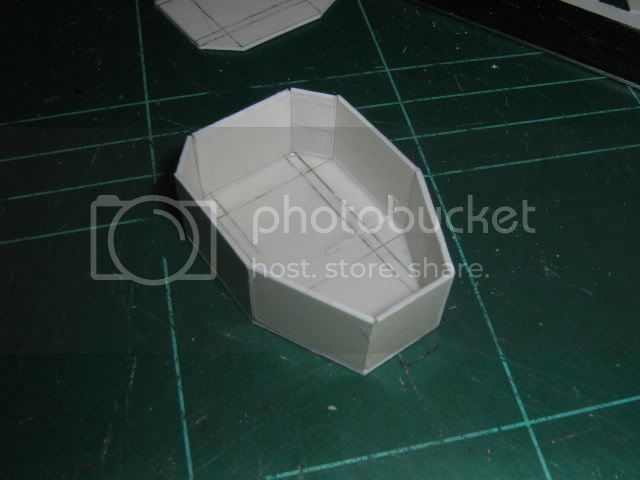
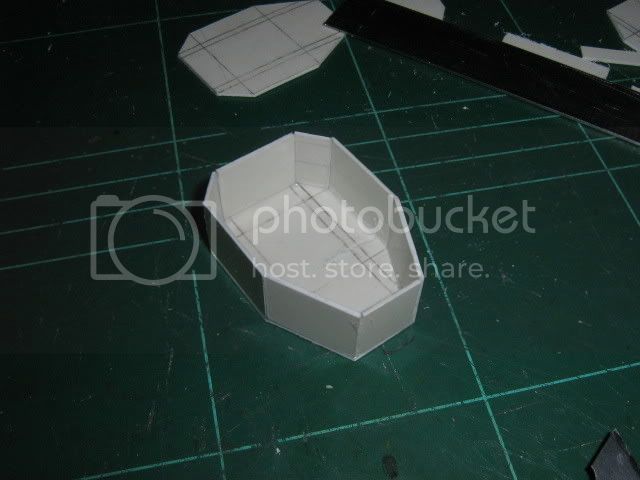
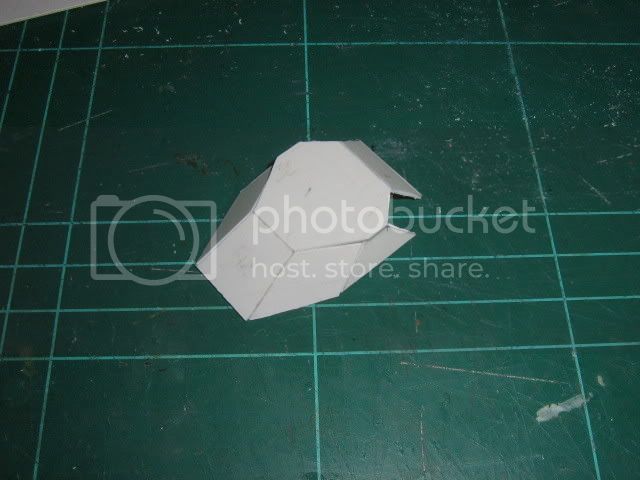
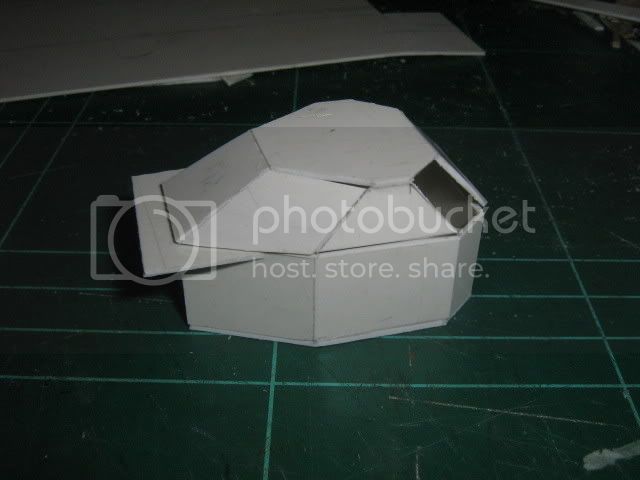
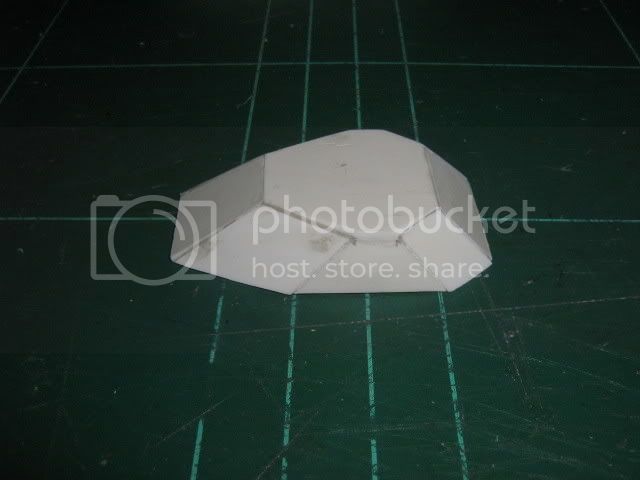
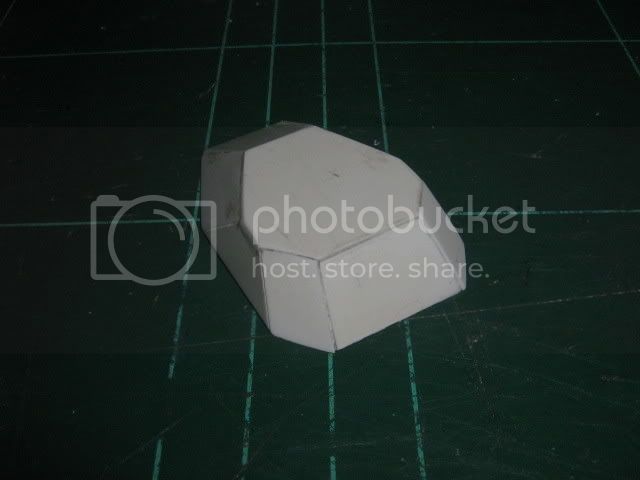
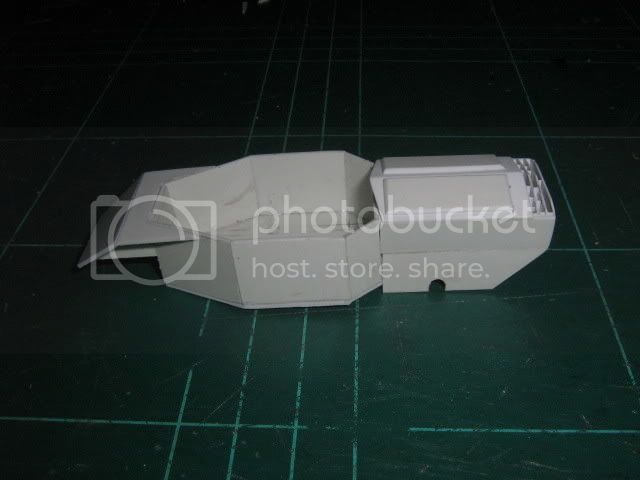
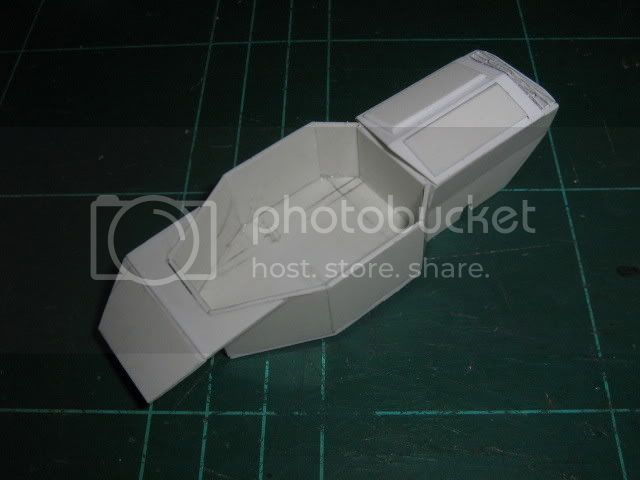
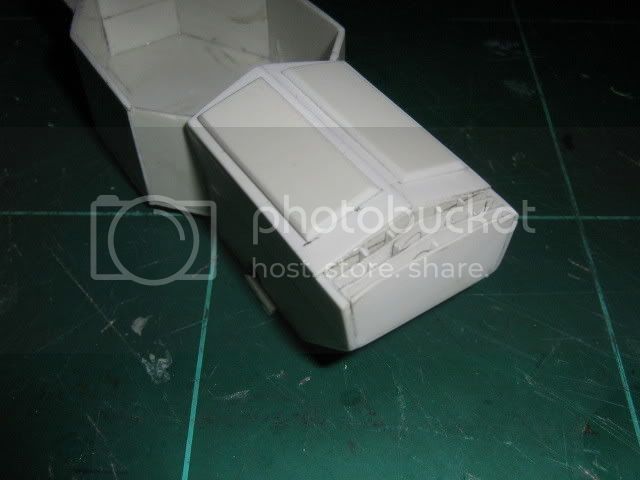
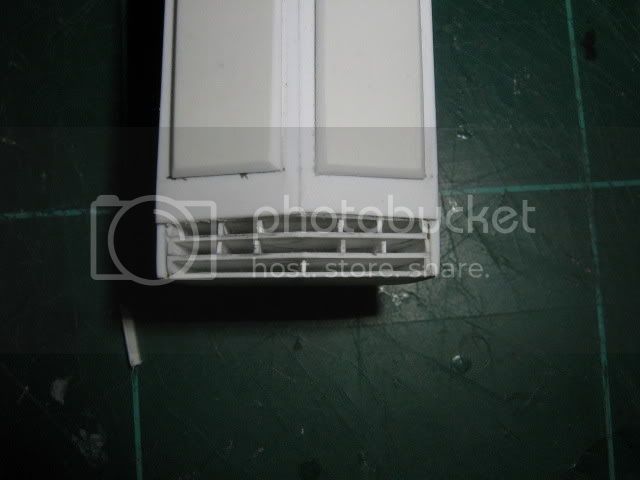
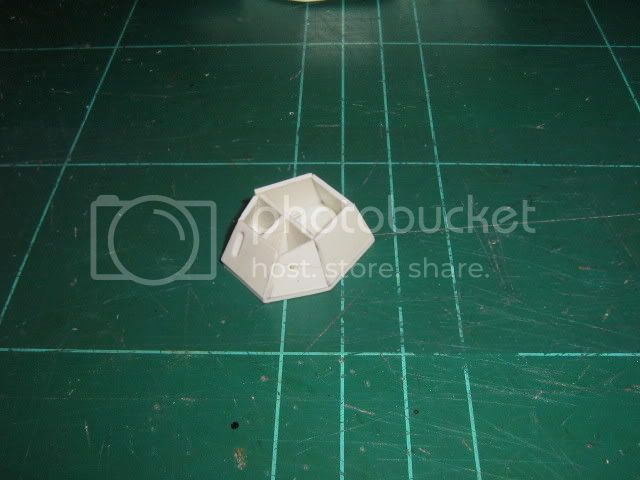
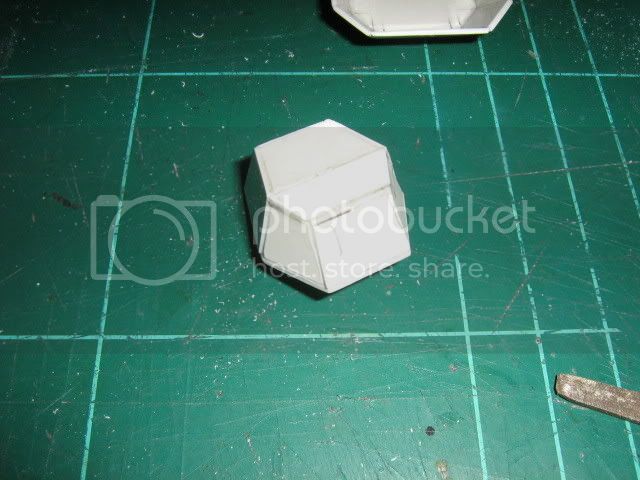
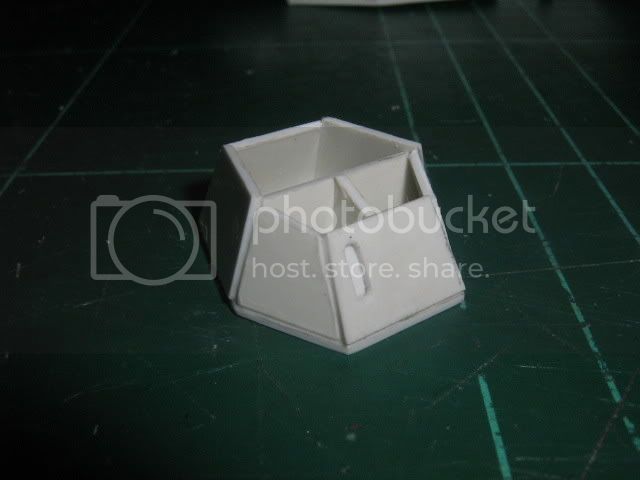
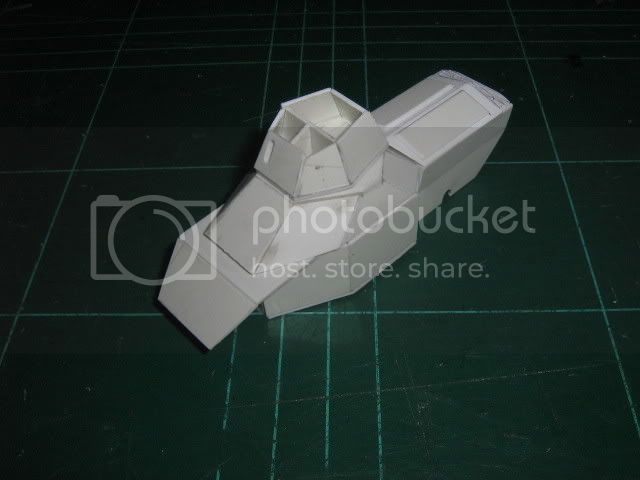
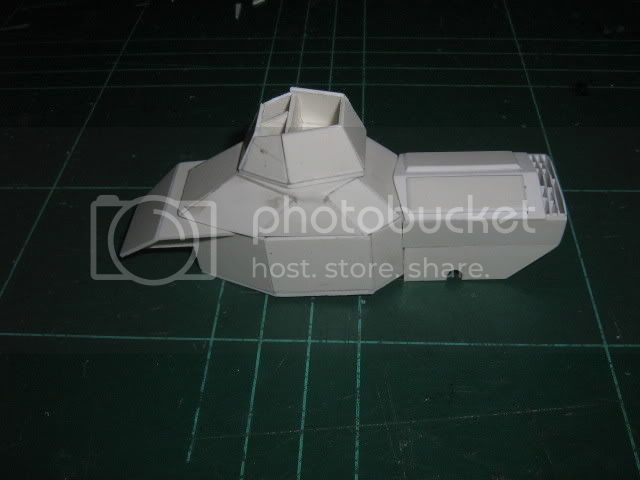
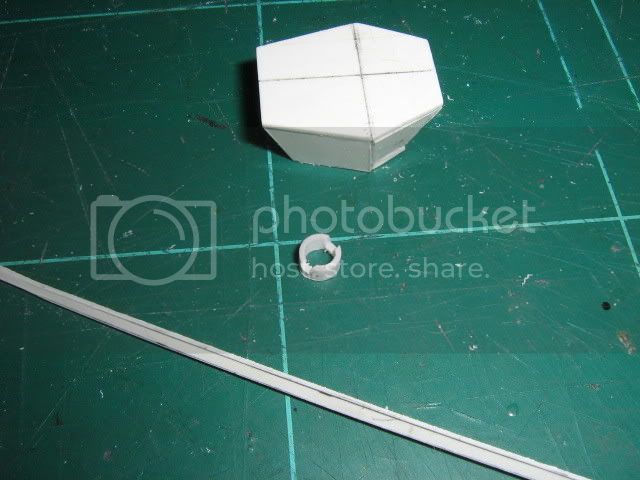
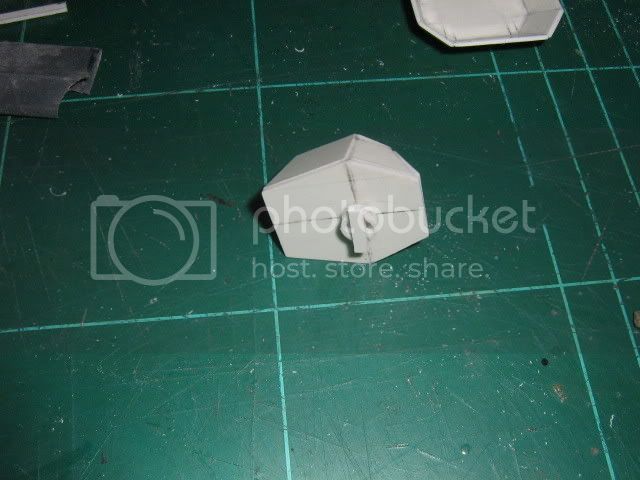
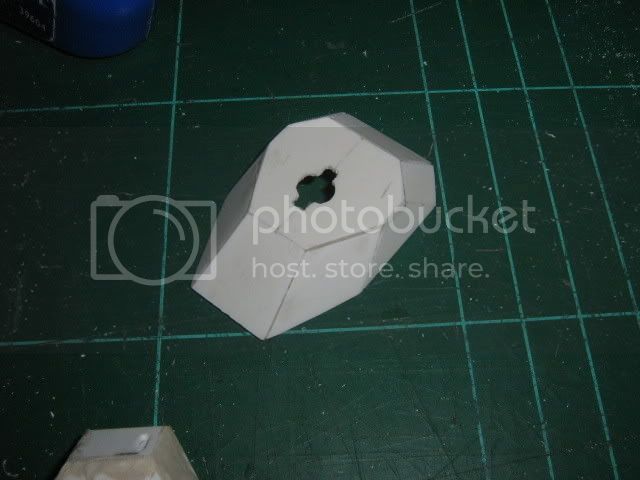
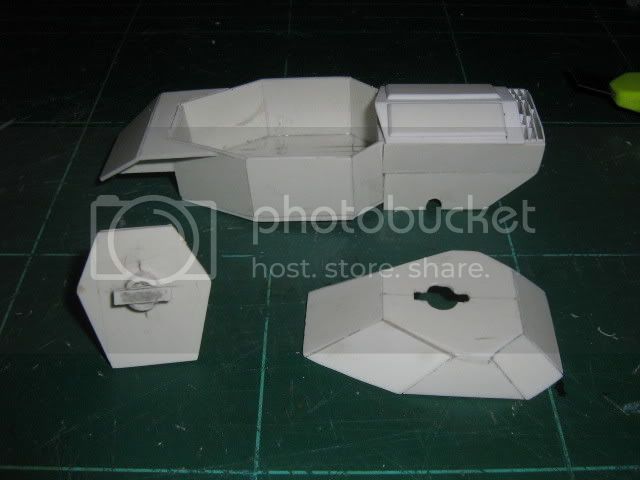
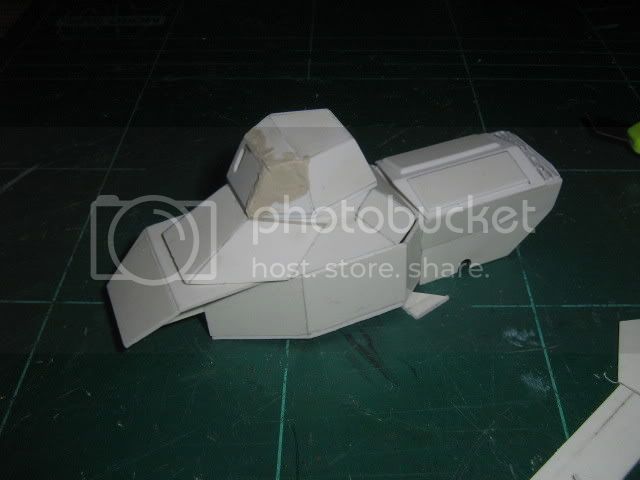
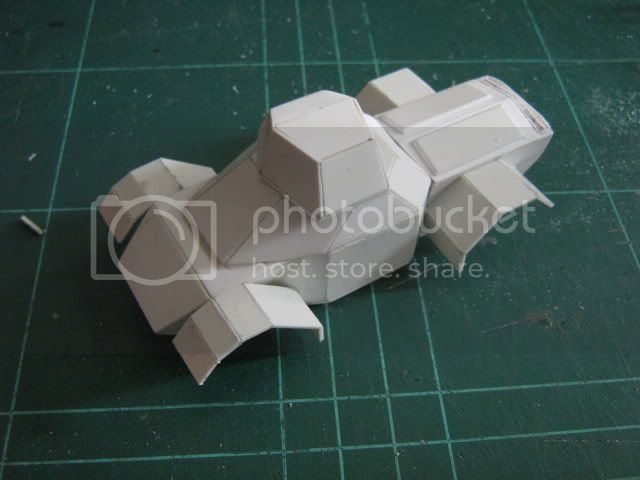
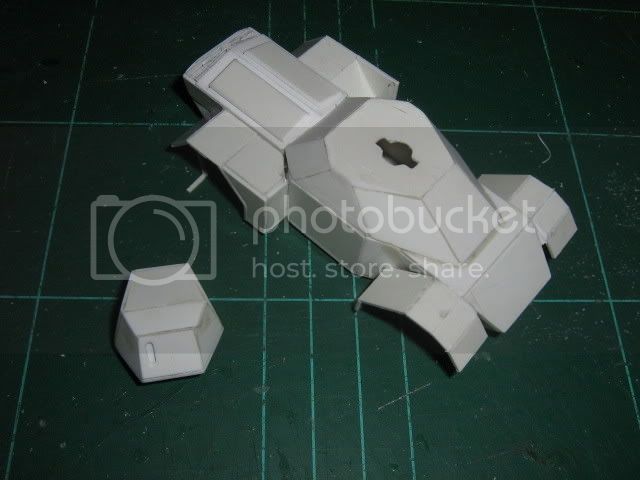
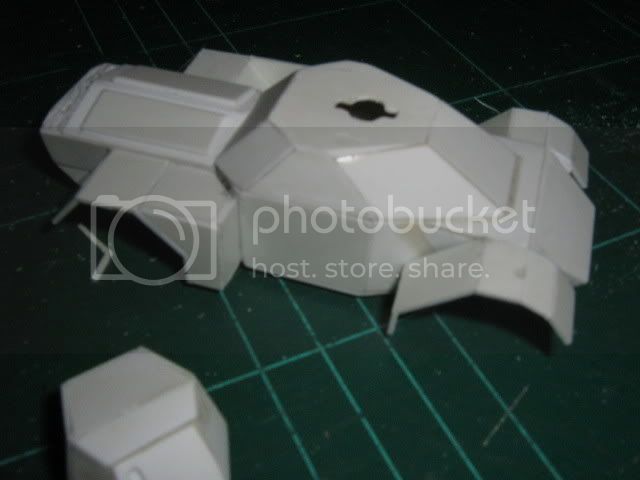
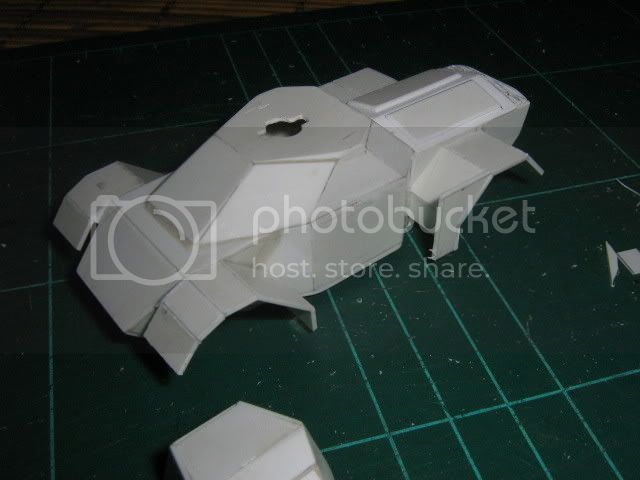
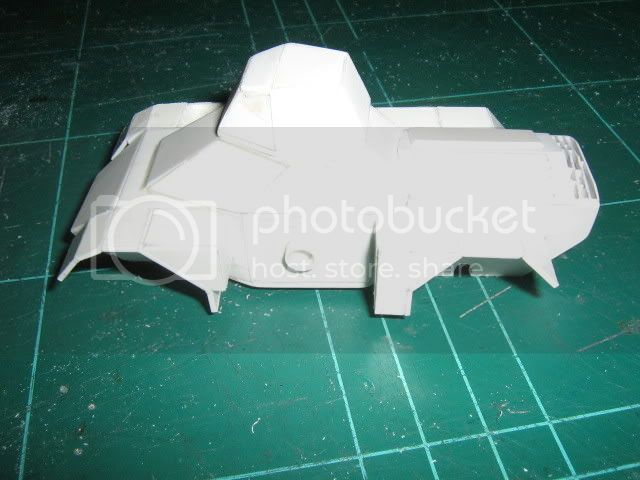
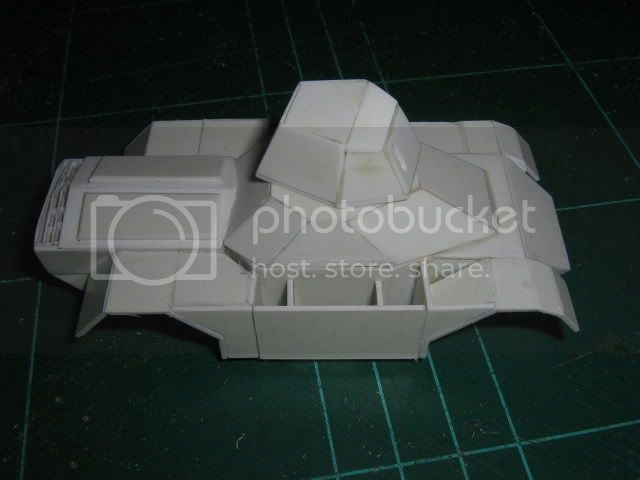
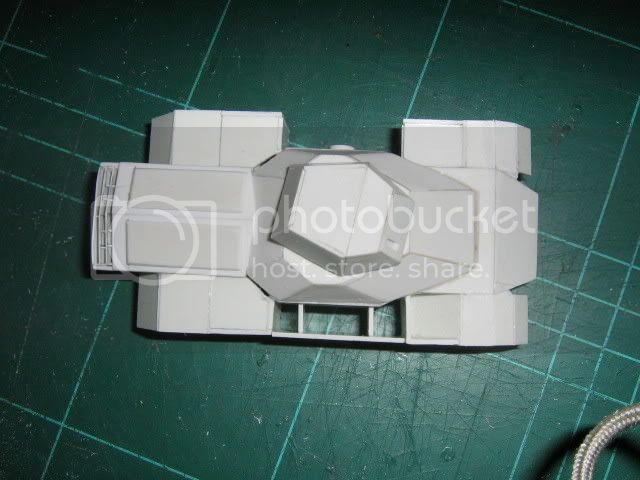
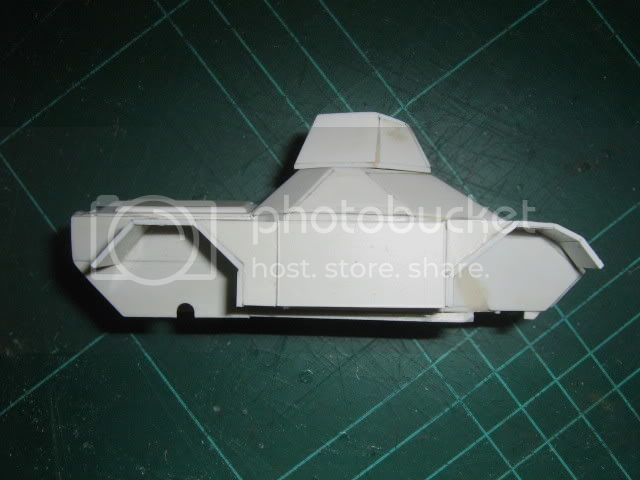
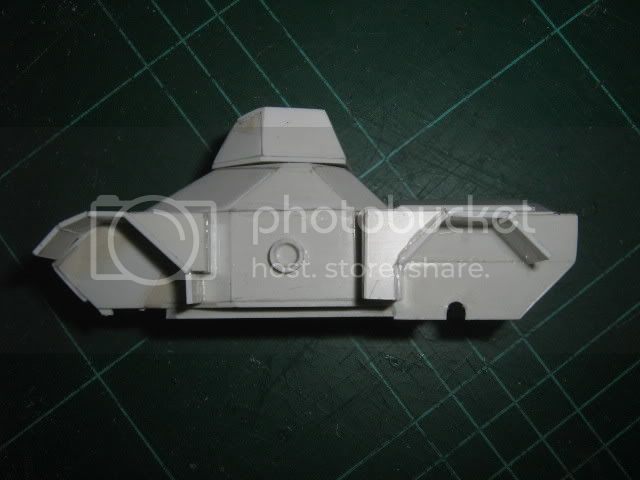
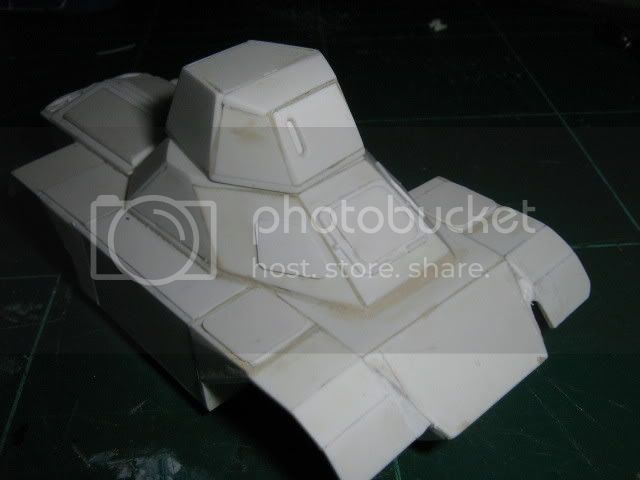
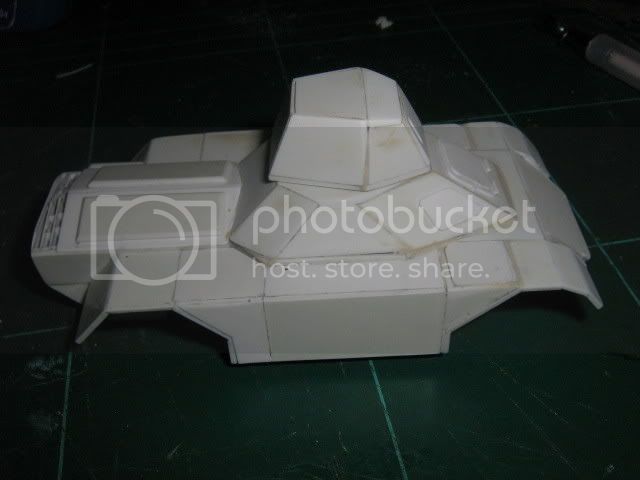
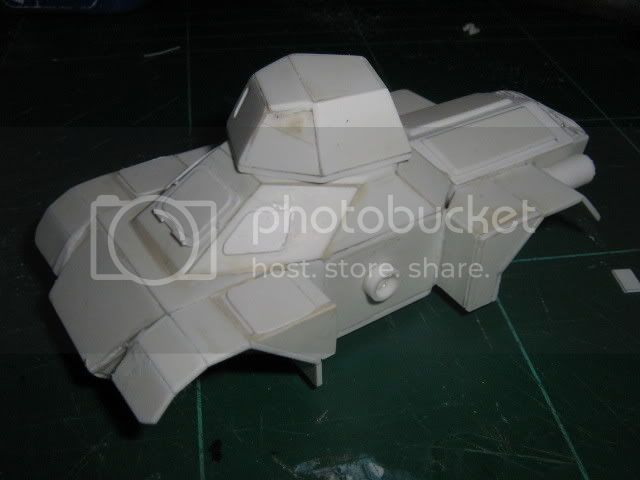
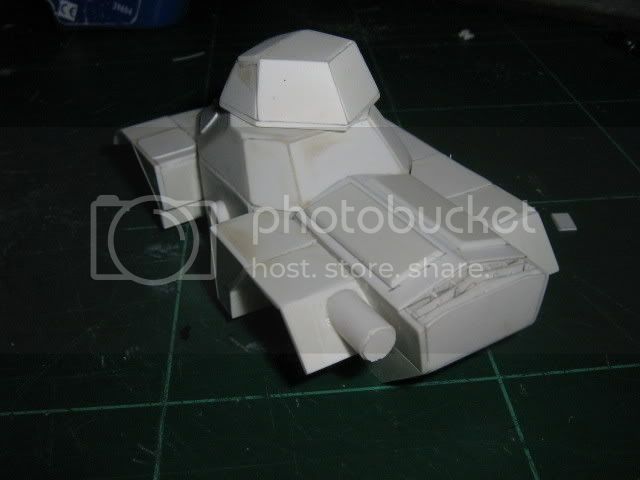
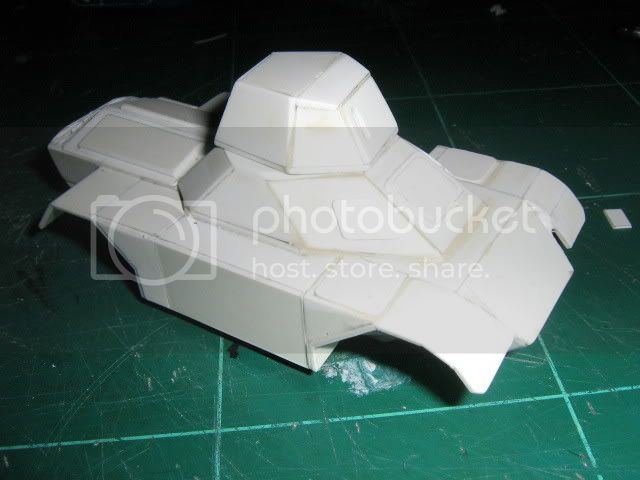
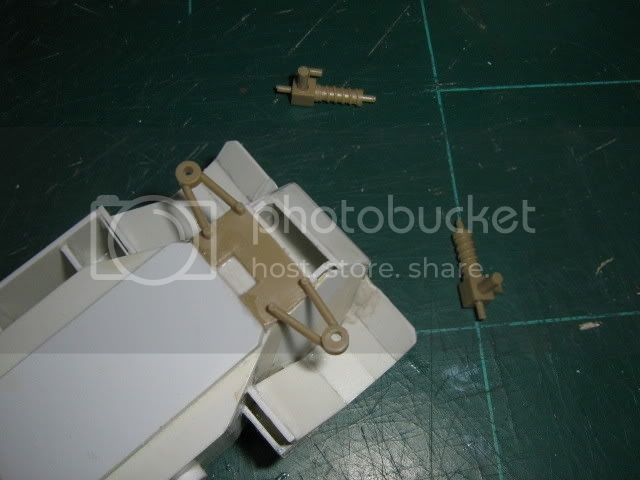
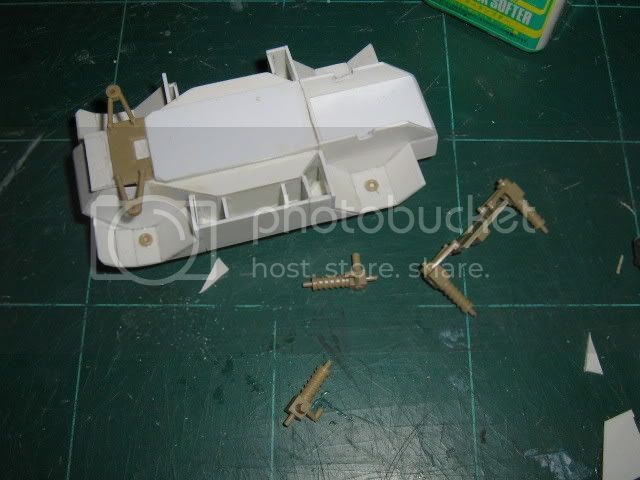
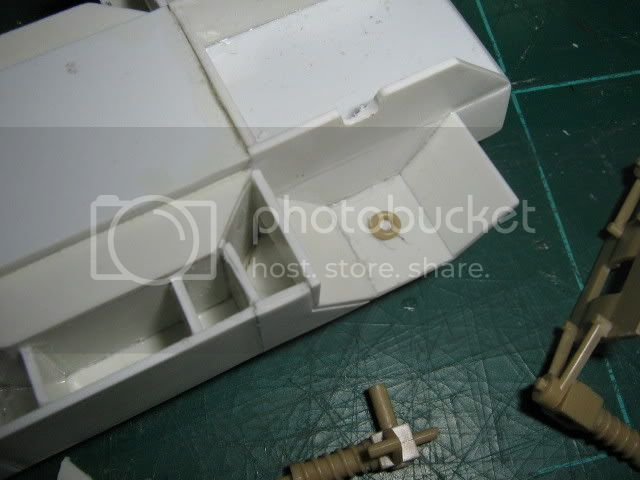
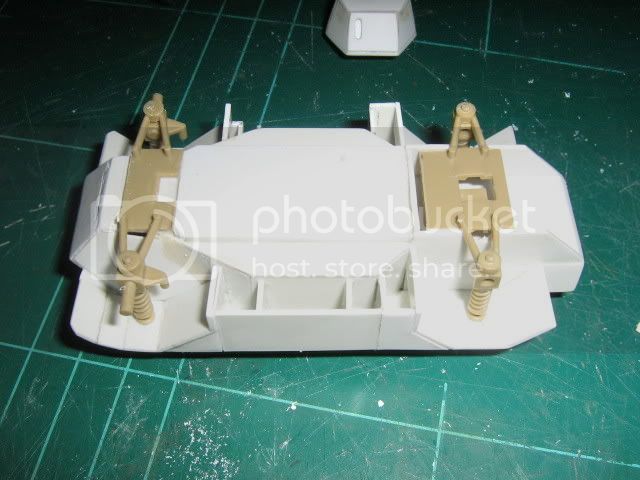
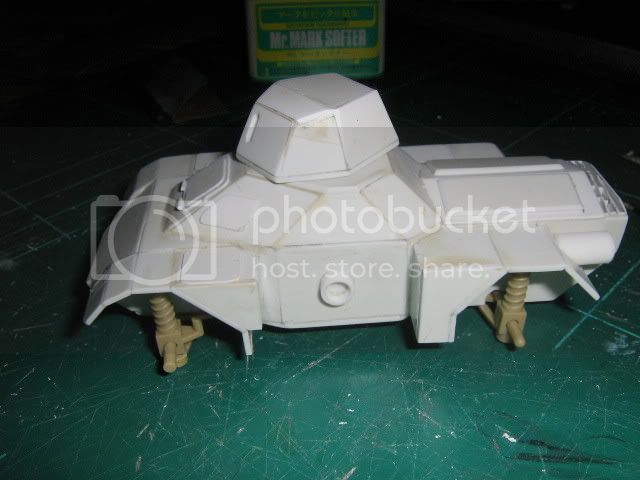
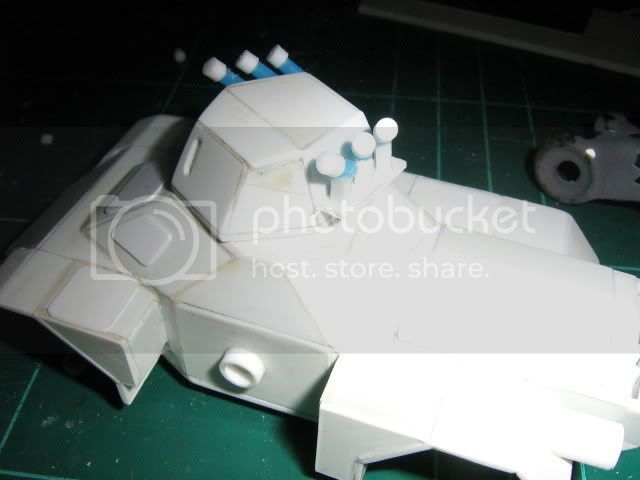
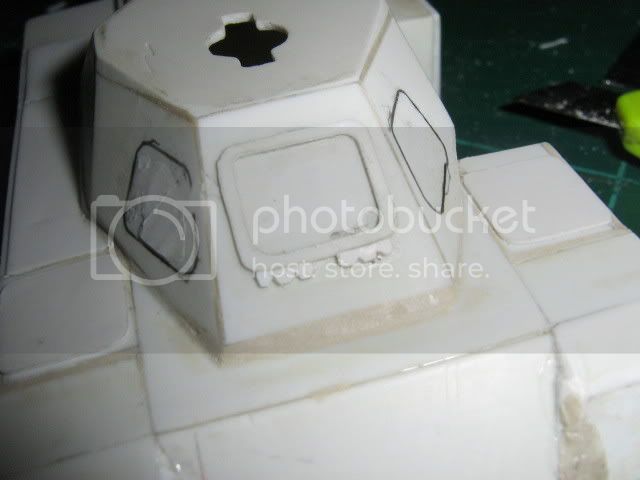
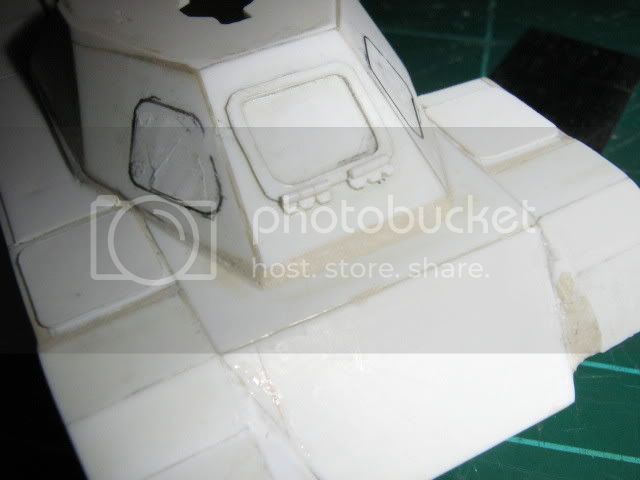
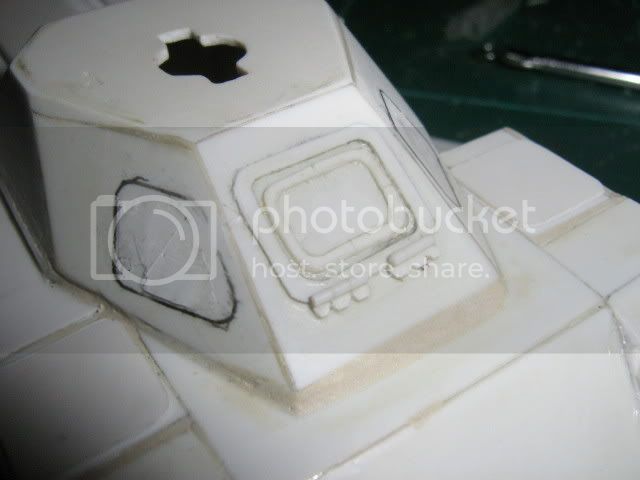
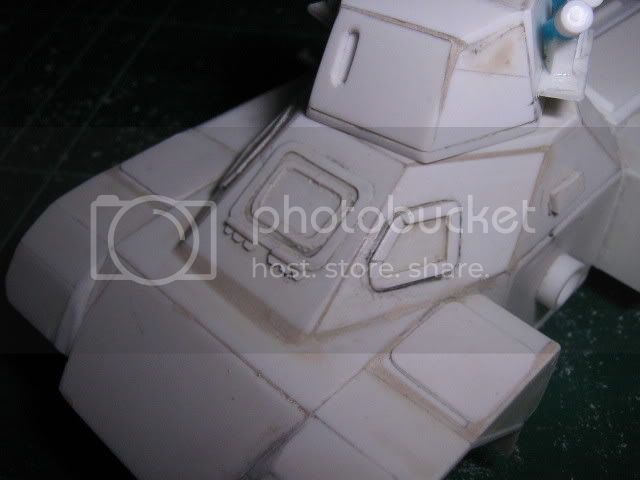
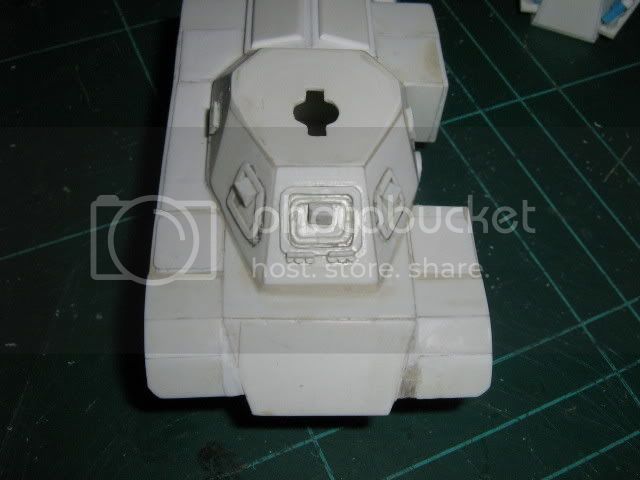
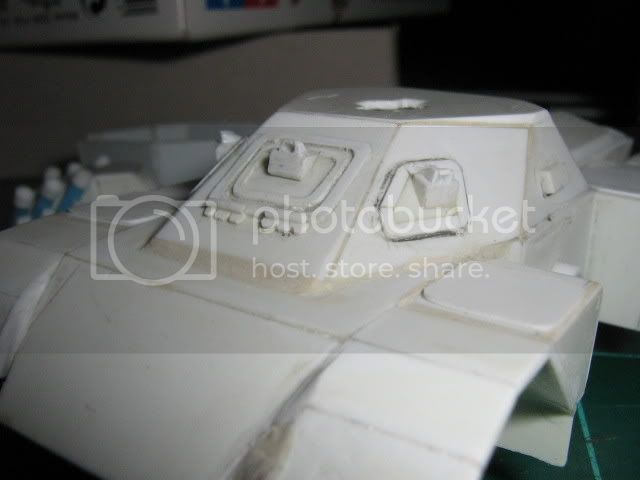
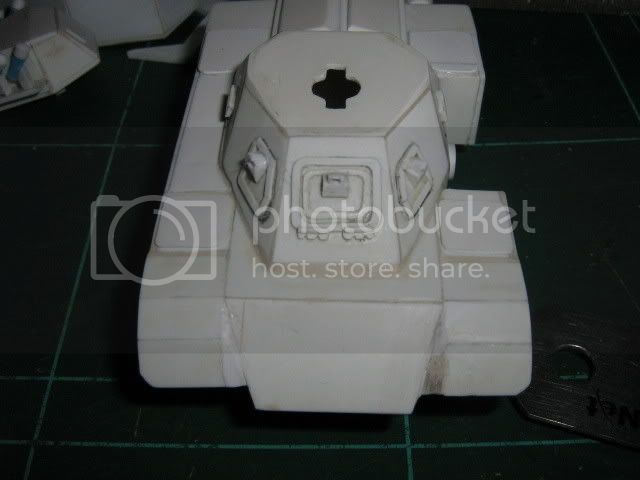
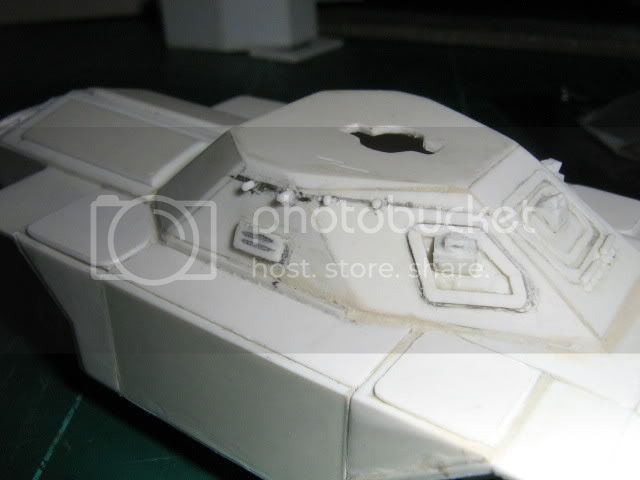
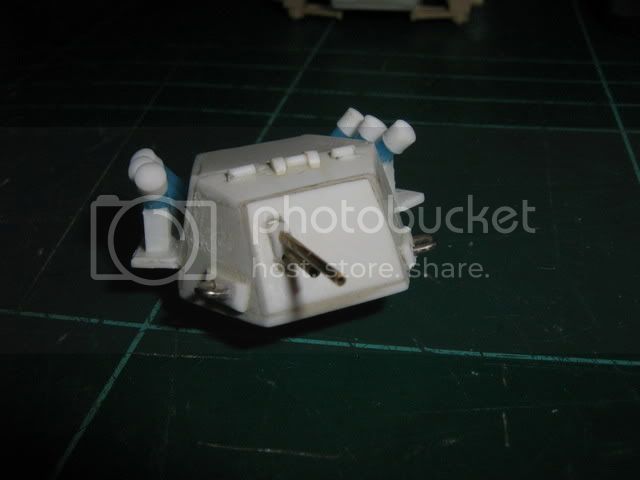
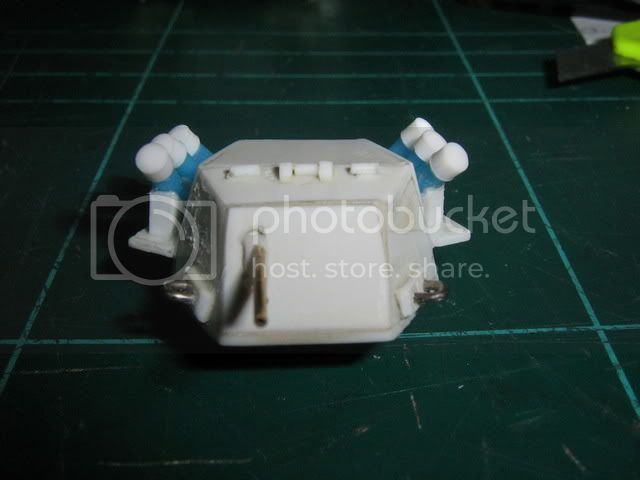
3) Main body - There are a few modifications that needs to be done in order to convert the Daimler into a Ferret. Upon inspection, the front will need to be extended, the upper body (the opening where the driver goes in/out) will need to be removed and rebuild, the engine cover will also need to be modified as well. The exhaust will need to be relocated as well.

The progress will be shown shortly.
druid_99
Visit this Community
Kuala Lumpur, Malaysia
Member Since: May 03, 2006
entire network: 47 Posts
KitMaker Network: 0 Posts
Posted: Tuesday, February 13, 2007 - 08:13 AM UTC
I'm tackling the tyre first for this build. The tyre diameter and size for the Daimler and Ferret is the same but from the reference I have, the Ferret has 16 lugnuts on the rim and eight near the wheel hub while the Daimler only has 15 lugnuts and the center is covered with hub caps (I think). So, off I go modifying the rims armed with a trusty Dremel, sandpaper, pencil and a few thick and thin plastic cards (0.25mm and 0.5mm).

First, the wheel hub is the same size with the hubcaps, so, what I do first is mark the areas that needs to be drilled by highlighting it with pencil.


Then I drill the holes needed for the hub to be put in place. the drilling is done carefully to make sure that the hole will fit the new hub perfectly. The pictures below shows the picture of the original wheel (left) and the wheels that has been drilled (right).


After that is done, using the trusty Dremel, I remove the hub caps and the lugnuts carefully to make sure that the surface is even. This is then sanded smooth before the next step.


Since all the lugnuts has been removed and needs to be relocated, instead of measuring each time to place the lugnuts (I will use small diameter plastic rods for this, I'm too lazy to stretch sprue :lol: ), I made a template to make it easy for me to locate each lugnuts at its place without much hassle. What I do is, I use the 0.5mm plastic sheet, measure and locate the place for the lugnuts to be at, cut it according to the diameter of the rim, and drill holes on the areas that will locate the lugnuts and.... tadaaa.... instant template for the lugnuts... :lol: Shown below is the template, the holes are a bit off but this will do lah. I will need to do another template for the middle set of lugnuts (the ones near the wheel hubs)


To use this template, what I so is I cut a 0.25mm plastic sheet the same size of the rim, glue the plastic sheet on the rim, then place the template on the rim like the picture below.


Then all I need to do now is to mark the location of the lugnuts using mechanical pencil and you have a mark on where to put the new lugnuts like the picture below.


All I need to do now is to make another template for the eight lugnuts the same way as I made the above and glue it all together. That is the progress for one wheel... I need to do this for another three before I cast it all for extra parts.

druid_99
Visit this Community
Kuala Lumpur, Malaysia
Member Since: May 03, 2006
entire network: 47 Posts
KitMaker Network: 0 Posts
Posted: Tuesday, February 13, 2007 - 08:23 AM UTC
I have made another template for the lugnuts that locates the eight inner lugnuts on the rim. The process is the same with the previous one that I've made. The picture below shows both the templates for the outer and inner lugnuts. Beside the templates are the rims with the location of the lugnuts marked.


After the location is marked, I drill all the holes on the rim where in this holes I will place the plastic rod that will replicate the lugnuts. Shown in the picture below are the rim with all the holes drilled out, all 24 of them (and I have to do this four times!)


Now is where the lugnuts is installed. First I cut the plastic rod about roughly 3mm long each. I purposely cut it longer as I can trim it later. The first plastic rod is for the outer lugnuts, all 16 of them.


Using tweezers, I carefully apply some glue on the plastic rod and individually insert them on the holes one after another.


After all the 16 plastic rods is installed, then another eight plastic rods (a bit bigger diameter) is cut (also roughly 3mm) to replicate the inner lugnuts. The picture below shows the size of the plastic rod compared to the tweezer.


After all the plastic rods has been installed, I then cut another plastic tube to replicate the wheel hubs and installed it on the rim. The plastic tube will then be filled before the casting process. Shown below is the completed wheel.


Three of the tyres is done and only one more left before I can cast it in resin. The reason why I painstakingly drill each individual holes and using plastic rods to replicate the lugnuts instead of just cutting them in small pieces and just stick it to the surface of the rims because I want to make copies of it. If there is not enough releasing agent on the parts while making the mold using RTV, it will tend to pull small details off the parts and this is what I want to prevent. Of course this rarely happens but better be safe than sorry right? The picture below shows all the three tyres that is completed together with the uncompleted ones.


I have also started working on the body of the scout car. As you can see, I have extended the rear side of the car and cut off the top portion of the driver compartment as well as the front side of the car.
druid_99
Visit this Community
Kuala Lumpur, Malaysia
Member Since: May 03, 2006
entire network: 47 Posts
KitMaker Network: 0 Posts
Posted: Tuesday, February 13, 2007 - 08:32 AM UTC
The picture below shows the actual body from the Tamiya model kit that has been chopped and glued back. If you can see the white plastic at the engine compartment of the model, that is where I have cut off 3mm of plastic in order to shorten it as the Ferret. The rear part is also added plastic as the Daimler has a bit different rear shape than the Ferret.

The second picture shows the added length on the chasis of the Daimler. I use a 0.5mm plastic sheet and cut to 3mm wide and add it to the chasis. Now the chasis is 3mm longer than the Daimler. Also note that I have fully remove all the sides on the Daimler as it is wider than the Ferret. I have to rebuild this as well.


This is the progress where I scratchbuild the body. The picture below shows the first try for the top part of the scout car. I have build a structure on the inside of the part and only then I put the side walls.

Front view

Rear view


After much thinking and analysing, I've decided to rebuild the top part again and this time without the inner structure. This way, I have the option to build it with full interior or not (I decided not to build it with full interior as I wanted this to be completed as soon as possible). First, I measure the length and shape as well as the measurement for both the top and bottom part of the Ferret's main body. Then I cut it to make it as a base where I will build it from bottom-up. The picture below shows the part (I made extra as back-up :lol: ). I only need one of each shape.


First I tackle the bottom part. I have the lower part ready and what I do is I measure the height of the sides (wall) of the car and cut pieces of plastic according to the length. When all that is done, I just glued the parts to get the shape. Sorry I don't have the step-by-step picture (I think you guys can figure this out as it does not have any complex shapes). The picture below shows the finished lower body (just the basic shape).


When that is complete, I proceed with the top part of the body. I use the part that is cut previously (the smaller shape) and again using plastics and some not too complex calculations, I stick the plastic plates that is cut according to shape to get the shape shown below. I use a very simple mathematical calculations to get the slant and the shape.

Top view


Bottom view (Inside view)


When I have got the basic shape that I wanted, I continue building the body bit by bit from plastic. I just manage to build a segment of the front part (the lip on the lower body). Shown below are the lower part of the body with partial front area and below it is the test fitting on both the parts and an overall look on how the lower body will be connected to the upper body.


druid_99
Visit this Community
Kuala Lumpur, Malaysia
Member Since: May 03, 2006
entire network: 47 Posts
KitMaker Network: 0 Posts
Posted: Tuesday, February 13, 2007 - 08:42 AM UTC
I decided to scratchbuild the whole armoured car (except for the tyres and rims) for the Ferret Scout Car.

I have finished the upper part of the body. Previously there are two missing parts and all I have to do is just cut a plastic sheet to shape and glue it all together. Below are the pictures of the finished parts.


The next picture is the partially completed body of the ferret. I measure and cut the plastic sheets and made a frame out of it to get the shape of the engine compartment. When I get the shape, then I cut some plastic plates to reinforce the engine compartment.


As for the rear vent, I cut some 0.4mm plastic sheets according to the shape and get some plastic strips to act as a guide as well as the vent structure and glue it all together.


Close up of the vent.


After all that is done, I proceed with the turret area which is placed on top of the ferret. In order to do this, again I cut a template as a guide for the shape and glue some plastic sheets for the sides. As for the front, using Hasegawa's template, I scribe according to the size and rounded it up using needle file before smoothing it with sandpaper. Shown below is the turret. The opening has been covered actually.


Close up where you can see where the turret will be located.


Test fitting the parts.


I actually wanted the turret to be movable rather than static so I decided to make a simple mechanism so that it is easily fitted and turnable. This is how I do it. First, I draw the centre line on the turrret part, then, I cut a plastic tube about 0.3cm length, when that is done, I cut some indentation on it like the picture below.


After that is done, I cut some plastic strips and glue it together with the plastic tube like the picture below.


When that is done, I carefully alligned the parts and glue it onto the turret like the picture below and let the glue hardened.


The next part is the place where the turret will be attached to. Using a template, I cut the hole onto the part and cut off according to the parts fitted on the turret like the picture shown below and the modification is complete.


Shown below is the parts that is completed to be test fitted. The body, the top part and the turret. The turret has been puttied to fill in the gaps.


And the test fitting.... perfect fit... :lol:


That's all the progress I've done currently, This project is still ongoing and I'll try to finish the build before August (I think I can finish it earlier).

Comments and suggestions appreciated. Thank you.
Murdo
Visit this Community
Scotland, United Kingdom
Member Since: May 25, 2005
entire network: 2,218 Posts
KitMaker Network: 760 Posts
Posted: Wednesday, February 14, 2007 - 01:38 AM UTC
Fascinating build mate. That looks like a lot of very nice work.
NebLWeffah
Visit this Community
Alberta, Canada
Member Since: October 13, 2004
entire network: 1,683 Posts
KitMaker Network: 284 Posts
Posted: Wednesday, February 14, 2007 - 05:14 AM UTC
Great work so far, keep on going....!!


druid_99
Visit this Community
Kuala Lumpur, Malaysia
Member Since: May 03, 2006
entire network: 47 Posts
KitMaker Network: 0 Posts
Posted: Tuesday, February 20, 2007 - 11:32 AM UTC
A friend of mine passed me this two guns on Monday that can be used on the ferret. I'll be using the FN Mag gun on the left for this build.


On to the progress of the ferret body. I have added front and rear fender on the body. This is build with a few pieces of plastic plates measured and cut according to size and glued together using Revell Contacta. I build it separately and when the glue has set, I glued it onto the body. This is what it looks like. It's actually my second try in building the fender for the ferret.


When the glue is set, I then starts to build what I think is the parts box (correct me if I'm wrong). It is located on both sides of the rear and front fender. Again, the plastic plates is measured and cut according to shape and glued in place. I decided to start building first on the rear. Shown in this picture is the completed box on the right side. The left side is still incomplete.


Below are the close-up of the part.


This picture shows the left side that is being build. I have placed the plastic plates on the rear fender that will be turned into the "box".


I build all the parts on all the fenders using the same technique. Shown below is the completed front and rear parts box (again, correct me if I'm wrong).


Coming up next.... more progress builds...
druid_99
Visit this Community
Kuala Lumpur, Malaysia
Member Since: May 03, 2006
entire network: 47 Posts
KitMaker Network: 0 Posts
Posted: Tuesday, February 20, 2007 - 11:38 AM UTC
Another progress. On this progress, I'm building the bigger box that is located on the right side of the ferret. This is also build using the usual 0.5mm plastic plates. I cut some strips to act as a support beam as a guide to place the plastic plate. The plastic plate is then glued in place.


View from the top.


As that is done, I have also added a plastic tube to act as a place where the spare tyre will be located. There is actually an escape hatch there but I decided not to go into detail on that, after all, it will be hidden by the spare tyre. Shown here are the right and left side of the ferret.

Right side.

Left side.


After that is done, the box will need to be covered. Again, measure and cut the plastic plates and glue it on top. The support beam will also act as a guidance to place the cover. I have also added some details on the body like the front and side hatch. This will be detailed later.


Using some plastic tube, I also created the exhaust for this armoured car. The plastic tube is cut into the length and shape desired and glued onto the rear fender, then with a template, I cut a 0.4mm plastic sheet for the exhaust cover. This will also be detailed later (it hase 3 exhaust holes on it).


The only problem now is how to create the exhaust cover as it is thin and at an angle. There are also a grill on the exhaust cover. I'm thinking of using alluminium cans for the shape and a friend suggests using wire mesh for the grills (I'll be using that idea too).

Using a 0.25mm plastic sheet and the Hasegawa Tritool template, I cut the plastic for the extra plating on the fender box.


Next.... The suspension...
druid_99
Visit this Community
Kuala Lumpur, Malaysia
Member Since: May 03, 2006
entire network: 47 Posts
KitMaker Network: 0 Posts
Posted: Tuesday, February 20, 2007 - 11:44 AM UTC
As my previous post stated, now is the time to build the suspension.

I'm using the suspension set from the Daimler kit as I'm too lazy to scratchbuild one (plus I'm trying to finish this as soon as possible). This is how I do it.

First I take the suspension and cut it off like so.


When the part is cut off, then I clean it up before test fitting it in place. When the fitting looks good, I glue the suspension in place.


Luckily in the Daimler parts, there are some sort of washer that I can use for the suspension guide and that's what I use it for. The picture below shows the guides installed and the rear suspension is waiting to be installed.


Close up pictures on the suspension guide.


When the guides has dried, then I place the rear suspension on place. This is just a dry fitting stage. I still have to add the plating on the rear and lower body.


The installed suspension.


That's all for now... After this.... It's detailing time
drumthumper
Visit this Community
Kansas, United States
Member Since: December 22, 2004
entire network: 392 Posts
KitMaker Network: 159 Posts
Posted: Tuesday, February 20, 2007 - 04:03 PM UTC
Imran,
Really awesome build you have there! I've been following it over the last week and find it not only inspiring but I really enjoy the way you have documented virtually each step. That's scratchbuilding!
Also, I like the way you transitioned from using the modified kit body to constructing your own. At what point did you decide this and why ...?

Keep up the nice work,
Mike
druid_99
Visit this Community
Kuala Lumpur, Malaysia
Member Since: May 03, 2006
entire network: 47 Posts
KitMaker Network: 0 Posts
Posted: Wednesday, February 21, 2007 - 05:09 AM UTC

Quoted Text

Imran,
Really awesome build you have there! I've been following it over the last week and find it not only inspiring but I really enjoy the way you have documented virtually each step. That's scratchbuilding!
Also, I like the way you transitioned from using the modified kit body to constructing your own. At what point did you decide this and why ...?

Keep up the nice work,
Mike


Hi Mike,

Thanks for the comments. I appreciate it.

To answer your question, it was actually my first intention to scratchbuild the whole thing and only used the Daimler rims but when I recieved the Daimler model kit, the basic shape is somewhat similar like the ferret that I decided to modify the kit.

I actually wanted to modify the Daimler because I taught it would be easier than scratchbuilding but then after looking at the things that I have to do to modify it like lenghtening the chasis, the engine compartment and reduce the size of the body (which I have done partially), I decided it will be much more easier to scratchbuild it as I have all the reference I need.

By scratchbuilding, I know exactly what should be done and how should it be done. I can build each part bit by bit and adding details along the way.

Hope this answers your question.

Murdo
Visit this Community
Scotland, United Kingdom
Member Since: May 25, 2005
entire network: 2,218 Posts
KitMaker Network: 760 Posts
Posted: Thursday, February 22, 2007 - 03:09 AM UTC
Erik67
Visit this Community
Buskerud, Norway
Member Since: July 31, 2005
entire network: 1,871 Posts
KitMaker Network: 376 Posts
Posted: Thursday, February 22, 2007 - 03:19 AM UTC
Excellet work Imran. Will be nice to see this one finished.

Erik
druid_99
Visit this Community
Kuala Lumpur, Malaysia
Member Since: May 03, 2006
entire network: 47 Posts
KitMaker Network: 0 Posts
Posted: Thursday, February 22, 2007 - 05:54 AM UTC
Thanks for the comments guys.

Now for the progress update. Not much is done last night. I just manage to add the smoke grenade dischargers on the ferret. I cut a 2mm plastic sheet and file it at an angle and make six each. Then I use a baby's cotton bud and cut the handle according to size. This is then glued onto the plastic bits and you have your smoke grenade dischargers. The blue bit is the handle from the cotton bud.


As for the smoke grenade discharger cap, I just use a bit of Evergreen plastic rod and cut to size and glued it to the smoke grenade discharger. In making the platform for it, I just use the 1mm plastic plate, cut into small pieces and glued onto the turret. When all this is complete, I just attach the smoke grenade dischargers onto the platform on the turret and you have the array of smoke grenade dischargers. All that is left now (for the smoke grenade discharger part) is to detail it a bit more.

PMP
Visit this Community
Alabama, United States
Member Since: November 18, 2005
entire network: 104 Posts
KitMaker Network: 0 Posts
Posted: Saturday, February 24, 2007 - 10:12 PM UTC
wow! i really like how you made the smoke launchers!
Cuhail
Visit this Community
Illinois, United States
Member Since: February 10, 2004
entire network: 2,058 Posts
KitMaker Network: 787 Posts
Posted: Saturday, February 24, 2007 - 11:25 PM UTC

Wow! What a great SB! Looking great, man!

Cuhail
druid_99
Visit this Community
Kuala Lumpur, Malaysia
Member Since: May 03, 2006
entire network: 47 Posts
KitMaker Network: 0 Posts
Posted: Monday, February 26, 2007 - 06:03 AM UTC
The detailing progress. First is the detailing of the front hatch. How I do it is I get a 0.25mm plastic sheet and using the Hasegawa tritool set, I carefully cut the frame details for the hatch. I cut off the holes first before cutting the outer shape making the frame. This is done for the first and second frame on the front hatch.


The next thing is building the hinge for the hatch. First I cut a 0.25mm plastic sheet into 1mm wide and 3mm length and then using a fresh/sharp knife I carefully cut off the indentation on the plastic to make the hinge.


When this is complete, I glue the frame and the hinge on the body.


Then, using the smallest diameter plastic rod, I cut about 3mm length and using the sharp knife, I roll it onto the plastic rod to make some impression marks to replicate the hinges.


Finally I glue the inner frame but not afer doing some size adjustments. You can see the cut marks on the second frame.


Although the frame is bigger than the actual, I don't think I will do it again. I will stick with this and hope I can make a more accurate one in my next build.
druid_99
Visit this Community
Kuala Lumpur, Malaysia
Member Since: May 03, 2006
entire network: 47 Posts
KitMaker Network: 0 Posts
Posted: Monday, February 26, 2007 - 06:11 AM UTC
Shown in the picture is the ferret where I had dry fit the modified wheels of the Daimler as the resin rim still needs some cleaning up to be done.


This next picture will show how small the ferret scout car actually is. I put it side by side with a Leopard 2A5 which I build some years back and compare how small this ferret is (and it's really small :lol:).

Cuhail
Visit this Community
Illinois, United States
Member Since: February 10, 2004
entire network: 2,058 Posts
KitMaker Network: 787 Posts
Posted: Monday, February 26, 2007 - 07:36 AM UTC


Yeah, that's pretty small alright.

But....


I've seen smaller.....


That's a 1/160 WIP BTR152 next to a 1/35 sdkf 222 tire.


He he he he

THAT'S small.


By the way, I'm lovin' the Ferret. I've been watching since you started and I like the fact that you constantly take in progress pictures. I'm sure I'm enjoying your build as much as you are! :-)

Take care, brotha. Keep up the great work!

Cuhail
druid_99
Visit this Community
Kuala Lumpur, Malaysia
Member Since: May 03, 2006
entire network: 47 Posts
KitMaker Network: 0 Posts
Posted: Wednesday, February 28, 2007 - 06:16 AM UTC
More update....

I've added the frames for both the side hatches and vents.


It's starting to slow down as the only thing left now is to add the details on this Ferret before the primer and paints.
druid_99
Visit this Community
Kuala Lumpur, Malaysia
Member Since: May 03, 2006
entire network: 47 Posts
KitMaker Network: 0 Posts
Posted: Wednesday, February 28, 2007 - 06:29 AM UTC
Ok, some more update but not that much. I'm adding the details on the front and side hatch. I've added the small opening (I think it's the window) on the front and side hatch. Again, some progress steps.

First, I cut a 2mm plastic sheet about 2mm width so that I can have a square plastic strip, then I sand it into half to make it three-sided. Then I cut 3mm of the plastic sheet and we have the first shape of the opening.


This is then glued onto the hatch.


Now, the tedious task of making the opening on the hatch. This is done using 0.25mm plastic strip cut into small pieces and glued together to get the right shape. Sorry I don't have the pictures of the parts that is cut because it's very small and hard to photograph. The picture below shows the completed hatch. I think you guys can imagine how it is done.


Finally, the last progress for last night is adding the rivets onto the body. Nothing complicated is done here. I just use the ruler to mark the areas neede to add the rivets and just cut the smallest plastic rod available and glue it (By the way, this plastic rod will be sanded to the right size when the glue is set). I've also scribed the holes for the vents on the side of the Ferret.


That's all for last night's progress.
Jurjen
Visit this Community
Groningen, Netherlands
Member Since: September 21, 2003
entire network: 3,040 Posts
KitMaker Network: 251 Posts
Posted: Friday, March 02, 2007 - 01:54 AM UTC
Hi Imram!

II follow your topic with great interest and keep up the good work! What are your basic tools for scratching?

With the tires in the beginning, wouldn't it be much easier to use the punch & Die for stamping out those holes, much easier to see where the cut will be instead of drilling. I always have the problem with drilling the the hole is not exactly centered where you want it to be.

Hope to see a new update soon!

Jurjen

jpl3k
Visit this Community
New Jersey, United States
Member Since: October 31, 2004
entire network: 5 Posts
KitMaker Network: 0 Posts
Posted: Saturday, March 10, 2007 - 05:55 AM UTC
FANTASTIC!! Amazing progress.. Very impressive and inspiring!
Keep up the great work!
-Jonathan Jpl3k
I have a few [scifi] scratchbuilds inprogress myself.. pics in my Flickr account:
http://www.flickr.com/photos/jpl3k/
druid_99
Visit this Community
Kuala Lumpur, Malaysia
Member Since: May 03, 2006
entire network: 47 Posts
KitMaker Network: 0 Posts
Posted: Sunday, March 11, 2007 - 09:03 AM UTC
Thanks for all the encouragement guys.

Jurjen: The basic tools that I use for this scratchbuilding is a sharp knife (with a lot of spares), metal ruler, plastic sheets in various thickness (0.25mm, 0.4mm, 1mm and 2mm), various sizes of plastic tubing and rods, scriber, a lot of reference pictures and a lot of patience. As for the punch and die set, I don't have the set so I opt to drill the template.

Jonathan: Thanks. I'll check out your builds soon.

More progress on the details. Not much can be done last weekend but there are progress even it is minimal.

First of all is the progress on the turret. I have added a place where I think will be used to attach hooks to remove the turret from the body (correct me if I'm wrong).

I use the easiest thing that I can find around the house which are paper clips. All that I do is bend the paper clips to get the shape using tweezers and pliers. Then I drill the holes on both sides of the turret and glued it in place. I think the platform for the hook placement is a bit off scale but I don't think I'll be redoing this again.


When that is done, I cut some small plastic rods to make the hinge for the hatch but it's still incomplete. In the middle there is what I think a scope of some sort or maybe just ventilation holes, so I try to replicate it as close as possible but this is still incomplete as well.


I'm having second thaughts of using the FN Mag that I got from a friend because I will only be using its barrel for the turret, so I opt to build the barrel using some brass tubing cut to size and glue it onto the turret. Does it look ok? Or should I just cut the barrel from the FN Mag and attach to it?


Next... detailing the body...
 _GOTOTOP