


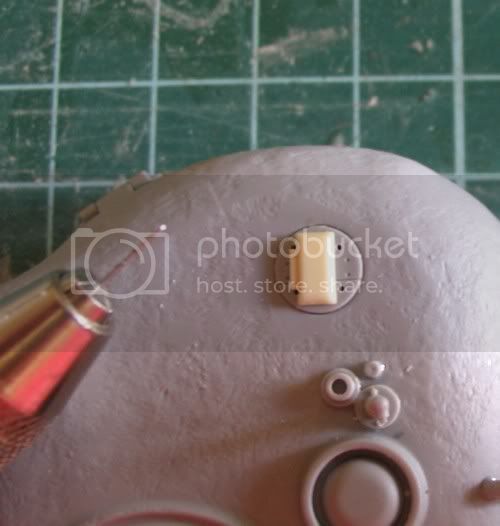
Thought to take some pics as I constructed my first periscope guard for my latest project... And thus this SBS was born!
The pics are of the loaders periscope on an M4 Sherman turret. The guard is made out of 8 amp. fuse wire
1. Firstly you need a drill bit slightly larger than the wire... Pin vice is essential... Drill 2X evenly spaced holes either side of the periscope cover.
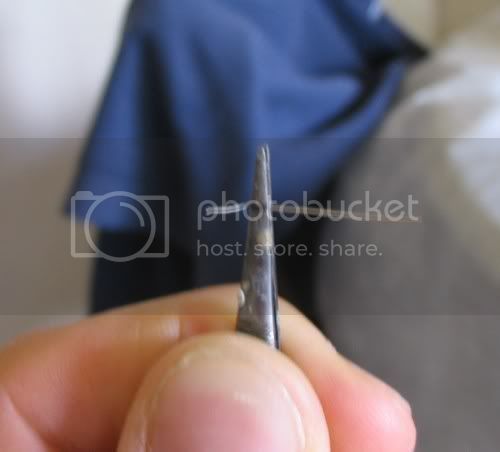
2. Take standard fine nose tweezers (even old belters like mine) and measure a mark across the width of the tweezer (approx. 2mm)
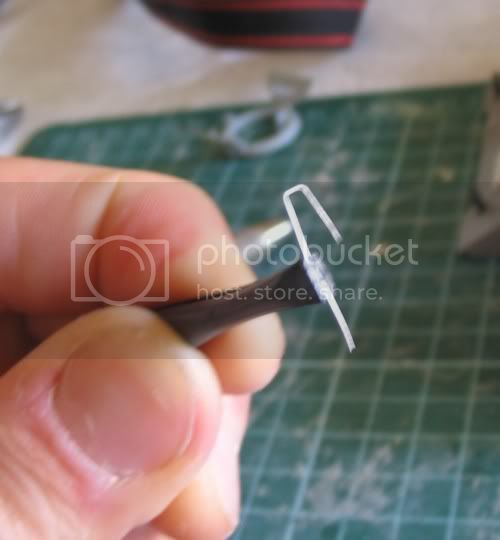
Cut a short length of the wire and bend a near right angle at this mark
3. Bend the other side so you get an inverted 'U' shape... The length of the longer sides does not matter, as the holes were drilled completely through the turret (You can be more exacting and have a set depth for your drill holes, especially if you have an interior you don't want to encroach upon)
4. Insert the wire into the holes, bearing in mind that the 'arch' straddles the cover (not running parallel to it) and repeat from step 2. with a second piece to match. Now these can be glued with CA from the underside where they poke through, or I recommend a drop of CA gel on the tips before insertion... These 2 arches need to be leant slightly outwards
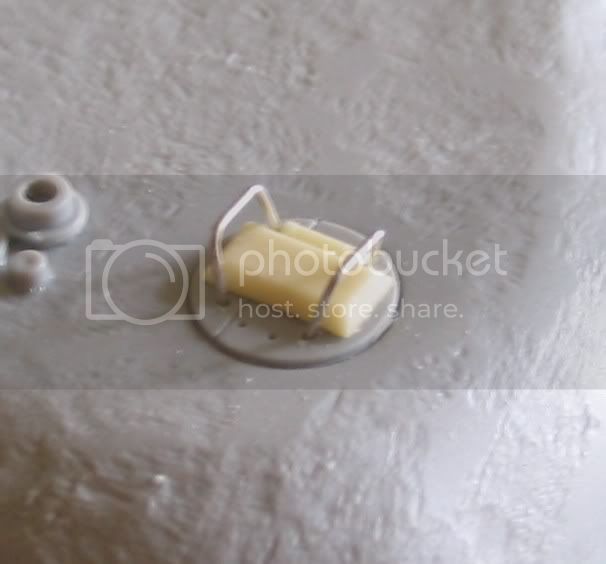
5. Cut straight pieces to straddle the gap left between the arches. I make mine sit on top [Although I have seen some examples where the wire is wedged between each arch, forming the same height] These are approx 5mm, but hold with tweezers and trim any excess before gluing... A spot of CA gel on the ends, then carefully position the wire length at one side, on the horizontal just near the bend. Match it on the other side with the next piece of wire. It should look like this
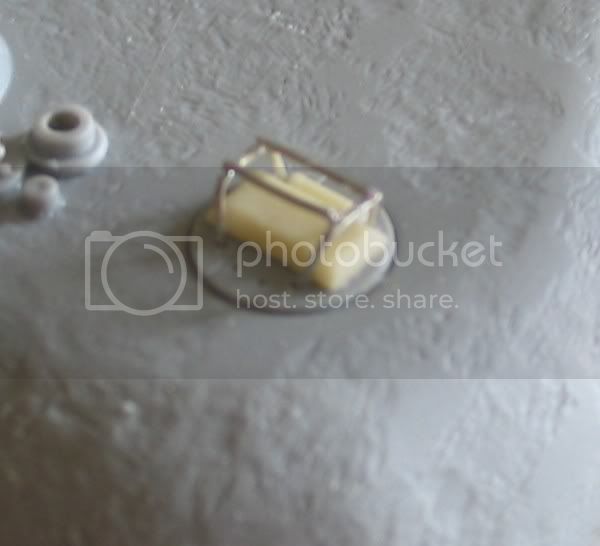
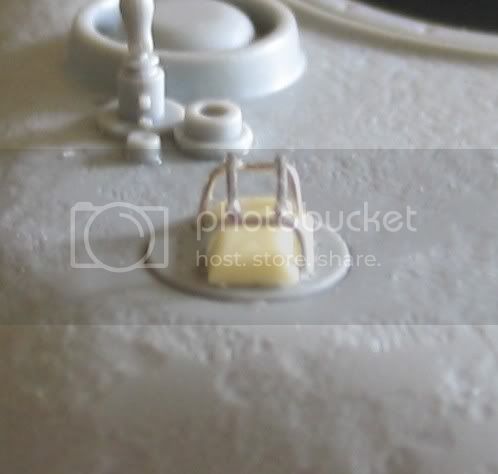

Voila! Simple, yet effective as it follows the basic construction of the real things, with the CA acting as the weld points... Only real difference is that the bottom of the wire arches were curved inwards towards each other like little legs and welded that way, but for rigidity the drilled holes work superbly... You will find this method to be stronger than PE equivalents, and look a little more accurate IMHO, and they can take as little as 10 min. each! This I do on all my Shermans where applicable, such as all the hatch periscopes and the loaders as shown.
Hope this helps
Cheers
Brad


