

Hallo everybody!
Is there a topic for this thing?I just finished a tiger's seat and i found a pretty easy and fast way to do those springs,but if something already exists I wouldn't want to repost it.
Please,if anyone knows let me know.
Kind regards.
Scratchbuilders!: Armor/AFV
This is a group for armor scratchbuilding questions, topics and projects.
This is a group for armor scratchbuilding questions, topics and projects.
Hosted by Mike Kirchoff
Springs on the back of the seat?

dedalos

Member Since: April 27, 2006
entire network: 89 Posts
KitMaker Network: 0 Posts
Posted: Monday, September 18, 2006 - 08:07 PM UTC

Teacher

Member Since: April 05, 2003
entire network: 4,924 Posts
KitMaker Network: 0 Posts
Posted: Monday, September 18, 2006 - 08:20 PM UTC
I remember seeing one a couple of months ago..............but another couldn't hurt! Go for it! 
Vinnie
Vinnie

05Sultan

#037

Member Since: December 19, 2004
entire network: 2,870 Posts
KitMaker Network: 1,044 Posts
Posted: Monday, September 18, 2006 - 08:21 PM UTC
Go for it! Never heard this topic before!  I'm interested.
I'm interested. 
Removed by original poster on 09/20/06 - 01:35:50 (GMT).
Removed by original poster on 09/20/06 - 01:37:00 (GMT).
dedalos
Member Since: April 27, 2006
entire network: 89 Posts
KitMaker Network: 0 Posts
Posted: Monday, September 18, 2006 - 11:38 PM UTC
First of all if something is not understud its because of my English so feel free to ask me to clarify it.
Ok so here it goes
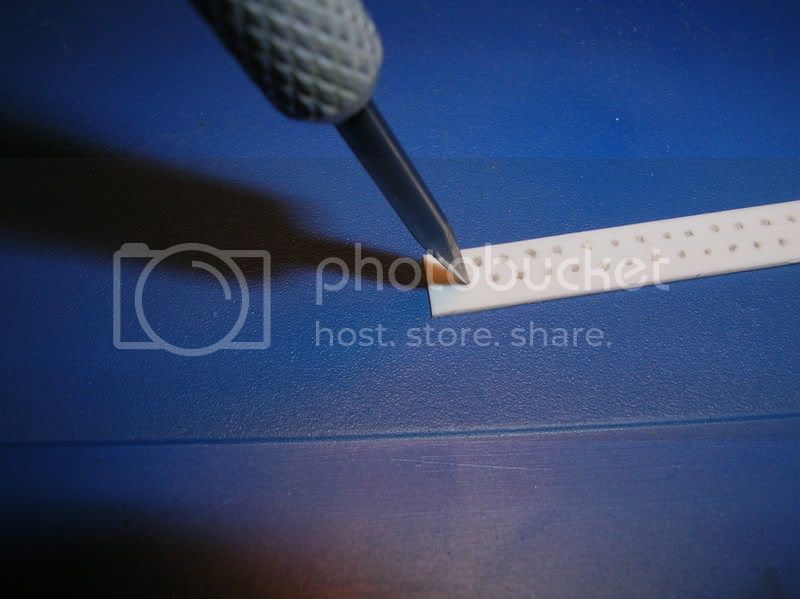
1.Measure the length of the area needed.(In my case i needed 3 pieces of 2cm each so i made one about 6cm and cut it in 3)take a piece of plastic and mark with a pencil a row of dots every 2mm(for 1/35)until the length that you need.Make a second row 2mm below the first one and diagonally.
2.with a pointy tool and MILD presure,press on the dots until a shallow mark is formed
Ok so here it goes
1.Measure the length of the area needed.(In my case i needed 3 pieces of 2cm each so i made one about 6cm and cut it in 3)take a piece of plastic and mark with a pencil a row of dots every 2mm(for 1/35)until the length that you need.Make a second row 2mm below the first one and diagonally.
2.with a pointy tool and MILD presure,press on the dots until a shallow mark is formed
dedalos
Member Since: April 27, 2006
entire network: 89 Posts
KitMaker Network: 0 Posts
Posted: Tuesday, September 19, 2006 - 12:23 AM UTC
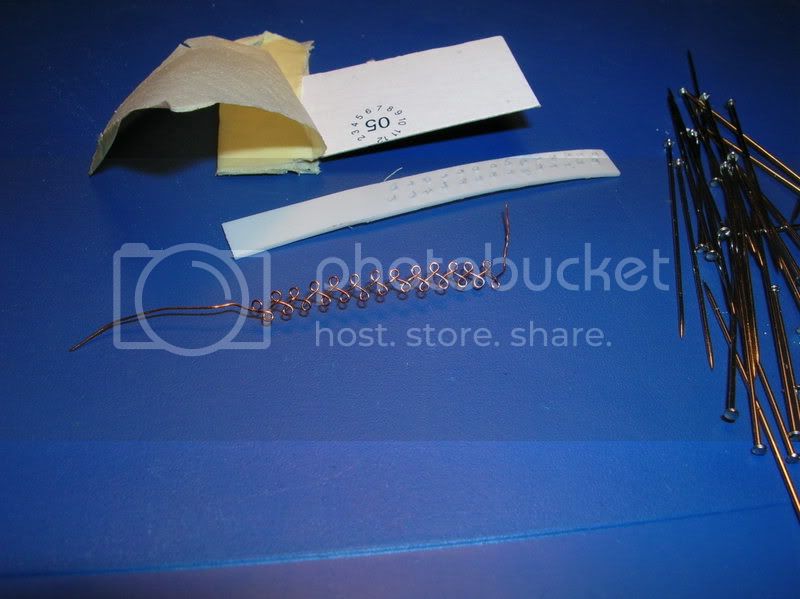
3.with a dremel(or any other drilling machine)and with a 0.5mm drill the holes.Put an eraser under the plastic to avoid damaging the drill or your working area,and to prevent any movement of the plastic
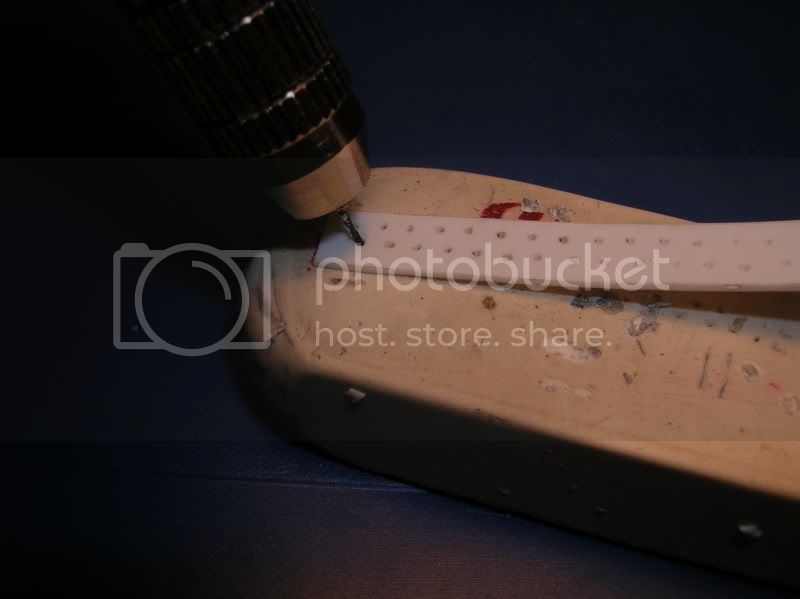
4.put the pins(the ones used in sewing not the office supply pins because they are larger in diameter and will tear the plastic apart).
Try to place them parallel and about 0.5cm in the eraser
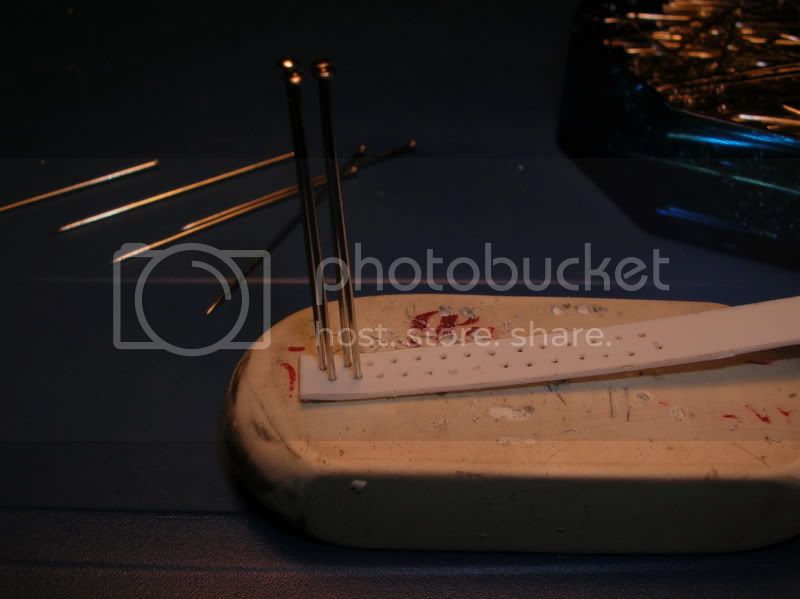
5.Between the 2 rows press a metal rouler to straighten up the plastic
6.place a flat,hart piece of paper or any other thing you find appropriate in the place of the rouler to keep the rows parallel.put a paper-tape(or however this thing is called?)to keep the pins parallel and immobilized
7.VERY important.Put a couple of STRONG clips(or a single large one)to hold the pinsIn the photo the 0.25 coper spring is holded by one of them

8.start passing the thread in 8s around the pins.Don't be afraid to pull it since the clips etc are holding the pins in place
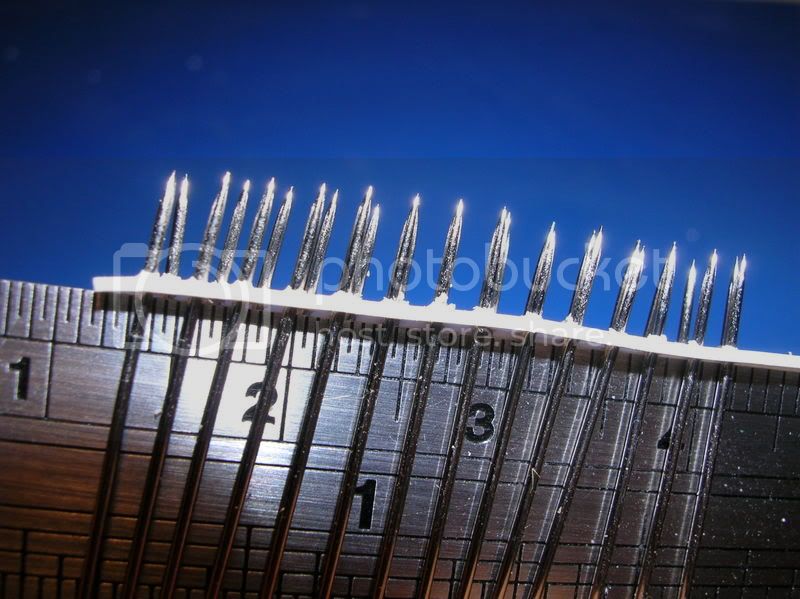
9.Every time you go around a pin take your cutter and with the oposite side press the sprue to"seat"on the plastic
this is what you get
10.Last but not least DO NOT try to pull all the pins at once!They will not come out and you risk damaging the result.Take the whole thing appart and pull them a few at a time.And that's it
I hope this was helpfull and sorry if my presentation was too long and tired you down
Have fun guys
4.put the pins(the ones used in sewing not the office supply pins because they are larger in diameter and will tear the plastic apart).
Try to place them parallel and about 0.5cm in the eraser
5.Between the 2 rows press a metal rouler to straighten up the plastic
6.place a flat,hart piece of paper or any other thing you find appropriate in the place of the rouler to keep the rows parallel.put a paper-tape(or however this thing is called?)to keep the pins parallel and immobilized
7.VERY important.Put a couple of STRONG clips(or a single large one)to hold the pinsIn the photo the 0.25 coper spring is holded by one of them
8.start passing the thread in 8s around the pins.Don't be afraid to pull it since the clips etc are holding the pins in place
9.Every time you go around a pin take your cutter and with the oposite side press the sprue to"seat"on the plastic
this is what you get
10.Last but not least DO NOT try to pull all the pins at once!They will not come out and you risk damaging the result.Take the whole thing appart and pull them a few at a time.And that's it
I hope this was helpfull and sorry if my presentation was too long and tired you down
Have fun guys
dedalos
Member Since: April 27, 2006
entire network: 89 Posts
KitMaker Network: 0 Posts
Posted: Tuesday, September 19, 2006 - 12:35 AM UTC
By the way,the whole thing took me 10 min with the picture taking to complete it(ok,you got me!that was the second time around becouse the first time it took me a bit more  )
)
This is the tiger seat i mentioned before.It is in comparation to the one the kit came with
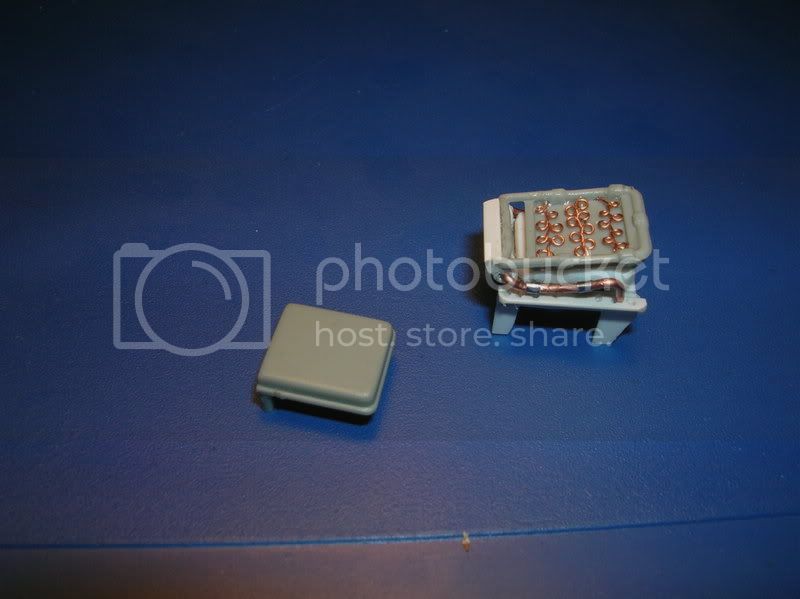
As soon as i finish my pet project i will post it here
) This is the tiger seat i mentioned before.It is in comparation to the one the kit came with
As soon as i finish my pet project i will post it here

Bigskip

Member Since: June 27, 2006
entire network: 2,487 Posts
KitMaker Network: 464 Posts

Posted: Tuesday, September 19, 2006 - 01:41 AM UTC
Tasos
That is a fantastically useful tip - Efharisto
Andy
That is a fantastically useful tip - Efharisto
Andy


HARV
#012
Member Since: November 07, 2003
entire network: 3,098 Posts
KitMaker Network: 899 Posts
Posted: Tuesday, September 19, 2006 - 02:02 AM UTC
Thanks for sharing Tasos. The end result is very nice.
If I remember right, Shepard Paine showed a process on how to make springs in one of his books. I would have to go through them and double check. Please correct me if I am wrong.
Thanks again and please continue to share with us.
HARV
If I remember right, Shepard Paine showed a process on how to make springs in one of his books. I would have to go through them and double check. Please correct me if I am wrong.
Thanks again and please continue to share with us.
HARV

dedalos
Member Since: April 27, 2006
entire network: 89 Posts
KitMaker Network: 0 Posts
Posted: Tuesday, September 19, 2006 - 02:17 AM UTC
Thanks for your kind words guys!This is the first time that i try to build a complete and as accurate as possible interior of a tank and i'm still experimenting!!
Randy,i haven't seen this article,but do try and find it and let us know.His way might be easier or faster.Thanks
Andy....Now tell me that you've been in Greece
Randy,i haven't seen this article,but do try and find it and let us know.His way might be easier or faster.Thanks
Andy....Now tell me that you've been in Greece

slodder
Member Since: February 22, 2002
entire network: 11,718 Posts
KitMaker Network: 2,584 Posts
Posted: Tuesday, September 19, 2006 - 04:15 AM UTC
Nice job -just saw this thread - that's basically how I do it. I just took some very fine 'brads' and nailed them into a small piece of wood instead of pins through a piece of plastruct.
Well done.
Well done.

HARV
#012
Member Since: November 07, 2003
entire network: 3,098 Posts
KitMaker Network: 899 Posts
Posted: Tuesday, September 19, 2006 - 04:22 AM UTC
I went and got out my copy of Modeling Tanks and Military Vehicles by Shepard Paine. On page 69 it shows how to make make seat springs. The process is very similar to yours except he used a block of wood like Scott mentioned. So I would say your process is just as quick and easy.
On page 48 he also shows how to make return springs for mud guards by winding wire around a brass rod.
Just thought I would share.
HARV
On page 48 he also shows how to make return springs for mud guards by winding wire around a brass rod.
Just thought I would share.
HARV
dedalos
Member Since: April 27, 2006
entire network: 89 Posts
KitMaker Network: 0 Posts
Posted: Tuesday, September 19, 2006 - 05:07 AM UTC
Thanks guys
I've tryed many variations before i concluded to this way.Nailing them in the eraser was the last one but i found it difficult to pass the thread through because of the heads of the pins.
Scott my english don't help me so...what is a brad?Are they like small nails?I though about those railway HO nails but i don't know how thin they are.Are they thinner than the pin.Because i would prefer it if the loops where a bit smaller!
Bigskip
Member Since: June 27, 2006
entire network: 2,487 Posts
KitMaker Network: 464 Posts
Posted: Wednesday, September 20, 2006 - 12:59 AM UTC
Tasos
Yes i have been to Greece, have speant a couple of very pleasent weeks on Lesvos and Crete, doing the tourist thing. I'll be back again one day.
My Greek is not good at all, but i find it is always apreciated if you at least try.
Andy
Yes i have been to Greece, have speant a couple of very pleasent weeks on Lesvos and Crete, doing the tourist thing. I'll be back again one day.
My Greek is not good at all, but i find it is always apreciated if you at least try.
Andy

Grumpyoldman
Member Since: October 17, 2003
entire network: 15,338 Posts
KitMaker Network: 5,072 Posts

Posted: Wednesday, September 20, 2006 - 06:57 AM UTC
Nice step by step.
as for finer pins, you may want to try sewing needles instead, as you can pick up some finer diameter sewing needles, than pins. Look for finer ones at the old fashion sewing/material selling stores.
Really is a nice simple technique.
as for finer pins, you may want to try sewing needles instead, as you can pick up some finer diameter sewing needles, than pins. Look for finer ones at the old fashion sewing/material selling stores.
Really is a nice simple technique.

dedalos
Member Since: April 27, 2006
entire network: 89 Posts
KitMaker Network: 0 Posts
Posted: Wednesday, September 20, 2006 - 11:46 PM UTC
Thank you very much Dave.I'll try that.
Andy,i hope you liked it as much as i liked London!!
 guys and thank you for your time and the nice words!
Andy,i hope you liked it as much as i liked London!!
guys and thank you for your time and the nice words! |

WEB HOSTING BY


Copyright ©2021 KitMaker Network and Kitmaker Network, a subsidiary of Silver Star Enterprises
All Rights Reserved. Please read our Conditions of Use and Privacy Policy.
All Rights Reserved. Please read our Conditions of Use and Privacy Policy.