_GOTOBOTTOM
 Community Forum: Filipino Modelers Phorum
Want to meet up with modelers in your country or region? This is the place.
Completed Model: M1A1 Abrams
BlackThor_06
Visit this Community
Metro Manila, Philippines
Member Since: August 12, 2003
entire network: 200 Posts
KitMaker Network: 0 Posts
Posted: Thursday, January 06, 2005 - 02:41 PM UTC
M1A1 Abrams MBT from Academy (older release). Parts of other M1A1 kits (from various manufacturers including DML, Trumpeter, and Italeri) were used to replace certain components. Enhanced with aftermarket accessories and scratchbuilt parts.


There's a story behind this kit. If you'd care to know, read on...

I always wanted to display a model at the workplace...a lot of options went through my head, including an F-8 Crusader, a modern US infantryman, an AH-6 Little Bird, and so on.

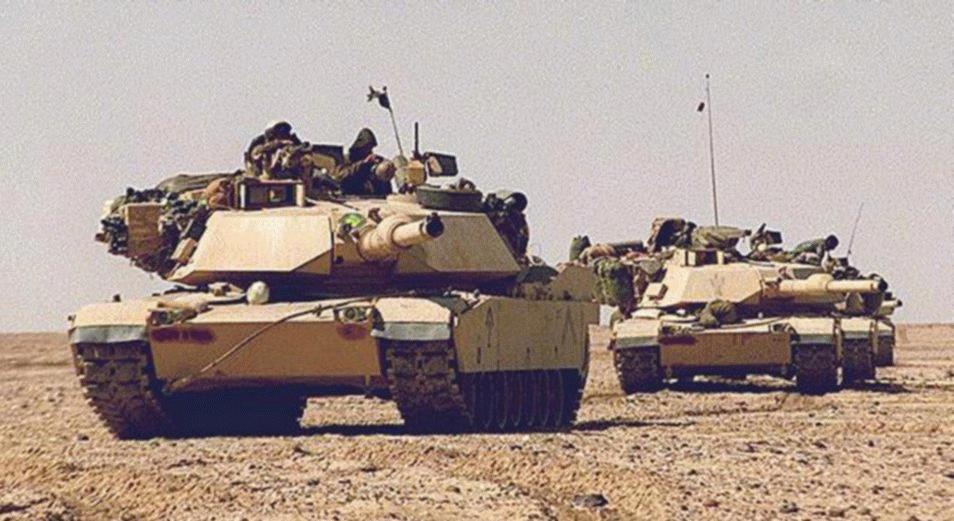
After a long deliberation - and studying the kit's instructions downloaded from Academy's website, I decided to get their M1A1.

While knowing that this is the least favored of all 1:35 Abrams available here, I chose it primarily for its ease of assembly - it was based on Tamiya's first M1, after all. I also planed to scavenge whatever useful parts from it to enhance my other, more deserving, M1 kits.

Indeed, it was easy assembly overall; almost no filler was needed, IIRC, but fitting the braces of the side bustle racks (near the rear of the turret) were frustrating, as the parts didn't fit as they should, like as if the parts were molded incorrectly and the slots to fit them in were at the wrong shape.

I really intended it to be a quickie build...paint it in overall desert sand, chuck in a few crew stowage, and I'm done...

...or so I thought. But then, along the way of construction, it just happened: AMS Attack.


I started adding the fasteners for the fenders; scratchbuilt the headlight bush guards; cut off a tail light to add a hull-mounted APU; made a notch for the fire extinguisher alongside the NBC; decided to add the training devices...ah, you folks know the sickness all to well.


Amidst all this, disaster struck: a rather large drop of Tamiya Extra Thin cement plopped onto the hull, in front of the driver's hatch...the size of the glue stain was equivalent to a drop from a kitchen sink faucet with a leaking gasket.

For some dumb reason, I did not try absorbing the glue drip with tissue and do the "sandpaper-sandpaper-filler-sandpaper-filler-sandpaper-sandpaper" remedy. I just tried to wipe the stain off. The result totally ruined the appearance of the hull.

The gash (best way to describe it) was really ghastly, and it forced me to do something - why not try and hide the mess by replicating the anti-slip coating?

After 15 minutes of applying glue and stippling with a brush (using DML and Trumpeter's M1s as templates, I was rather surprised with the finish, at it almost replicates the anti-slip molded on Dragon M1 kits. It didn’t completely hide the glue stain gash; I really should have did some serious sanding and filling first. Again, impatience in modeling rears its ugly head.


Accepting the reality of my stupidity, I pressed ahead. AMS for the M1 Abrams was strong in me and I made more modifications/alterations to the stock kit. The more notable ones are:

- Replacing the kit's 120mm gun with the one from Italeri's M1A2. Although I understand that the latter kit has an underscale main gun, I felt it was less noticeable than using the Academy's hideously oversized version. I did shave off the muzzle reference sight from the latter and glued it in place.

- The roadwheels are from Trumpeter. Needed to cut off a portion of the suspension arm axles for the wheels to settle in properly. I added thin strips of Evergreen halfway or so around the trimmed axle stubs to have a tight (and permanent) fit. Sorry, officemates, little tank cant move around, so don’t try pushing it along the table...or else.

- Academy's design of the Gunner's Primary Sight housing (aka. The Doghouse) does not replicate any version of the M1, as far as my meager resources indicate. I then used a spare from Trumpeter.


- Nipped off the kit's cal .50 gun barrel and stuck in one from Academy's US Machine Gun set, as it is more appropriate for the M1 and would allow the blank adapters to fit.

- I have several M1A2s from Trumpeter and Italeri, so that means a small collection of decals of "Another Bad Creation". After a few hours of scribbling, I formed several words with those letters; and selecting "Rabid Core" as the name of this M1A1 (Uh yeah, so what's does "Rabid Core" mean? Don’t ask, it'll make me start another tale).

- The black cartoonic pig (nipped off from Tamiya's Isuzu Impreza WRC "Arai Version") in the turret face was a fanciful addition, at my brother's recommendation. Something to add a jab of humor to an otherwise serious, no nonsense and menacing look of the M1. (++)


And so: After roughly 2 months of assembly...while in the process compromising a few hours of sleep, being late for work (although modeling was not the primary reason), missing out some socializing with peeps including my best friend (several times, so he now thinks I'm avoiding him), the M1A1 Abrams now sits at my workstation.


Now if I can be careful all the time while handling it, and keeping a watchful eye out for ignorant officemates, I think "Rabid Core" can stay intact for a long time. I did bring a small packet filled with several toothpicks, tube cement and superglue, just in case.


Hope this post provided a few minutes of entertainment.


BT6

warthog
Visit this Community
Metro Manila, Philippines
Member Since: July 29, 2002
entire network: 1,460 Posts
KitMaker Network: 366 Posts
Posted: Thursday, January 06, 2005 - 08:29 PM UTC
Look fantastic...sayang some pics are blurred, but again despite the blurred pic it still looks good. Well done...

Cheers
shonen_red
Visit this Community
Metro Manila, Philippines
Member Since: February 20, 2003
entire network: 5,762 Posts
KitMaker Network: 2,610 Posts
Posted: Friday, January 07, 2005 - 12:35 AM UTC
Galeng! Ganda ng work sa tank! A bit blurry kaya di ko gano kita yung detail sa figs. Well done mate!
blitz
Visit this Community
Ontario, Canada
Member Since: May 15, 2003
entire network: 502 Posts
KitMaker Network: 432 Posts
Posted: Friday, January 07, 2005 - 02:22 AM UTC
Black Thor,
Galeng!! great build there, that's a lot of kitbashing and details..

Hope you can post more photos..
buck
Visit this Community
Metro Manila, Philippines
Member Since: November 12, 2003
entire network: 437 Posts
KitMaker Network: 0 Posts
Posted: Friday, January 07, 2005 - 05:44 AM UTC
The pics are a little blurry, but I can see enough that its a fine looking piece. Great work! Buti di ginagalaw ng officemates mo?

GIBeregovoy
Visit this Community
Metro Manila, Philippines
Member Since: May 31, 2002
entire network: 1,612 Posts
KitMaker Network: 1,129 Posts
Posted: Saturday, January 08, 2005 - 03:51 AM UTC
FINALLY! The M1A1 project we've been talking/texting about for months!

Despite the blurry pix, it looks impressive already. Can't wait for the sharper pix - most interested in the anti-slip coating.

Suggestion: add some MILES belts. You have the Hoffman device and the blank suppressor on your tank. I've been trying to make a decent MILES belt for my KVT. I reckon the best route is plain paper, or crepe paper. There are three belts AFAIK. I'll dig up my old emails from NTC tankers about the MILES belts.

So.... when are you doing an M1A2SEP?
BlackThor_06
Visit this Community
Metro Manila, Philippines
Member Since: August 12, 2003
entire network: 200 Posts
KitMaker Network: 0 Posts
Posted: Friday, January 14, 2005 - 09:06 AM UTC
I was able to get hold of a better digicam and replaced the images. Enjoy!


BT6
shonen_red
Visit this Community
Metro Manila, Philippines
Member Since: February 20, 2003
entire network: 5,762 Posts
KitMaker Network: 2,610 Posts
Posted: Friday, January 14, 2005 - 04:42 PM UTC
WHOA! ang danda danda! Linis!
GIBeregovoy
Visit this Community
Metro Manila, Philippines
Member Since: May 31, 2002
entire network: 1,612 Posts
KitMaker Network: 1,129 Posts
Posted: Friday, January 14, 2005 - 09:19 PM UTC
Better pix. Great detail.

One nitpick thought: the tracks. Unless you want to show an early M1A1 during ODS, the tracks are the old type (I know you know this already), but with all the trouble you went to kitbash this one, I think IMO it'd be nice to replace the current ones with the "Big Foot" tracks. AFAIK, Trump has two sets - one vinyl, the other link-to-length (unless you're saving them for another Abrams project). Other than that (and a suggestion to add MILES belts) it's a very good build.

Query: the cables for the "kill light" and the Hoffman device - what did you use? I bought some beading cable for my KVT project but the damn thing doesn't form the way I want to. Worse, it wants to "levitate". What did you use - solder wire?

Re: Academy "doghouse", AFAIK it's a very early type found in the M1, IPM1, and early M1A1s in ODS. I read somewhere on this site (very very VERY old thread) that the doghouse underwent several "forms" much like the wind sensor at the turret bustle. So it depends on what date you're building. AFAIK, the ones offered by Trump, Tamiya, and maybe even Dragon (and Ital) are current ones, the old Academy kit being the old version.

The TC, btw, looks nicely done. Whole projekt goes well with your office space. (like the Strv103B goes well in mine hehehe)
BlackThor_06
Visit this Community
Metro Manila, Philippines
Member Since: August 12, 2003
entire network: 200 Posts
KitMaker Network: 0 Posts
Posted: Friday, January 14, 2005 - 10:25 PM UTC
Thanks for all your comments!

I really retained the older T-156 tracks since I wanted to depict an a Desert Storm (or pre-ODS) type. Note the use of a hull EAPU, the lack of CIP devices, and the TC's older style desert BDU camo. Besides, the use of the vinyl treads would allow some traction when some idiot officemate tries to push the model around or perch it atop my (slippery) PC monitor.

The real reason why I didn't try to model an OIF version is the lack of a turret EAPU, like a resin duplicate of Tamiya's ...(hint, hint).

For the cabling, I just used...stretched sprue! I first cemented them under the kill light, and the capillary action bonded sections of the 'cable' to the turret (not a good idea to try, though. Better to use superglue). Note that I did not include a third cable that runs to the back of the turret - I do not know where it would be connected to.

BTW, the gray 'duct tape' is just Tamiya masking tape cut to size and painted.

I did consider adding the MILES velcro belts but I did not have styrene rods big enough to be salami sliced to represent the MILES recievers.

Based on the Squadron/Signal book on the M1, the GPS housing represented by Academy does not replicate any version of the M1. IIRC, the early M1A1 variants that still used the T-156 tracks and did not even have the mountings for the CITV/MCD had the doghouse shapes that are similar to Trumps and the rest of the currently offered M1Ax kits. I could be wrong, but that's what I found.

The crosswind sensor may be at least three types, most likely two. Again, I am open to correction.

Actually, the TC figure is nothing noteworthy. The face was poorly molded and I had a hard time painting the eyes. I also did not accurately depict the 'chocolate chip' pattern; I used only 4 colors when there should be I think 6. The 'chips' themselves were to big and to few.

That aside, I admittedly feel some of the stress of work lessen whenever I take a glance at "Rabid Core"...


BT6
GIBeregovoy
Visit this Community
Metro Manila, Philippines
Member Since: May 31, 2002
entire network: 1,612 Posts
KitMaker Network: 1,129 Posts
Posted: Saturday, January 15, 2005 - 12:07 AM UTC
I can now see the anti-slip coating (had to play with the monitor's contrast/brightness). Looks decently done.

Re: doghouse, actually I had that problem when building an Abrams before. While researching, I noticed the doghouse was different and looked similar to that of Academy's offering. I'll check for any pix that I've saved in me hard drive.

Re: cable, the third cable runs to the rear towards the MILES belt. There are three MILES belts AFAIK - left, right, and rear. I'll dig up the old emails I received from two tankers who are familiar with using MILES and MILES II.

Yeah, better use the rubber tracks than plastic ones. More grip and an insurance factor against dumb officemates hehehe

Yeah, I know the feeling too. Whenever I'm pissed, I glance at my snowy S and feel happier.
cardinal
Visit this Community
Visayas, Philippines
Member Since: October 05, 2003
entire network: 1,008 Posts
KitMaker Network: 492 Posts
Posted: Sunday, January 23, 2005 - 06:36 AM UTC
Very impressive build there BT6. If I may suggest, a base for this build would really look nice. Looks pretty good on your workstation. Build on.
Beans
Visit this Community
California, United States
Member Since: February 04, 2005
entire network: 84 Posts
KitMaker Network: 47 Posts
Posted: Tuesday, March 08, 2005 - 06:48 PM UTC
I'd honestly admit that I don't know much about the Abrams but that looks great- how's Rabid Core coping with your office mates -hope she's doin' well.
Imagine that tank used to fight in the desert now giant office mates :-)

My only nitpick though is from your story--------------------------- The black cartoonic pig (nipped off from Tamiya's Isuzu Impreza WRC "Arai Version")
---------------------------------------------------------------------------------
Might be a typo-error but that Impreza was made by Subaru not Isuzu --oohhh, may the rally freaks forgive you :-) :-)
rakurakugid
Visit this Community
Visayas, Philippines
Member Since: May 14, 2005
entire network: 6 Posts
KitMaker Network: 0 Posts
Posted: Friday, July 01, 2005 - 06:56 PM UTC

Quoted Text

Thanks for all your comments!

I really retained the older T-156 tracks since I wanted to depict an a Desert Storm (or pre-ODS) type. Note the use of a hull EAPU, the lack of CIP devices, and the TC's older style desert BDU camo. Besides, the use of the vinyl treads would allow some traction when some idiot officemate tries to push the model around or perch it atop my (slippery) PC monitor.

The real reason why I didn't try to model an OIF version is the lack of a turret EAPU, like a resin duplicate of Tamiya's ...(hint, hint).

For the cabling, I just used...stretched sprue! I first cemented them under the kill light, and the capillary action bonded sections of the 'cable' to the turret (not a good idea to try, though. Better to use superglue). Note that I did not include a third cable that runs to the back of the turret - I do not know where it would be connected to.

BTW, the gray 'duct tape' is just Tamiya masking tape cut to size and painted.

I did consider adding the MILES velcro belts but I did not have styrene rods big enough to be salami sliced to represent the MILES recievers.

Based on the Squadron/Signal book on the M1, the GPS housing represented by Academy does not replicate any version of the M1. IIRC, the early M1A1 variants that still used the T-156 tracks and did not even have the mountings for the CITV/MCD had the doghouse shapes that are similar to Trumps and the rest of the currently offered M1Ax kits. I could be wrong, but that's what I found.

The crosswind sensor may be at least three types, most likely two. Again, I am open to correction.

Actually, the TC figure is nothing noteworthy. The face was poorly molded and I had a hard time painting the eyes. I also did not accurately depict the 'chocolate chip' pattern; I used only 4 colors when there should be I think 6. The 'chips' themselves were to big and to few.

That aside, I admittedly feel some of the stress of work lessen whenever I take a glance at "Rabid Core"...


BT6


Hello!

I just passed by your forum, great job man! Ganda ng Abrams mo, but I saw some pictures from FAS.org that I'm certain are Operation Desert Shield/Storm 1991M1 with Bigfoot tracks, just check it out, I'm not sure yet kung desert storm nga yun, pero obvious na walang CIP eh, since Iraqi Freedom vehicles except for some M1a2s have CIPs.

Anyway just checking, just correct me if I'm wrong kase I'm more on the Axis Panzer side. .

More Power!

Gian
 _GOTOTOP