

Hiyo
I've started to build models again after about 20 years.
I'm building a tank and its the first time I've come across DS tracks. I've got a couple questions.
I've heard that they can be cemented with model cement.
Does it really bond the tracks together or just sticks them together?
How does DS take paint?
Prime first?
Do I mask the attachment points.
Will the paint stick to those wiggly things?
Any pointers?
Thanks
RWD
Modeling Questions?
Ask your modeling related questions here.
Ask your modeling related questions here.
Hosted by Jim Starkweather
DS Tracks

Yellamoon

Member Since: January 05, 2016
entire network: 4 Posts
KitMaker Network: 3 Posts
Posted: Tuesday, January 05, 2016 - 07:55 AM UTC

Thirian24
Member Since: September 30, 2015
entire network: 2,493 Posts
KitMaker Network: 147 Posts
Posted: Tuesday, January 05, 2016 - 08:15 AM UTC
Yes the glue will bond them together. The way I did mine, was glued them together, off of the model, primed and painted. Then I assembled them on the model and weathered them.
Thirian24
Member Since: September 30, 2015
entire network: 2,493 Posts
KitMaker Network: 147 Posts
Posted: Tuesday, January 05, 2016 - 08:18 AM UTC
They turned out nice IMO. Except I couldn't select the sag on this Pz.
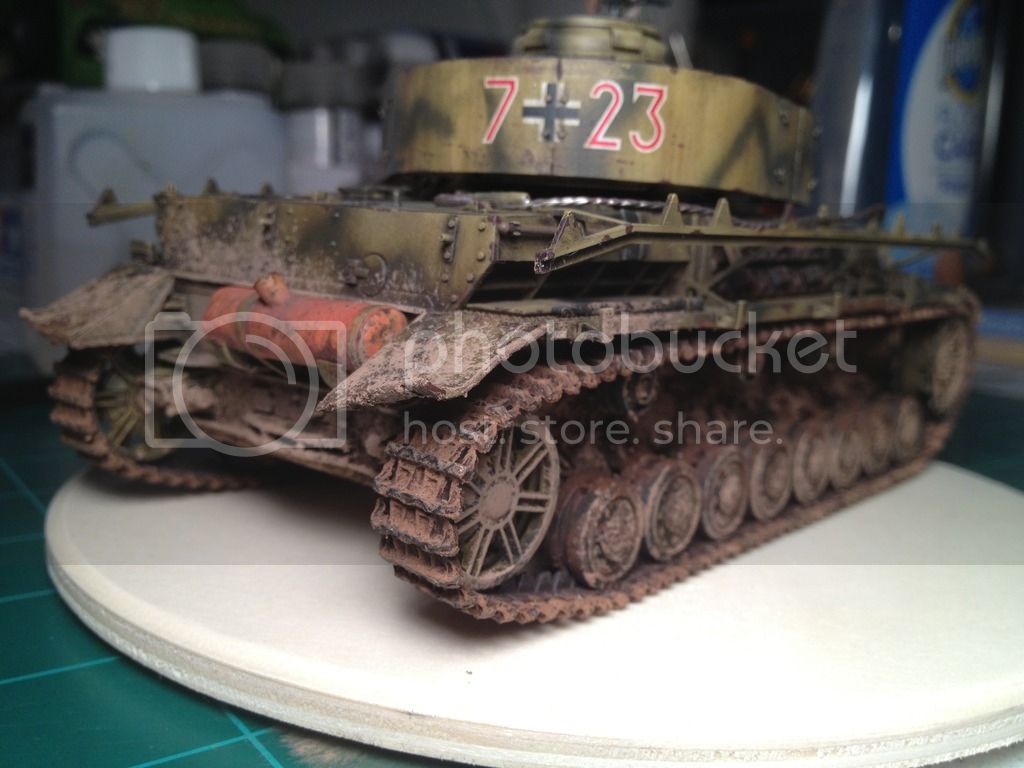

Just be careful when handling them. Any roughing them around an the paint will chip off.
Hope this helps.


Just be careful when handling them. Any roughing them around an the paint will chip off.
Hope this helps.
Yellamoon
Member Since: January 05, 2016
entire network: 4 Posts
KitMaker Network: 3 Posts
Posted: Tuesday, January 05, 2016 - 08:51 AM UTC
Thanks, Dustin
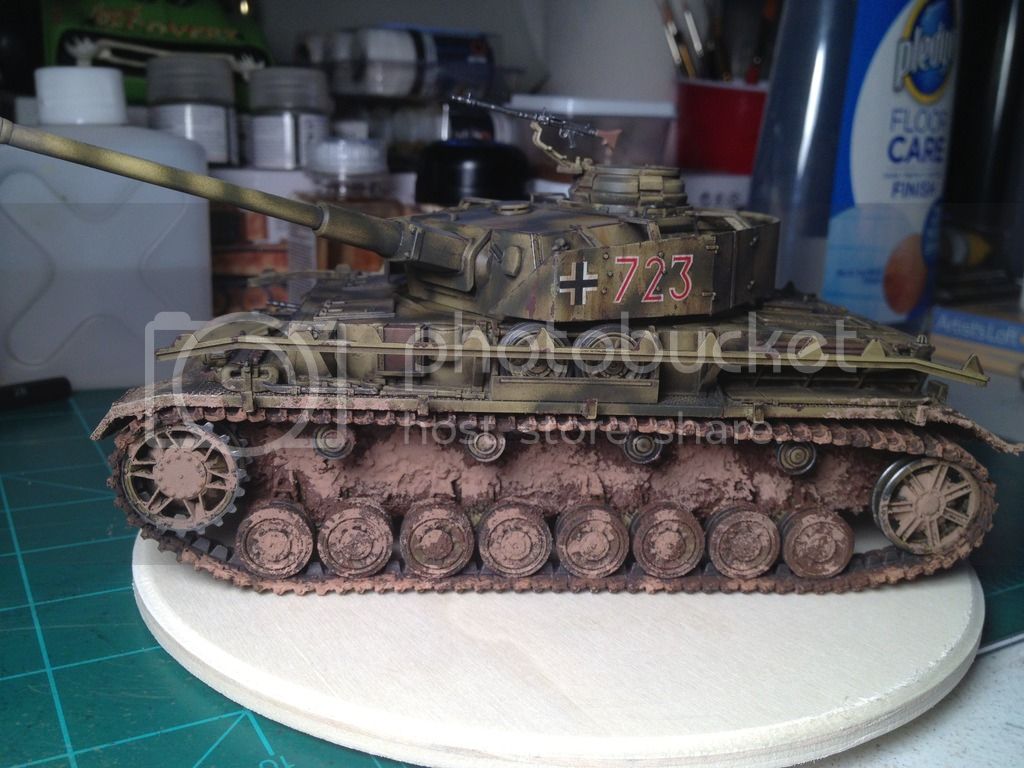
Yes that's helpful information. Does the seam bod well? That is, can you tell that the seam is there, or will I have to bury it in mud or weeds.
RWD
Nice PZIV, by the way.
Yes that's helpful information. Does the seam bod well? That is, can you tell that the seam is there, or will I have to bury it in mud or weeds.
RWD
Nice PZIV, by the way.
Thirian24
Member Since: September 30, 2015
entire network: 2,493 Posts
KitMaker Network: 147 Posts
Posted: Tuesday, January 05, 2016 - 09:48 AM UTC
Thank you for the kind words.
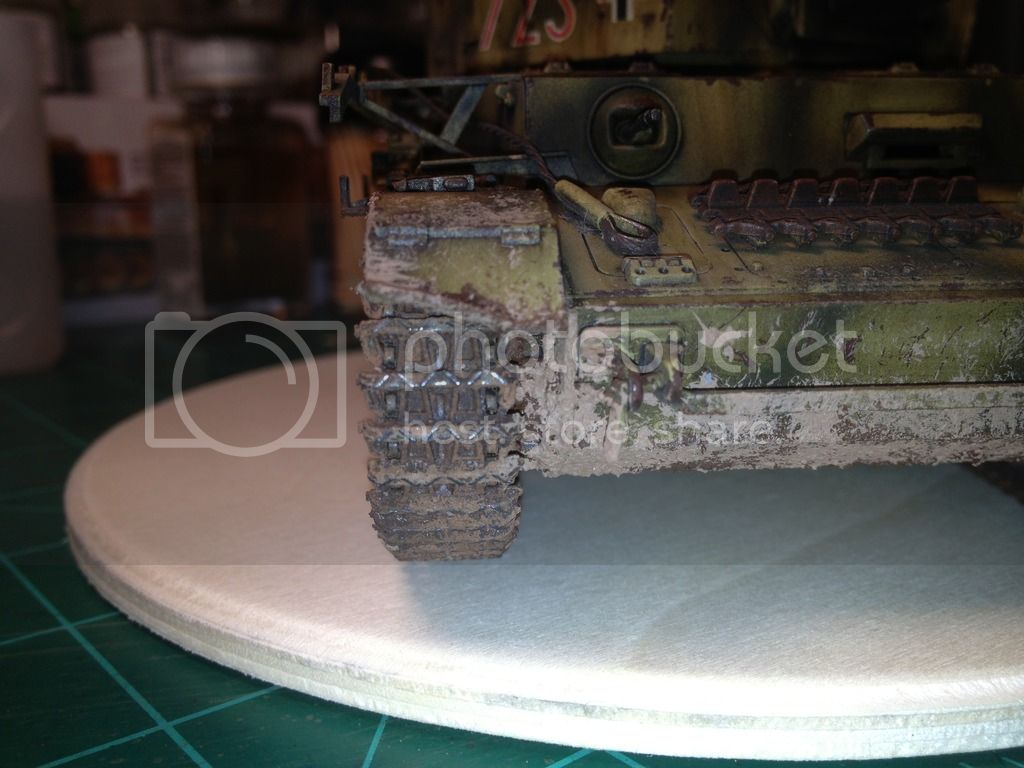
I put the seams on the bottom. I can't see them from the pics.
Cheers,
Dustin
I put the seams on the bottom. I can't see them from the pics.

Cheers,
Dustin
barkingdigger

#013

Member Since: June 20, 2008
entire network: 3,981 Posts
KitMaker Network: 574 Posts
Posted: Tuesday, January 05, 2016 - 08:53 PM UTC
Lots of folks report that DS tracks get "eaten" by enamel paints, and by the solvents in pigments and washes. (This includes the turps used in oil painting, apparently.) The few I've done were all airbrushed with very thin coats of Tamiya acrylics and then hand-brushed with Vallejo & other brands of water-based acrylics, and are still A-OK. Just so you know...
Yellamoon
Member Since: January 05, 2016
entire network: 4 Posts
KitMaker Network: 3 Posts
Posted: Wednesday, January 06, 2016 - 10:04 AM UTC
That's good to know. Ill probably use acrylics on the tracks. I'll test anything harsh on the little piece of sprue before I commit them to the painted treads. thanks for the info.
RWD
RWD

retiredyank
Member Since: June 29, 2009
entire network: 11,610 Posts
KitMaker Network: 3,657 Posts
Posted: Thursday, January 07, 2016 - 07:40 PM UTC
Quoted Text
from: https://armorama.kitmaker.net/forums/239280&page=1...The DS tracks included, with this kit are excellent. I will describe the process I went through to achieve the effect. First, I primed them with MicroSol Satin acrylic. I went over this, with Tamiya acryl White. Vallejo Violet Brown was next. I applied sand, using white glue. I broke up the monotone, with Tamiya Brown and NATO Brown. I then sealed with Model Master Dullcote(lacquer). I set the tracks down, flat on a piece of mdf board and left them for a month. When I applied them, they were still nice and springy. The only difficult part was connecting the ends, as the paint made the pins a little larger and the holes a little smaller.

 |

WEB HOSTING BY


Copyright ©2021 KitMaker Network and Kitmaker Network, a subsidiary of Silver Star Enterprises
All Rights Reserved. Please read our Conditions of Use and Privacy Policy.
All Rights Reserved. Please read our Conditions of Use and Privacy Policy.