_GOTOBOTTOM
Scratchbuilders!: Armor/AFV
This is a group for armor scratchbuilding questions, topics and projects.
Hosted by Mike Kirchoff
How-To scratch build blankets and bed rolls
Wolf-Leader
Visit this Community
New Hampshire, United States
Member Since: June 06, 2002
entire network: 1,225 Posts
KitMaker Network: 463 Posts
Posted: Sunday, June 02, 2013 - 06:41 AM UTC
Hi,
I would like to know how do you make blankets and bed rolls for an armored vehicle in 1/72nd scale?Are there tutorials that show how to make them?
Grauwolf
#084
Visit this Community
Quebec, Canada
Member Since: September 14, 2005
entire network: 2,485 Posts
KitMaker Network: 480 Posts
Posted: Monday, June 03, 2013 - 05:44 AM UTC
Find some heavy duty tissue paper or paper towel
with some texture to it.

Cut and roll or fold to desired shape.

Add sting or straps fashioned from masking tape.

Soak all this in a 50/50 mix water and white glue.

Place on vehicle and work it as to conform to shape
of vehicle.

Let dry and then remove and paint the appropriate colors.

Place on painted vehicle with white glue.

Voila....quite simple and lots of fun!

Cheers,
Joe
Wolf-Leader
Visit this Community
New Hampshire, United States
Member Since: June 06, 2002
entire network: 1,225 Posts
KitMaker Network: 463 Posts
Posted: Monday, June 03, 2013 - 06:23 AM UTC
Hey thanks joe for the tip!
frogman_13
Visit this Community
United States
Member Since: September 06, 2008
entire network: 84 Posts
KitMaker Network: 1 Posts
Posted: Sunday, June 23, 2013 - 11:49 AM UTC
Try Apoxie putty. Wonderful stuff when you learn the tricks. Mix 50/50 part A & B.

Squish it between thumb and forefinger until you get a neutral grey color. Roll into a nice little ball and let it set for 10-15 minutes (or it will be too sticky to comfortably work with).

To make a vehicle tarp or bedroll, roll the ball on a flat surface until you have a "worm" the length you want to fit your model. Now a neat trick..cut the "worm" into equal pieces (4 or 5) and roll each piece into a ball.

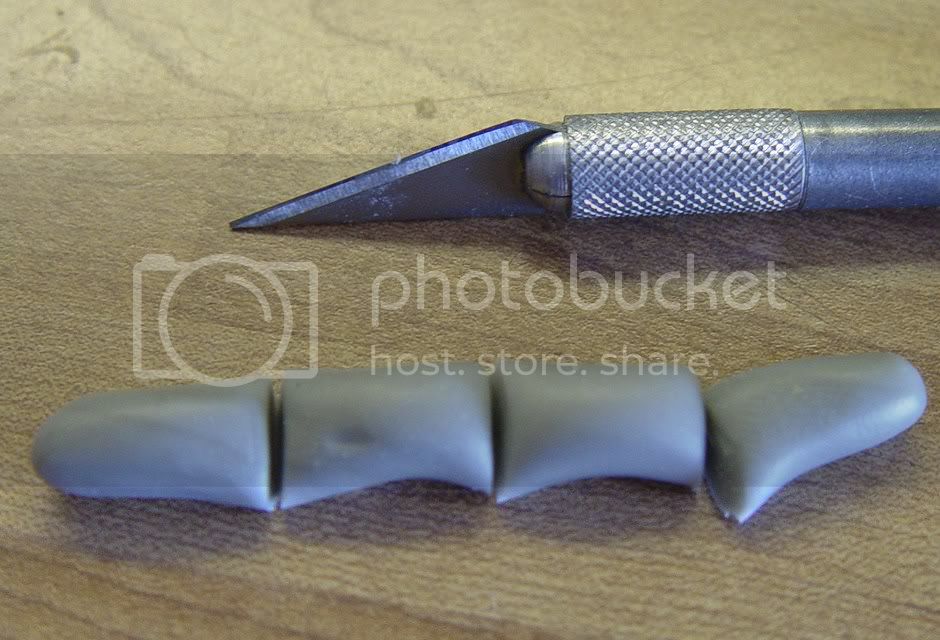
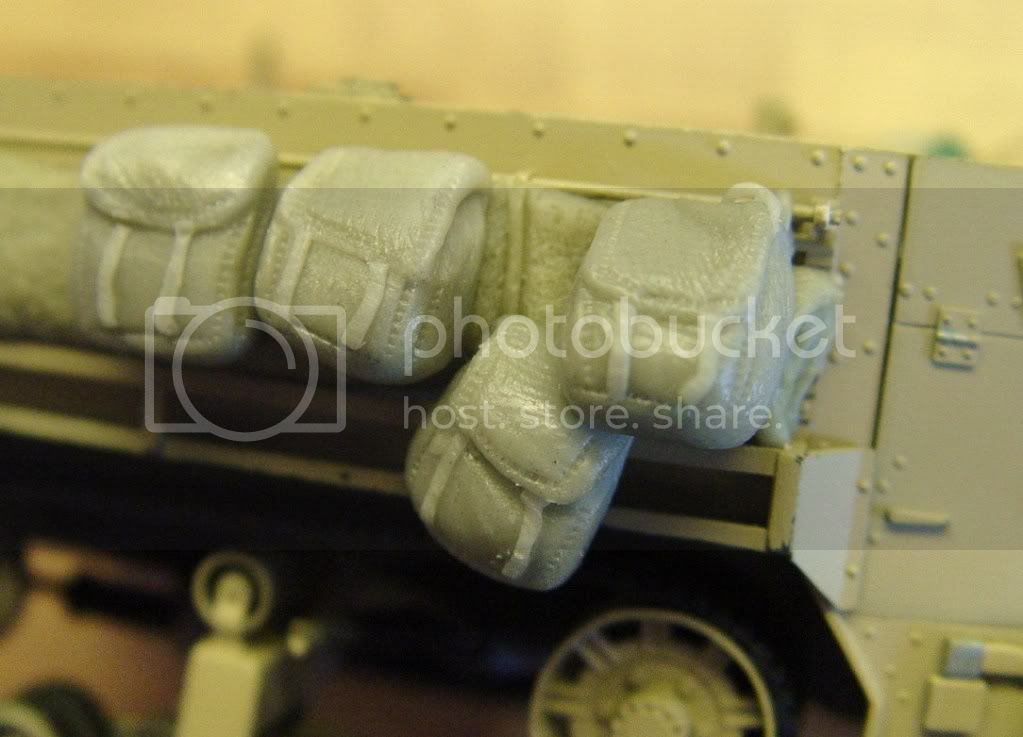
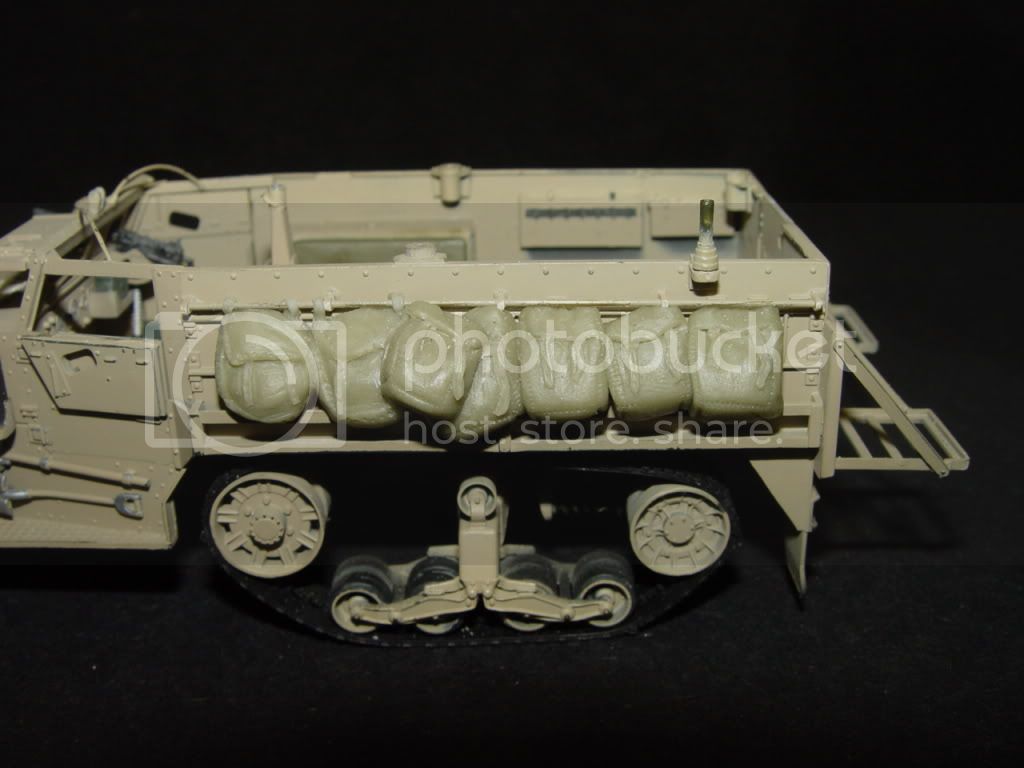
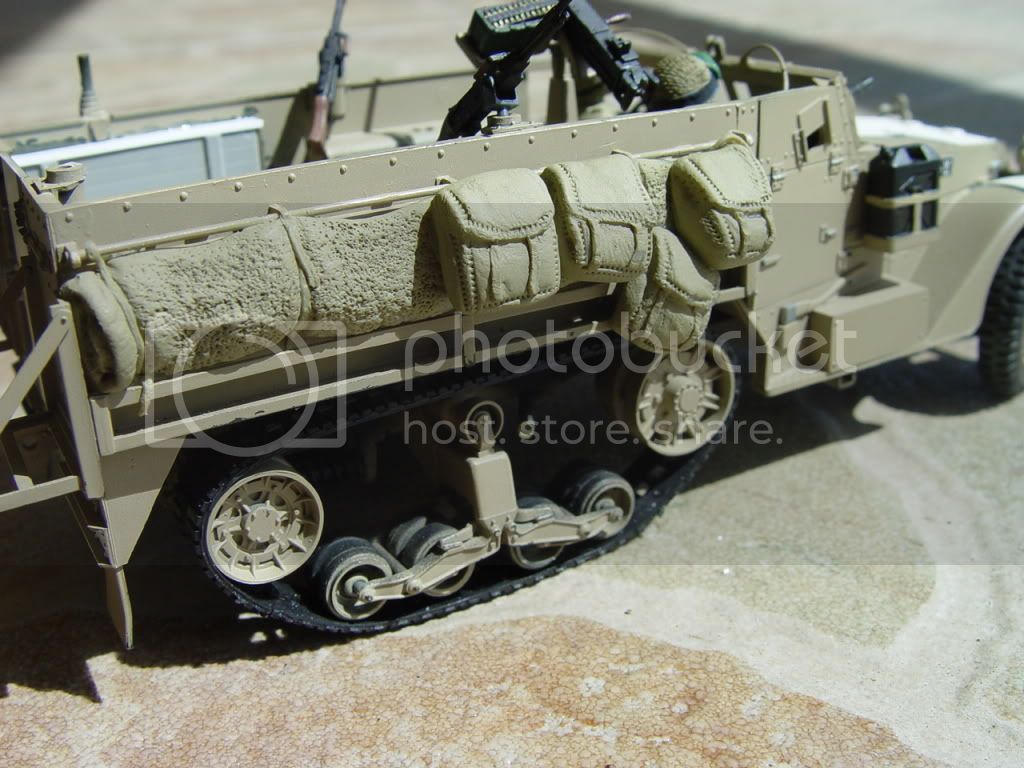
Now stick the balls together and mount on your vehicle, pressing lightly against the surface. There is enough stick to the epoxy to do this. The separations between the balls will simulate the tiedown creases in the fabric of your tarp. You can place thread in them now. With a toothpick or some other tool (I prefer toothpicks because they are always handy...)you can now press into the epoxy more creases emanating out from each segment line. On the ends use the tool to simulate a rolled fabric. This is very easy to do and you will have enough putty from one set to do many, many models in 1/72nd scale. Here are examples of tarps and backpacks I made with Apoxie when I first got this material. It was a pleasure to work with.


Hope this helps you.
Cheers
Ed Okun
 _GOTOTOP