_GOTOBOTTOM
Scratchbuilders!: General
For general topics on scratchbuilding.
Hosted by Mike Kirchoff
sculpting and casting-- first attempt
windysean
Visit this Community
Wisconsin, United States
Member Since: September 11, 2009
entire network: 1,917 Posts
KitMaker Network: 133 Posts
Posted: Wednesday, August 24, 2011 - 09:19 AM UTC
This topic is general, even though my trial subject is a 1/87 (HO) scale civilian vehicle, so I could have put it under Railroad Modeling or under Automotive, but I intend to use this knowledge later for all sorts of subjects. I know there are experts out there in every Kitmaker category who can help me with advice.
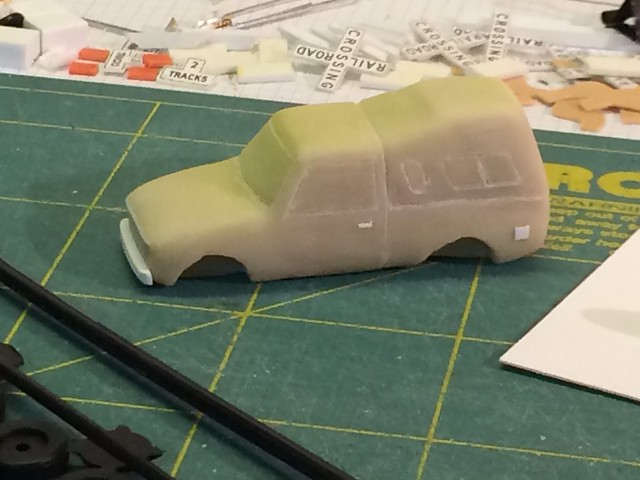
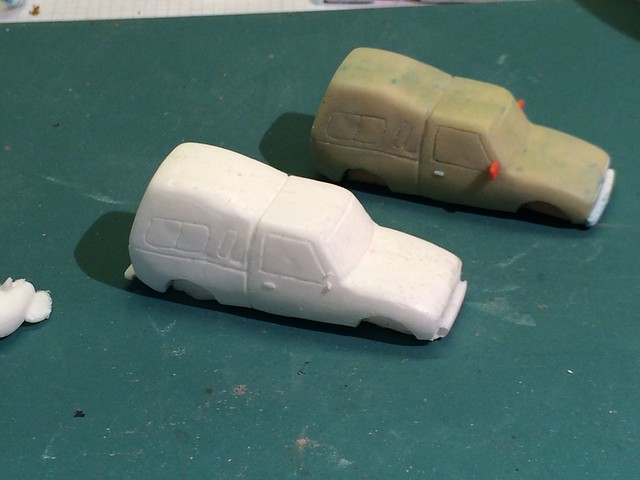
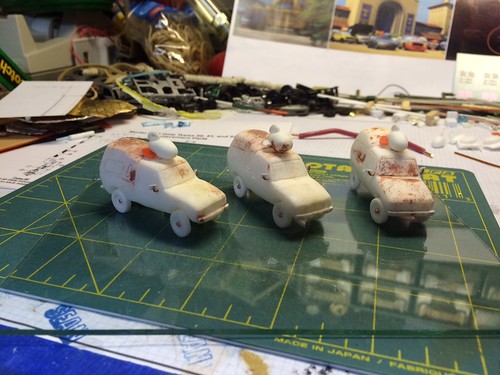
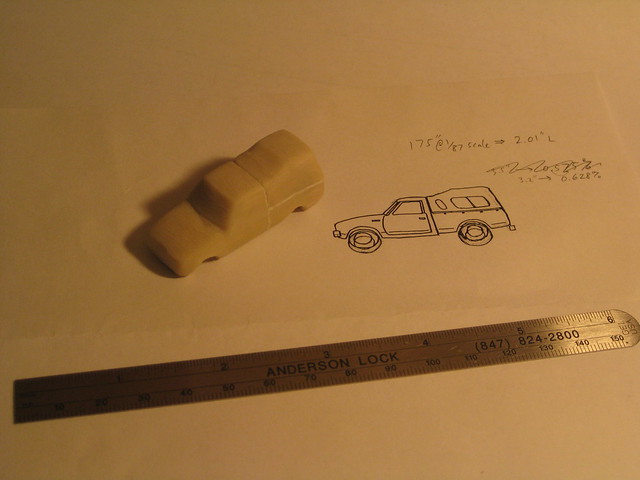
For starters, I made up drawings of the full-sized final product. Then I formed Sculpey putty to shape. I found it's very difficult working with the soft putty, because as you concentrate on one part, you inadvertently distort other parts of the shape.
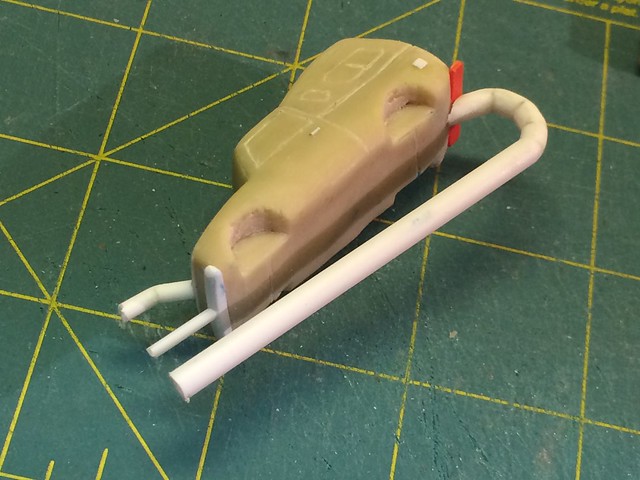
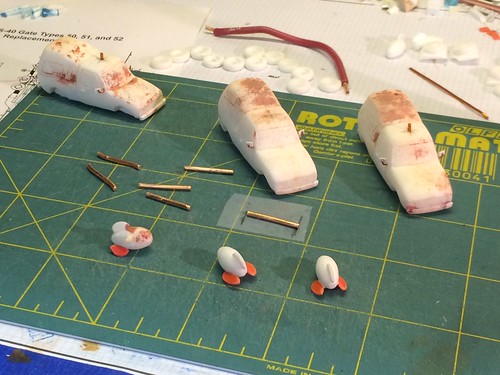
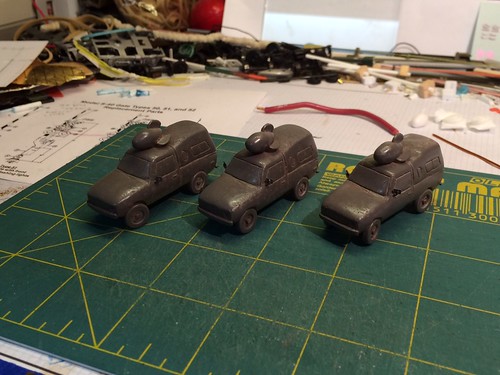
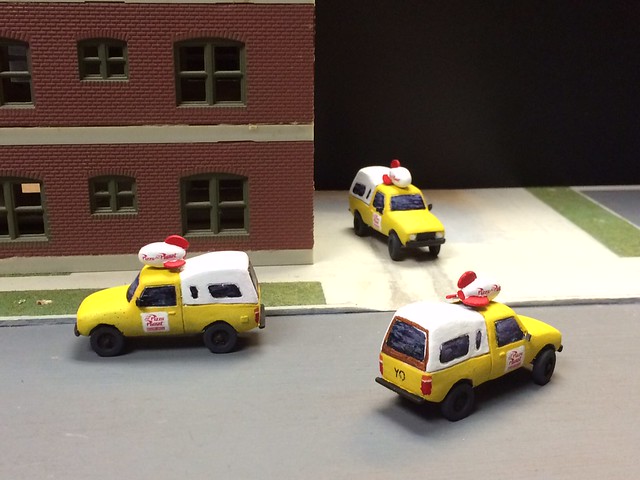
I won't try adding too many details to this rough shape, planning instead to super-glue more detail parts from styrene or metal later. I plan to cast and copy this item in resin eventually, so I left off details like wheels for later too.
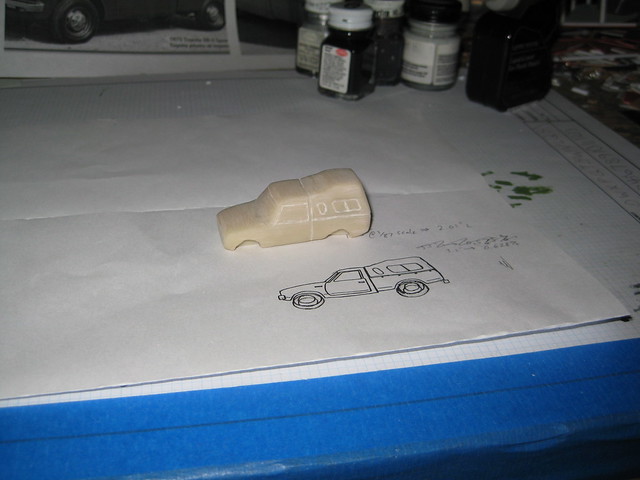
When I had an acceptable shape, I baked it per the instructions. The instructions specifically say not to over-bake, but I've also noticed that it's possible not to bake it thoroughly enough, resulting in a piece that seems too soft to permanently hold its shape.
Toyota pickup form
Once it was baked to satisfaction, I started to carve window outlines. I used electrical tape as a straightedge (I think I read about airplane modelers doing that to carve panel lines) and a sharp #11 blade, then widened the lines with the back of an older, duller blade.
Carving window shapes
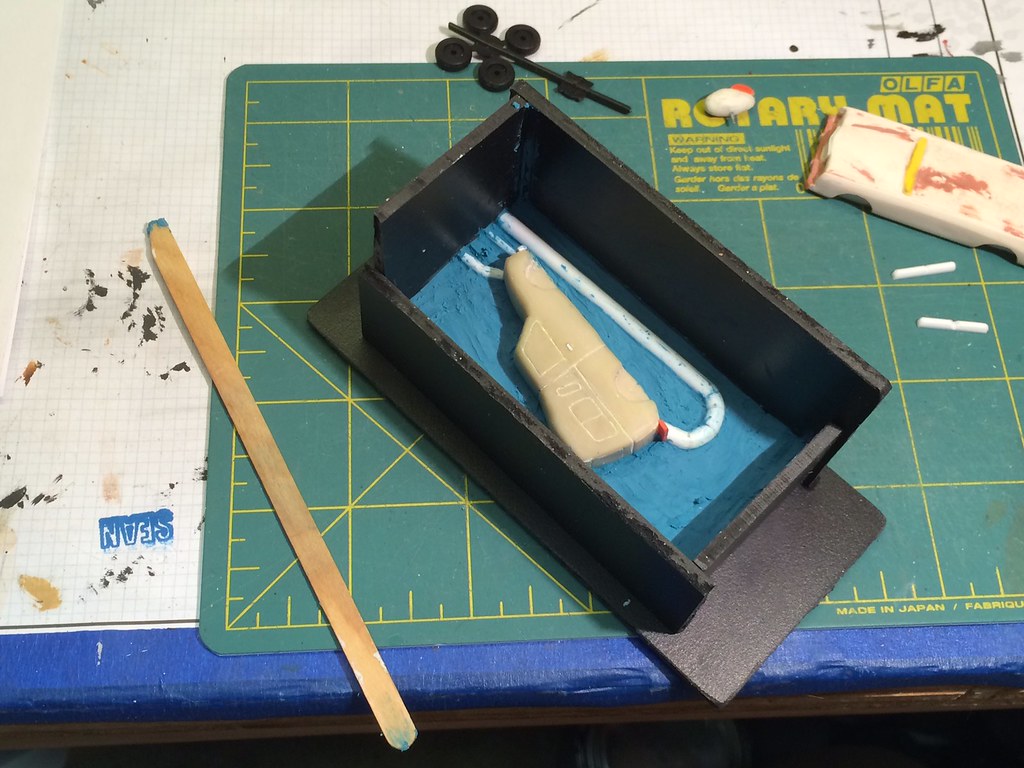
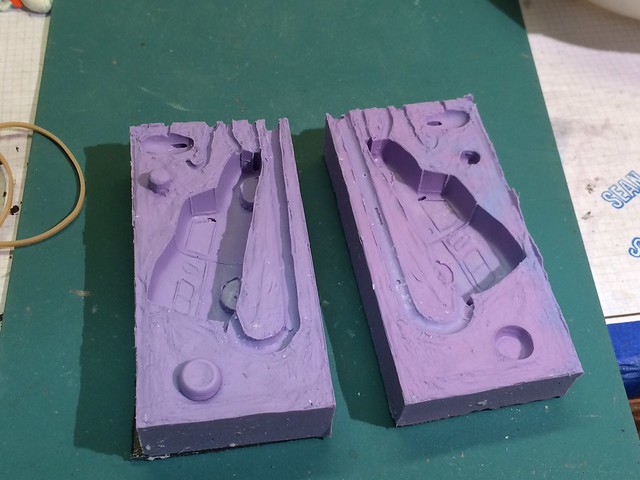
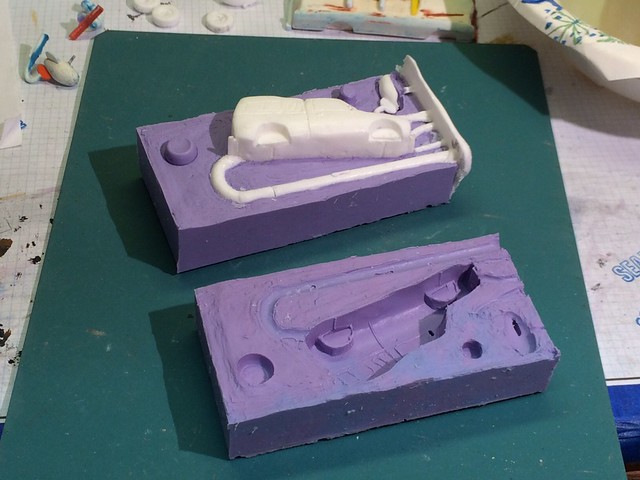
Any thoughts, ideas, tips welcome. I'll really need them when I get closer to casting resin. I have a resin-casting kit from Micro-Mark, and I've seen demonstrations, but I've never gotten the courage yet to try it myself until now.
Thanks!
-Sean.
Danny_506
Visit this Community
Antwerpen, Belgium
Member Since: October 07, 2007
entire network: 254 Posts
KitMaker Network: 1 Posts
Posted: Thursday, August 25, 2011 - 07:49 AM UTC
looks really great good job...
JPTRR
Staff MemberManaging Editor
RAILROAD MODELING
#051
Visit this Community
Tennessee, United States
Member Since: December 21, 2002
entire network: 7,772 Posts
KitMaker Network: 802 Posts
Posted: Saturday, November 12, 2011 - 04:56 PM UTC
Hi Sean,

Wow, you go! I've never been brave enough to try sculpting my own.
KoSprueOne
Visit this Community
Myanmar
Member Since: March 05, 2004
entire network: 4,011 Posts
KitMaker Network: 879 Posts
Posted: Sunday, November 13, 2011 - 04:42 PM UTC
Nice little sculpt

as far as mold making, I'd make a one piece mold. Double sticky tape it down to flat material that you'll use for the mold walls. Do this in the same position as your last photo above.

You can establish the axle positions and stance of the vehicle by drilling holes through the 'master' where the axles will go. Then insert rod or wire into and through these positions. Leave them in place while pouring the mold rubber. Place these axle rods into position in the mold each time you cast a new one


rokket2001
Visit this Community
South Australia, Australia
Member Since: March 28, 2005
entire network: 353 Posts
KitMaker Network: 14 Posts
Posted: Monday, December 12, 2011 - 06:24 PM UTC
Here's a 2-part article that may help. Part 2 is on pressure casting.

Bottom line - It's not really scary once you do it, so do it!

Hope it helps.

http://amp.rokket.biz/lib_resources "Easy Resin casting"
windysean
Visit this Community
Wisconsin, United States
Member Since: September 11, 2009
entire network: 1,917 Posts
KitMaker Network: 133 Posts
Posted: Wednesday, April 08, 2015 - 10:34 PM UTC
I picked up this old project again.
Added more details...
Closer detail by windysean, on Flickr


I like that idea of a one-part mold with the axles applied each time, but I decided to go with a 2-part mold for my first try, so I added channels for the material to enter and exit...
Pour tunnels added for casting. by windysean, on Flickr

Then I made a bed of modeling clay for the first half of the mold. The black walls are a vinyl sign material, not quite styrene, super-glued into two subcomponents so I could dismantle the box again later.
Half mold with modeling clay. by windysean, on Flickr

At this point, I had trouble finding proper rubber mold material. The stuff I got from Micromart had dried up before I ever opened it, so I was trying all the local craft stores-- Hobby Lobby and a local store didn't, but I think Michaels does, so I'll go there soon.
thanks for reading along so far.
Sean H.
pbhawkin
Visit this Community
New South Wales, Australia
Member Since: November 23, 2009
entire network: 179 Posts
KitMaker Network: 6 Posts
Posted: Monday, April 27, 2015 - 06:07 AM UTC
Hi,
Wink that link is the exact way I cast my 1/144 planes.
Bought the pressure pots on Ebay for $30.
Haven't looked back since doing this.
It also means that the molds last longer as the RTV does not have hundreds of thousands of air bubbles that break down over time ruining the mold (they still break down but much slower allowing more casts to be made).
windysean
Visit this Community
Wisconsin, United States
Member Since: September 11, 2009
entire network: 1,917 Posts
KitMaker Network: 133 Posts
Posted: Tuesday, April 28, 2015 - 01:42 PM UTC
Thanks, Peter. I'll read up on the pressure pots.
I haven't made progress past the photos above yet. My mold RTV material expired in 2007 and stiffened up in the jars. Then I tried to cheat with some cheap materials, not wanting to pay the prices in the Micromart catalog, but finally I have found an art source online that was easier to afford.
Sean
windysean
Visit this Community
Wisconsin, United States
Member Since: September 11, 2009
entire network: 1,917 Posts
KitMaker Network: 133 Posts
Posted: Sunday, June 28, 2015 - 07:31 PM UTC
Focusing on this now. For my mold material, I'm using Oomoo 30 with success.
Molding mini-pickups by windysean, on Flickr

Molding mini-pickups by windysean, on Flickr

Of course, I'm still stubbornly trying to get my money out of the resin material that also expired in 2007, and got predictable results. Later today, I'll stop at Hobby Lobby or Michaels for new resin material, with their standard 40% off one item coupon.

Molding mini-pickups by windysean, on Flickr

Thanks for following along so far!
-Sean H.
edmund
Visit this Community
United States
Member Since: November 10, 2014
entire network: 668 Posts
KitMaker Network: 211 Posts
Posted: Monday, June 29, 2015 - 07:58 AM UTC
Is there a michaels or AC Moore near you , I believe they carry casting supplies and with a 50% coupon that's a substantial savings over hobby lobby . That's how I get my oil paints and brushes .
windysean
Visit this Community
Wisconsin, United States
Member Since: September 11, 2009
entire network: 1,917 Posts
KitMaker Network: 133 Posts
Posted: Monday, June 29, 2015 - 09:07 AM UTC
Thanks, Edmund. Yes, there is a Michaels nearby. Can't argue with 50% off!
edmund
Visit this Community
United States
Member Since: November 10, 2014
entire network: 668 Posts
KitMaker Network: 211 Posts
Posted: Monday, June 29, 2015 - 10:49 PM UTC
Now you have to get hold of their flyer .
windysean
Visit this Community
Wisconsin, United States
Member Since: September 11, 2009
entire network: 1,917 Posts
KitMaker Network: 133 Posts
Posted: Tuesday, July 07, 2015 - 11:45 PM UTC
Now to take over the world! by windysean, on Flickr

I bought new resin, "Amazing" brand, but the pot life was only 1-2 minutes, and I can't stir it and pour it into my molds entirely before it sets up. The finish is surprisingly smooth, so it's good in that regard.
I went back to the 10-year-old resin I had from MicroMark, and with thorough stirring, it seems to have a 5 minutes pot life, and I used it for the three trucks in the photo above (and some other tests). I may have to putty some grainy areas smooth though.
Reading further, the clear version of the "Amazing" brand resin has a 3-minute pot life, and it may be better to see through the windows of my castings, so I'll get some of that to test out too.
The short pot-life resin will require simpler open molds to pour quickly.
-Sean H.
windysean
Visit this Community
Wisconsin, United States
Member Since: September 11, 2009
entire network: 1,917 Posts
KitMaker Network: 133 Posts
Posted: Monday, July 27, 2015 - 10:10 PM UTC
Taking these three test subjects to completion before I try again...
PizzaDeliveryShuttles by windysean, on Flickr
Assembled by windysean, on Flickr
Since the pour wasn't quite complete, I made new mirrors for each, filled rough surfaces with auto body filler putty, added styrene where the front bumper didn't form.
Here, I hit a snag-- the primer didn't set, apparently from improper resin cleaning and prep before painting. I'll strip the paint and any oils/residue and prime again...
Primed but bleed-thru oil appeared by windysean, on Flickr
cheers!
-Sean H.
windysean
Visit this Community
Wisconsin, United States
Member Since: September 11, 2009
entire network: 1,917 Posts
KitMaker Network: 133 Posts
Posted: Wednesday, August 26, 2015 - 06:42 PM UTC
Finished these trucks. It took some re-priming and swiping with mineral spirits where the bleed-through had continued.
Pizza Planet delivery shuttles-- final by windysean, on Flickr

The original truck in the movies was a cartoon, so my copies aren't much more detailed than that. I used art acrylic paint, which dried to a dead flat. Where I intended decals, I gave two coats of Pledge Future floor finish beforehand.
A coat of Testors gloss soaked right in and is barely perceptible. I gave the windows several coats of Future then sanded smooth with 600-grit wet, then two more coats of Future to get to this point.
My next trials will need more detail than this cartoon, so I'll work some more on the masters.
These took a lot of work to clean up, detail, and paint. More than I expected.
Cheers!
-Sean H.
captfue
Visit this Community
Texas, United States
Member Since: September 02, 2006
entire network: 785 Posts
KitMaker Network: 210 Posts
Posted: Friday, August 28, 2015 - 02:34 AM UTC
Looks like a great finish
KoSprueOne
Visit this Community
Myanmar
Member Since: March 05, 2004
entire network: 4,011 Posts
KitMaker Network: 879 Posts
Posted: Sunday, August 30, 2015 - 05:08 AM UTC
Those little dudes came out great!


windysean
Visit this Community
Wisconsin, United States
Member Since: September 11, 2009
entire network: 1,917 Posts
KitMaker Network: 133 Posts
Posted: Sunday, August 30, 2015 - 05:46 AM UTC
Thanks, guys!
JClapp
#259
Visit this Community
Massachusetts, United States
Member Since: October 23, 2011
entire network: 2,265 Posts
KitMaker Network: 225 Posts
Posted: Sunday, August 30, 2015 - 02:46 PM UTC
You've got something going there! Thats inspiring!
 _GOTOTOP