_GOTOBOTTOM
Scratchbuilders!: Armor/AFV
This is a group for armor scratchbuilding questions, topics and projects.
Hosted by Mike Kirchoff
Upscaling a Sanky GS Trailer to 1/24
okdoky
Visit this Community
Scotland, United Kingdom
Member Since: April 30, 2007
entire network: 1,597 Posts
KitMaker Network: 673 Posts
Posted: Thursday, October 07, 2010 - 03:37 PM UTC
Hi Folks

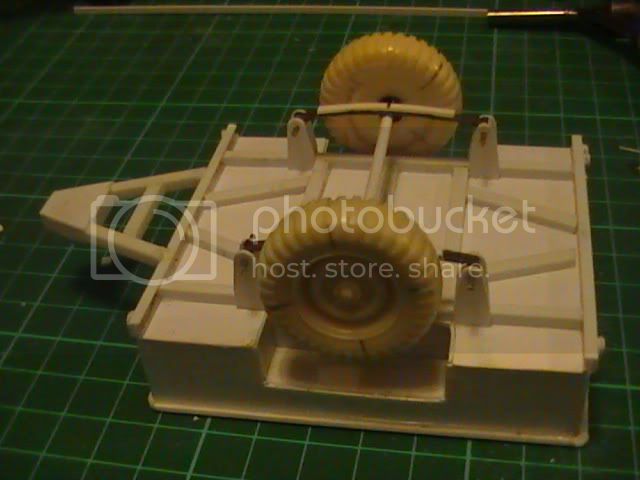
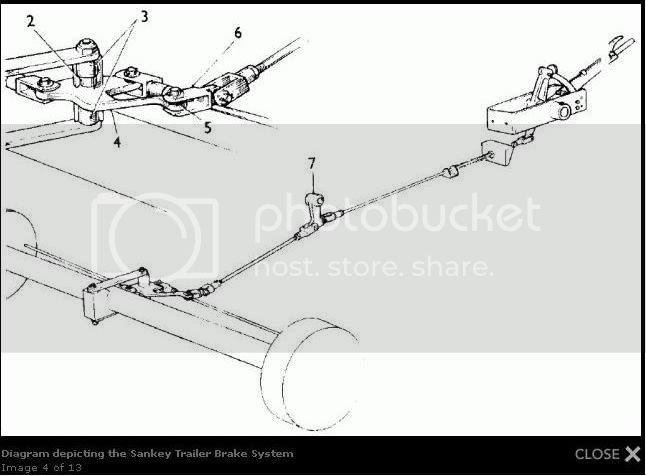
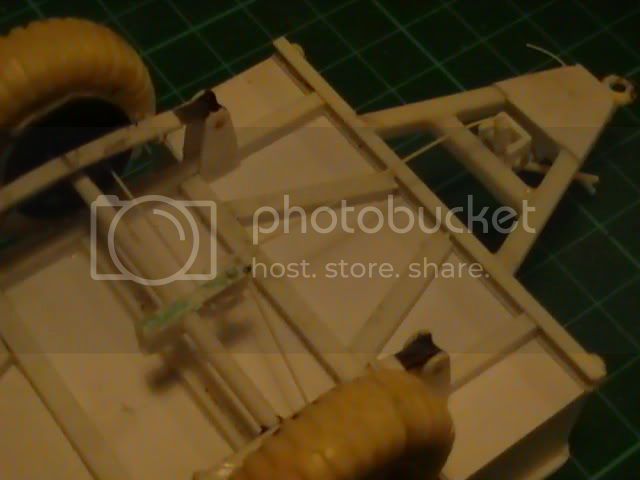
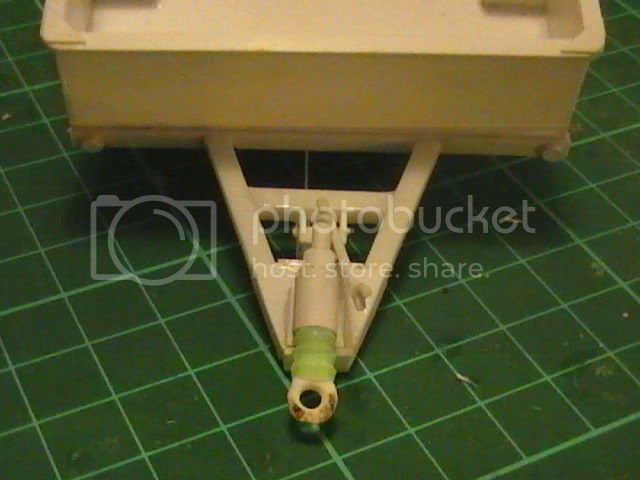
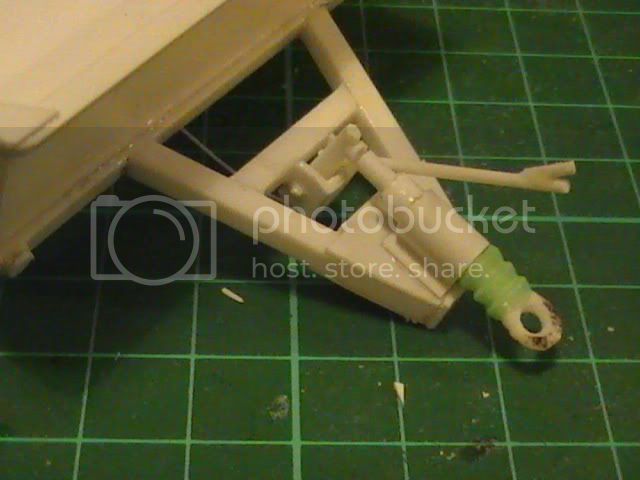
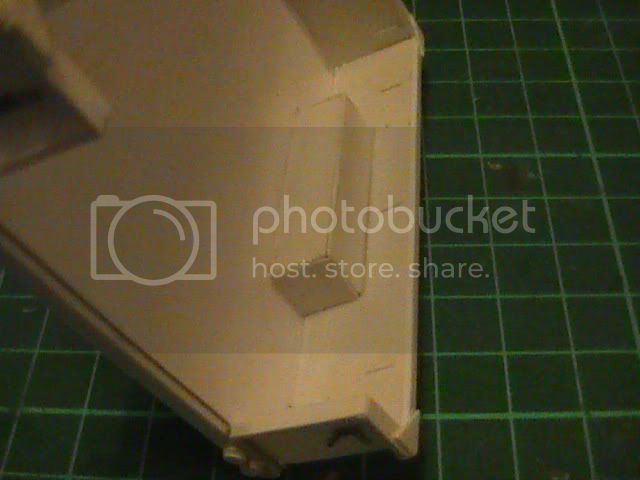
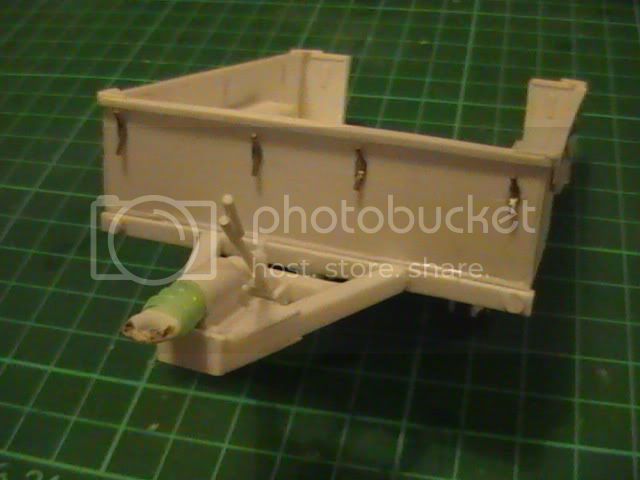
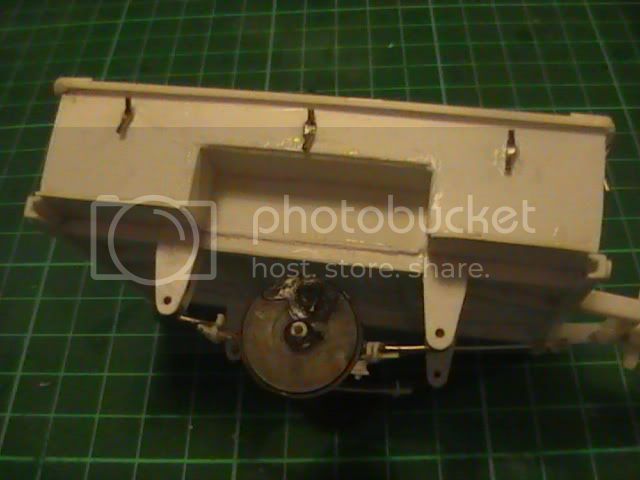
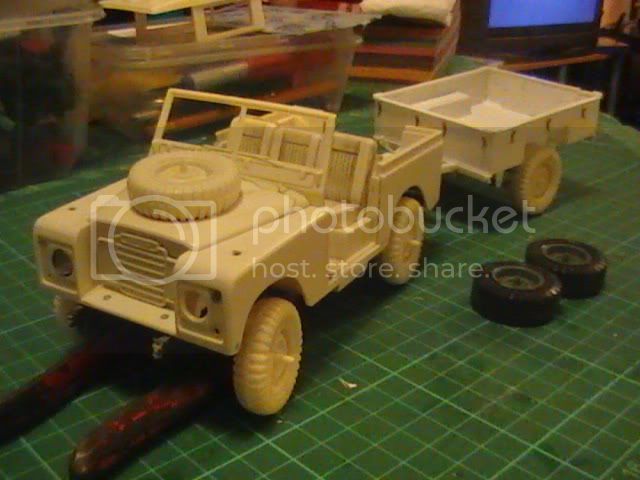
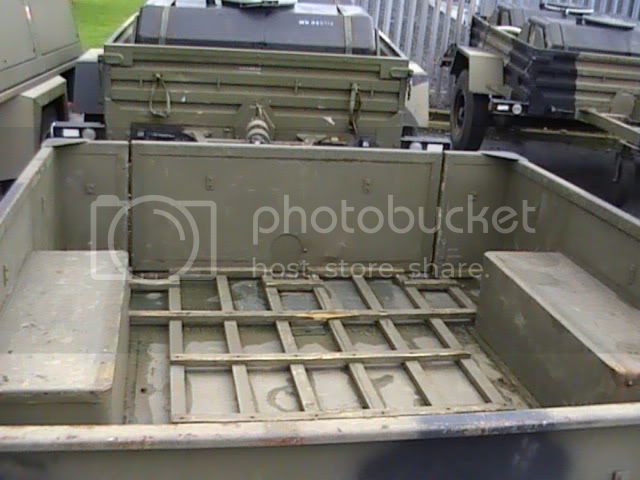
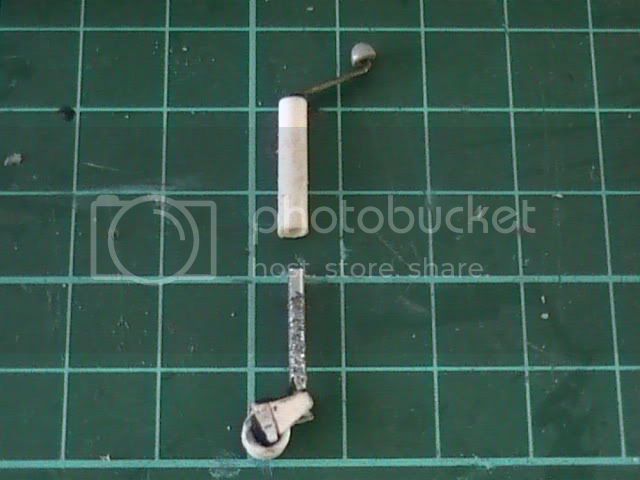
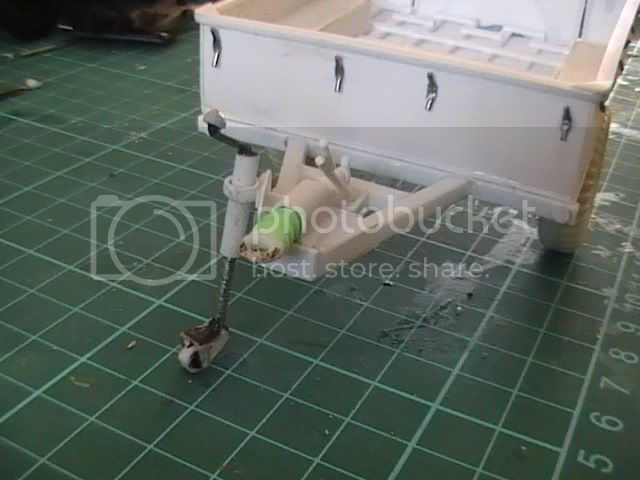
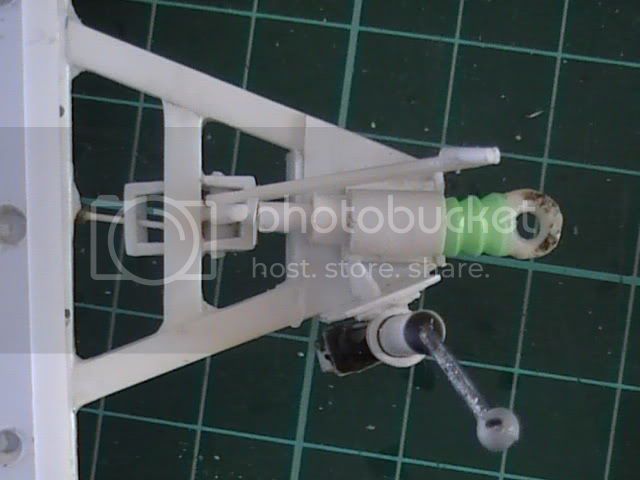
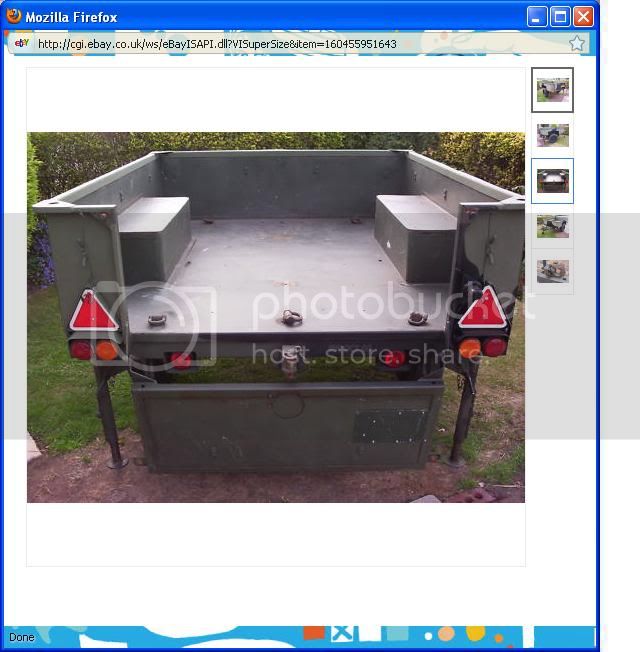
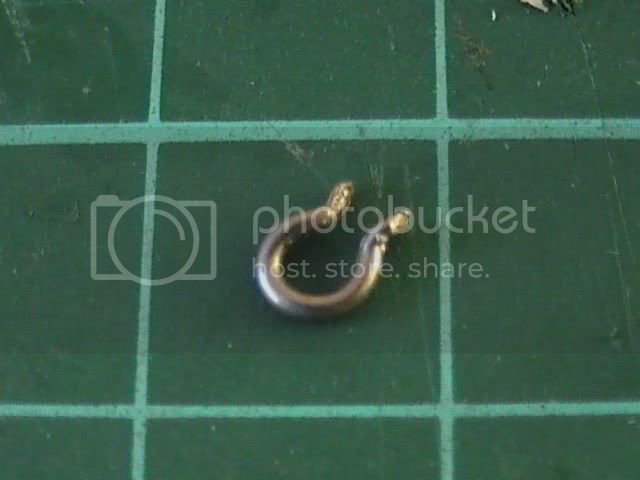
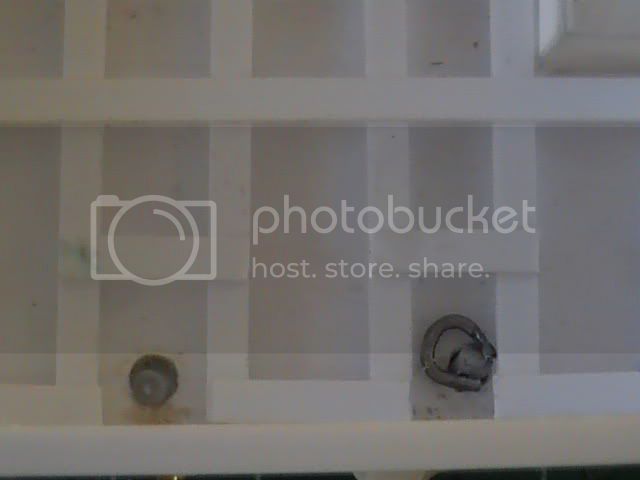
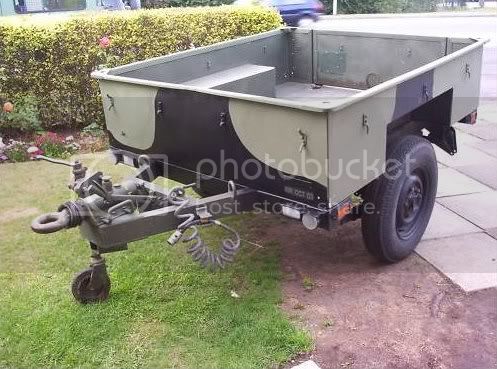
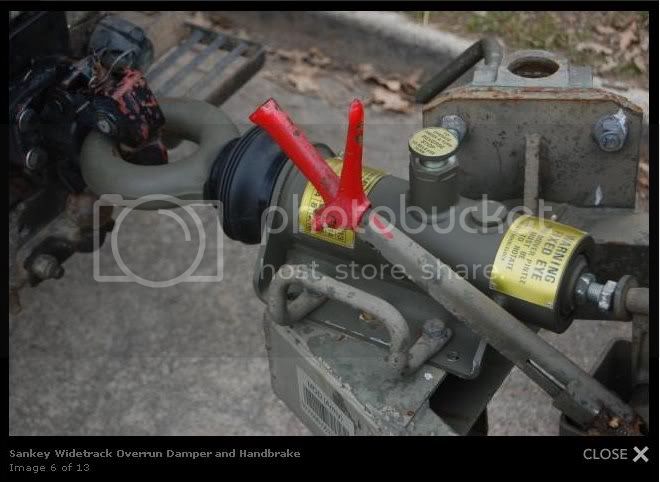
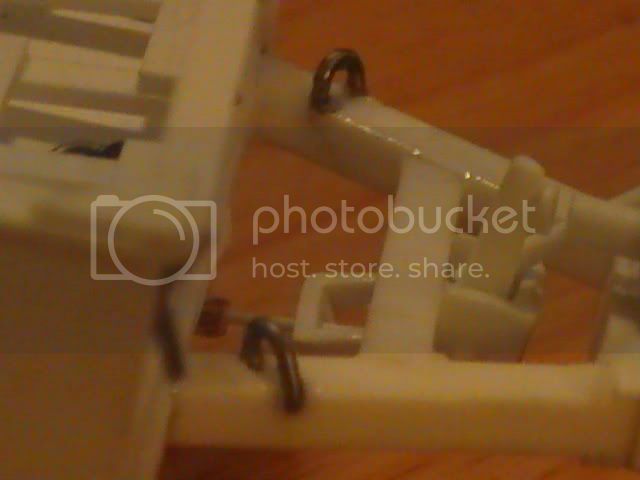
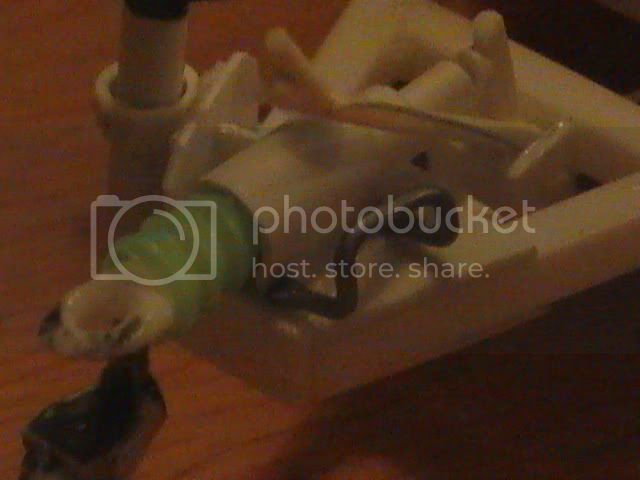
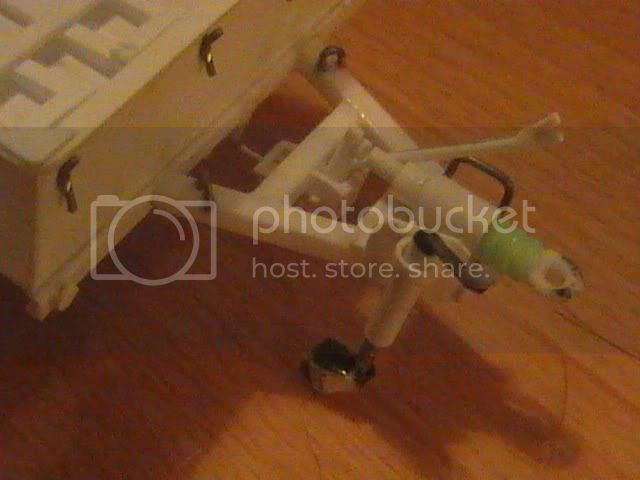
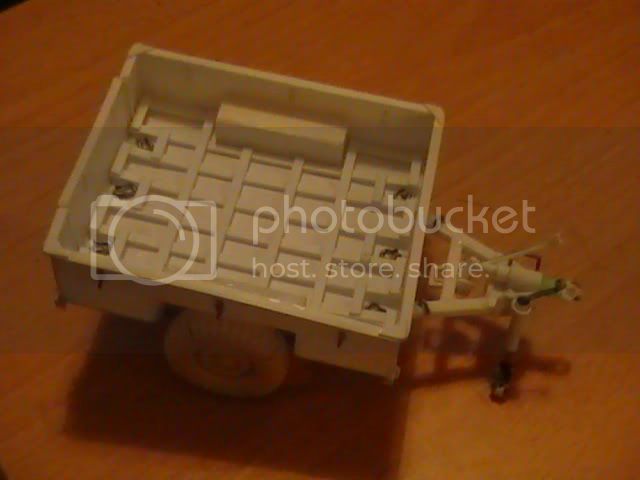
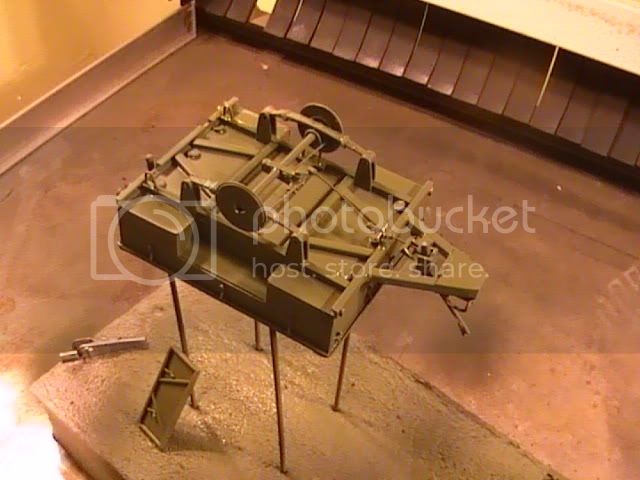
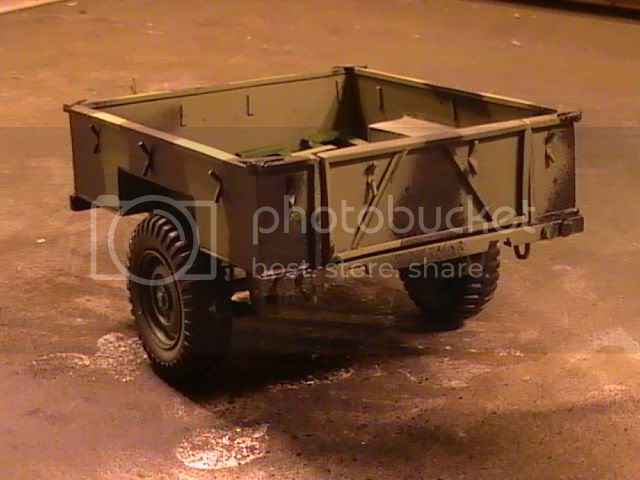
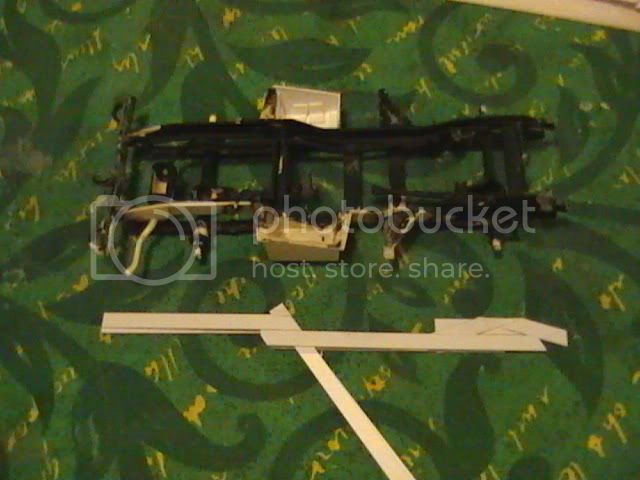
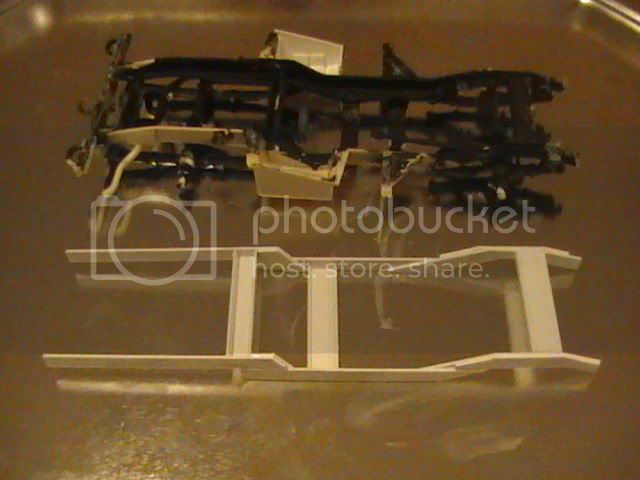
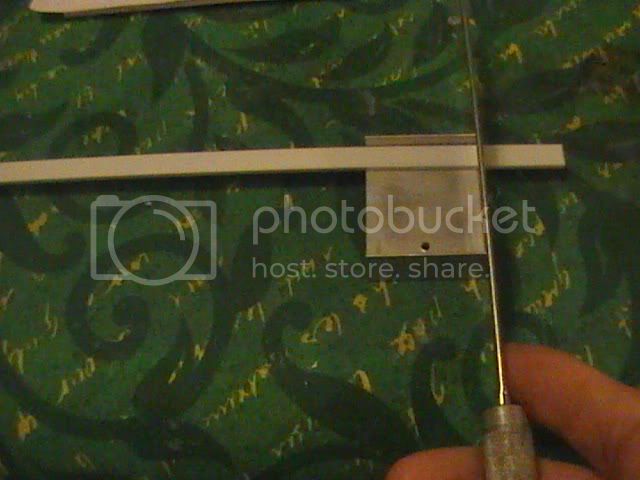
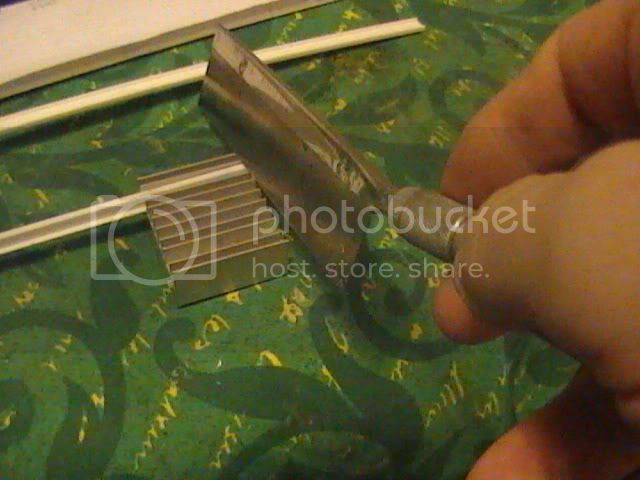
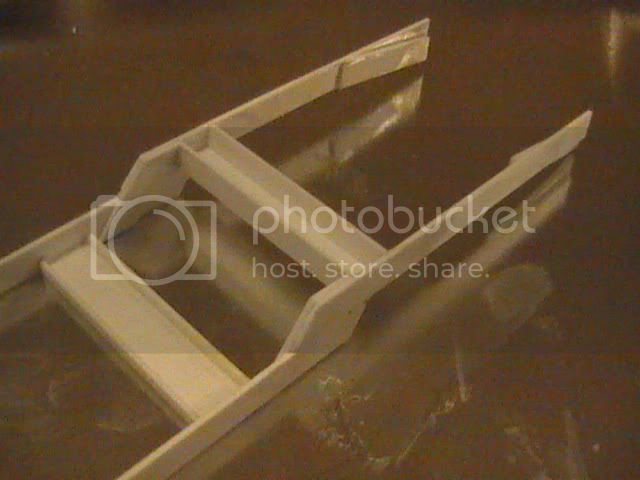
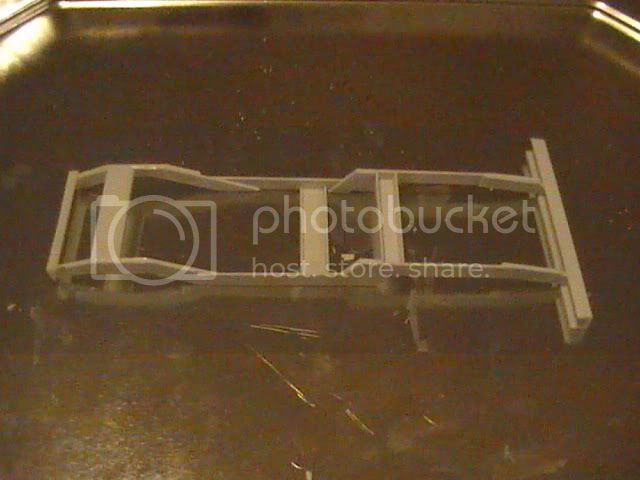
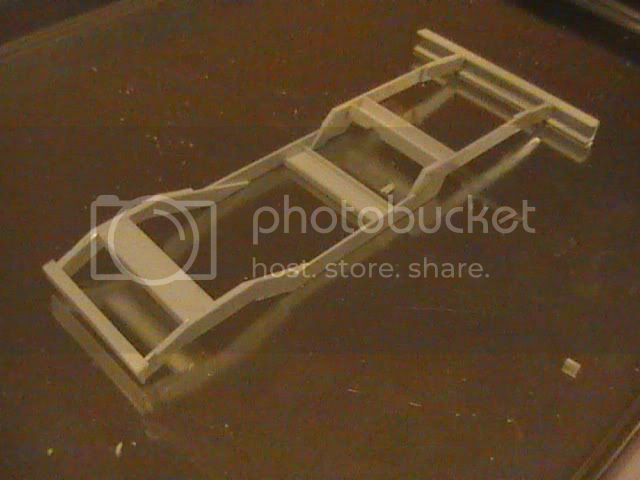
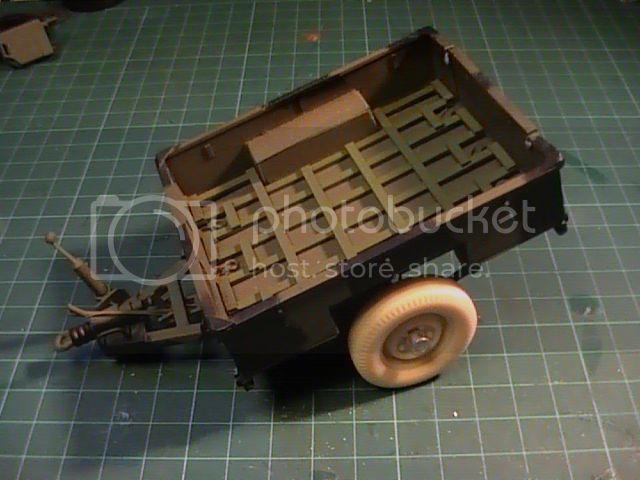
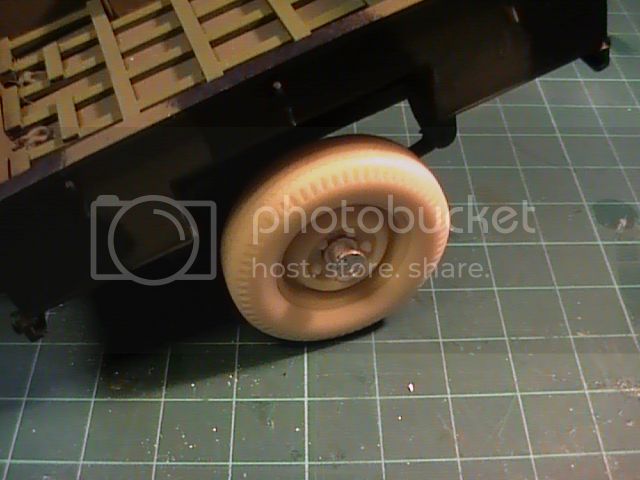
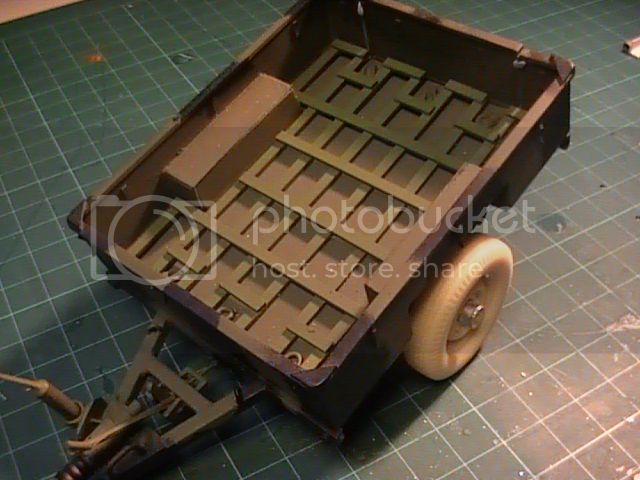
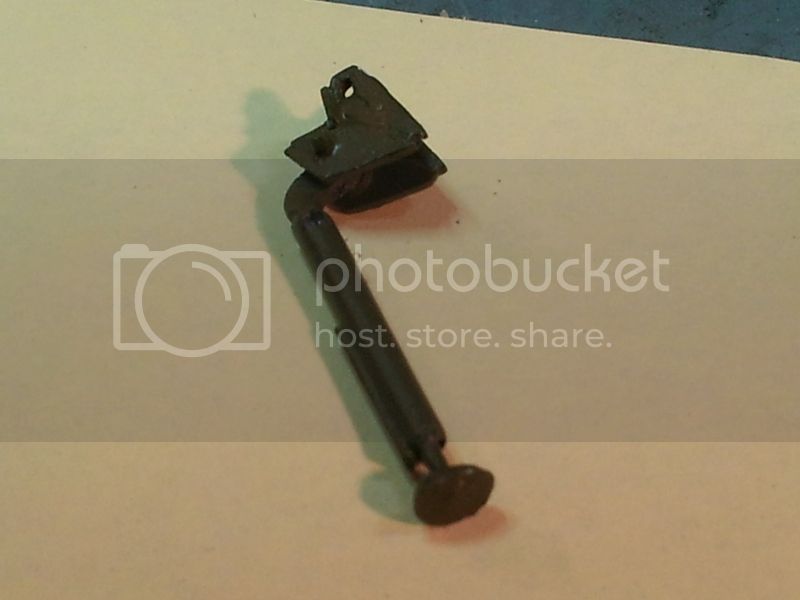
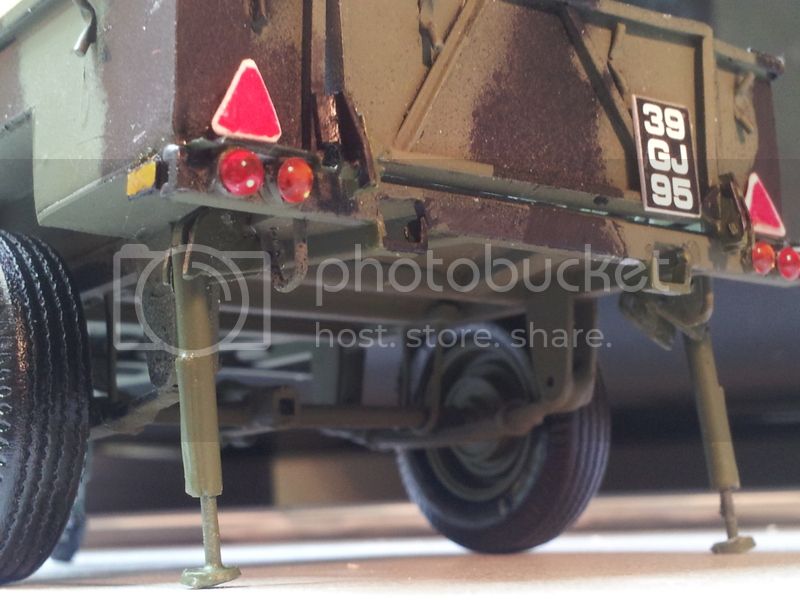
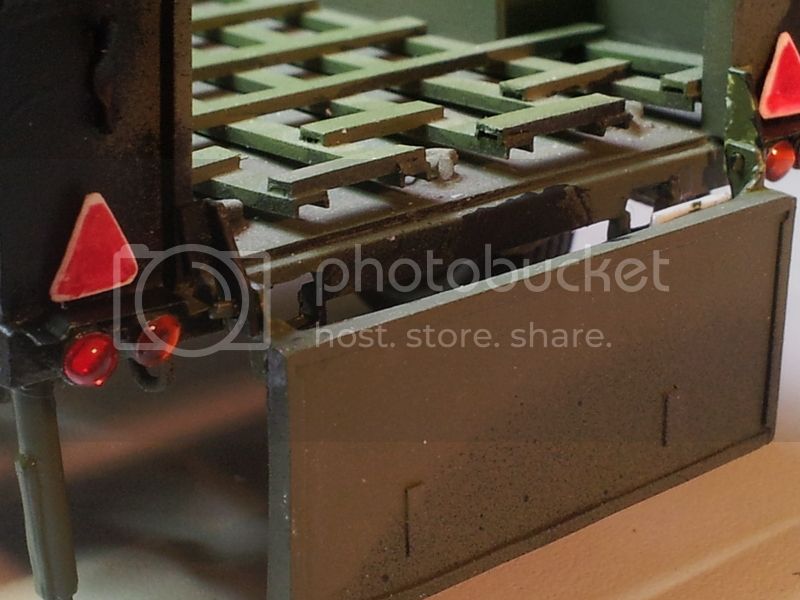
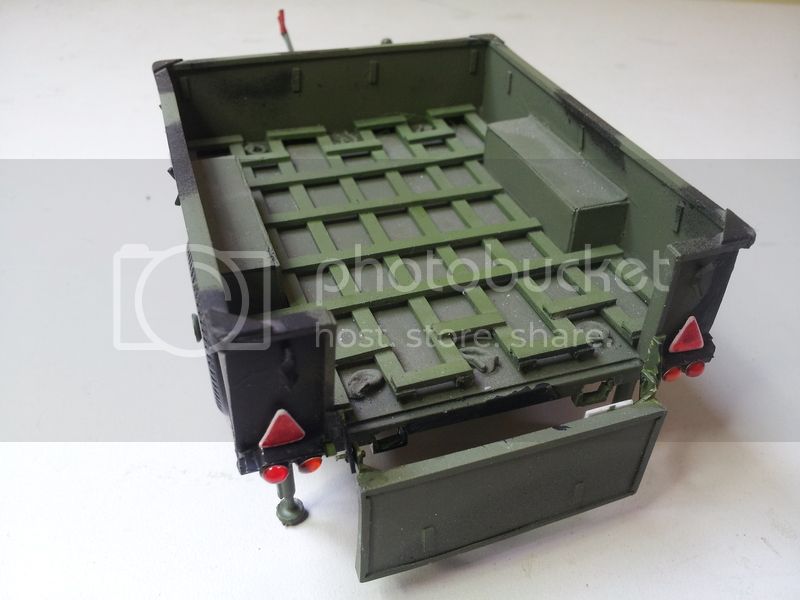
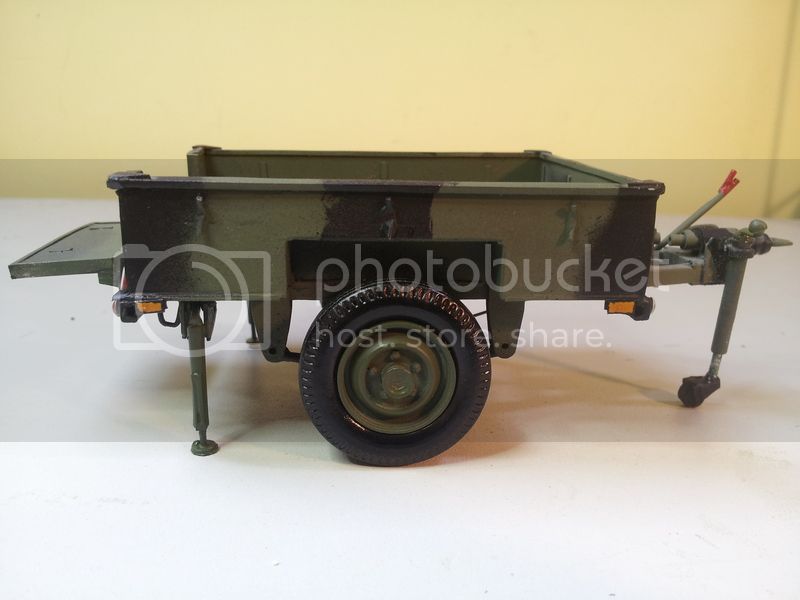
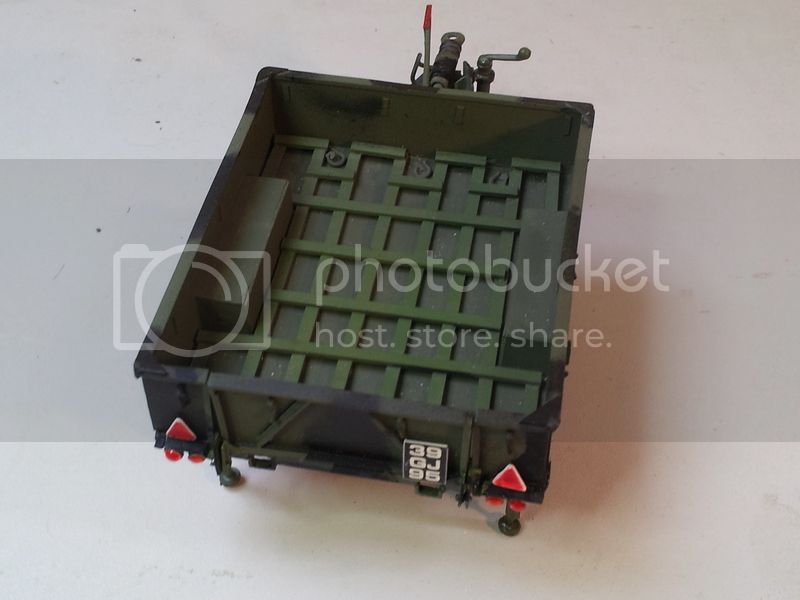
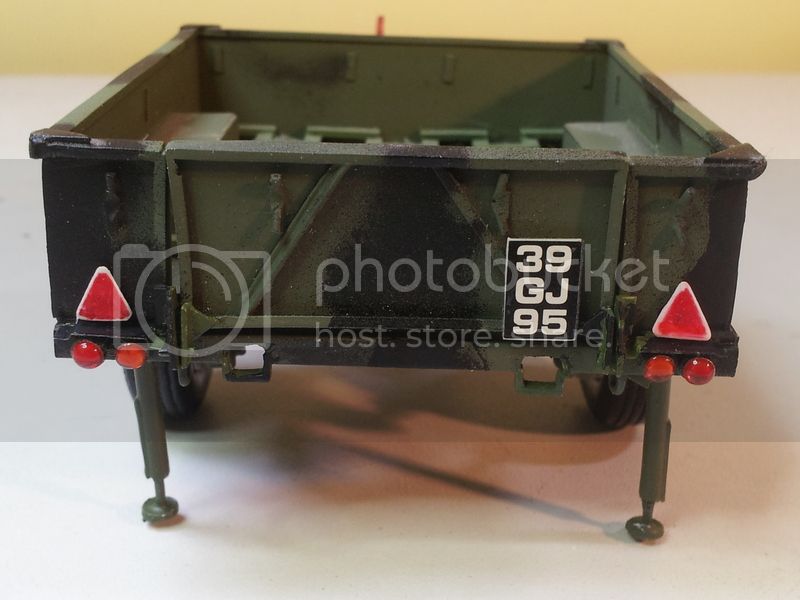
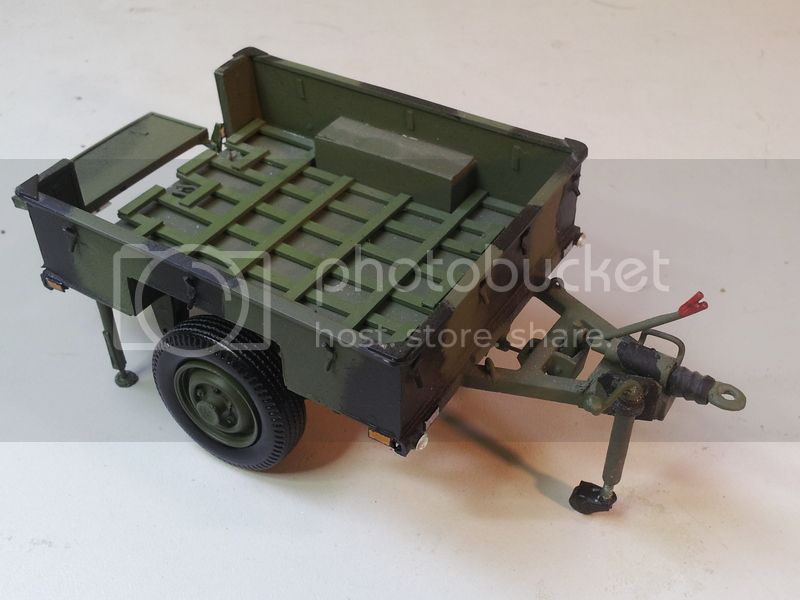
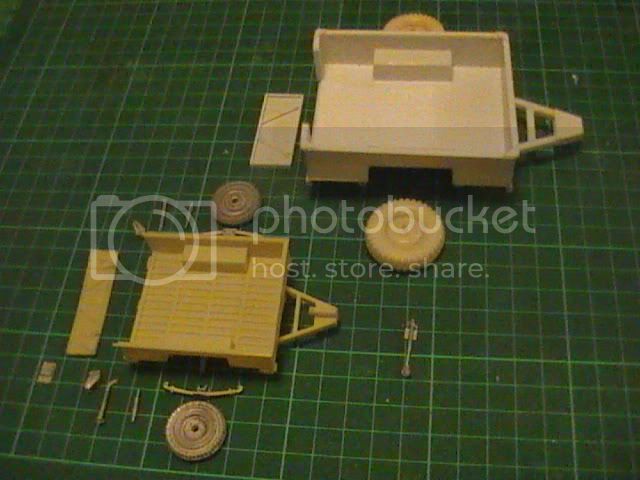
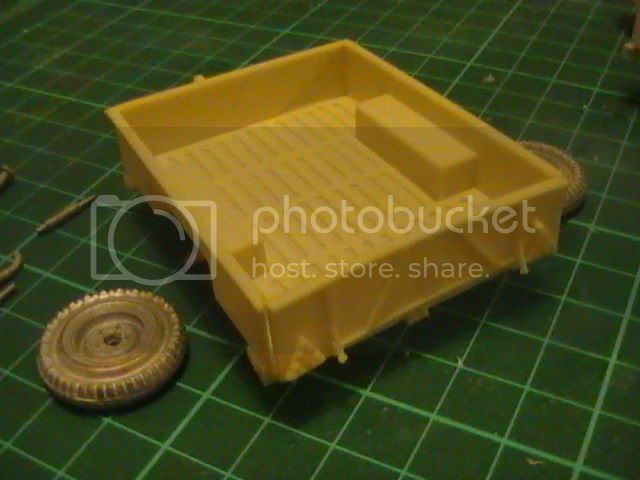
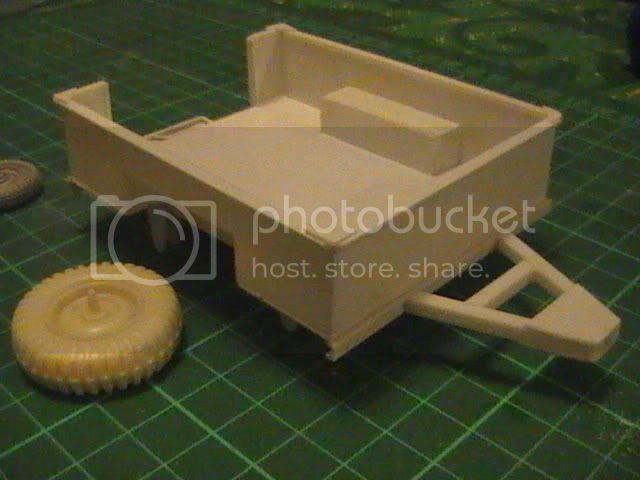
Thanks to Mike at the model club who gave me a loan of his 1/35 scale Firing Line Land Rover (Sanky) Trailer that I could use for reference purposes to upscale to 1/24 and scratchbuild.

I was finding that the house alterations, changes at work and preparing for Baby three's arrival in December have been rather stressfull and keeping me too busy to get any decent amount of modelling done.

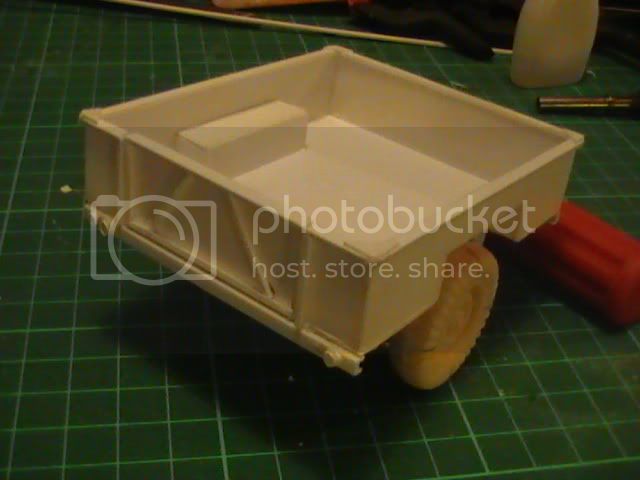
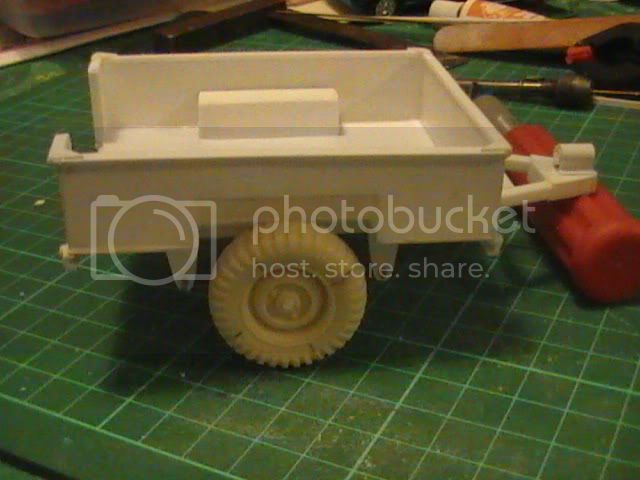
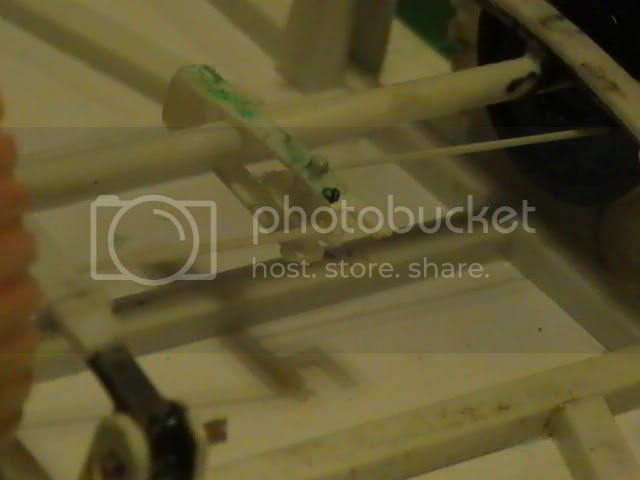
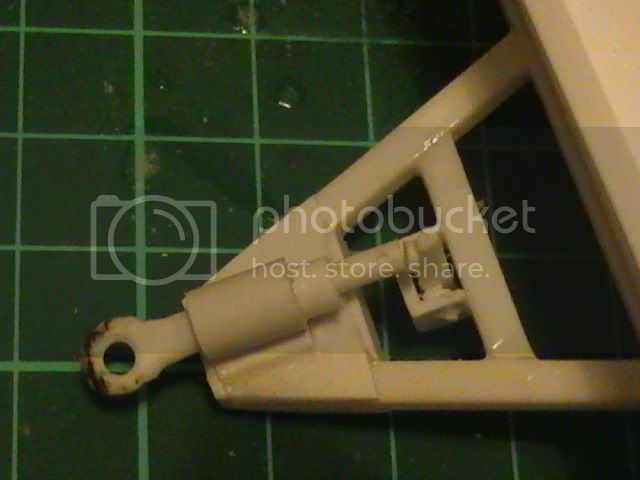
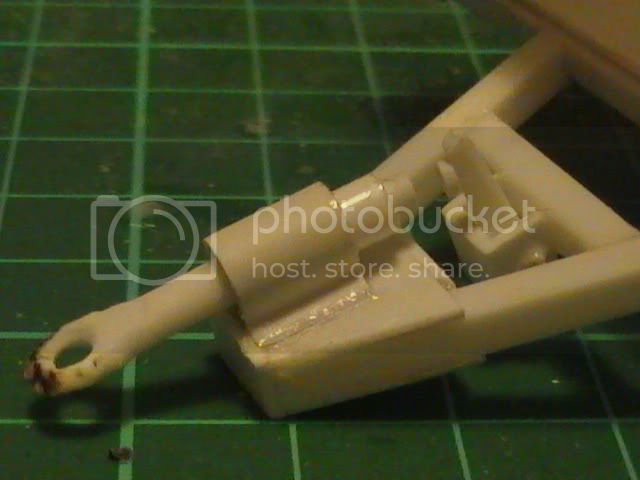
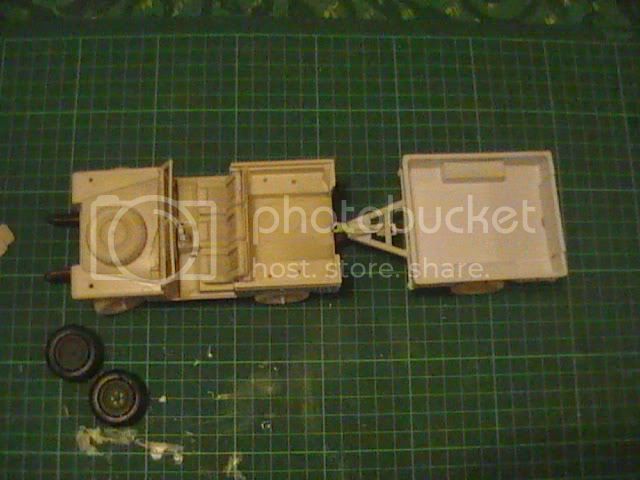
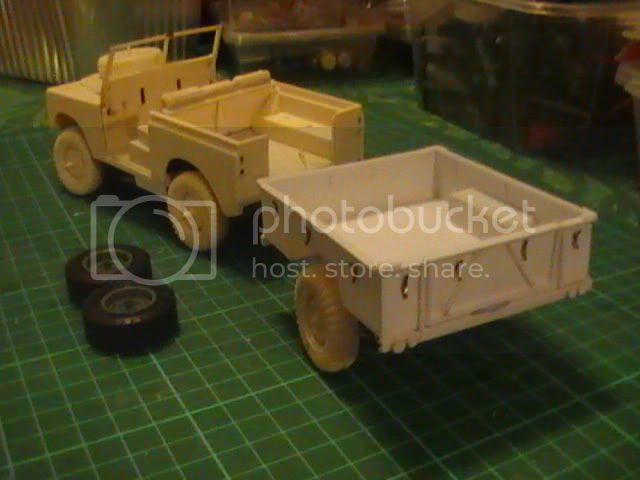
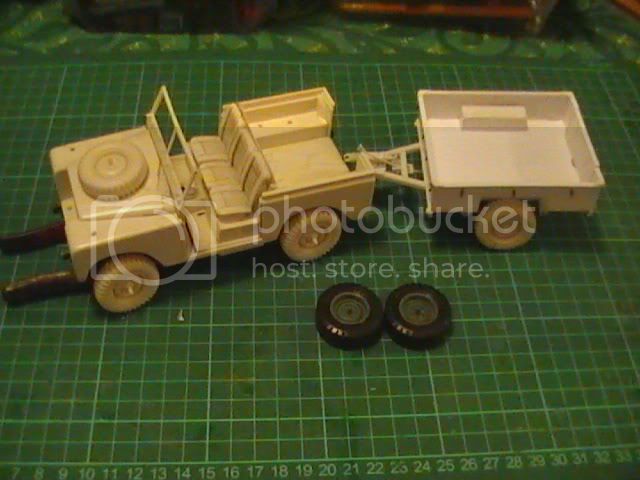
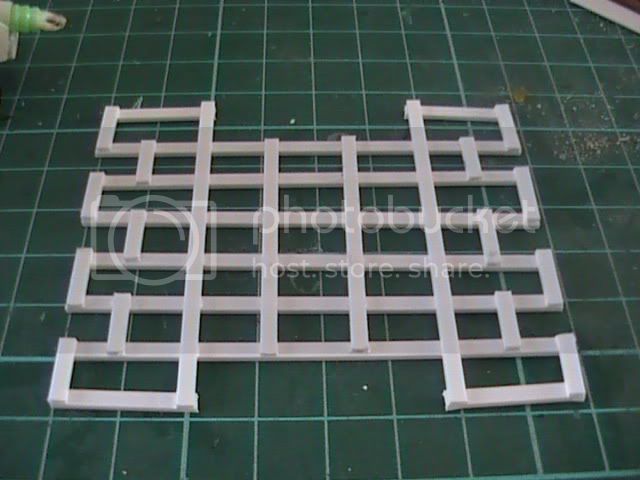
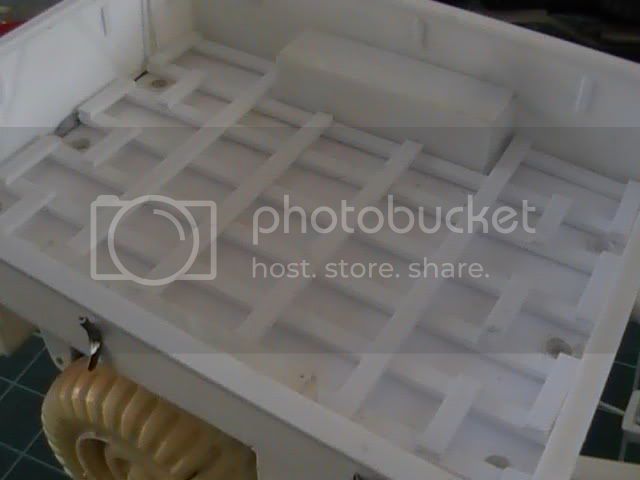
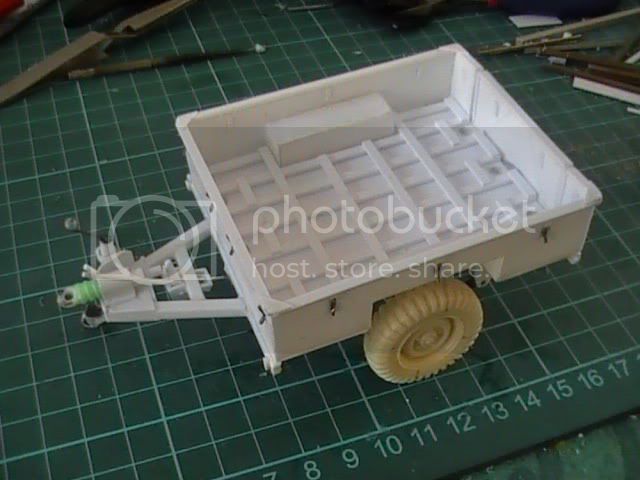
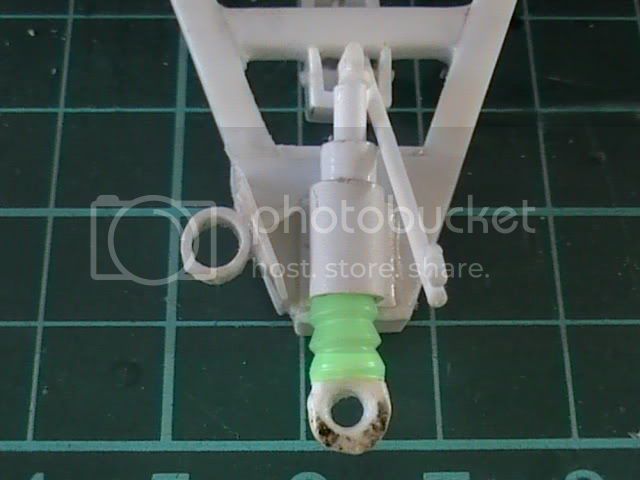
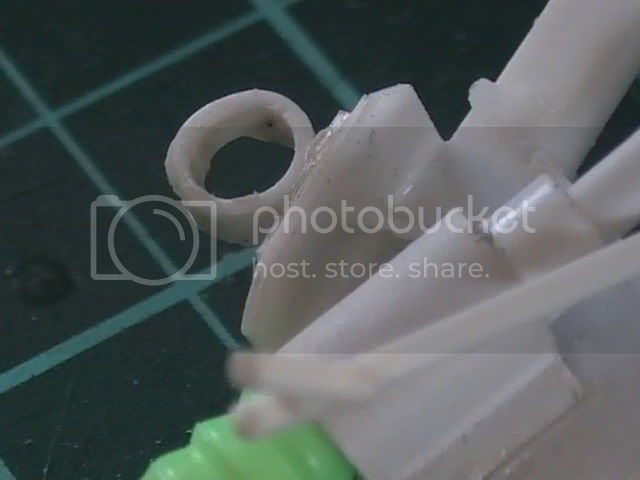
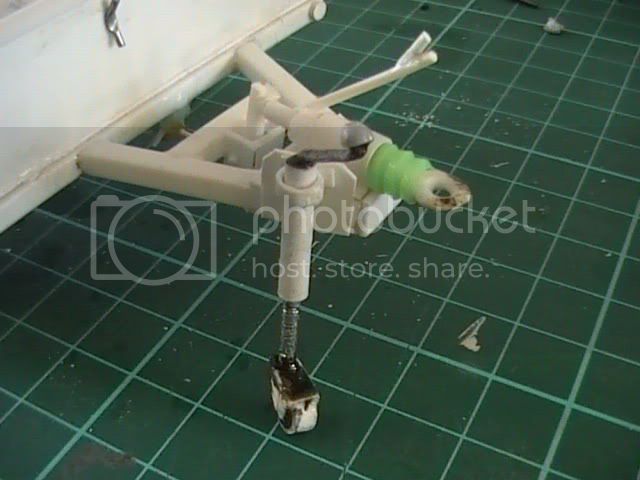
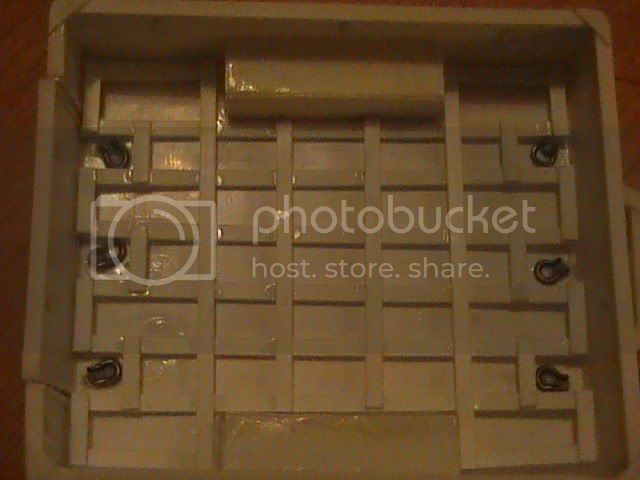
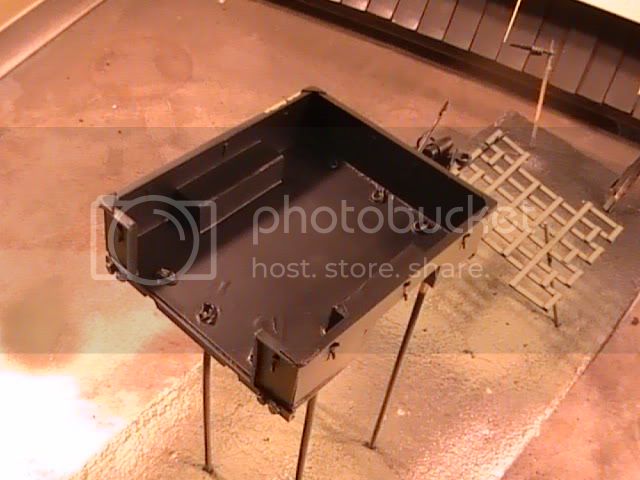
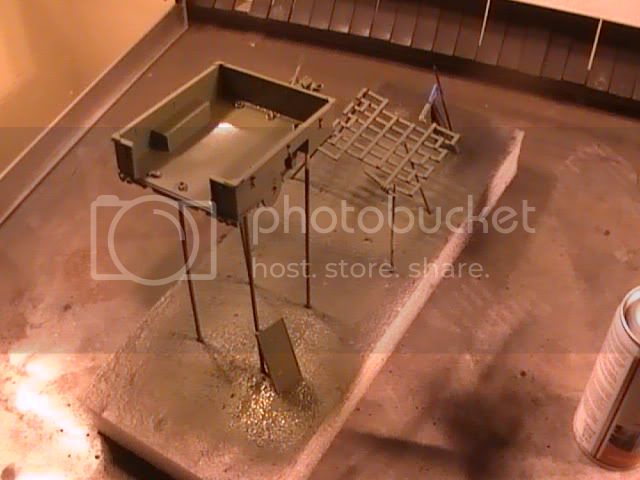
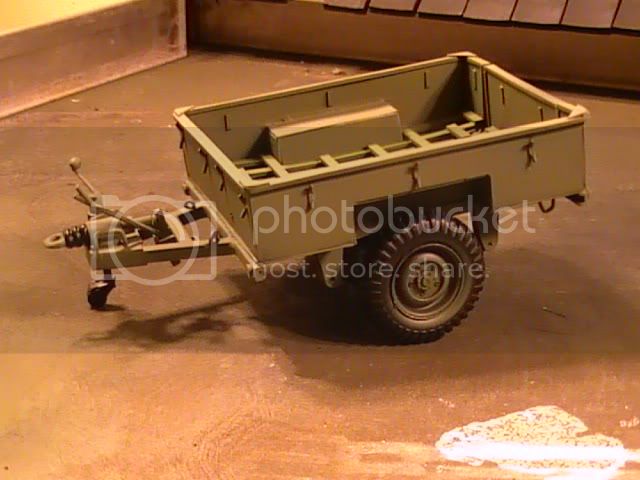
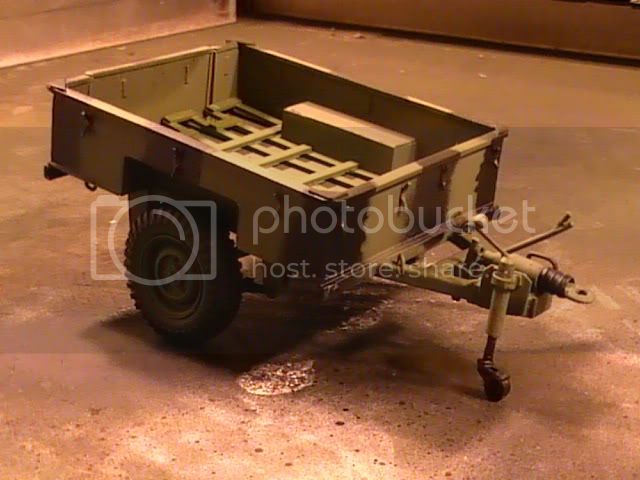
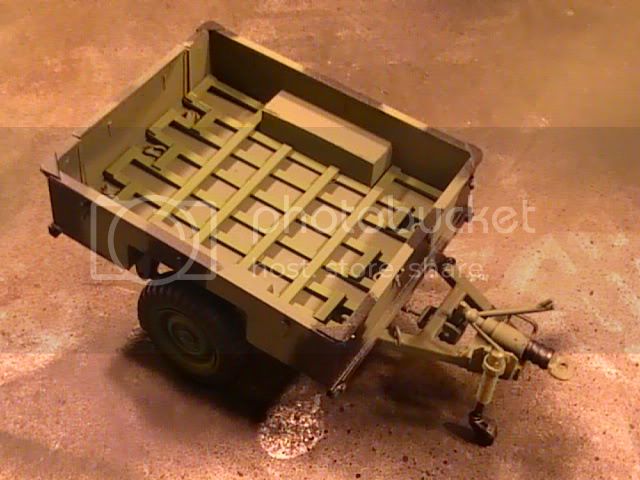
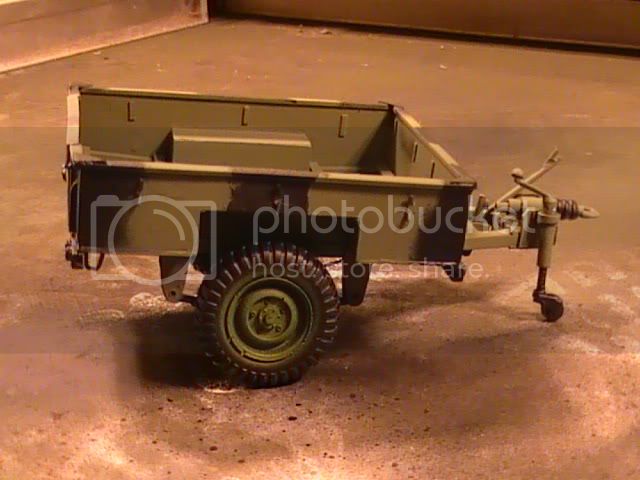
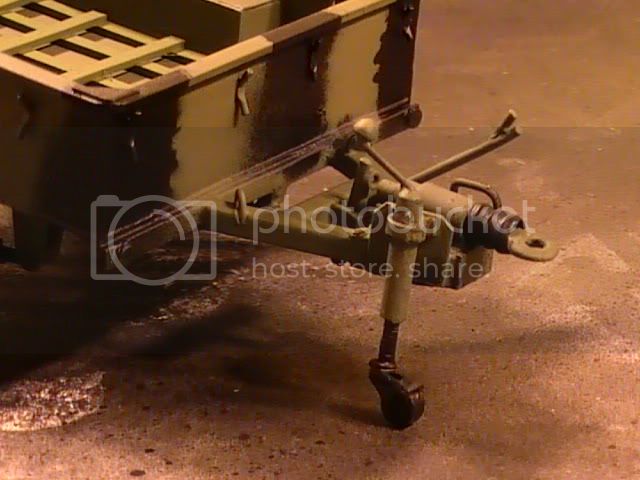
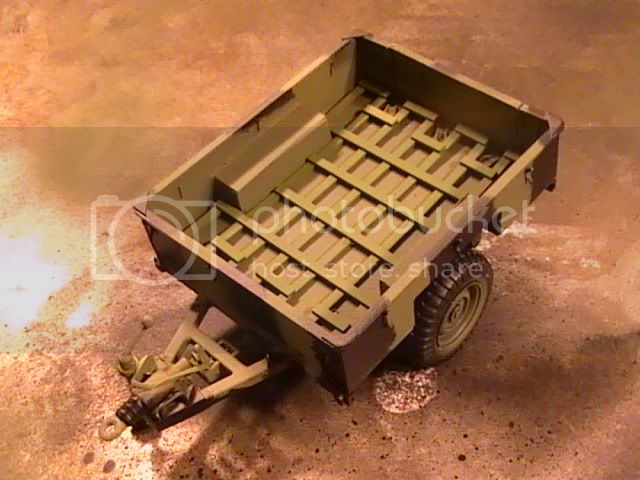
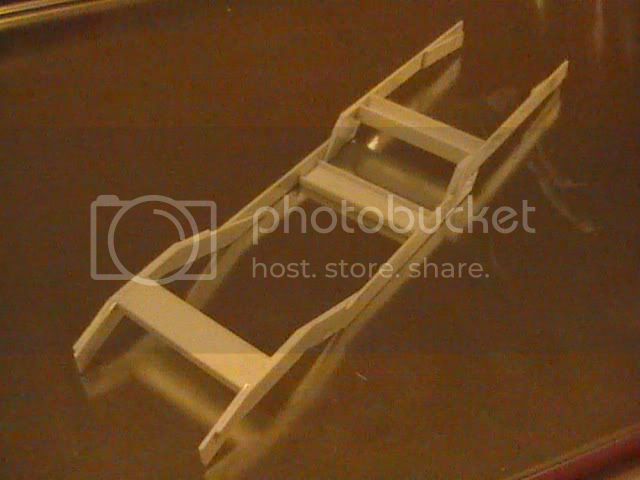
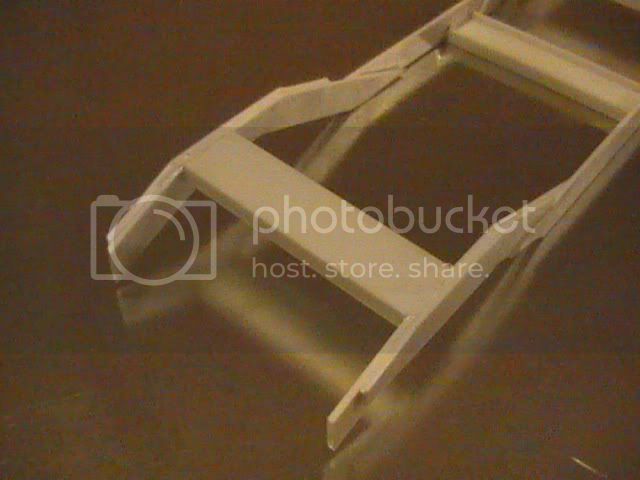
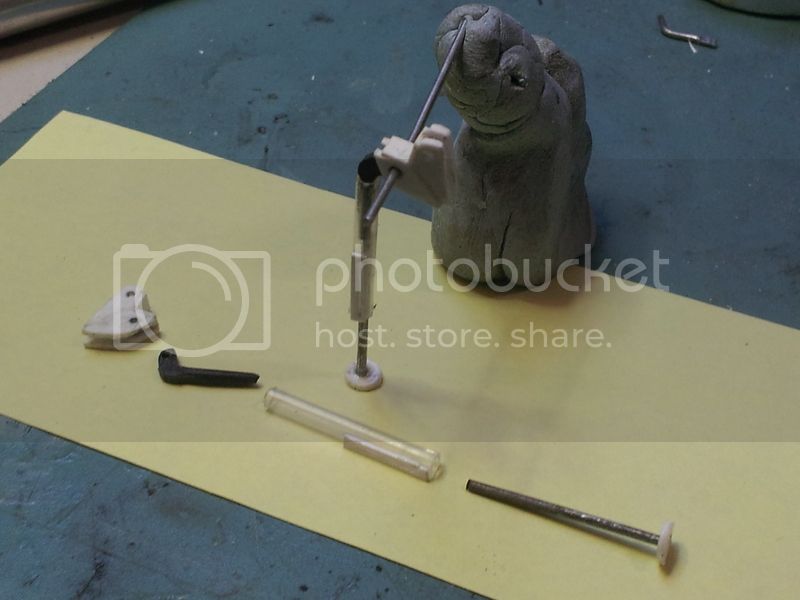
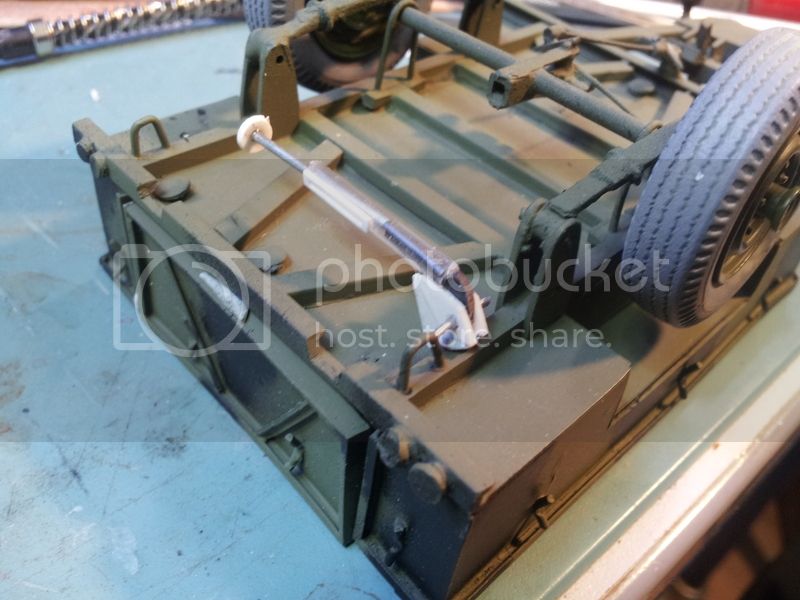
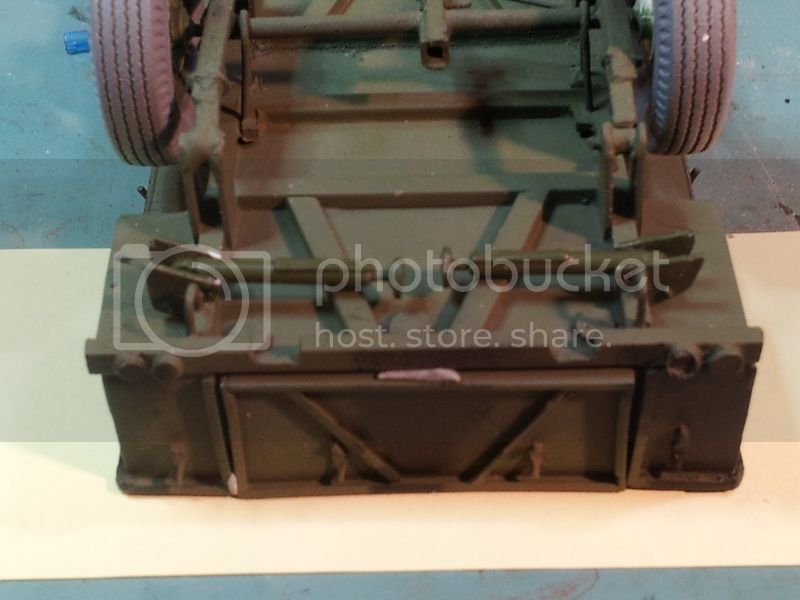
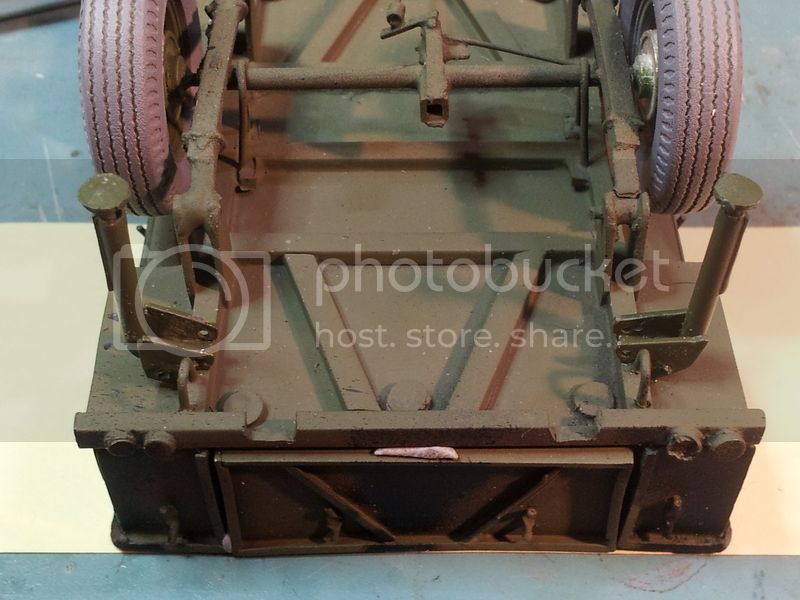
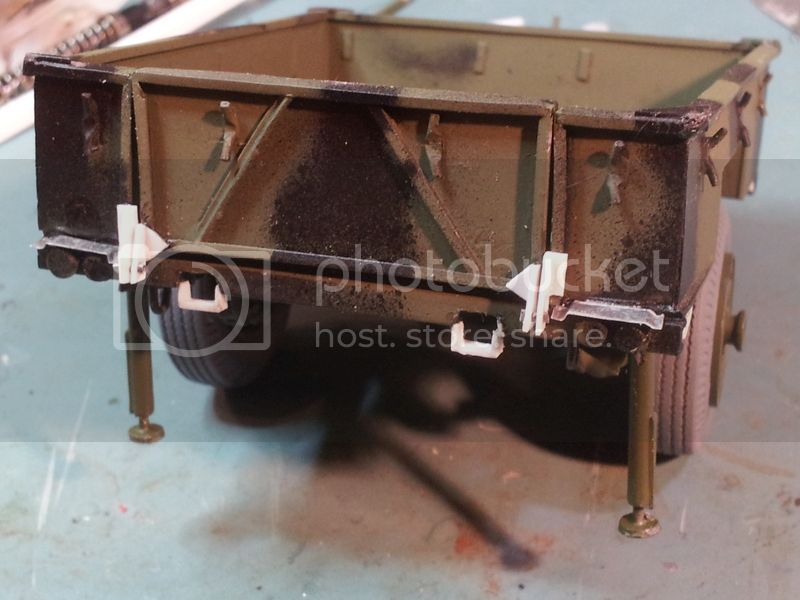
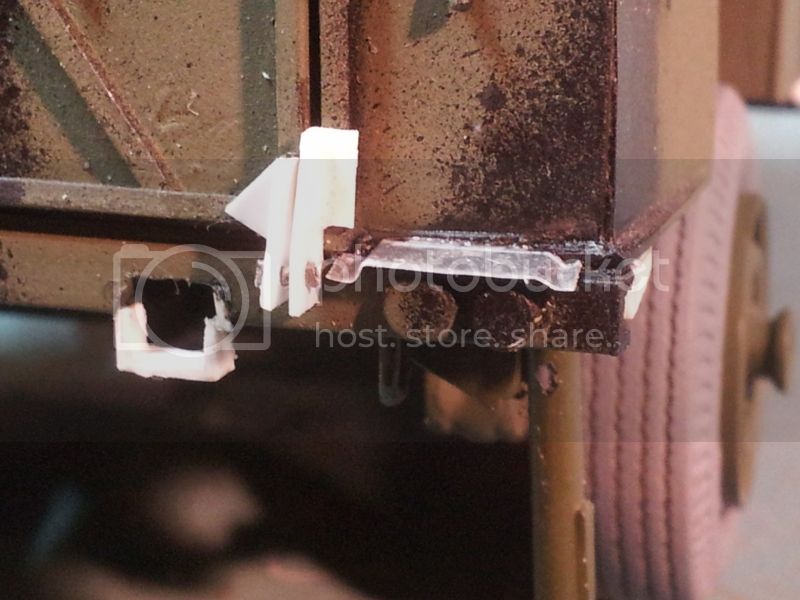
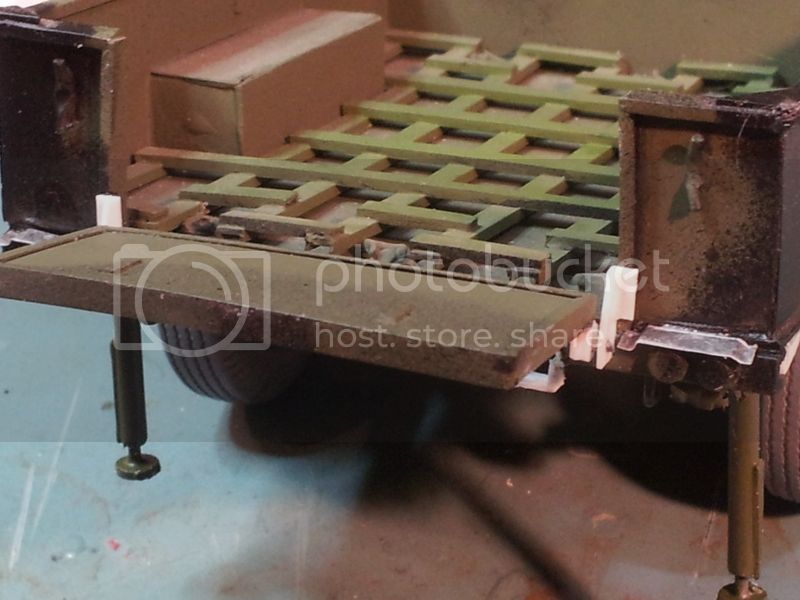
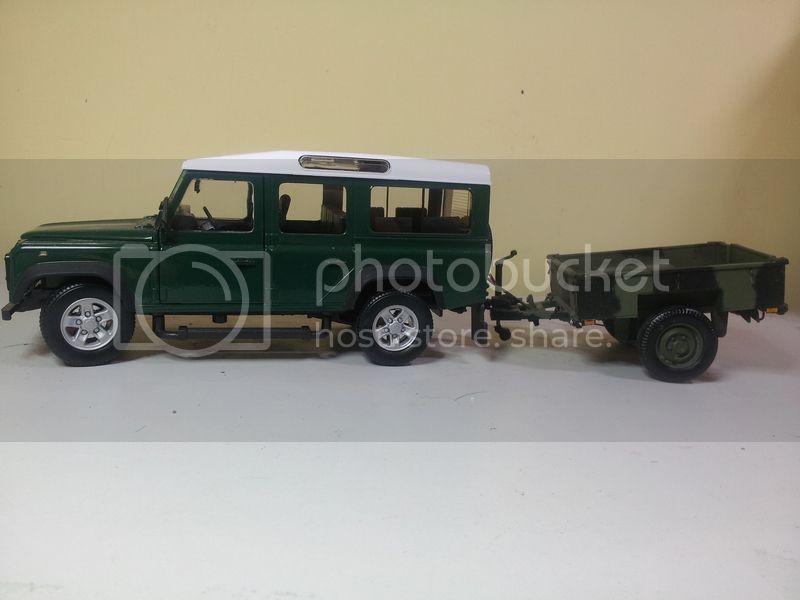
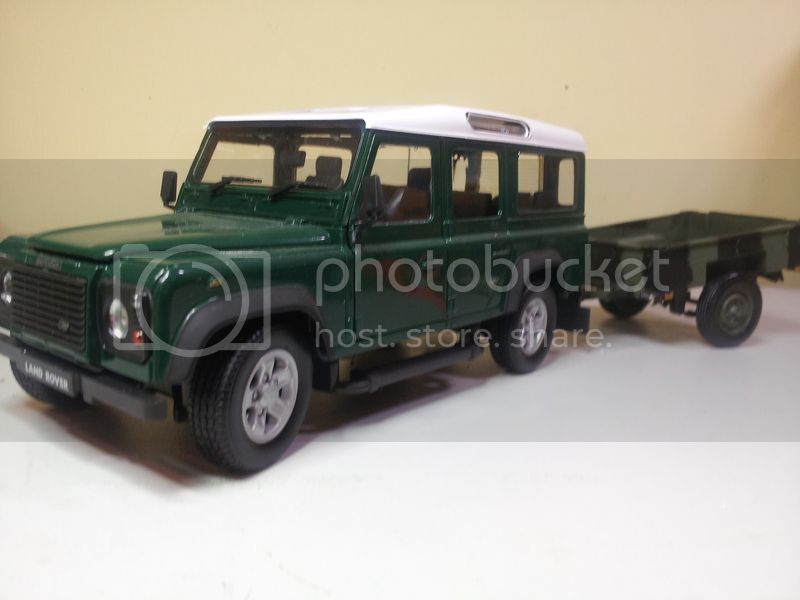
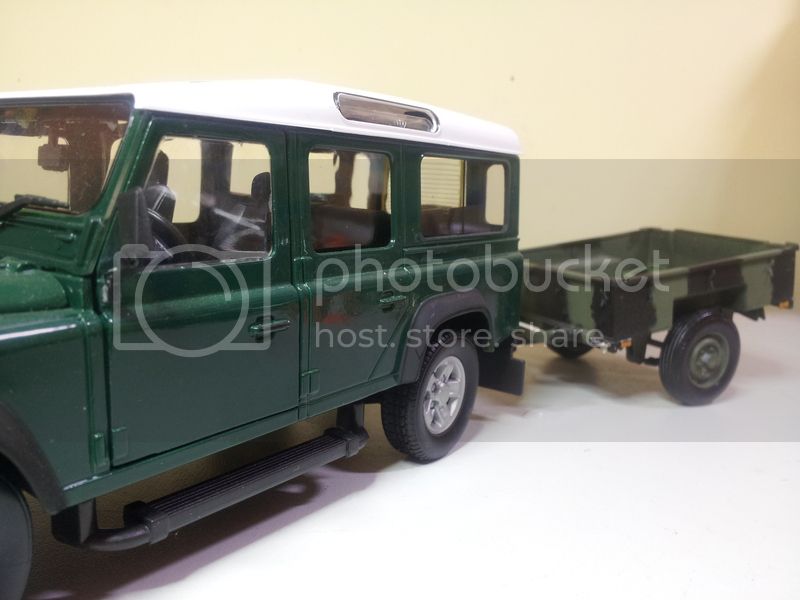
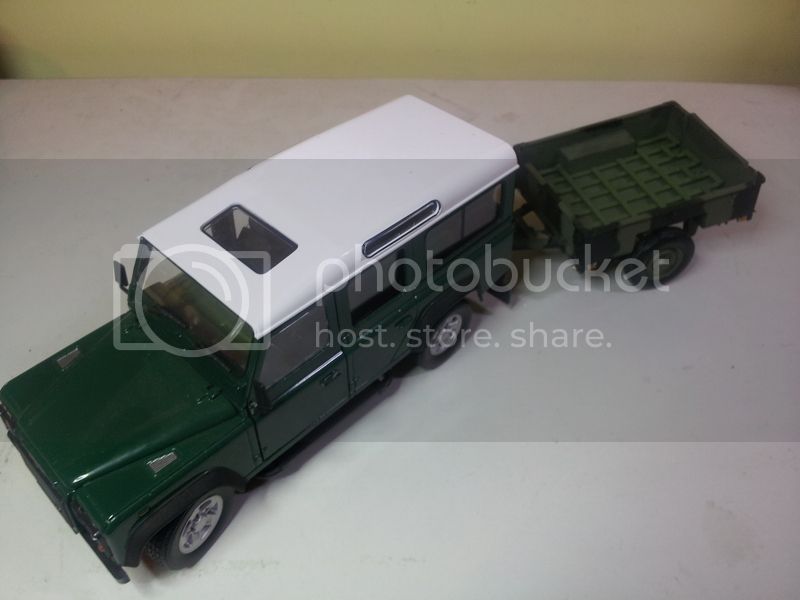
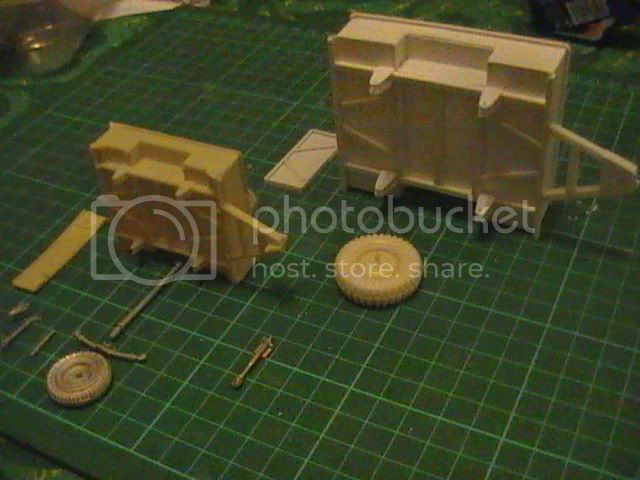
The intention is to build a couple to go behind the 1/24 Landrover kits in the stash. I have been really chuffed at how quick it took me to throw this up having been able to get all vital dimensions from Firing Line's lovely resin, white metal and PE kit and doing the number crunching on my mobile.

Something quick and simple to keep my sanity and something I knew would not challenge my numbed brain cells too greatly.

Hope you like


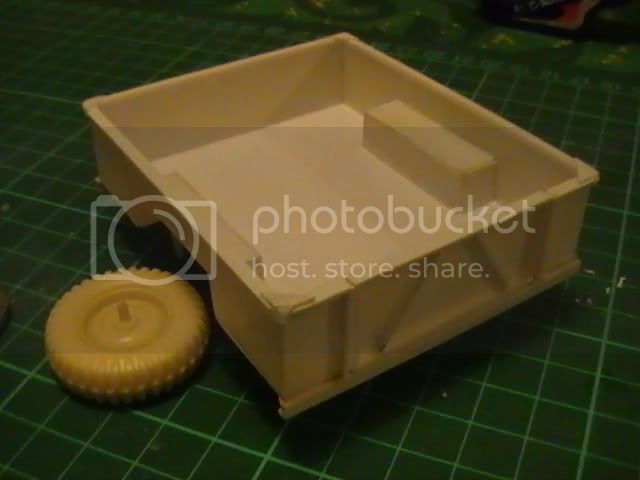
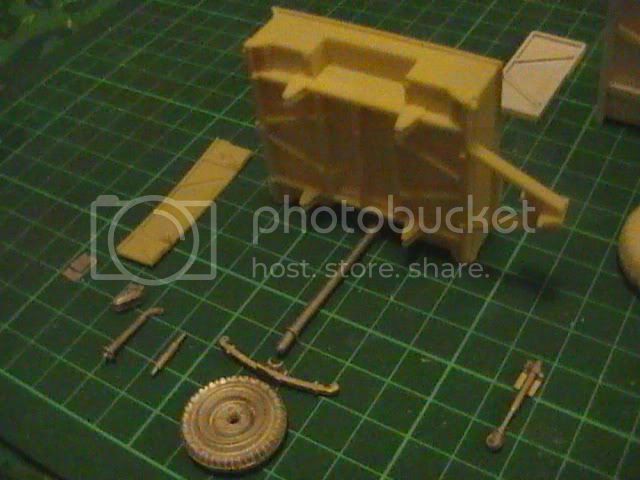
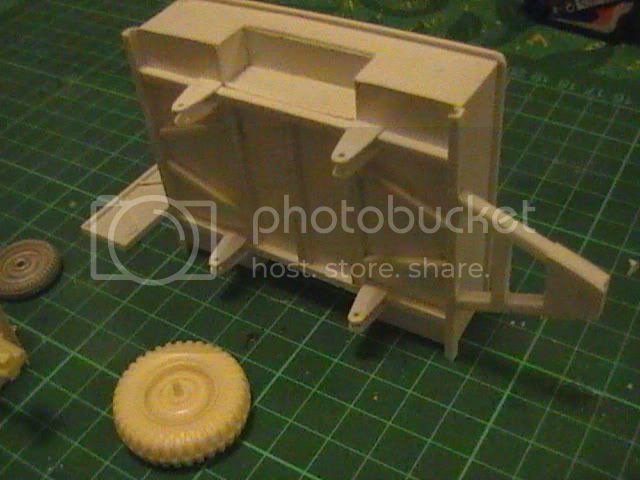
Nice kit too Firing Line

Nige
HEINE-07
Visit this Community
Ohio, United States
Member Since: February 28, 2007
entire network: 392 Posts
KitMaker Network: 35 Posts
Posted: Monday, October 25, 2010 - 03:37 PM UTC
Does the Sanky trailer have the same tires as the 1/24th scale Landrover? Nice trailer build. Please post pictures of further progress, when you get the chance.
okdoky
Visit this Community
Scotland, United Kingdom
Member Since: April 30, 2007
entire network: 1,597 Posts
KitMaker Network: 673 Posts
Posted: Tuesday, October 26, 2010 - 09:33 AM UTC
Hi there Rick

From what I understand, the tyres are of the same or similar size. The photo I took on a TA depot shows a lot less agressive tyre tread but since I don't have any tyres of this size in that style I will be using copies of the Landrover wheel and tyre.

If something else comes up after, I will be able to swap them easily and use the wheels for spares on the landrovers.

I am working on the suspension and axle just now so hopefully some pics to follow. Not much to it but is taking ages for the epoxy to set.

Nige
okdoky
Visit this Community
Scotland, United Kingdom
Member Since: April 30, 2007
entire network: 1,597 Posts
KitMaker Network: 673 Posts
Posted: Tuesday, October 26, 2010 - 10:42 AM UTC


okdoky
Visit this Community
Scotland, United Kingdom
Member Since: April 30, 2007
entire network: 1,597 Posts
KitMaker Network: 673 Posts
Posted: Tuesday, October 26, 2010 - 01:49 PM UTC
Tow hitch formed by melting the end of a sprue piece and flattening the end with my fingers. Then reeming out the hole and filing down the shank to fit into the spring housing. Tow hitch will swivel.


Will form the handbrake, pivots to the actuators and cables next.

okdoky
Visit this Community
Scotland, United Kingdom
Member Since: April 30, 2007
entire network: 1,597 Posts
KitMaker Network: 673 Posts
Posted: Tuesday, October 26, 2010 - 02:49 PM UTC
Brake lever cables and actuator


okdoky
Visit this Community
Scotland, United Kingdom
Member Since: April 30, 2007
entire network: 1,597 Posts
KitMaker Network: 673 Posts
Posted: Tuesday, October 26, 2010 - 03:57 PM UTC
Hitch to brake actuator


Handbrake and cables still to be added
okdoky
Visit this Community
Scotland, United Kingdom
Member Since: April 30, 2007
entire network: 1,597 Posts
KitMaker Network: 673 Posts
Posted: Tuesday, October 26, 2010 - 04:51 PM UTC
Cables connected


A segment of flexible straw added to make the hitch gaiter


Handbrake lever added also

HEINE-07
Visit this Community
Ohio, United States
Member Since: February 28, 2007
entire network: 392 Posts
KitMaker Network: 35 Posts
Posted: Sunday, October 31, 2010 - 04:30 PM UTC
Nice work! How about the leaf-springs--are they the metal castings seen in the second picture down from the top? It is good to see them attached to the trailer by metal pin, that the model will stay durable!

How did you make the thin, round reflector frames, to be seen in the thirteenth picture down from the top?

The "Drops and King Trailer" project seen on your photo profile is impressive too!
okdoky
Visit this Community
Scotland, United Kingdom
Member Since: April 30, 2007
entire network: 1,597 Posts
KitMaker Network: 673 Posts
Posted: Monday, November 01, 2010 - 01:32 AM UTC

Quoted Text

Nice work! How about the leaf-springs--are they the metal castings seen in the second picture down from the top? It is good to see them attached to the trailer by metal pin, that the model will stay durable!

How did you make the thin, round reflector frames, to be seen in the thirteenth picture down from the top?

The "Drops and King Trailer" project seen on your photo profile is impressive too!


Thanks Rick

I made the leaf spring using a technique from someone elses blog with a strong metal strip as the main spring. On the DROPS and King trailer blog you can see how this was built up using a piece from a bra cup. My wife's, not my own that its !

The small circles for the light and reflector lenses were punched out of sheet plastic using a leather punch. The type with a rotating barrel that has the various hole sizes to choose from. I do have various other hole punches that I could have chosen to use.

Two circular pieces placed one on top of the other (even though the glue did not seem to bond the shiny plastic sheet I used cause they keep falling off). I will add a bubble of woodglue on after they are painted black on the outside, silver on the face, and then add the clear lense colour to the dried bubble hopefully.

I am annoyed that I am not able to do much work on the DROPS at the moment as Xmas is drawing ever closer. House needs so much work done before the wife gives birth to bump number three.

I can sit and dabble on this small project in between work on the house without too much hastle. Helps to keep me sane.

Thanks for the comments. Appreciated.

Nige
okdoky
Visit this Community
Scotland, United Kingdom
Member Since: April 30, 2007
entire network: 1,597 Posts
KitMaker Network: 673 Posts
Posted: Saturday, November 06, 2010 - 09:45 AM UTC
Time for some tie downs made of solder wire cut to length and pressed flat in the middle for the fixing points


The thin squashed flash can be trimmed off with a sharp nife.


The reinforcement pieces on the inside are cut from plastic strip


Nige
okdoky
Visit this Community
Scotland, United Kingdom
Member Since: April 30, 2007
entire network: 1,597 Posts
KitMaker Network: 673 Posts
Posted: Monday, November 08, 2010 - 10:37 AM UTC
Sanky and LandRover short wheelbase together for comparison


S/wheelbase L/R is the Monogram kit bought as a built kit off flea bay for a very cheap price. Only had one broken axle stub which has been pinned through to reinforce,


All body parts have been through a bath of Mr Muscle oven cleaner and toothbrush scrub to clear old paint. Parts must have been lightly glued as they have parted company very easily with no breakages.


Replacement resin wheels moulded from the Esci LWB 109 L/R kit (Thanks Willie from Model Club) give it a more military look again. I will be thinking about replacing the seats too with more utilitarian types and without the middle seat. Will need to look up some pics of SWB versions in Army use.


Spare tyre will lose hub centre and get its nuts drilled out (that has got to hurt).

NATO style hitch will be made using the bracelet catches used on the DROPS truck too.

Frenchy

Any help with your magic research?

Nige

HEINE-07
Visit this Community
Ohio, United States
Member Since: February 28, 2007
entire network: 392 Posts
KitMaker Network: 35 Posts
Posted: Friday, November 19, 2010 - 06:30 PM UTC
Wow! Nice work. The Land-Rover introduces your fine scratch-building to the prospect of rambling off, for action.

I guess the solder is soft enough to mash with steel tool. Heat would dissolve it, right?
okdoky
Visit this Community
Scotland, United Kingdom
Member Since: April 30, 2007
entire network: 1,597 Posts
KitMaker Network: 673 Posts
Posted: Saturday, November 20, 2010 - 06:34 AM UTC
Hi Rick

I am trying to find a screw thin enough to use as the jocky wheel that I can add to the front and then will move on to the short and long wheelbase Landrovers that I want to build at the same time.

Main reason will be to try out the spray booth and paint the Landys and the trailer at the same time so I get similar shades of black and green.

Am still stuck for references for the short wheelbase, though I have seen an RAF Military Police swb which looks very appealing though I only have a front view for reference. The green on it also looks a lighter shade than the Army colours.

Any more reference pics for a swb would be appreciated.

Nige
okdoky
Visit this Community
Scotland, United Kingdom
Member Since: April 30, 2007
entire network: 1,597 Posts
KitMaker Network: 673 Posts
Posted: Friday, November 26, 2010 - 11:39 PM UTC
Had a chance to make some bits and pieces for the trailer

First off is the timber crib in the load area


Then the jockey wheel made from a long rivet with a simple threading carved using pliers to hold and wire cutters to carve. Solder wire flattened with the pliers makes up the winder.handle


Jocky wheel can be posed raised or lowered


Upper view shows the brake actuator, winding handle, etc


Hope ya like

Nige

okdoky
Visit this Community
Scotland, United Kingdom
Member Since: April 30, 2007
entire network: 1,597 Posts
KitMaker Network: 673 Posts
Posted: Saturday, November 27, 2010 - 02:23 AM UTC
Time to scratch a couple of shackles for internal tie downs


Holes made in the base to accept the support for the shackle. In hind sight it would have been simple to drill the hole same size as the support but the slightly larger hole won't be easily seen.


Round sprue for the support and solder wire turned around the sprue first to get the size.


The ends of the shackle pressed flat. I know others would drill out the shackle ends on 1/35 scale and fit a pin through a hinge. I am too ham fisted to get that level of drilling right, even at 1/24 scale, therefore I am going on the basis of just enough detail to get the look.


One shackle in position


Nige
okdoky
Visit this Community
Scotland, United Kingdom
Member Since: April 30, 2007
entire network: 1,597 Posts
KitMaker Network: 673 Posts
Posted: Tuesday, January 18, 2011 - 08:32 AM UTC
Managed to get some time to model at the club night and decided to add the grab handle and helicopter lifting points to the frame using fuse wire.

Not much but is keeping me sane getting something done.


All the tie down shackles


Nige
HEINE-07
Visit this Community
Ohio, United States
Member Since: February 28, 2007
entire network: 392 Posts
KitMaker Network: 35 Posts
Posted: Saturday, January 29, 2011 - 04:53 AM UTC
It is incredible what can be accomplished bit-by-bit. Thank-you for being generous with photographs of this. Please keep posting when you go through the painting process.
okdoky
Visit this Community
Scotland, United Kingdom
Member Since: April 30, 2007
entire network: 1,597 Posts
KitMaker Network: 673 Posts
Posted: Saturday, February 12, 2011 - 08:57 AM UTC
At last I have had a chance to make use of my fume cabinet spray booth that I have moved into the house from the shed. With the proper lights and comfort of heating it was a pleasure to use.


Everything got an overall spray of Halfords matt black


Using my foam and bamboo stick and toothpick paint stand made it very easy to prop the model for a quick spray


I chose to use three tones of Humbrol green, a light olive (86), grass green (80), and a dark green (30) from rattle cans.

The bodywork got an overall light olive spray


For a bit of contrast I used the much lighter grass green for the wooden lattice crib


Added the black camo in a very rough manner allowing deliberate overspray and a crude, soft edging. My photos of the real thing indicate painting trailers was not something that needed to be very exact.

Rough masks were torn from kitchen roll applied with simple spit to hold in place.


Still got detailing to add to the trailer such as the tail gate brackets, latch, rear support legs, lighting cable and plug, etc.

Then I will have to add the smaller coloured items including lights, reflectors, brake lever handle and jockey wheel winder.

Will have to find a couple of trailer plating labels from somewhere too.

And then the final task hopefully will be to add some weathering using washes and crushed pastels.

Hope you like
okdoky
Visit this Community
Scotland, United Kingdom
Member Since: April 30, 2007
entire network: 1,597 Posts
KitMaker Network: 673 Posts
Posted: Sunday, February 13, 2011 - 10:31 AM UTC
Had some time to make a start on a L/R lightweight chassis as the girls went to their ten pin bowling. Would have got more done if baby Arron had not decided to kick off every ten to 20mins. The joys !!!!!!

Using this drawing as my basis for the build


And a restoration blog on this site

[url]http://andy.photos.de.com/p67897481.html[url]

With it hopefully looking a lot like this


Chassis rails are simple stips of styrene cut and welded with glue having used the chassis of the Monogram kit to guage the shape, size and angles.


Left and right chassis rails formed together to make equal sized rails.


An old aluminum heat sink from an old electrical appliance (video player or summit else) is a handy tool for cutting strip or tube and sanding true. Fits in my chinese carry out tub tool boxes better than the big mitre tool.


I am not being too fussy about chassis cross rail size or profile as I want to consentrate on the upper shape. I don't intend to be turning it upside down too often and would like to build this quickly and keep up momentum.


Using the strip profiles in my stash on "if it looks about right, it will do"


Hope you like !!!!!! I am hoping to make use of tin roast foil for the body panels, which will be rather appropriate for the Landy and should be very easy to manipulate into the very basic shapes of this great wee motor.

Nige
okdoky
Visit this Community
Scotland, United Kingdom
Member Since: April 30, 2007
entire network: 1,597 Posts
KitMaker Network: 673 Posts
Posted: Saturday, March 16, 2013 - 02:42 PM UTC
Thanks to Steve, I now have two correct tyres and wheels for the Sankey trailer ,,,,,,,,,,,,,,,, what a star !!!!!!!!!!!

Had to cut the hubs off the axle and pin through the white metal brake drums so that I could fit them to my simple tube axle already fitted


I believe these are the KFS set and it is obvious to see the quality of the production that is offered !!!!!!!!!!!!


I am much happier with the overall look now and will get around to spraying them up when I have a few more parts for the TM ready to spray too


Thanks again Steve

Nige
okdoky
Visit this Community
Scotland, United Kingdom
Member Since: April 30, 2007
entire network: 1,597 Posts
KitMaker Network: 673 Posts
Posted: Sunday, May 15, 2016 - 10:01 PM UTC
Finally got round to adding a bit more detail to the Sankey while waiting a wee bit info on the Arrows trailer !!


Some tiny chains to sort out and maybe a load
okdoky
Visit this Community
Scotland, United Kingdom
Member Since: April 30, 2007
entire network: 1,597 Posts
KitMaker Network: 673 Posts
Posted: Tuesday, May 17, 2016 - 04:52 AM UTC
I was reminded that the Sankey Wide-track came in with the Defender and was therefor better placed behind a 110 or 90 rather than the 109's 88's or Lightweights !!!!!!

So may have to consider this for repaint or cut-n-shunt to graft on army soft-top scratch instead !!!!


 _GOTOTOP