_GOTOBOTTOM
Scratchbuilders!
Built a model or part from your own materials lately?
Hosted by Mike Kirchoff
1/25 garbage truck WIP
pastafarian
Visit this Community
United States
Member Since: April 10, 2008
entire network: 207 Posts
KitMaker Network: 68 Posts
Posted: Wednesday, May 19, 2010 - 04:25 AM UTC
Hey folks, here's what I've been working on.

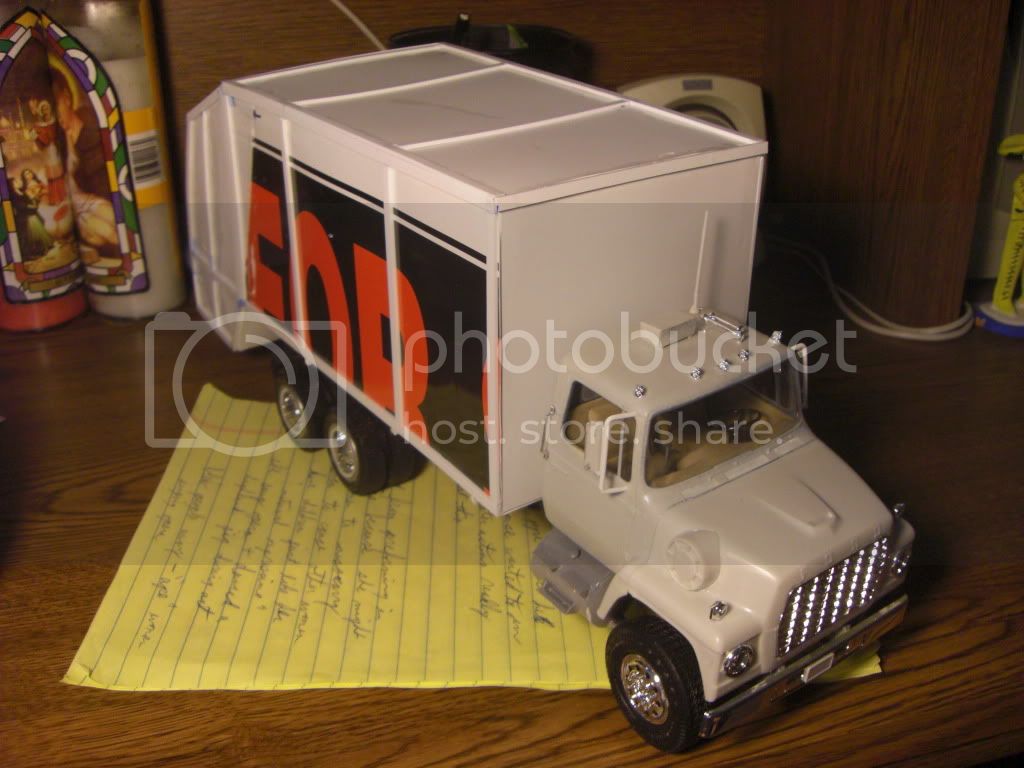
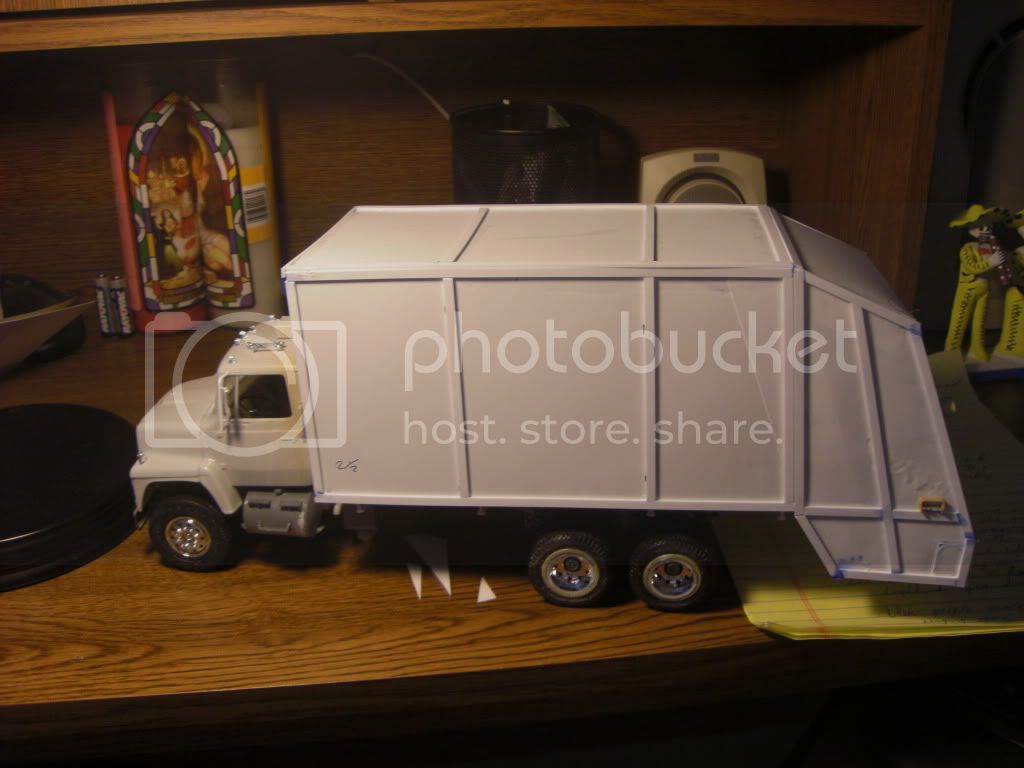
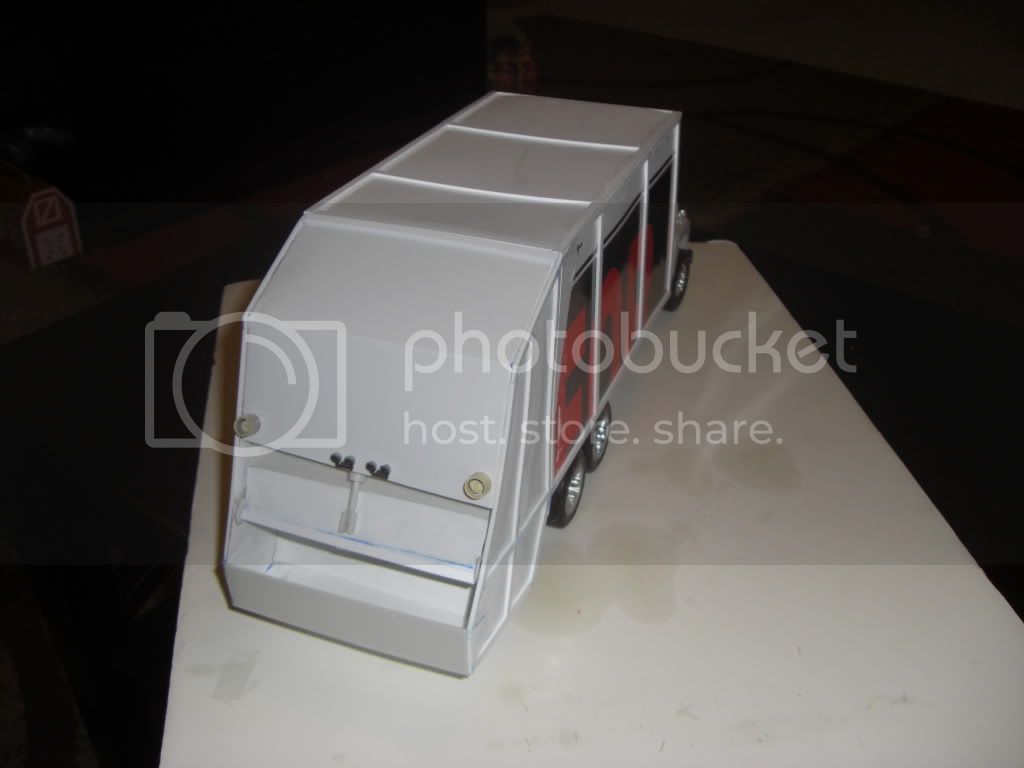
Here's what it looks like so far. I need garbage bags, the actuators to open the rear of the truck, more lights, and wiring. Started as an AMT Shorthauler, kept the frame, cab, and engine. I took the rear wheels from another kit (short hauler only had one set, the weight of the garbage truck needed two sets I figured).


A few more pics here:

http://s472.photobucket.com/albums/rr81/pastafarian7/garbage%20truck/

John
KoSprueOne
Visit this Community
Myanmar
Member Since: March 05, 2004
entire network: 4,011 Posts
KitMaker Network: 879 Posts
Posted: Wednesday, May 19, 2010 - 08:14 AM UTC
Great idea! good progress too


CReading
#001
Visit this Community
California, United States
Member Since: February 09, 2002
entire network: 1,726 Posts
KitMaker Network: 558 Posts
Posted: Wednesday, May 19, 2010 - 01:03 PM UTC
Don't know how detailed you want to get but for the type of truck you are depicting, the box directly behind the cab is open with a large telescoping hydraulic ram inside attached to (for all intent and purpose) a movable wall.
At the beginning of the route the driver will extend the ram moving the wall to the rear of the truck over the wheels. As trash is put into the hopper in the rear of the truck, and the blade is run, the trash is compacted against the movable wall.
As material is added the wall slowly moves forward in the body of the truck.
When full, and at the landfill, the tail is lifted (there are also large hydraulic rams that lift the tail of the truck when dumping) and the 'movable wall' pushes the material out of the back of the truck.
There are also several control levers on the side at the rear of the truck to operate the blade and compacting mechanism.
Good job....love to see it weathered as these trucks get notoriously beat up and dirty

Cheers,
C.
jimb
Visit this Community
New York, United States
Member Since: August 25, 2006
entire network: 2,539 Posts
KitMaker Network: 263 Posts
Posted: Thursday, May 20, 2010 - 01:30 AM UTC
Looking good so far. You should post some pics in the Trucks forum over on AutoModeler. Very cool.

Jim
pastafarian
Visit this Community
United States
Member Since: April 10, 2008
entire network: 207 Posts
KitMaker Network: 68 Posts
Posted: Thursday, May 20, 2010 - 03:25 AM UTC
Thanks guys.

I'll look around for a pic of the front of the compactor. I want to get it pretty close to the real thing. If I can't find any pics, is there just a horizontal steel beam across the middle with the press arm mounted on it? I'd imagine the press arm would be pretty big to move all of that stuff (maybe a foot in diameter?).

John
CReading
#001
Visit this Community
California, United States
Member Since: February 09, 2002
entire network: 1,726 Posts
KitMaker Network: 558 Posts
Posted: Thursday, May 20, 2010 - 08:14 AM UTC
These photos show (generally) the area. If you need I can get detail pictures for you but this is what I have on hand now:


the above are the front of the compactor box behind the cab.
The following are rear shots showing some detail. The photos show a truck equipped with a cart lifting mechanism. Most residential trucks now have those. A commercial bin truck would have a different set up.


Let me know if you want or need any specific shots
Cheers,
C.
pastafarian
Visit this Community
United States
Member Since: April 10, 2008
entire network: 207 Posts
KitMaker Network: 68 Posts
Posted: Thursday, May 20, 2010 - 09:45 AM UTC
Thanks Charles, those are going to help out a bunch.

I think i'm going to shorten the "hood" over the blade and probably redo the blade to add some more detail to it.

Can you get me a shot or two looking up into the rear of the truck? So that I can work out how the blade is attached up there.

Also, a shot either looking through the back window of the cab or standing back there looking into the compactor ram. I can't quite see the way it's set up back there.

Thanks for offering to help out on these!

John
old-dragon
Visit this Community
Illinois, United States
Member Since: August 30, 2005
entire network: 3,289 Posts
KitMaker Network: 592 Posts
Posted: Thursday, May 20, 2010 - 11:48 AM UTC
Ooooh in pic 3 there's a Leach sanicruiser{white compactor body}.
John, we'd love to have your talents over in the truck modeller section...consider yourself invited!
Your compactor looks something of a Garwood set up...is it or did you just build by eye{which she looks fine either way!!!}.
Here's some links for you to check out...hope they can help.
Leach sanicruiser III
Classic refuse trucks
Garbage guru
History of garbage trucks
Remember, some companies ran open or enclosed front ends per they're wants/needs so just because you don't see one enclosed doesn't mean you can't do that to yours. Some people wanted a cleaner look to the rig by enclosing it up front and had a small sized access door to gain entry to the ram cylinder or pumps...run her the way you want!
CReading
#001
Visit this Community
California, United States
Member Since: February 09, 2002
entire network: 1,726 Posts
KitMaker Network: 558 Posts
Posted: Thursday, May 20, 2010 - 12:24 PM UTC

Quoted Text

an you get me a shot or two looking up into the rear of the truck? So that I can work out how the blade is attached up there.
Also, a shot either looking through the back window of the cab or standing back there looking into the compactor ram. I can't quite see the way it's set up back there.


I'd be happy to. Probably be tomorrow before I get them posted.

C.
pastafarian
Visit this Community
United States
Member Since: April 10, 2008
entire network: 207 Posts
KitMaker Network: 68 Posts
Posted: Friday, May 21, 2010 - 03:00 AM UTC
Thanks for the help Charles.

Thanks Bob. I don't know anything about garbage trucks, just eyeballing it from some pics I found on the net and the one or two like this one I see around town.

I didn't notice it until you said something, but there's an access door in the top picture of the Charles' post.

couple questions since like I said, I'm just guessing on this build.
It looks like there is more of an opening in the rear of the truck than I have. Do you guys think I should take about half of the rear "hood" off the back (the area from the top rear lights to that first bend)? Or would that be too much?

Also, my switches for the blade are on the left side of the truck in the back (the little tan box). Is that location about right? I didn't see any on the green truck Charles posted.

John
pastafarian
Visit this Community
United States
Member Since: April 10, 2008
entire network: 207 Posts
KitMaker Network: 68 Posts
Posted: Friday, May 21, 2010 - 03:21 AM UTC
Found my blade assembly.

http://www.classicrefusetrucks.com/albums/EZ/EZ08.html

The video on the bottom shows it eating a couch. coolness.

CReading
#001
Visit this Community
California, United States
Member Since: February 09, 2002
entire network: 1,726 Posts
KitMaker Network: 558 Posts
Posted: Friday, May 21, 2010 - 07:29 AM UTC
View from behind the cab into the box:


Same view looking downward:


Same area from right side of truck:


Right side rear showing controls:


Left rear:


Hopper (rear of truck):


Hope these help. If you need anything else, just ask. Obviously the trucks I am photographing are "in mothballs" and haven't been active for several years. (just in case anyone was wondering about the cobwebs and stagnate water)

Cheers,
C.
pastafarian
Visit this Community
United States
Member Since: April 10, 2008
entire network: 207 Posts
KitMaker Network: 68 Posts
Posted: Friday, May 21, 2010 - 08:20 AM UTC
Those are great Charles, thanks!!! All the scraped paint and wear are going on my build as well

I'll expose the ram in the front of the compactor too. It'll add alot of interest up there.

This is gonna be fun.

John
old-dragon
Visit this Community
Illinois, United States
Member Since: August 30, 2005
entire network: 3,289 Posts
KitMaker Network: 592 Posts
Posted: Friday, May 21, 2010 - 11:21 AM UTC
The controls{switches} are usually on the RH rear corner now-a-days since a single person runs the rig...back when I was little I sometimes saw two guys running a rig - one driver/compactor controller and one loader. With your rig's vintage and LH steering wheel, I could see two guys working.

As for a larger opening in back, If you were to do it, I'd go no further up than 1/3 the upper panel there.
 _GOTOTOP