_GOTOBOTTOM
Scratchbuilders!
Built a model or part from your own materials lately?
Hosted by Mike Kirchoff
KT turret remake: advice needed
John_O
Visit this Community
Oost-Vlaanderen, Belgium
Member Since: November 23, 2007
entire network: 569 Posts
KitMaker Network: 32 Posts
Posted: Sunday, May 16, 2010 - 06:59 AM UTC
Hello everybody,

I like to build German paper panzers and what ifs. This often leaves me in tight spot to realize certain projects. So it seems that I have some novice scratchbuilding to do...

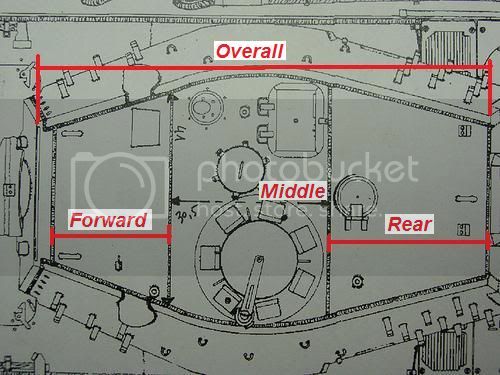
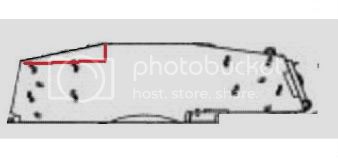
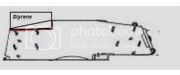
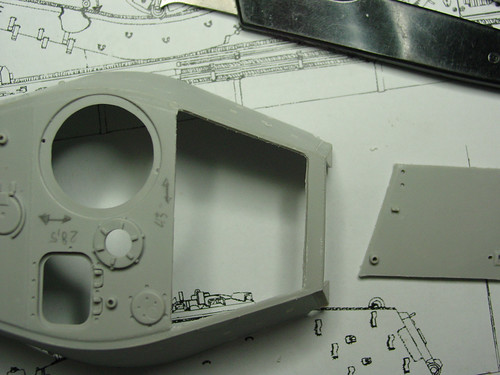
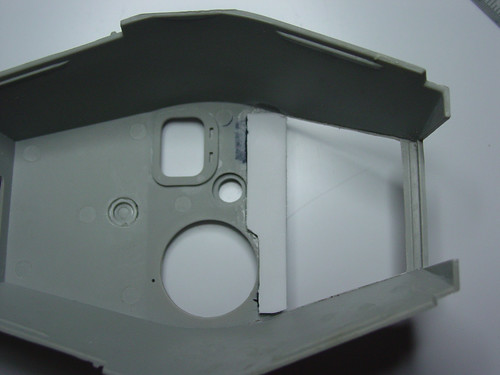
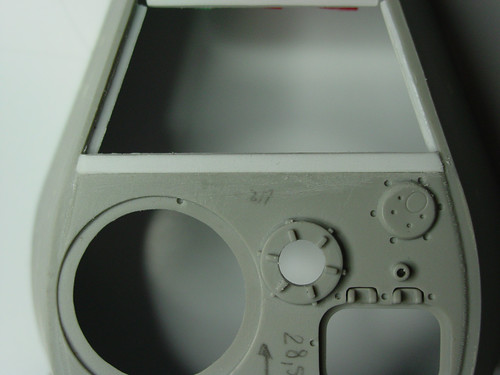
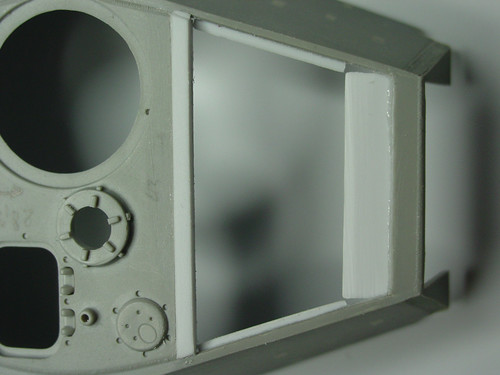
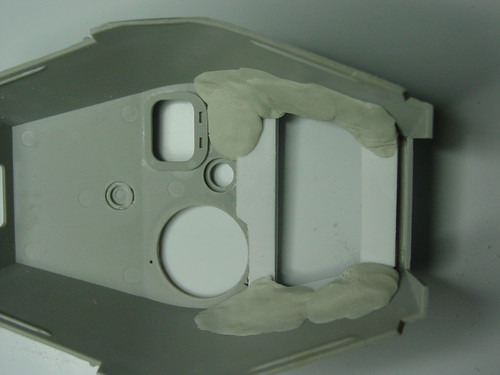
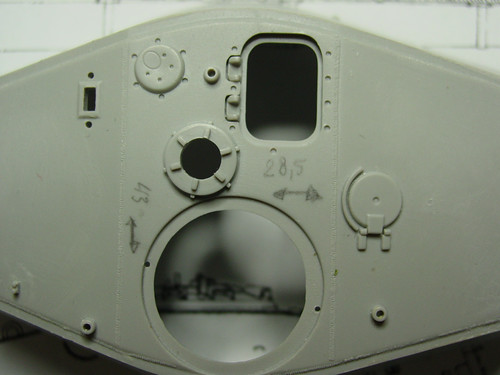
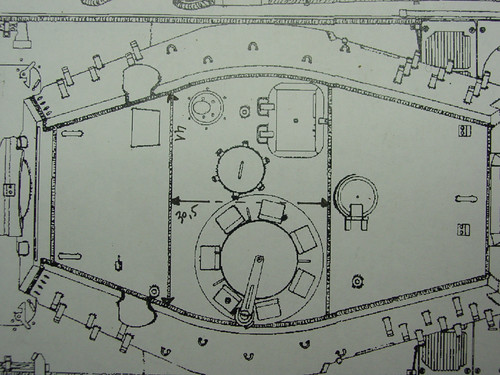
I would like to rebuild a 1/35 King Tiger turret into the post July 1945 version. This turret had a telescopic rander finder and the turret roof needed to be modified for this. The Trumpeter E-75 kit has a standard KT turret with the range finders. I'd like to modify this. Below are two pictures. One is the Trumpeter KT turret and the length and width of the flat panel to be modified are indicated. Below is the technical drawing in 1/35. It seems that I need to lenghten the flat panel by 2mm to the front. How should I proceed? More precisely, where should I cut up the turet for the modification? I've been thinking about cutting loose the front turret roof panel on the top and the sides and take it from there... Your advice is much appreciated, especially since I fear wasting a turret...


Thanks a lot!

John
SteveReid
Visit this Community
Massachusetts, United States
Member Since: September 07, 2007
entire network: 212 Posts
KitMaker Network: 52 Posts
Posted: Sunday, May 16, 2010 - 07:20 AM UTC
John-

I need a little help to understand.

How do these measurements compare?


Is the overall turret measurement going to be lengthened- or is it that the flat panel gets larger and the front panel gets smaller ONLY?

Cool project - good to see you back at the "What-If's"

Steve

John_O
Visit this Community
Oost-Vlaanderen, Belgium
Member Since: November 23, 2007
entire network: 569 Posts
KitMaker Network: 32 Posts
Posted: Sunday, May 16, 2010 - 08:08 AM UTC
Heya Steve,

The main objective is to lenghten the flat middle part, which will shorten the forward part and put it in a different angle. But I fear that these modifications will have an influence on the sides as well, although maybe not dramatically, but it might be necessary to change the 'bend' too, waddayathink?

Thanks for the help Steve! And BTW, what are you upto? Still have your E-25 Sturmpanzer clearly in my mind!!

Cheers,

John
SteveReid
Visit this Community
Massachusetts, United States
Member Since: September 07, 2007
entire network: 212 Posts
KitMaker Network: 52 Posts
Posted: Sunday, May 16, 2010 - 11:56 AM UTC

Quoted Text

Heya Steve,

The main objective is to lenghten the flat middle part, which will shorten the forward part and put it in a different angle. But I fear that these modifications will have an influence on the sides as well, although maybe not dramatically, but it might be necessary to change the 'bend' too, waddayathink?
John


Hey John-
I have an E-50 and E-75 ordered- I am up to some other stuff too.

I would cut out the forward panel using the dental floss technique. The forward panel will be destroyed but all of the detail will be saved.


Extend the middle panel forward using a strip of styrene. (The Red Piece above)Reinforce every added bit from the interior. This is essential since when all the new bits are in place you will need to do some heavy sanding and scribing to replicate the details.
Now cut off the front face of the turret along the welds- easiest to fix later.

Then I would sand the top edge of the sides down to make a nice flat surface for gluing on some 0.040" risers for the side walls.


Trace on the new profile and cut them down to the right height.


Then glue on the new top and the front face of the turret- add the welds and the pilzen and vision block from the roof part you cut out.

Then cast some copies for your pals so all the work was worth it.


Steve
John_O
Visit this Community
Oost-Vlaanderen, Belgium
Member Since: November 23, 2007
entire network: 569 Posts
KitMaker Network: 32 Posts
Posted: Sunday, May 16, 2010 - 11:45 PM UTC

Quoted Text


Hey John-
I have an E-50 and E-75 ordered- I am up to some other stuff too.

--> I was looking forward so much to these I ordered several online. But I was pretty disappointed by the kits. I must stress that the bigger parts such as the hull and the turrets are nicely detailed. But all the smaller parts such as tools, exhausts, etc. are really not that good. Don't expect Dragon quality here. Ah well, it leaves us plenty of room for improvements.


Then cast some copies for your pals so all the work was worth it.


--> Hahaha, yep, that's the plan actually. I allready have the silicon and resin...


Cheers,

John
John_O
Visit this Community
Oost-Vlaanderen, Belgium
Member Since: November 23, 2007
entire network: 569 Posts
KitMaker Network: 32 Posts
Posted: Monday, May 17, 2010 - 03:04 AM UTC

Quoted Text

using the dental floss technique.
Steve


Haven't tried this technique yet. TBH it's totally new to me. I thought to attack the turret with a scribler (got a Tamiya and Trumpeter one), maybe a fine saw and my scalpel.

... 0.040" risers for the side walls... Help! How much is that in mm? Can someone point me in the direction of a decent online converter for this?

Thanks!!!

John (your continental European whatif builder )
SteveReid
Visit this Community
Massachusetts, United States
Member Since: September 07, 2007
entire network: 212 Posts
KitMaker Network: 52 Posts
Posted: Monday, May 17, 2010 - 03:45 PM UTC
John-
this one works:

http://www.industrial-enclosures.com/html/inch-mm-calculator.html

0.040" is just over 1 mm.

But the important thing is to use whatever you can find that is close to the thickness of the turret walls. Thick enough for a nice strong glue joint- but not so thick that you need to carve the top edge to much.

Go with the dental floss John. Try it on an old scrap kit- It works like magic!

Anything else you could slip with and make a mess of the pieces you want to keep.

Sent you an e-mail- did you receive it?

Steve
John_O
Visit this Community
Oost-Vlaanderen, Belgium
Member Since: November 23, 2007
entire network: 569 Posts
KitMaker Network: 32 Posts
Posted: Tuesday, May 18, 2010 - 01:44 AM UTC
Cool, thanks for the converter link.

In the meantime I have cut out the front plate the old skool way (scribler and scalpel). I'll try to post a pic tonight when I get home.

Yes Steve, I got your mail. Thanks for those links! And there's some info in the mail I'd like to come back to for more info (especially since I have very similar ideas... ) I'll answer tonight (CET).

Cheers,

John
John_O
Visit this Community
Oost-Vlaanderen, Belgium
Member Since: November 23, 2007
entire network: 569 Posts
KitMaker Network: 32 Posts
Posted: Tuesday, May 18, 2010 - 07:27 AM UTC
Here we go, step one: cut out the front plate. A bit rough, but in the meantime I sanded it just a little. I'm not going to worry about it too much for now.


Next update will not be until after the weekend.

Cheerio,


John
John_O
Visit this Community
Oost-Vlaanderen, Belgium
Member Since: November 23, 2007
entire network: 569 Posts
KitMaker Network: 32 Posts
Posted: Sunday, May 23, 2010 - 10:20 AM UTC
Some progress:

Reinforcement for the extended horizontal piece:


Horizontal piece in place:


Reinforcements for the front turret top plate:


And yes, some more reinforcement:


Cheerio,

John
SteveReid
Visit this Community
Massachusetts, United States
Member Since: September 07, 2007
entire network: 212 Posts
KitMaker Network: 52 Posts
Posted: Sunday, May 23, 2010 - 10:31 AM UTC
John-
looking good! Extra reinforcement will pay off.

Chopping it up is the hard part isn't it?

Steve
 _GOTOTOP