_GOTOBOTTOM
Scratchbuilders!: Armor/AFV
This is a group for armor scratchbuilding questions, topics and projects.
Hosted by Mike Kirchoff
1/24 Leyland DAF DROPS update
okdoky
Visit this Community
Scotland, United Kingdom
Member Since: April 30, 2007
entire network: 1,597 Posts
KitMaker Network: 673 Posts
Posted: Wednesday, December 12, 2007 - 03:25 PM UTC
As the most of this project will be scratch I thought I would add it to this forum too.
The planning

the dry fit

side locker

rear double drive axle

will try to keep the articulation


Any help with photos of underside of DROPS or during wheel changes to get the plumbing, wiring and suspension arrangements right would be greatly appreciated!!!!!!!!!!


Nige
okdoky
Visit this Community
Scotland, United Kingdom
Member Since: April 30, 2007
entire network: 1,597 Posts
KitMaker Network: 673 Posts
Posted: Thursday, December 13, 2007 - 12:51 PM UTC
Made a start at revamping the first attempt at hook arm and main frame to correct shape and dimensions.

I cut off the end of the resin hook arm base and added the sheet plastic top plate. Added on an extension piece of rectangular hollow section to which I slotted in a single centre thick sheet forming the hook and arm. The shape of the arm is to be formed around this solid hook.

As it is likely this resin hook arm will be moved about for posing the flat rack I have deliberately thickened the main frame pivot point brackets and will be out of scale.

If the articulation of the loading equipment works it should be quite robust (Ihope). Sides of hook arm to be plated still. Plumbing of the hydraulics should be easy to plan out. Would like to see how you guys do the connection pieces for the hydraulics.


Nige
okdoky
Visit this Community
Scotland, United Kingdom
Member Since: April 30, 2007
entire network: 1,597 Posts
KitMaker Network: 673 Posts
Posted: Saturday, December 22, 2007 - 03:07 PM UTC
Put the DROPS parts together for dry fitting and have put it aside to give one of my commercial campaign vehicles a start off. Here is how the truck is looking thus far though.


Here is the Fujimi 1/32 Canter mini skip loader up against the 1/24 DROPS (little and large)


Seasons greating to all
Nige
KoSprueOne
Visit this Community
Myanmar
Member Since: March 05, 2004
entire network: 4,011 Posts
KitMaker Network: 879 Posts
Posted: Saturday, December 22, 2007 - 03:16 PM UTC
Very impressive indeed. I'm watching this one and learning.


Murdo
Visit this Community
Scotland, United Kingdom
Member Since: May 25, 2005
entire network: 2,218 Posts
KitMaker Network: 760 Posts
Posted: Sunday, December 23, 2007 - 07:11 AM UTC
Man! That's going to be a big beast Nige!
BROCKUPPERCUT
Visit this Community
Rhode Island, United States
Member Since: October 29, 2006
entire network: 191 Posts
KitMaker Network: 79 Posts
Posted: Sunday, December 23, 2007 - 02:36 PM UTC
where do you find the plans like this ,in general?
okdoky
Visit this Community
Scotland, United Kingdom
Member Since: April 30, 2007
entire network: 1,597 Posts
KitMaker Network: 673 Posts
Posted: Sunday, December 23, 2007 - 02:47 PM UTC
Hi there

With this truck, I used to drive with Territorial Army and between the various training documents I was given during my familuarisation and training on the truck, and those begged off of various sources, I was able to build up the basic set you see here.

With regards the King trailer that is towed by the DROPS, I had to spend a whole afternoon taking sizes and photos of the real thing when the Army did a display at our local park. I drew up the plans in 1/50 then enlarged them on the work photocopier up to 1/24 scale.

A good source for plans too is
http://www.the-blueprints.com/index.php?blueprints/

Best regards

Nige
okdoky
Visit this Community
Scotland, United Kingdom
Member Since: April 30, 2007
entire network: 1,597 Posts
KitMaker Network: 673 Posts
Posted: Wednesday, December 26, 2007 - 02:50 PM UTC
The King trailer build
I adjusted the wooden jig I used to make the truck chassis by widening the rail width

Nails were used to hold the two end rails where the iso locks are located

Turntable ring from fire ladder kit used for dolly axle turntable

Towing hitch formed from plastic tube heated and flatened then sanded and drilled

Hitch rotates freely on internal pin to allow truck and trailer to take on rough ground

Dolly axle, hitch triangle and hitch itself all will rotate freely giving ability to pose model on rough terrain dio (hopefully rear axle of truck model will also allow a high degree of articulation to be posed)

Trailer spare wheel hanger

Front end of trailer

Rear of trailer

As it stands for now


Hope you like

Nige
okdoky
Visit this Community
Scotland, United Kingdom
Member Since: April 30, 2007
entire network: 1,597 Posts
KitMaker Network: 673 Posts
Posted: Thursday, December 27, 2007 - 11:27 AM UTC
Hi folks

Came across these plans for an american version of the skelletal trailer which has a flat bed arrangement between the iso lock rails.


Nige
barv
Visit this Community
Scotland, United Kingdom
Member Since: December 24, 2004
entire network: 1,594 Posts
KitMaker Network: 0 Posts
Posted: Thursday, December 27, 2007 - 12:13 PM UTC

....... When are you gonna finish this
I'm pushing 66 years old .........time is getting short for me ...to see it done

----great stuff Nige !
aye
BARV
(GOSMG)
okdoky
Visit this Community
Scotland, United Kingdom
Member Since: April 30, 2007
entire network: 1,597 Posts
KitMaker Network: 673 Posts
Posted: Thursday, December 27, 2007 - 12:26 PM UTC
Hey S.C.

If the DVD on your master class was in my xmas stocking this xmas there might have been a chance to get a crack on with the build.

I have got to wade through all your past blogs to pick out the juicy bits of detailing that look anything like the bits I have still to fassion, then build up the dutch courage to try and make my bits look something like the bits they should be.

Did you like the dolly axle tow bar and eyelet. That is from watching how you melted and shaped. I was quite pleased with it.

Time scale for completion???????? I wish I knew! But enjoying it all the same.

And there was me thinking you were 166! Tee hee!

Thanks for your help etc!!!!!

Nige
okdoky
Visit this Community
Scotland, United Kingdom
Member Since: April 30, 2007
entire network: 1,597 Posts
KitMaker Network: 673 Posts
Posted: Tuesday, January 15, 2008 - 09:28 AM UTC
Making a start on the trailer axles and leaf springs

Found an unusual source for the first leaf of spring by straightening out a 'u' shaped strip of metal that last saw action in my wifes bra that dug in too much (to my wife,,,,,,,,,,,,,not me I hasten to add). She's not got my size!!!!!!!

The additional layers of plastic strip made up the 7 leafs on each

I decided to drill out the centre rear of the resin hubs to insert plastic tubes that will in turn insert directly into the axles so that I can spray the model with the resin wheels off as they will hang heavy on the axle and spring hangers

I had to build up the height of the rear axle sring hangers as per the real trailer using plasticard (laminated and glued to give me the thickness I needed as I had no plasticard thick enough)

These will be glued onto the axles and will have a plate and "U" bolts added


Nige


okdoky
Visit this Community
Scotland, United Kingdom
Member Since: April 30, 2007
entire network: 1,597 Posts
KitMaker Network: 673 Posts
Posted: Saturday, January 19, 2008 - 10:43 AM UTC
Still working on the King trailer axles

'U' bolts added by pinching the copper wire holding balloons that my kids got in the shopping mall over xmas. What a bad daddy. Had to burst their balloons first!!! Front axle of trailer has the leaf springs fixed directly on top of the axle

The rear axle has blocks added to give the rear of the trailer the same ride height as the front


The wheels are fitted to plastic tube that is inserted into the trailer axles


It's getting there slowly

Nige
okdoky
Visit this Community
Scotland, United Kingdom
Member Since: April 30, 2007
entire network: 1,597 Posts
KitMaker Network: 673 Posts
Posted: Saturday, January 19, 2008 - 10:48 AM UTC
I noticed in the pics one of the plates holding the u bolts has split so I will add a thin strip to make up the edge again

Nige
okdoky
Visit this Community
Scotland, United Kingdom
Member Since: April 30, 2007
entire network: 1,597 Posts
KitMaker Network: 673 Posts
Posted: Sunday, January 20, 2008 - 03:42 AM UTC
Making the axle leaf hangers


Nige
okdoky
Visit this Community
Scotland, United Kingdom
Member Since: April 30, 2007
entire network: 1,597 Posts
KitMaker Network: 673 Posts
Posted: Sunday, January 20, 2008 - 08:55 AM UTC
Tackled the NATO standard towing pintles on Truck and Trailer
Thanks to Rory of Britmodeller.com forum for this pic

I decided to go with the fasteners from the dressmaker's shop as they scale down qhite nicely and will allow easy connection and disconnection of trailer if taking to display.

The trailer pintle is mounted on a cut piece of box section which will get the four mounting bolts added and is secured in place by a the same copper used for the 'u' bolts through the ring on the end. This allows the pintle to rotate 360 degrees. Scope for doing DAF plus two trailers in tow ,,,,,,,,,,,,,,, Ausie style , ,,,, teehee


The truck has a rear plate between the chassis rails and has a slightly different mounting arrangement for the pintle

The trailer eyelet was built quite some time ago without the references or fasteners but matched the size of the new towing pintles perfectly without any additional filing.

The angle of the tow hitch will look better once the ride height of the truck is set out on the axles

How the combination looks tonight


Nige
barv
Visit this Community
Scotland, United Kingdom
Member Since: December 24, 2004
entire network: 1,594 Posts
KitMaker Network: 0 Posts
Posted: Sunday, January 20, 2008 - 12:25 PM UTC

Nice one squirrel -----------"Chickened out " on the scratch then------
Looks good Nige
aye
BARV
(GOSMG)
okdoky
Visit this Community
Scotland, United Kingdom
Member Since: April 30, 2007
entire network: 1,597 Posts
KitMaker Network: 673 Posts
Posted: Tuesday, January 22, 2008 - 11:33 AM UTC
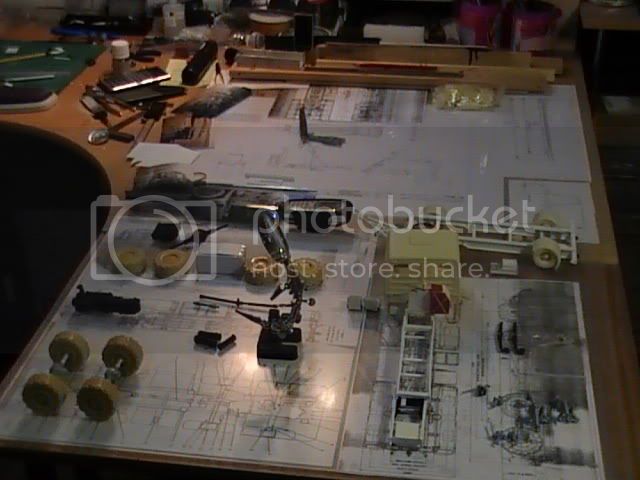
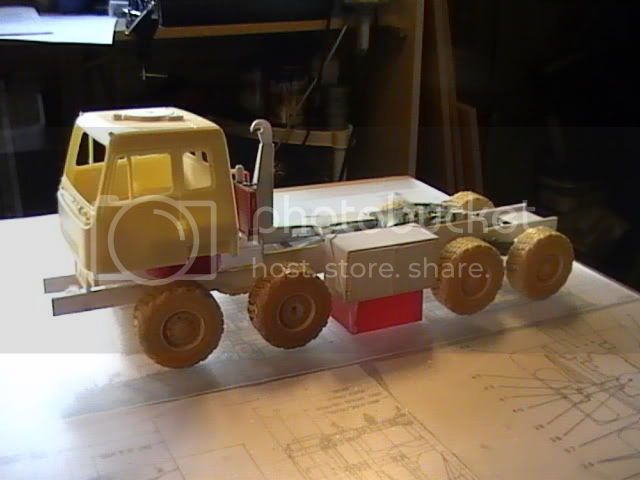
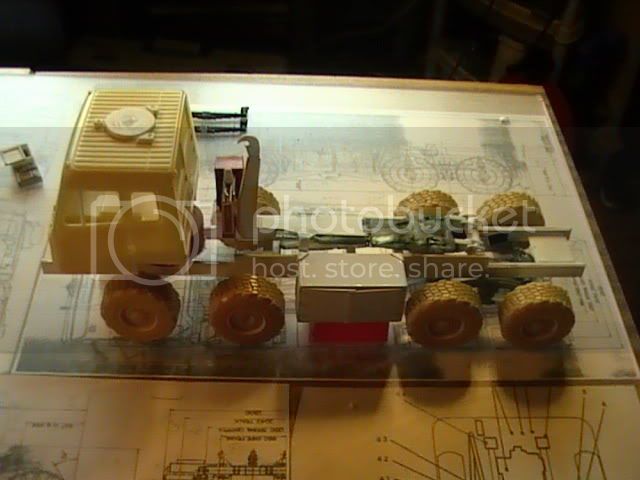
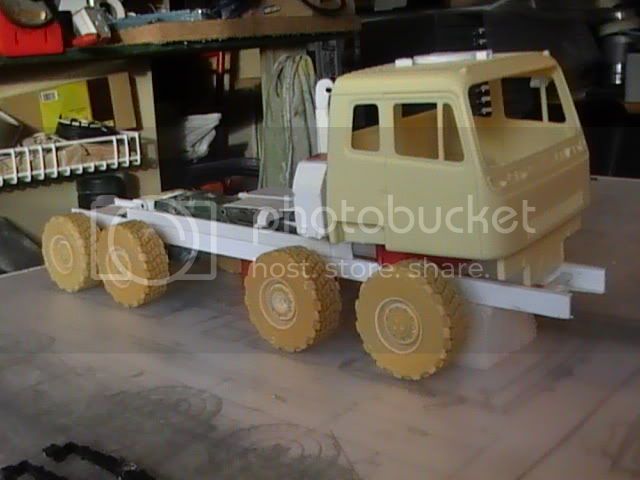
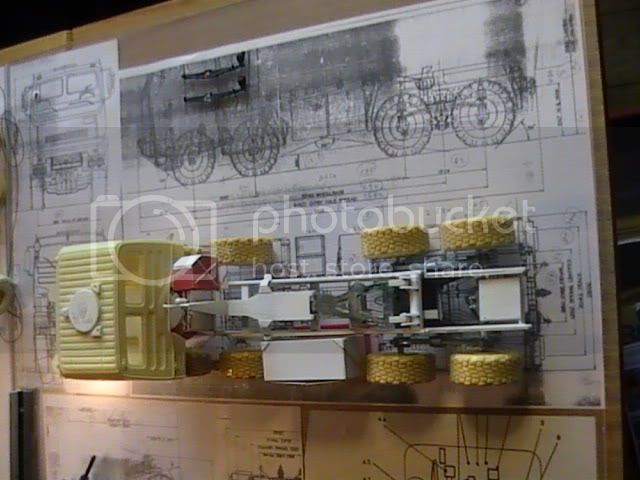
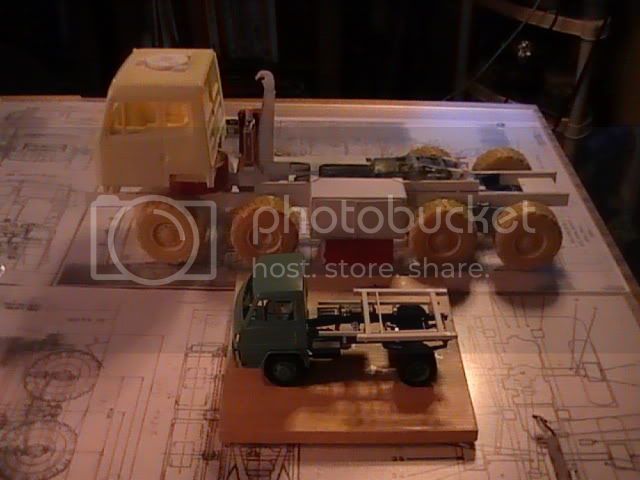
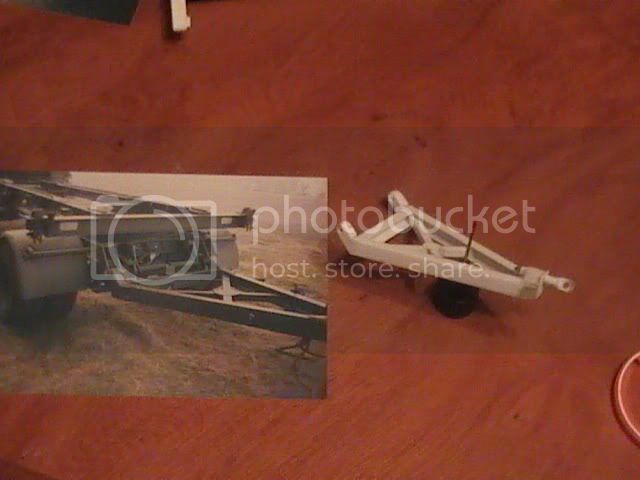
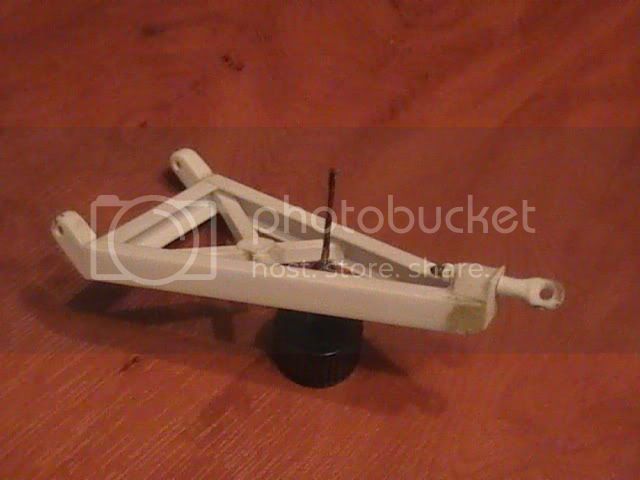
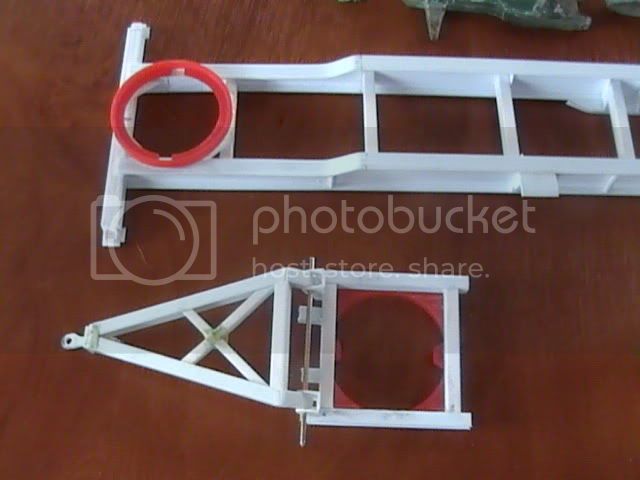
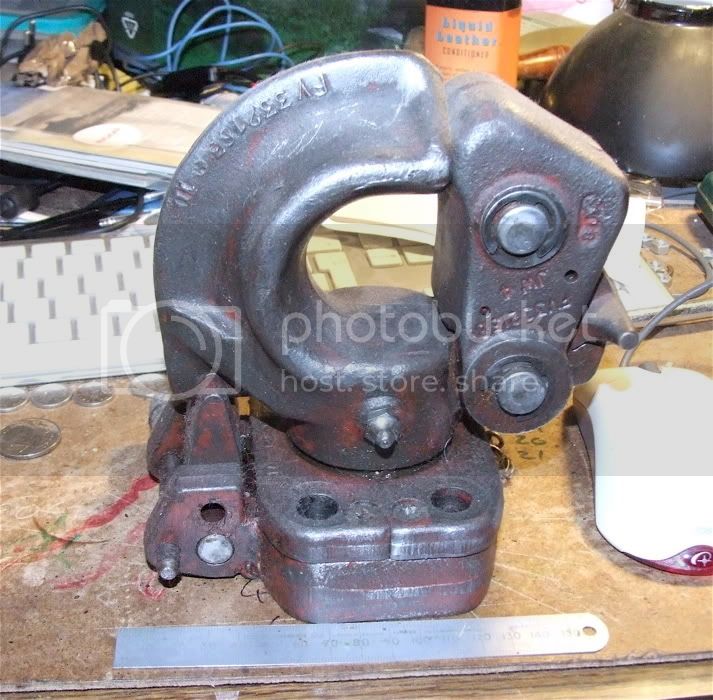
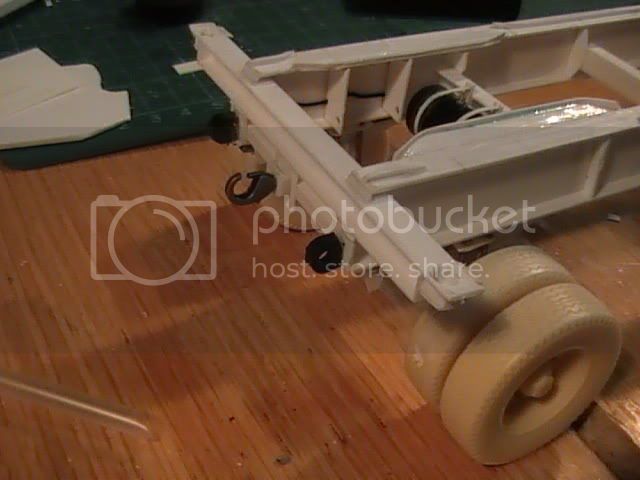
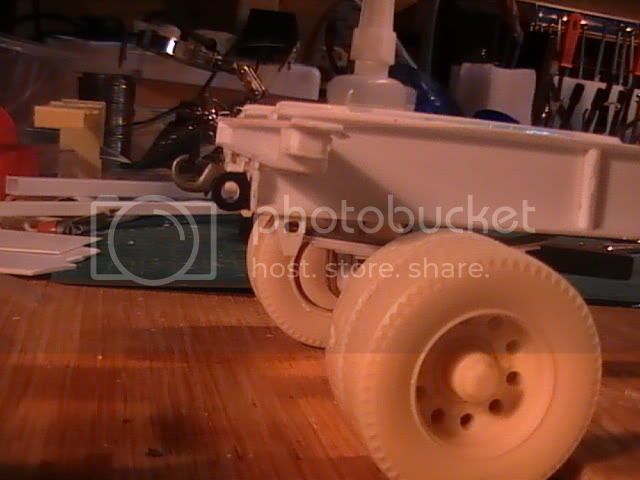
Has been too cold and wet so I looked out a few old pics from my time in the TA driving the DROPS for reference
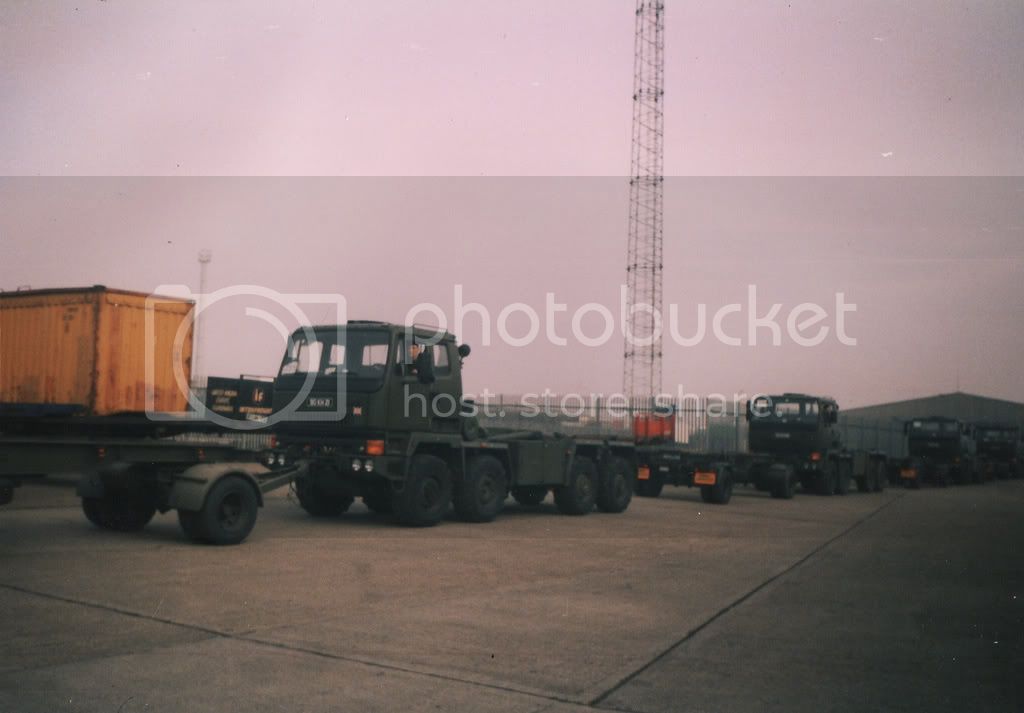
In the line waiting to push the trailers onto the ferry for Hamburg Germany (easier than trying to reverse a dolly axle).

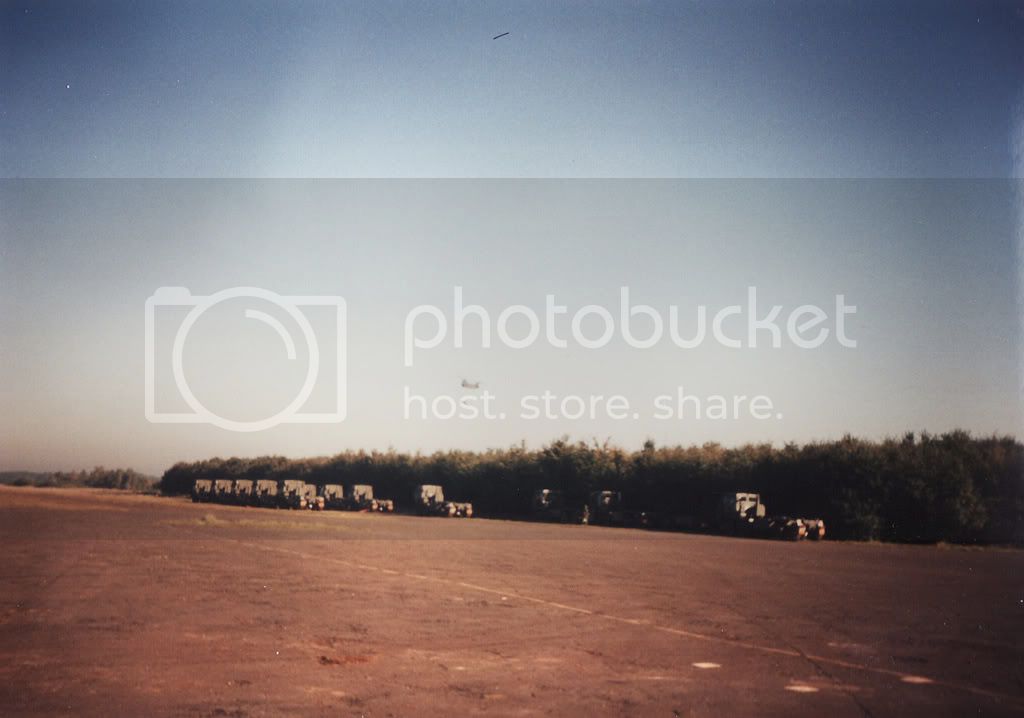
Location on an active German airfield waiting for next route and orders

So they send us to another, abandoned German airfield,,,,,,,,,,,,,,then leave us there for three days cause they didn't have enough fuel that year for the exercise. Great camouflage,,,,,,,,,not!!!!

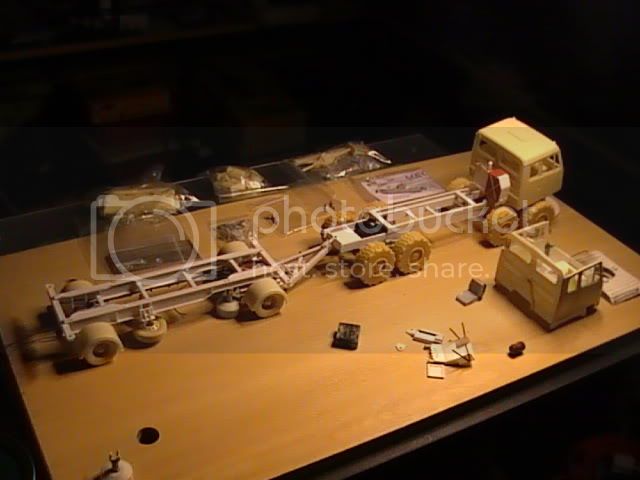
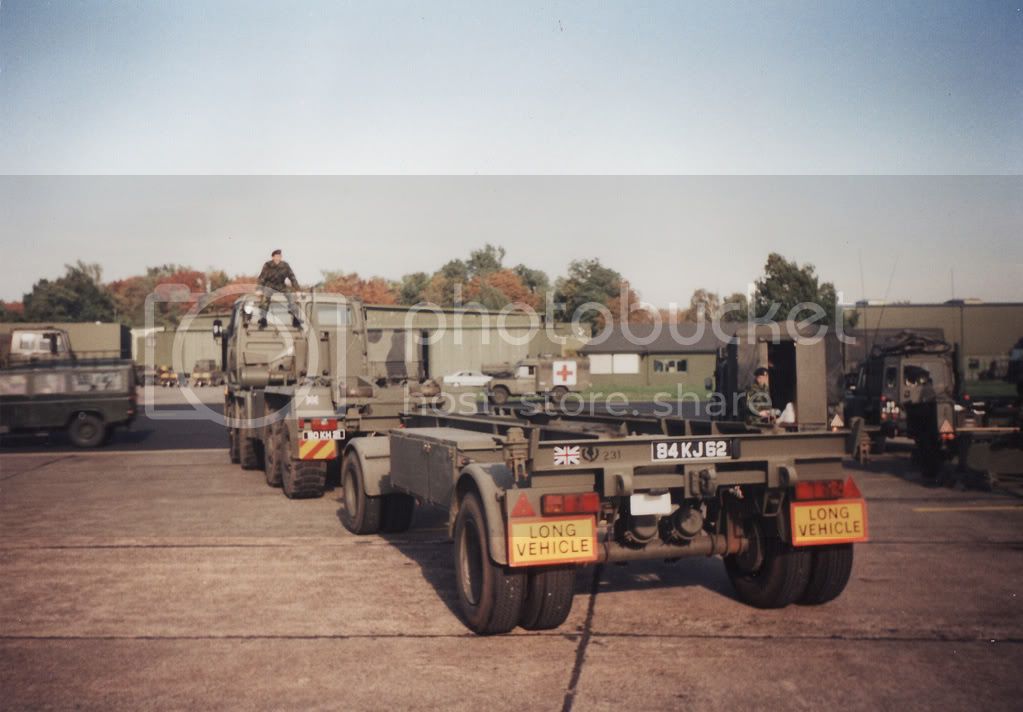
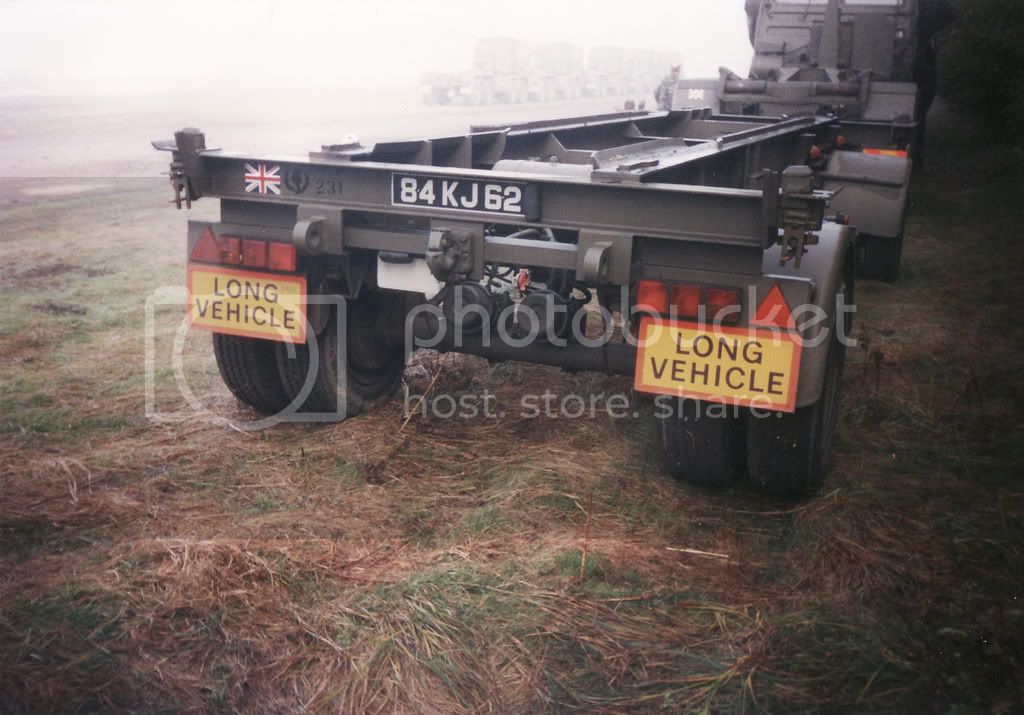
Great opportunity to sit and take photos. After all, nothing else to do. Model will get this registration from 231 Sqn Scottish Transport Regiment

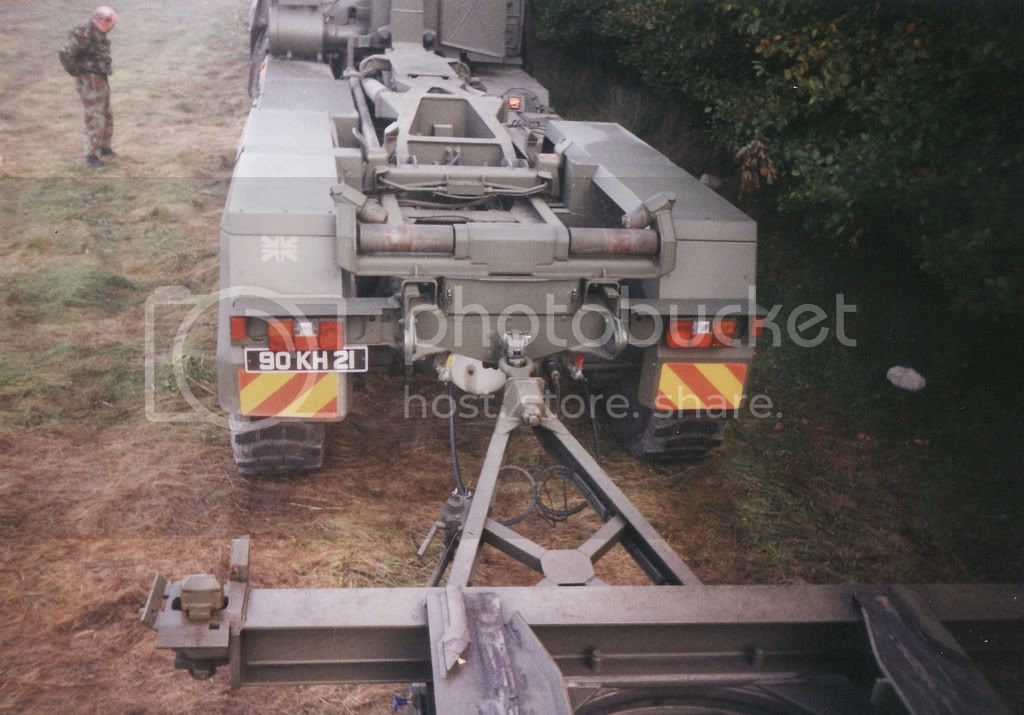
Trailer will get this one with the thistle and 231 (just in case we lose it)

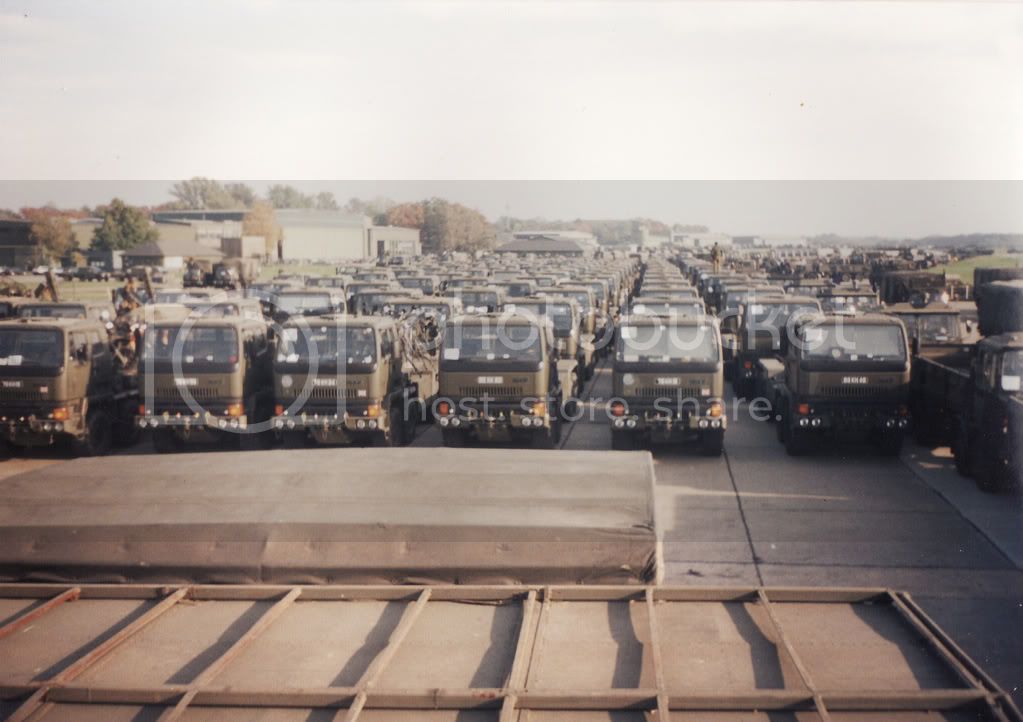
Where did I park the motor??????????????????????????????????????
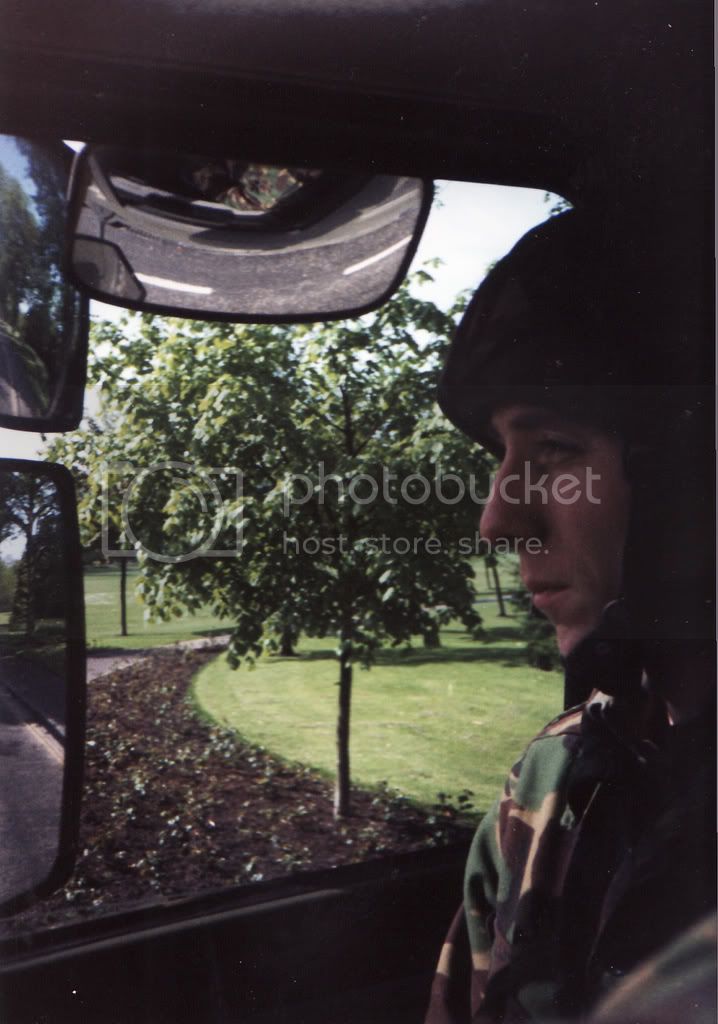
At the wheel

Rest of exercise was better fortunately.
Nige


okdoky
Visit this Community
Scotland, United Kingdom
Member Since: April 30, 2007
entire network: 1,597 Posts
KitMaker Network: 673 Posts
Posted: Sunday, January 27, 2008 - 11:36 AM UTC
Found one of my own pics passing a DROPS broken down in Germany with cab raised and realised my cupola was drilled too far to the rear by a good 7mm which I had sussed out without that pic. The cupola cover was hanging too far over the rear from what I could remember and just didn't look right. The line of corrugations on the roof and the location of the standing box containing the boiling vessel is also too much of a giveaway to any one who drives these.
In the wrong position


I was dreading cutting the hole again but since the cupola liner I had made has a lip I felt I could build up the difference with filler and scribe the corrugations back in


Matched against the pic


Any body got some hints as to how best to make the hand rails and rear ladder. Have thought either superglue or solder. Not had much luck at superglueing such thin wire and ain't got a clue how to solder.

Nige
 _GOTOTOP